
29+ Jaw-Dropping Pinecone Christmas Crafts You Absolutely Need to Try This Holiday Season

Here’s the thing about pinecone crafts: the photos on Pinterest are gorgeous, and the reality is usually a glue gun, a glitter spill, and one very lumpy wreath. Not this year. We sorted through hundreds of projects from real makers and real homes — not staged studio sets — across Etsy, Target, Michaels, Hobby Lobby, and Amazon, and kept only the 29 that hold up when you get close. Prices run from about $4 for a bag of pinecones to $85 for a finished lantern arrangement, and budget and luxury versions sit side by side so you can pick your lane.
Most of what’s here leans rustic woodland, vintage traditional, and handcrafted whimsical — the three looks defining Christmas 2026, where the pendulum has swung back toward things that look touched by human hands. And stay until the end — we break down the most common mistakes that can ruin these looks. 📌 Save this to Pinterest for later — you’ll want to revisit these ideas.
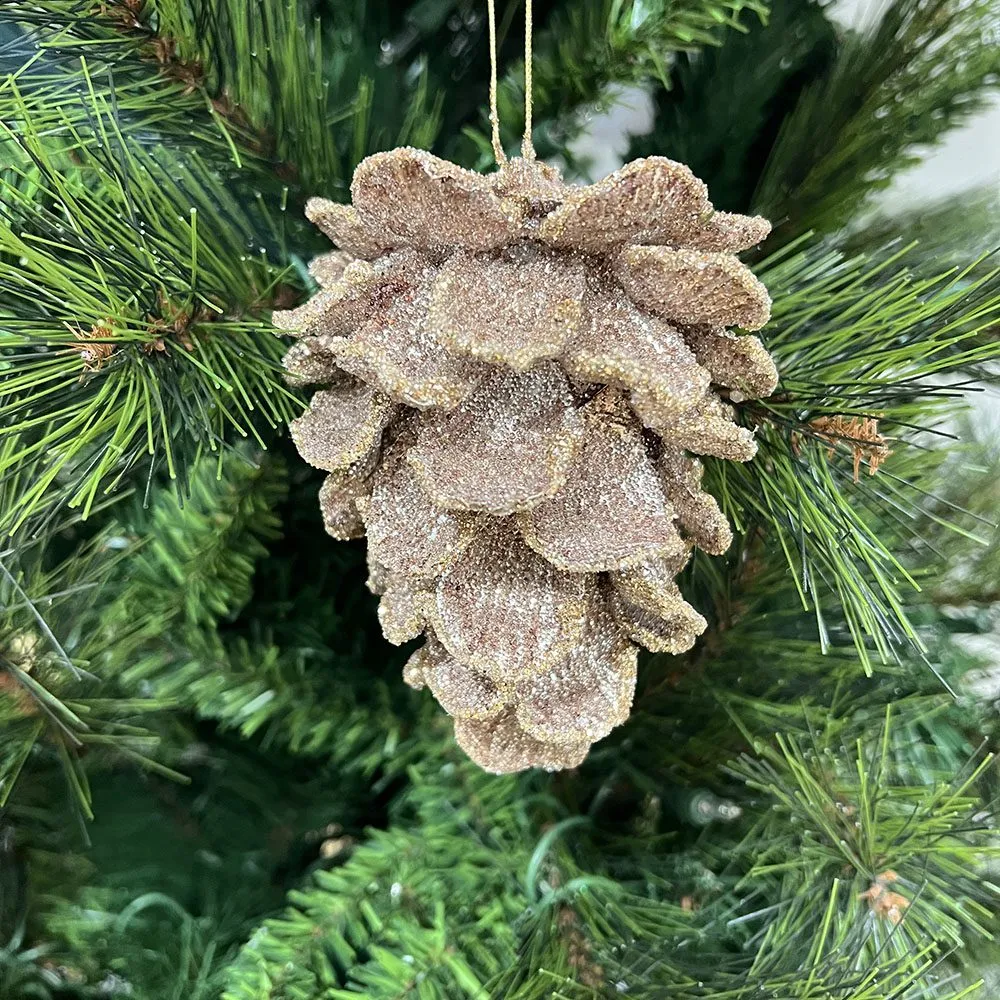
1. Glitter-Dusted Pinecone Ornaments for a Classic Green Tree
This is one of the cheapest looks in the entire roundup, which is exactly why it’s worth starting here.
- Pinecones: $0–12 (a $5 craft-store bag, or free if you gather and bake them)
- Fine gold or silver glitter plus Mod Podge: $8–14
- Ornament caps and string: $5–9
- Foam brush and wax paper: $3–5
Total: $16–40 for a dozen ornaments. Budget alternative: skip the caps entirely and hot-glue a loop of beige string to the top — saves about $6 and reads more handmade.
The magic here isn’t the glitter, it’s the restraint. The brown scales stay matte and visible, and the gold and silver sit only on the raised edges, so the ornament reads as texture first and sparkle second. Hanging a single pinecone against dark green needles gives it a clean silhouette, and that thin beige string disappears so the ornament appears to float. Cluster five or six on one branch and the effect compounds into something that looks collected rather than store-bought.
2. An Oversized Silver-Dusted Faux Pinecone on a Wood Tray
If you’re styling one of these oversized faux pinecones, treat it like sculpture and give it a stage. Set it on a tray with a 3- to 4-inch lip, fold a piece of velvet underneath, and tuck the evergreen sprigs so they extend about 1.5 times the pinecone’s height to one side. That asymmetry is the difference between a styled vignette and a hotel lobby centerpiece.
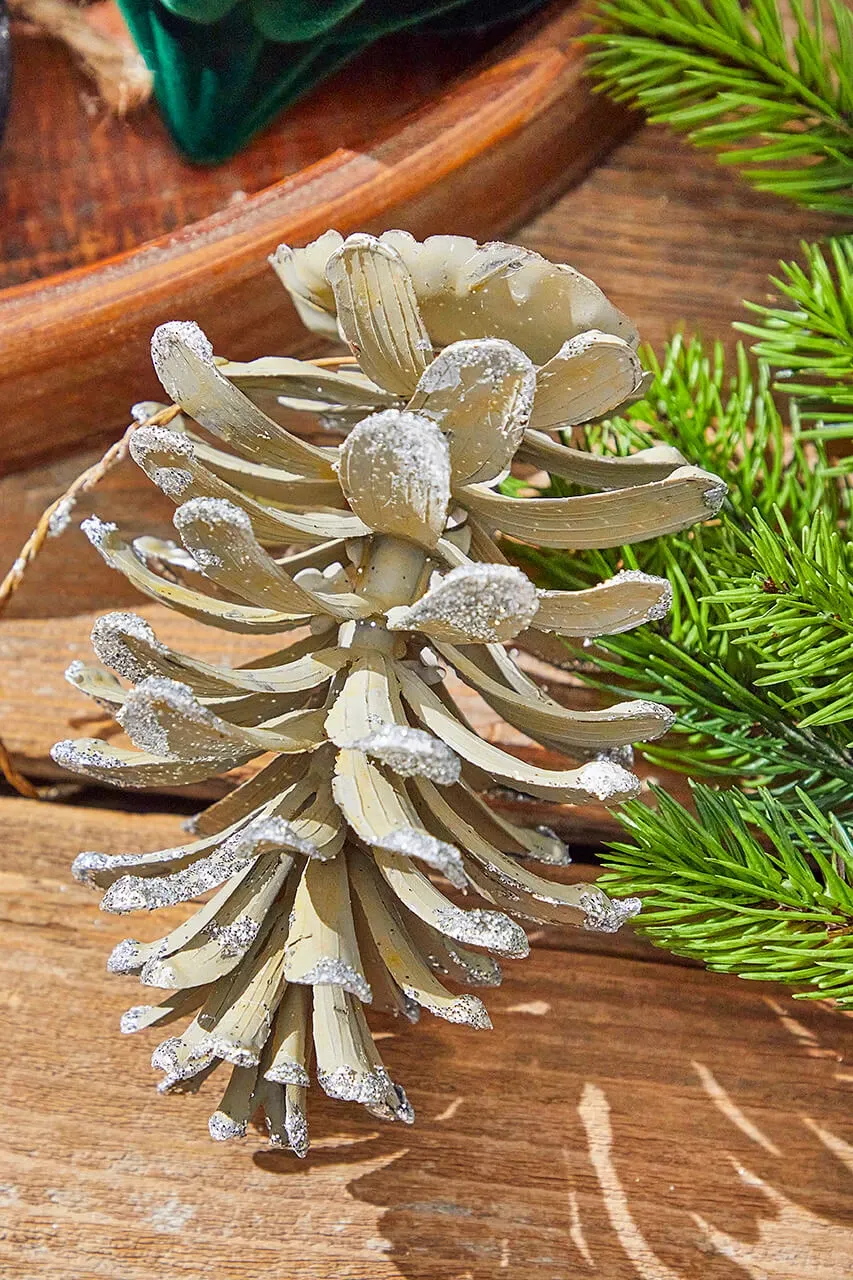
The dark green velvet is the whole trick. Silver glitter on a pale wood tray is pretty; silver glitter on matte green velvet suddenly looks expensive, because the fabric absorbs light while the glitter throws it back. Swap the velvet for burlap and the same pinecone drops two notches on the formality scale. If you own a green scarf or an old velvet pillowcase, you already own the difference.
3. Pinecone-and-Berry Gift Toppers That Beat Any Bow
Materials run under $10 and cover six toppers.
- Mini pinecones, about 10 per topper
- Red berry cluster on wire
- Dark green faux leaves
- Twine and hot glue
- Glue pinecones in a tight circle around a 2-inch cardboard disc.
- Fill the center with smaller cones so the top reads domed, not flat.
- Tuck berry sprigs between cones at three points — odd numbers only.
- Add two leaves at the base for contrast.
- Wrap twine twice around the gift box, knot, and glue the topper over it.
Twenty minutes per topper, and nothing needs to dry overnight.
You don’t need a craft-store run, either. Dollar Tree sells berry picks in bundles of six, a bag of mini pinecones runs about $3 at Walmart in November, and the cardboard disc is a cereal box. Six toppers lands around $7, versus $25–30 for pre-made versions on Etsy that look remarkably similar. Use real jute twine, not curling ribbon — it’s the one material you can’t fake.
4. An Antique Gold Pinecone Bauble on Braided Gold Cord
The formula is roughly 70 percent forest green, 20 percent antique gold, 10 percent warm red-orange, and it works because two of those three are warm. Swap the gold for brushed silver and the whole tree goes cool and crisp — lovely, but a different room entirely. Swap the red-orange ornaments for cream and you get a quieter, more Scandinavian feel. Keep the gold cord either way; it’s the thread tying the palette together.
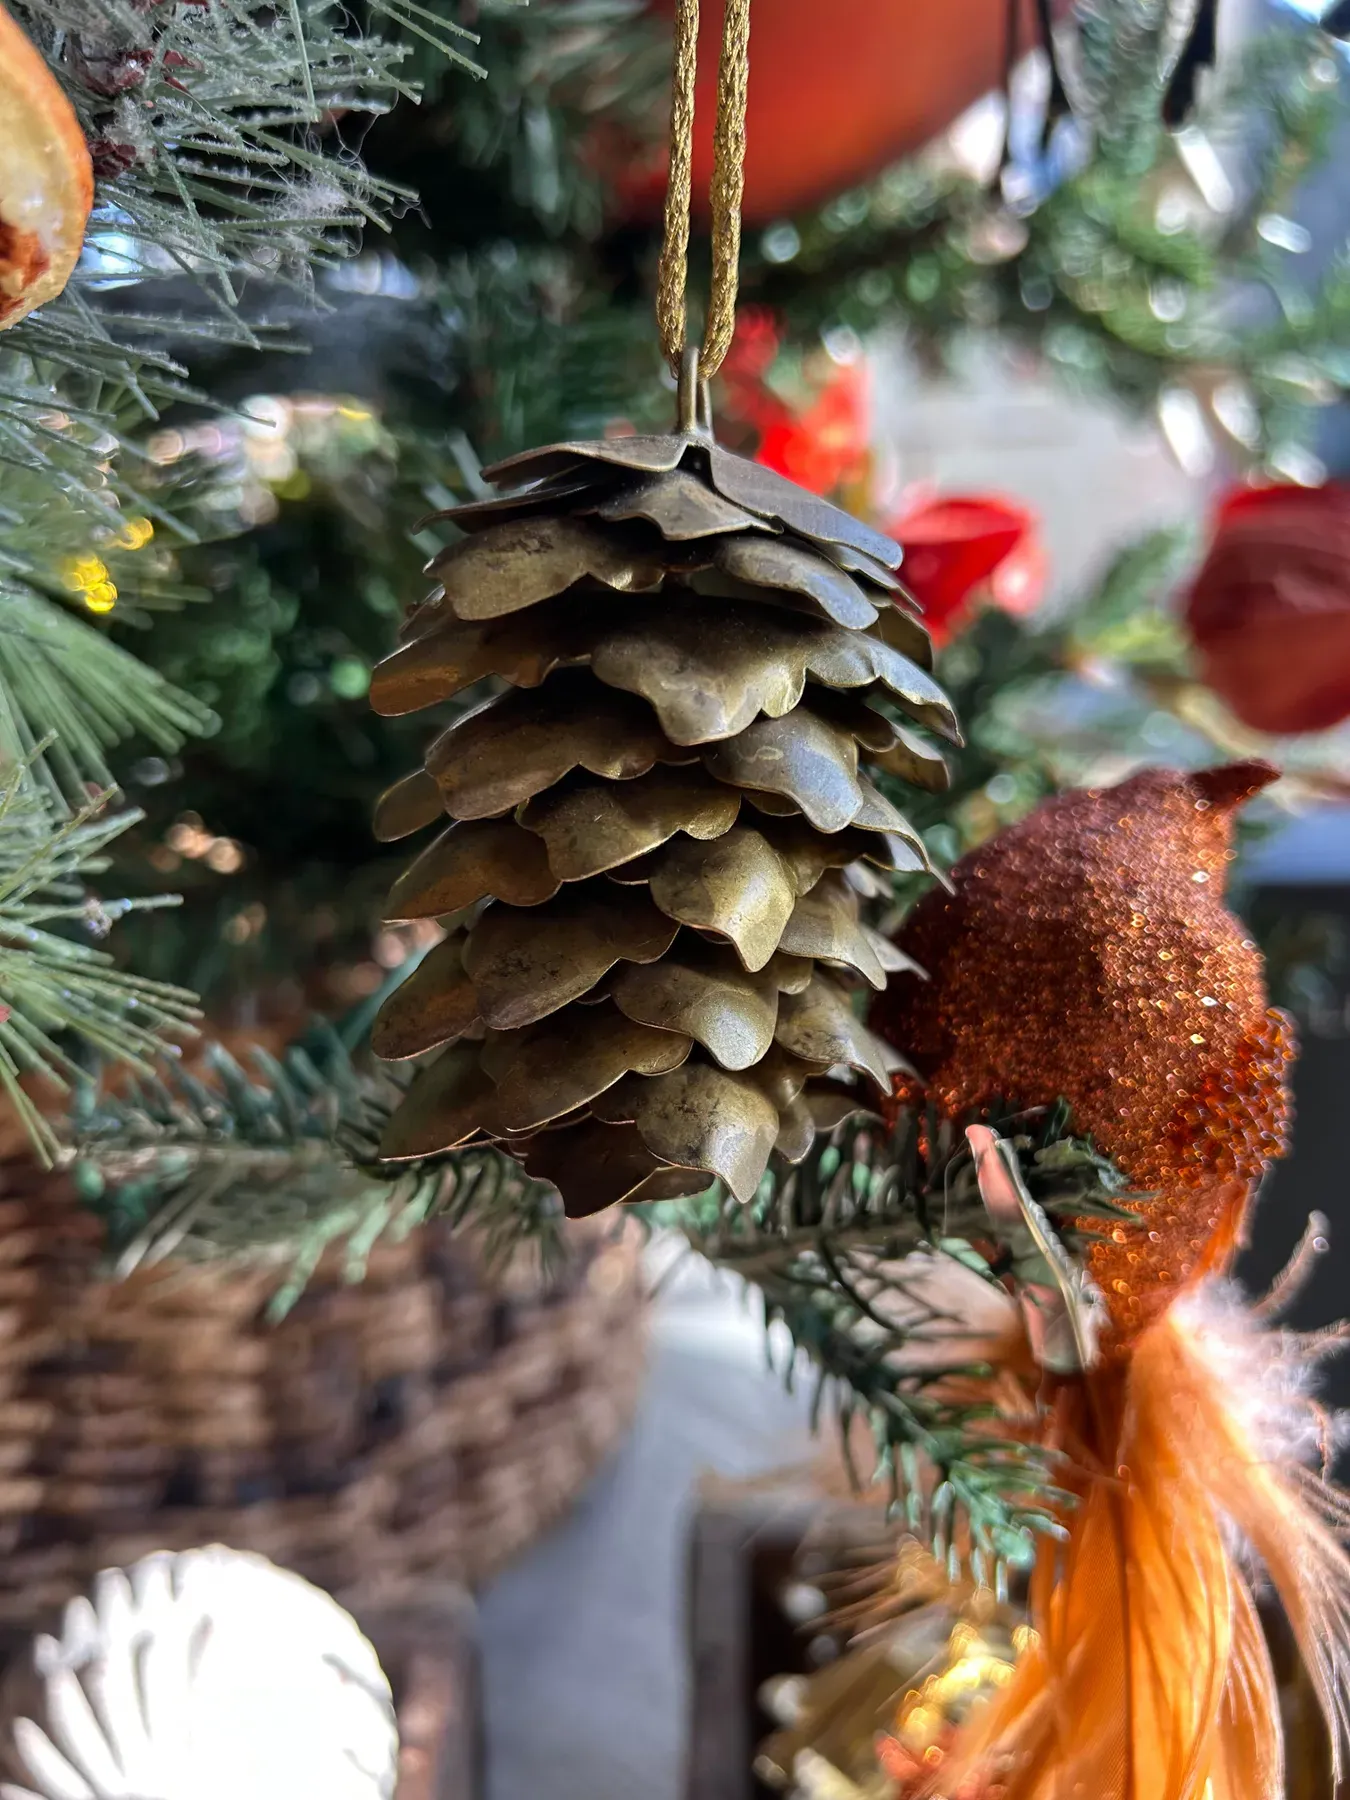
Ditch the wire hook. A braided gold cord cut to about 4 inches and knotted into a loop makes the ornament hang lower than the branch line, so it catches light from below instead of sitting buried in needles. Tie the knot tight against the cap and trim the ends at an angle — a straight cut looks unfinished at close range, and this is an ornament people will pick up.
5. Rose Gold and Silver Glitter Pinecones, Three in a Row
Metallic glitter finishes are gorgeous and slightly high-maintenance. Expect a light dusting of glitter on the tree skirt for the first week, plus fingerprints on the rose gold if anyone handles them — a dry microfiber cloth fixes both. Worth knowing before you buy a set: the copper tone reads warm under incandescent bulbs and almost pink under cool LEDs, so check them in your actual room first.
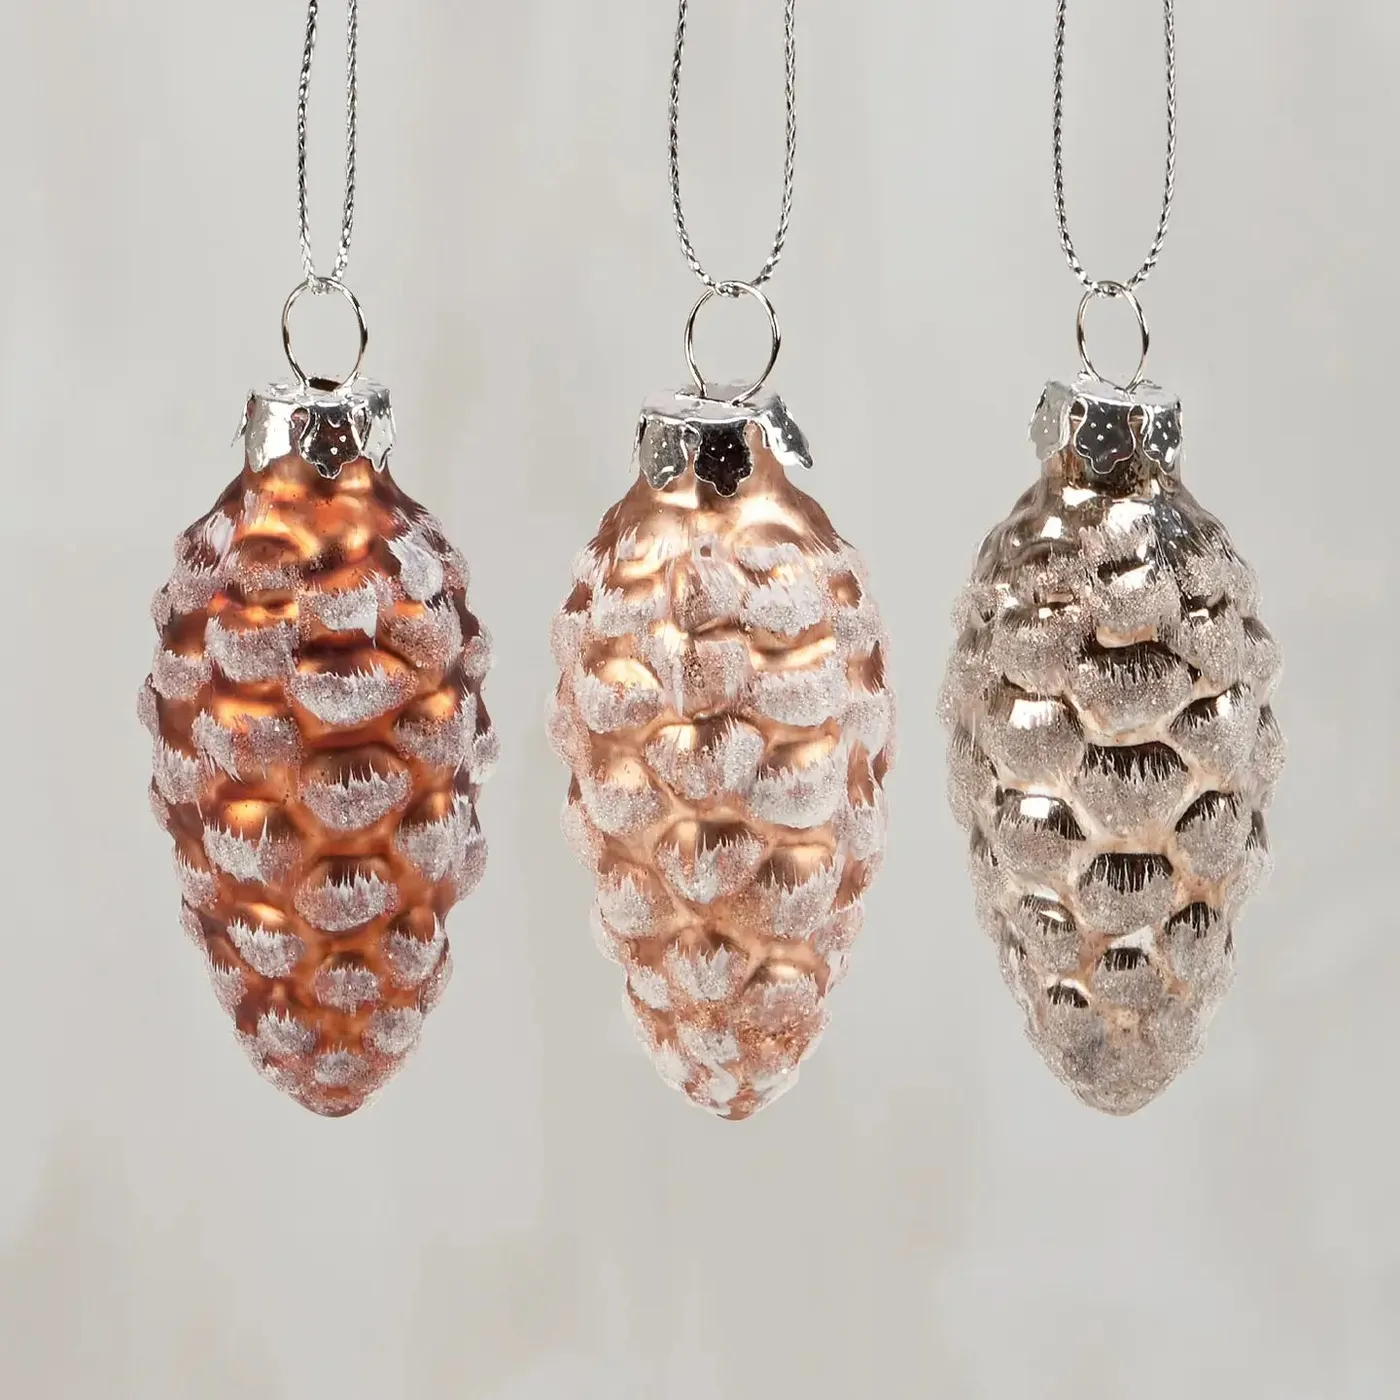
These read best in clusters of three hung at slightly different heights with 4 to 6 inches between them. On a 6- to 7-foot tree that’s one cluster per quarter of the tree; more than that and the shimmer turns into noise. On a 4-foot tabletop tree, use two and skip glitter everywhere else. Working with a bigger space? Compare with Idea #28 for an oversized version of the same idea.
Plastic pinecones from a dollar store, hit with two light coats of rose gold metallic spray and one pass of adhesive plus fine glitter, get you 90 percent of the way there for about $12 for six. The giveaway is weight — plastic ones feel hollow, so glue a small washer inside the base and nobody will know.
6. Painted Pinecone Trees on Wine Cork Bases
Five little trees for the price of a coffee run.
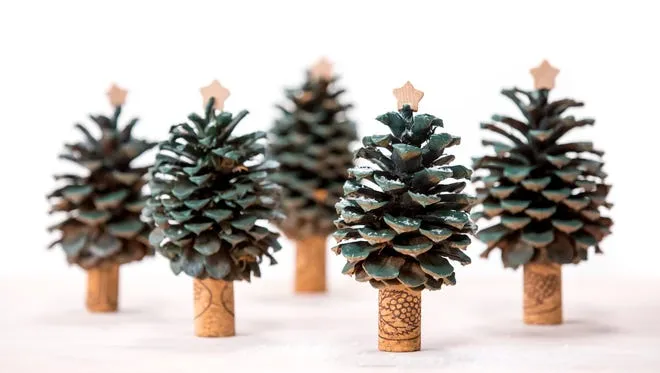
- Pinecones, five: $0–8
- Dark green acrylic paint: $2–4
- White acrylic for snow flecks: $2–3
- Wine corks: free, or $4 for a bag
- Mini wooden star cutouts: $4–8
Total: $12–27 for the set. Budget alternative: cut the stars from a cereal box painted light tan — saves $6 and nobody notices at three feet.
Repetition does the heavy lifting. Five identical shapes at graduated heights read as a deliberate collection, which is why a row of them on a mantel looks styled and one alone looks like a craft project. The cork bases matter more than you’d think: they’re the same warm neutral as the pinecone, so your eye reads the tree, not the stand. Keep the background plain and let the group talk.
7. Pinecone Trees Topped with Pipe-Cleaner Stars
Four things to sort out before the paint comes out.
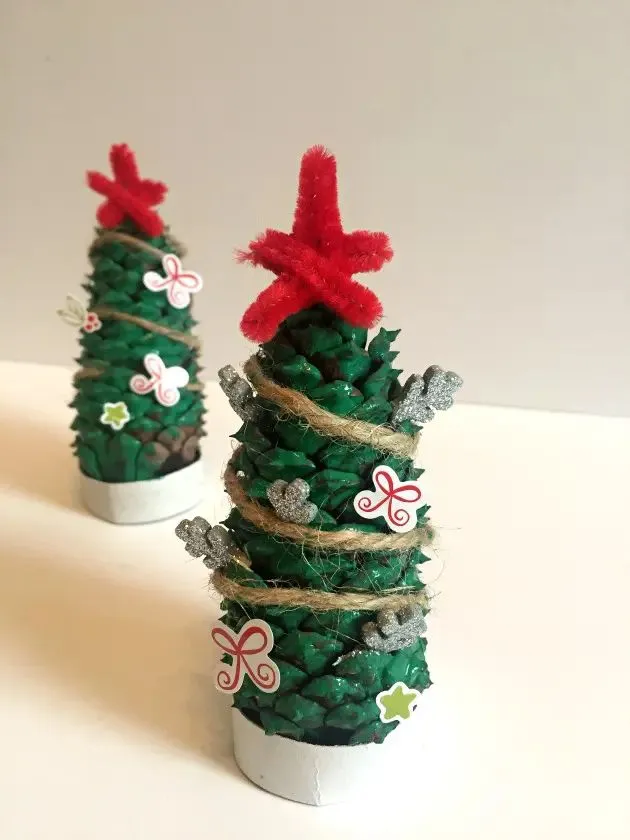
- Your pinecones are fully open and dry — closed ones won’t paint evenly.
- You have a drying rack or wax paper, because wet pinecones stick to everything.
- The base is wider than the pinecone, or the tree will tip.
- You’ve got red pipe cleaners on hand — one 12-inch stem makes two stars.
Paint the pinecone upside down, holding the tip, and let gravity pull paint into the gaps between scales. Two thin coats beat one thick coat every single time — thick paint fills the texture and you lose the whole reason you’re using a pinecone. Finish with a light dry-brush of white on the outer scale edges only, then let them cure a full 24 hours before gluing anything to a base.
8. A Wooden Bowl of Gold Ornaments, Pine, and Frosted Berries
The gold ornaments are all different finishes — embossed, ridged, glittered, some brushed matte — and that variety is what makes the bowl look collected over years instead of bought in one trip. Remove it and you have a nice bowl of gold balls. If you’re starting from scratch, buy one ornament a year in a new texture and let the arrangement build itself.
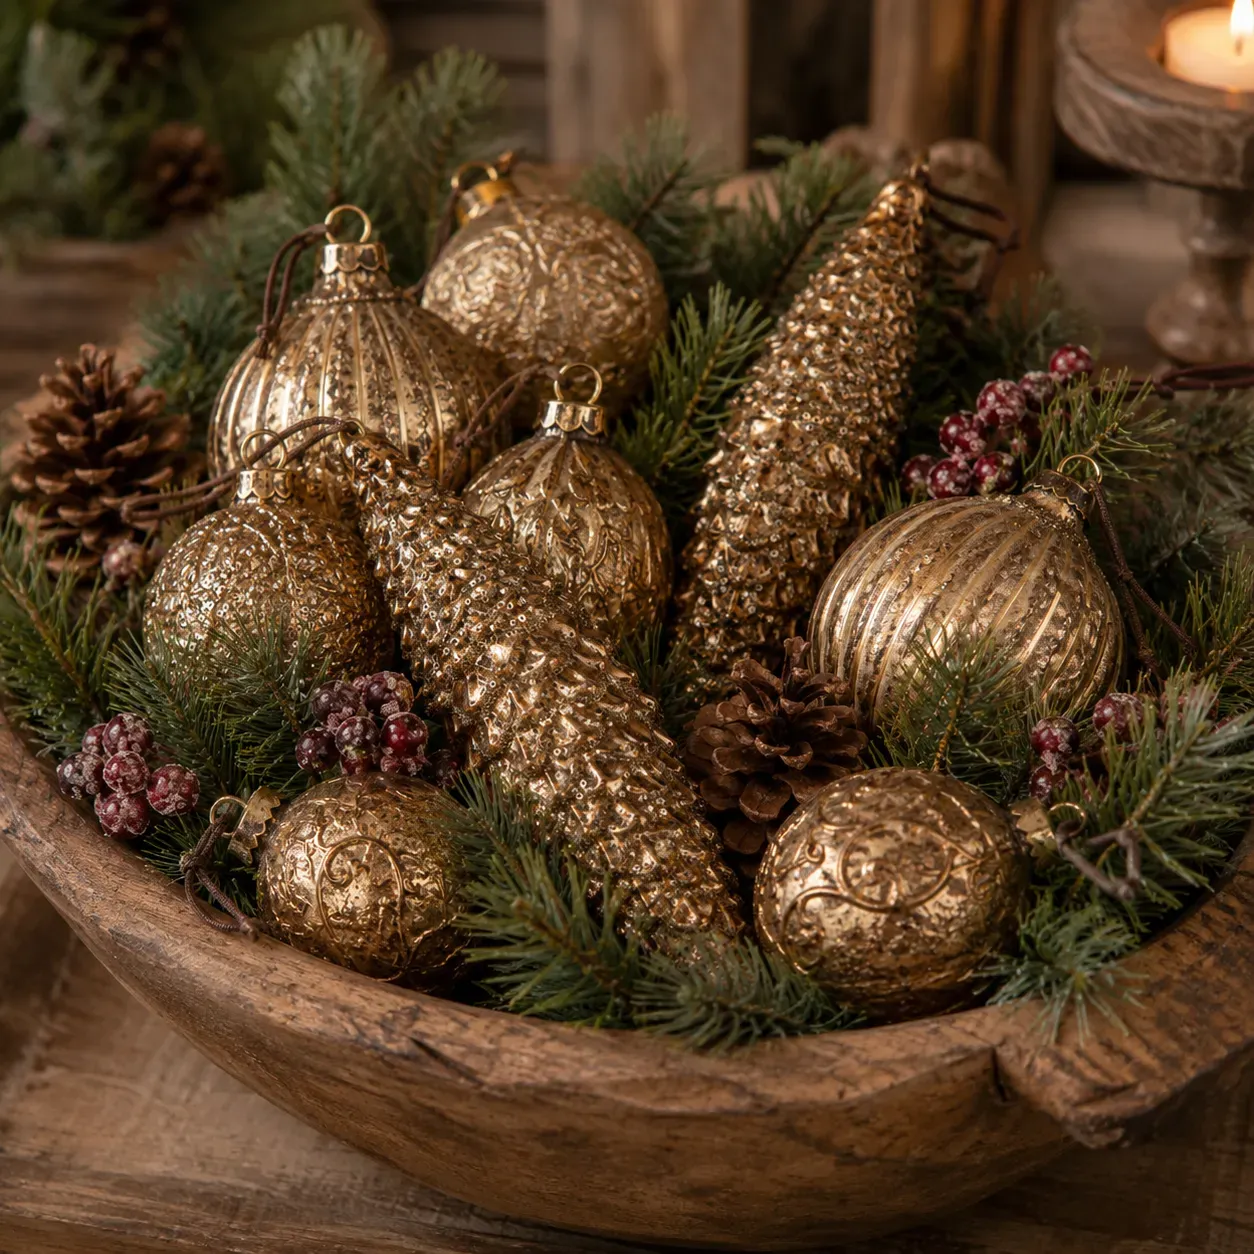
Roughly half green pine, a third gold ornament, the rest brown pinecone with a whisper of frosted red berry. Keep the wood bowl light and rustic — a dark or glossy bowl fights the arrangement. To push this toward a more modern look, drop the gold to 20 percent, raise the pine to 60 percent, and swap the frosted berries for plain ones.
9. Yarn-Looped Pinecones Hung from a Bare Branch
Yarn you already own, pinecones from a park, and a branch from a craft-store bundle — that’s the whole supply list, maybe $8. Compare with Idea #25 for a fancier take on the same hanging idea. Skip the prepackaged rustic ornament sets that run $30 and up; they’re almost always the same pinecones with a markup and a bow you’ll redo anyway.
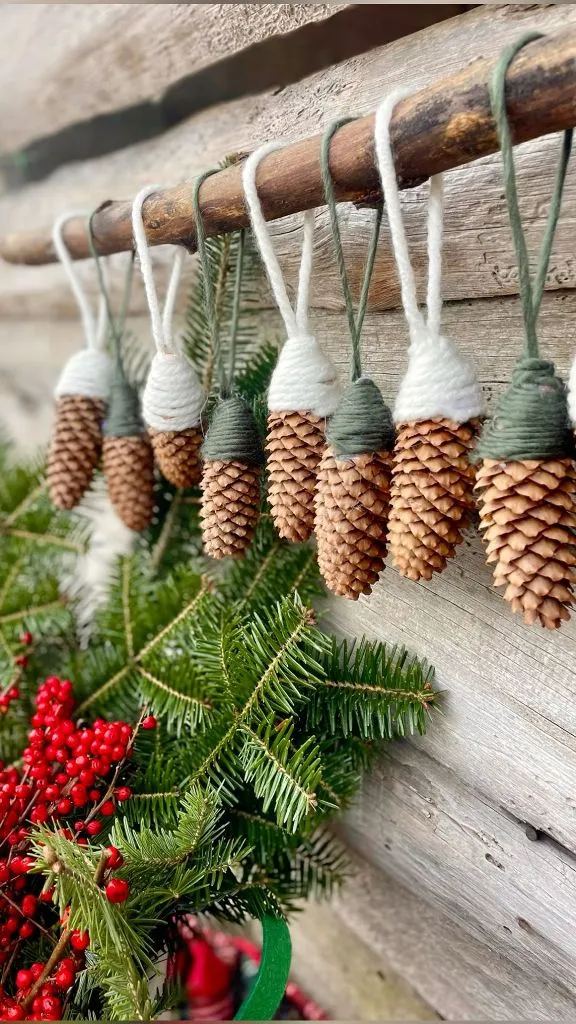
Wrap the yarn around the pinecone’s top three or four times before knotting — a single loop slips and the pinecone hangs sideways within a day. Use a 6-inch length for a 4-inch pinecone and knot it tight enough that the loop stands up on its own. Alternate white and deep green yarn across the branch so the eye has something to follow.
10. A Ribbon-Strung Pinecone Swag for a Paneled Door
- Cut six lengths of white fabric ribbon, each 14–18 inches, and knot them together at one end.
- Hot-glue each pinecone to the end of its own strand, hiding the glue under the top scales.
- Stagger the strands so the cones land at three different heights.
- Tie small green bows along the ribbons, about every 4 inches.
- Hang from an over-the-door hook, not a nail — this thing has weight.
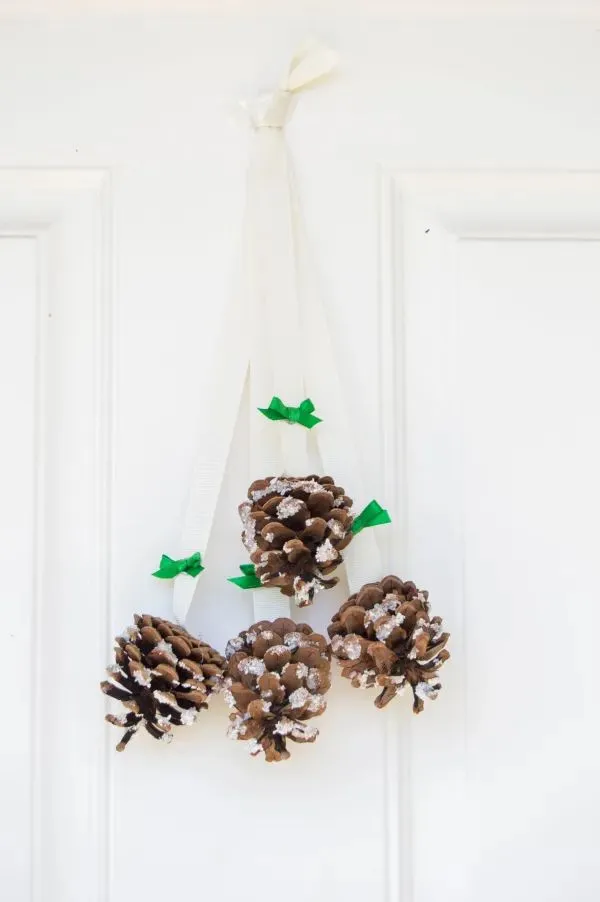
About 45 minutes total and roughly $15 in supplies if you catch ribbon on sale.
White ribbon and glitter are a complicated relationship. Expect a fine glitter drift on the door and floor for the first week, and steam or iron the ribbon ends before hanging or they’ll curl by day two. Fabric ribbon fades in direct sun, so keep this on a shaded door or bring it in after the season. A vacuum with a brush attachment handles the drift.
11. Frosted Pinecones with Wooden Beads and Lace Bows
Wooden beads and lace have been creeping into Christmas decor for a few years, and 2026 is the year they fully merged with the woodland look. The appeal is obvious: this is the quiet side of holiday decorating, the antidote to twelve-foot inflatables. Frost the pinecones and the whole thing reads soft and slightly vintage, which photographs beautifully and survives eleven months in a storage bin.
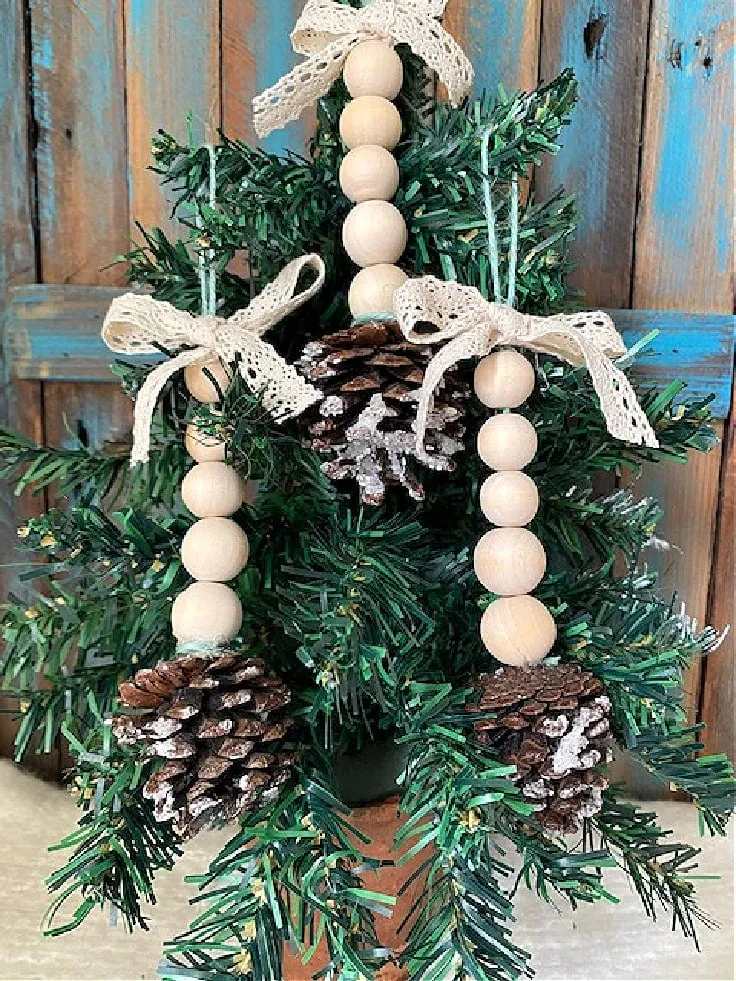
This is a tabletop look, not a tree look. An 18- to 24-inch mini tree holds six to eight of these ornaments before it feels crowded, and the whole vignette needs about two feet of surface. It’s the rare Christmas idea that genuinely works in a studio apartment — see Idea #21 for the same small-space thinking. Skip it on a full-size tree, where these get lost.
12. Pinecone Gnomes in Felt Hats
Gnomes are charming and also a choking hazard waiting to happen. The wooden bead noses and pom-poms come off under determined toddler fingers, so keep these above waist height if you have little ones or a beagle who eats everything. Hot glue, not craft glue, for anything structural — and press for a full 30 seconds while it sets.
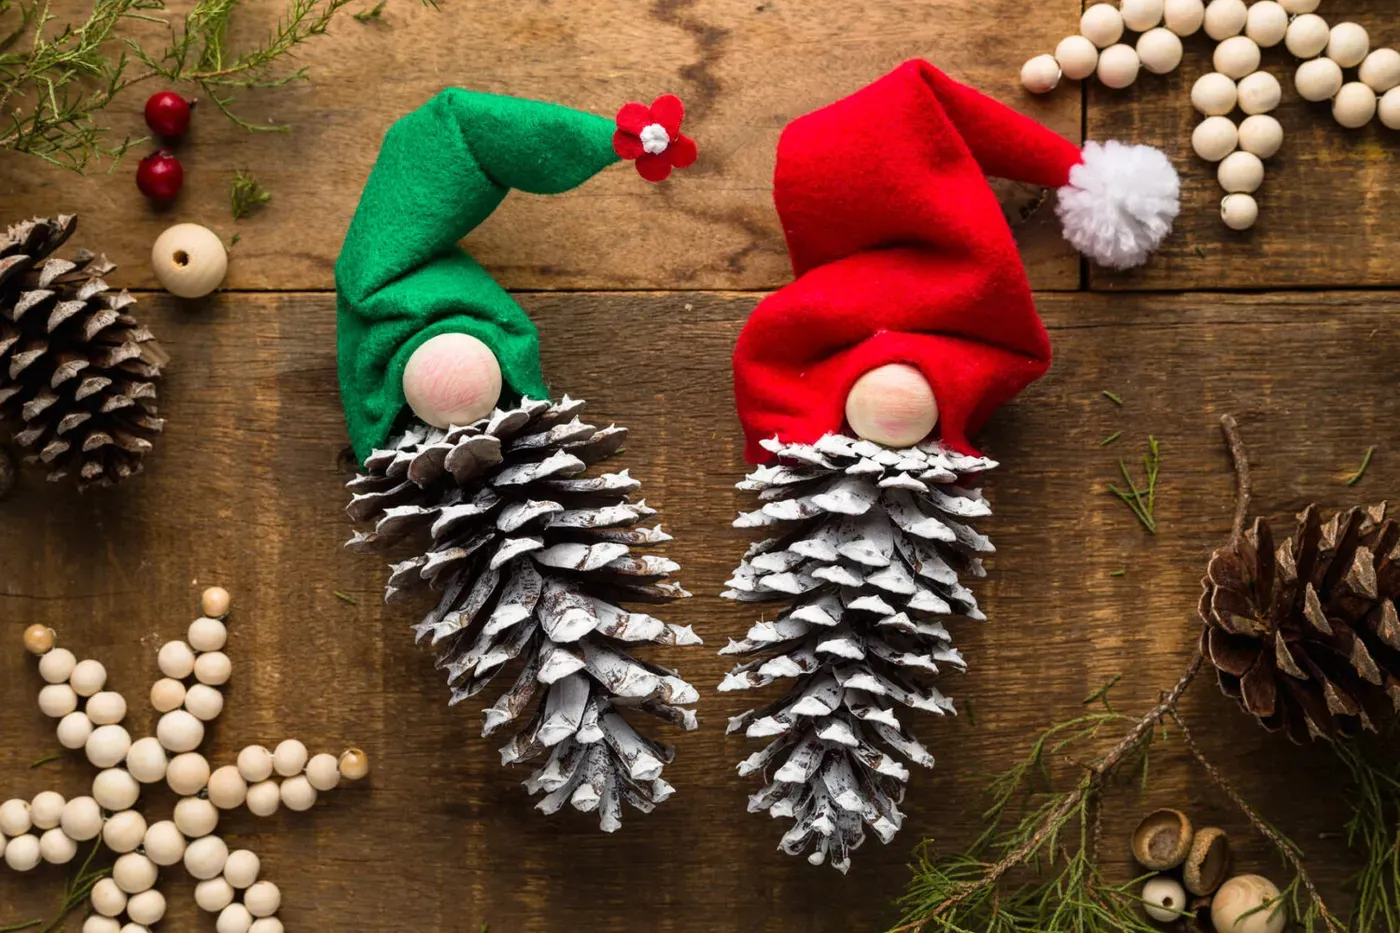
- White-dusted pinecones, four: $6–10
- Felt squares in red and green: $2–4
- Wooden beads for heads and noses: $4–7
- Faux evergreen sprigs and berry picks: $5–9
- Hot glue sticks: $3
Total: $20–33 for a pair. Budget alternative: cut hats from an old wool sweater and skip the berry picks — you’ll land near $12.
13. Gilded Pinecones Stacked on Antique Books
Gild only the tips. Load a stiff brush with gold wax or liquid leaf, wipe most of it off on a paper towel, then flick the brush across the outer scales so the gold catches the high points and the recesses stay dark. Full coverage looks spray-painted; edge coverage looks like age. Two books stacked underneath brings everything up to shelf-eye level, which is roughly 10 inches off the surface.
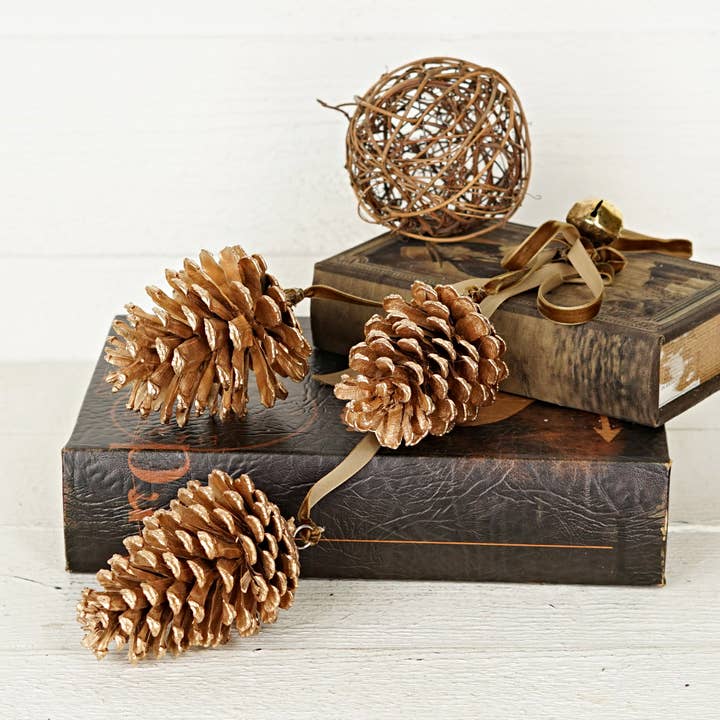
Those two dark antique books are the piece. Without them, three gilded pinecones on a white shelf are just three gilded pinecones. With them you get height, a dark anchor for all that gold, and the story of a collection that’s been around a while. Any two hardbacks with dark spines will do — thrift stores sell them for a dollar, and you can flip them spine-in if the titles are embarrassing.
14. Distressed White Pinecones with a Gold Bell
Sixty percent distressed white, 25 percent warm brown, 15 percent gold. The trick is that the white isn’t clean — it’s rubbed back so the brown shows through, which is what keeps this from looking like a spray-painted craft fail. Swap gold for aged brass and it reads more traditional; swap it for pewter and you get a cooler, snowier feel without changing a single pinecone.
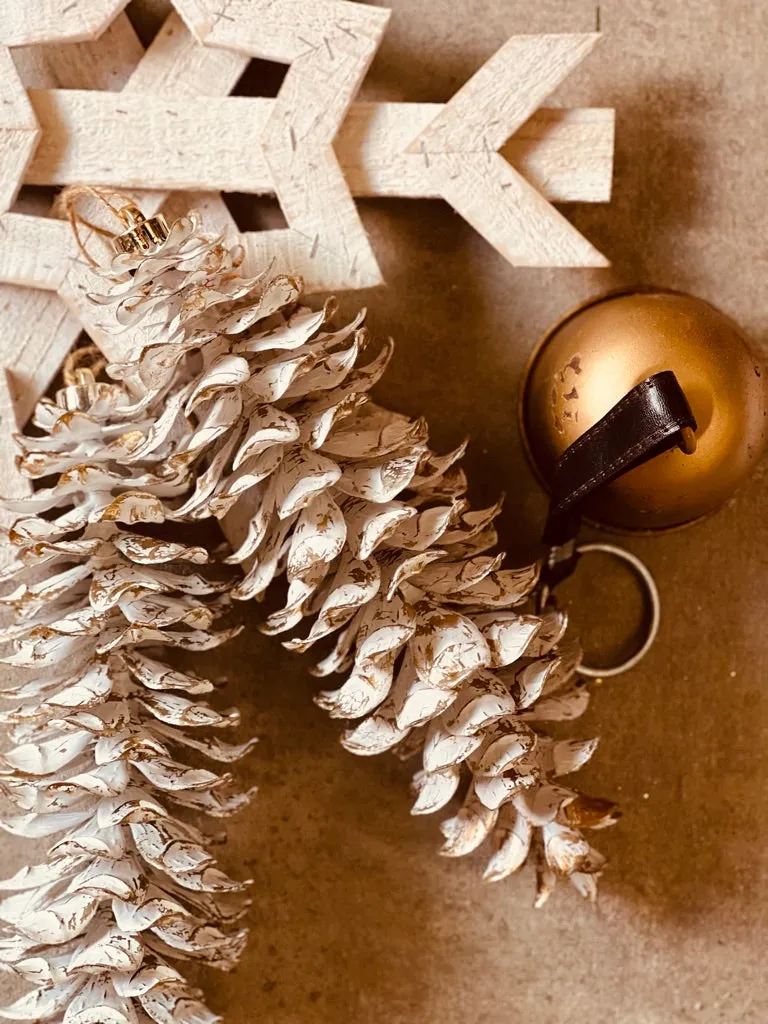
White craft paint plus a sanding block beats buying pre-frosted pinecones at $4 apiece. Paint them fully, let them dry, then knock the paint back on the scale tips with 120-grit paper until the brown peeks through. A $3 bottle does a dozen. Compare with Idea #6 — same paint, completely different result.
15. A Tightly Packed Arrangement of Natural Pinecones
This is a study in scale variation. The big open cones that look like wooden roses set the rhythm, the tight closed ones fill the gaps, and because everything sits in the same brown family there’s no visual clutter — just texture. Packing them tightly matters, too. Pinecones arranged with breathing room look sparse; pinecones pressed against each other look intentional.
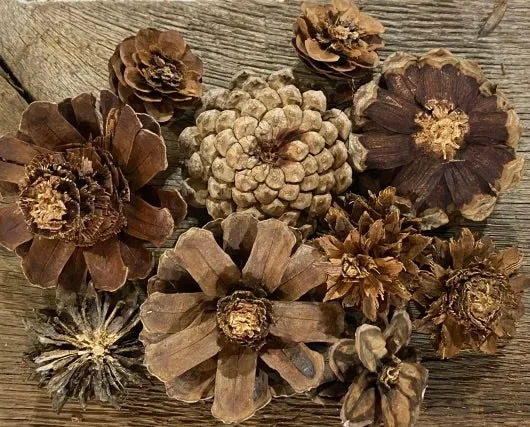
For a dining table runner you need roughly 36 to 48 inches of length and 20 to 30 mixed pinecones. For a coffee table, halve it — a 24-inch stretch and a dozen cones. Keep the arrangement under 4 inches tall so it doesn’t block sightlines across the table, and lay a strip of shelf liner underneath so the wood doesn’t scratch.
16. A Gold-Tipped Pinecone Wreath in Progress
- Grapevine wreath base, 18 inch: $8–15
- Pinecones, 20–25: $8–14
- Gold spray paint or liquid leaf: $6–10
- Matte gold ball ornaments: $8–12
- Wooden star cutout: $3–6
- Floral wire and glue: $5
Total: $38–62. Budget alternative: a thrifted wreath base from Facebook Marketplace runs about $3, and you only need to gild the pinecones that face front — saving paint and an hour.
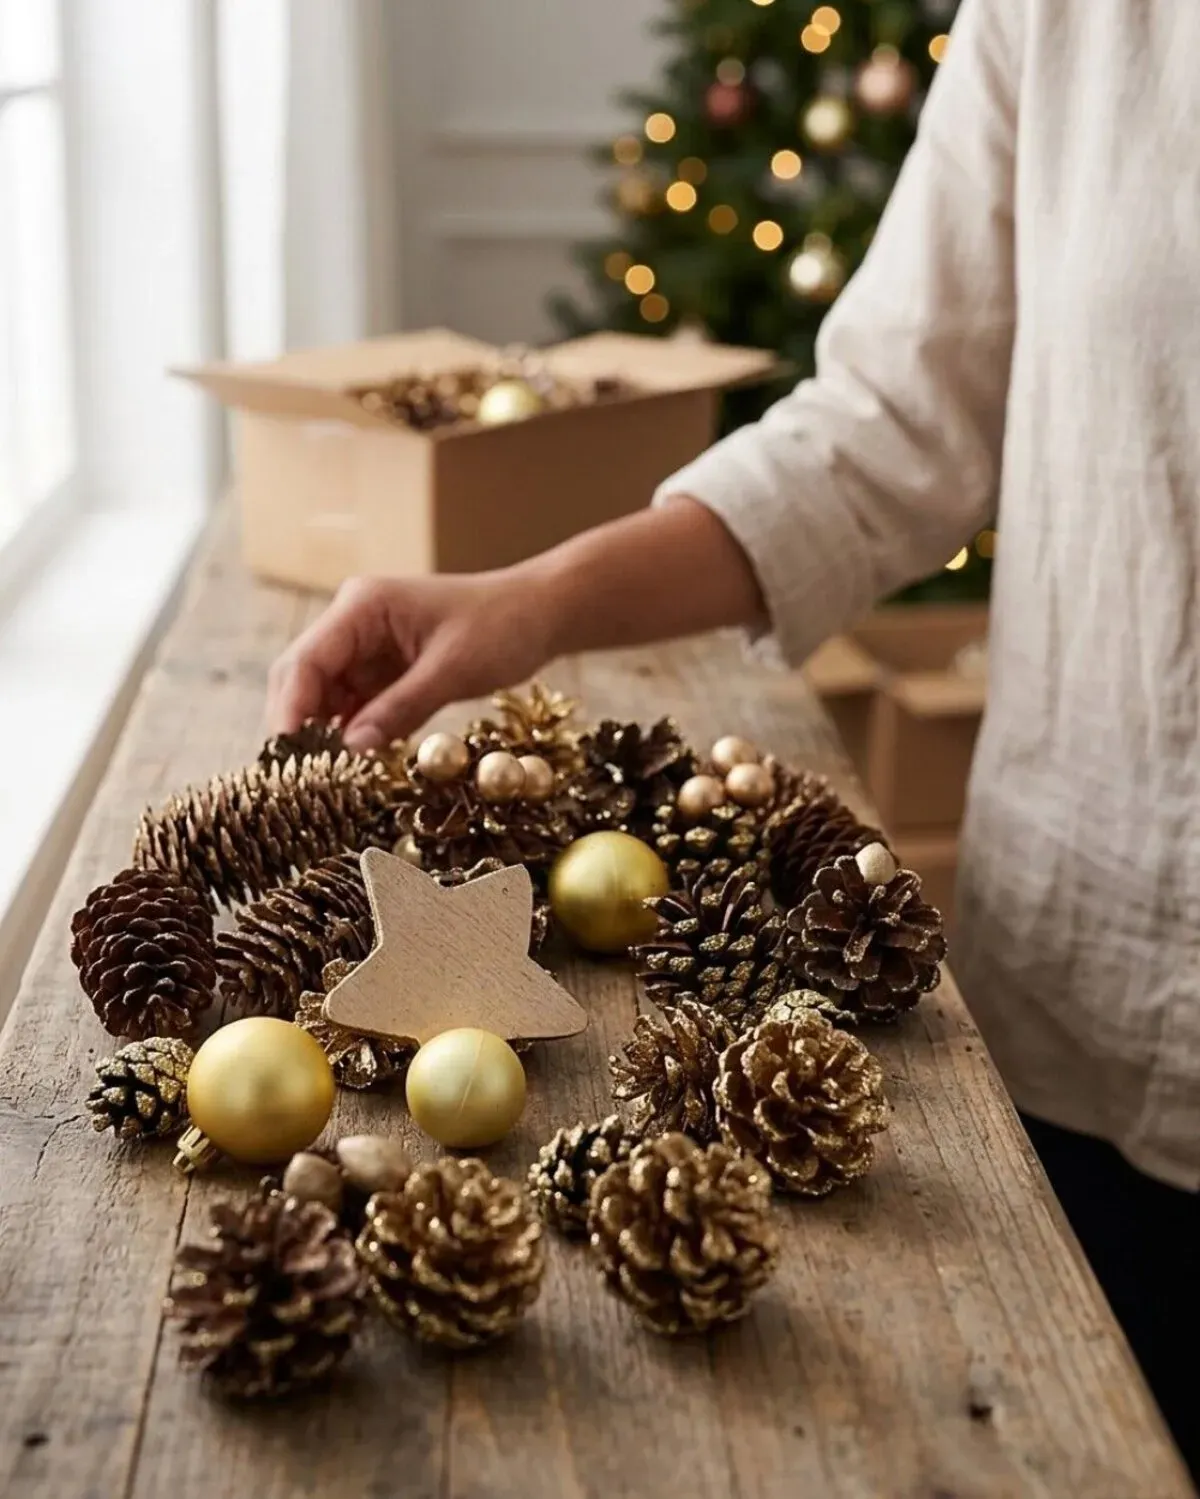
Wreaths get heavy fast. Twenty-five pinecones plus ornaments on an 18-inch grapevine base can land near four pounds, which is more than a suction cup or a thumbtack will hold. Use a proper over-the-door wreath hook rated for the weight, and wire the largest pinecones instead of gluing them — hot glue pops off grapevine in a cold doorway.
17. Pinecones on a Raw Wood Stump Beside a White Tree
Gathered pinecones carry sap and sometimes tiny hitchhikers. Bake them on a foil-lined sheet at 200°F for 30 to 45 minutes, then cool completely before they touch anything you care about. Skip this and you’ll get sticky resin rings on the stump and, worst case, little beetles on your floor in January. Store them in a paper bag, never plastic — trapped moisture means mold.
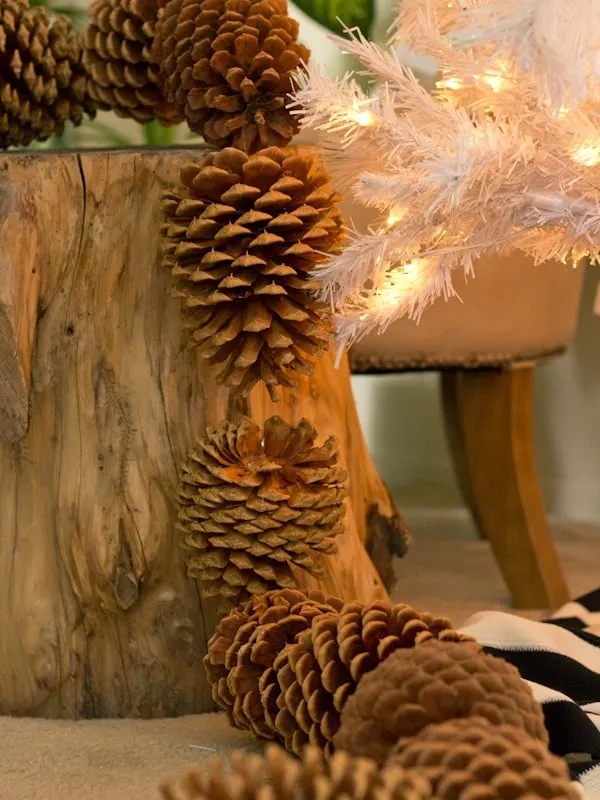
That black and white striped textile under the stump is doing more than you think. A graphic stripe next to organic pinecones and raw wood gives the eye something geometric to land on, which keeps the whole corner from becoming a brown blur. No striped throw? A black-and-cream runner or a folded scarf does the same job.
18. A Smoky Mercury Glass Pinecone Against Pale Planks
The thick twine hanger is the entire personality of this ornament. A mercury glass pinecone with a standard metal cap reads department store; the same ornament on a chunky natural twine loop reads like something you found at a barn sale. It’s a two-dollar swap that changes the story. If yours came with wire, cut it off and knot twine through the cap instead — leave the ends raw.
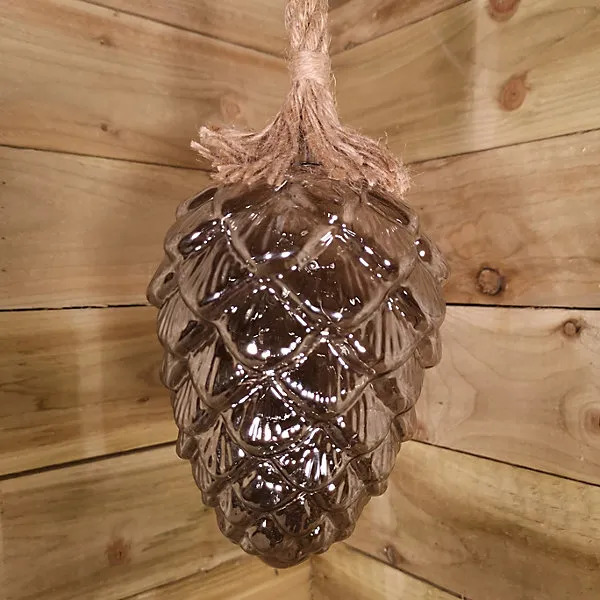
Roughly 70 percent pale wood, 20 percent smoky glass, 10 percent twine. The restraint is the point: three materials in the same warm-neutral range, so the texture of the glass scales does the talking. Want more contrast? Add a single matte black hook or a dark green sprig behind it. Don’t add a fourth material — that’s where these arrangements go wrong.
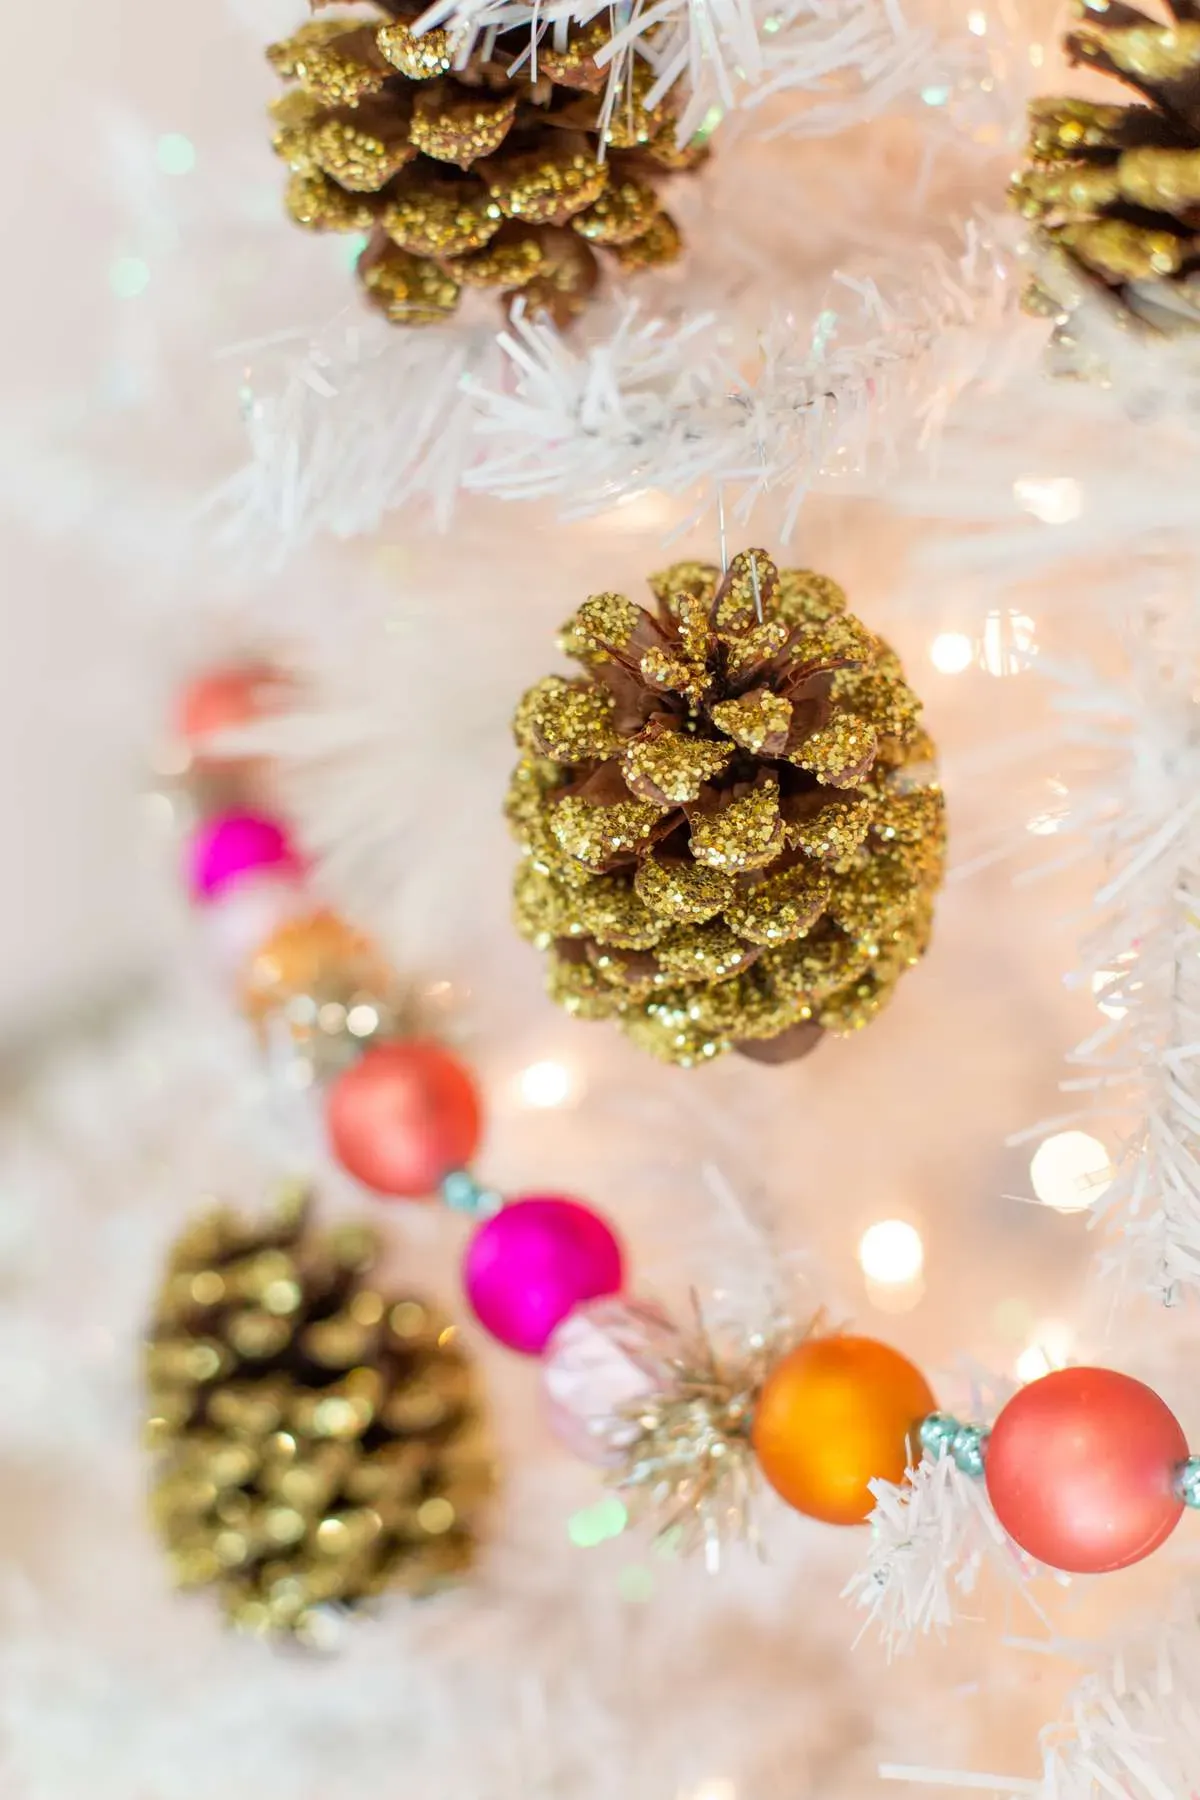
19. Glittered Gold Pinecones Against Warm Bokeh Lights
Warm-white string lights have quietly won. After a decade of cool-blue LEDs, 2026 tree styling has swung hard toward 2700K warmth, and glittered gold pinecones are the natural partner — they throw the light back without adding another color. It’s also why vintage-style metallic ornaments are resurging on Pinterest: they read rich in a photograph in a way flat matte finishes simply don’t.
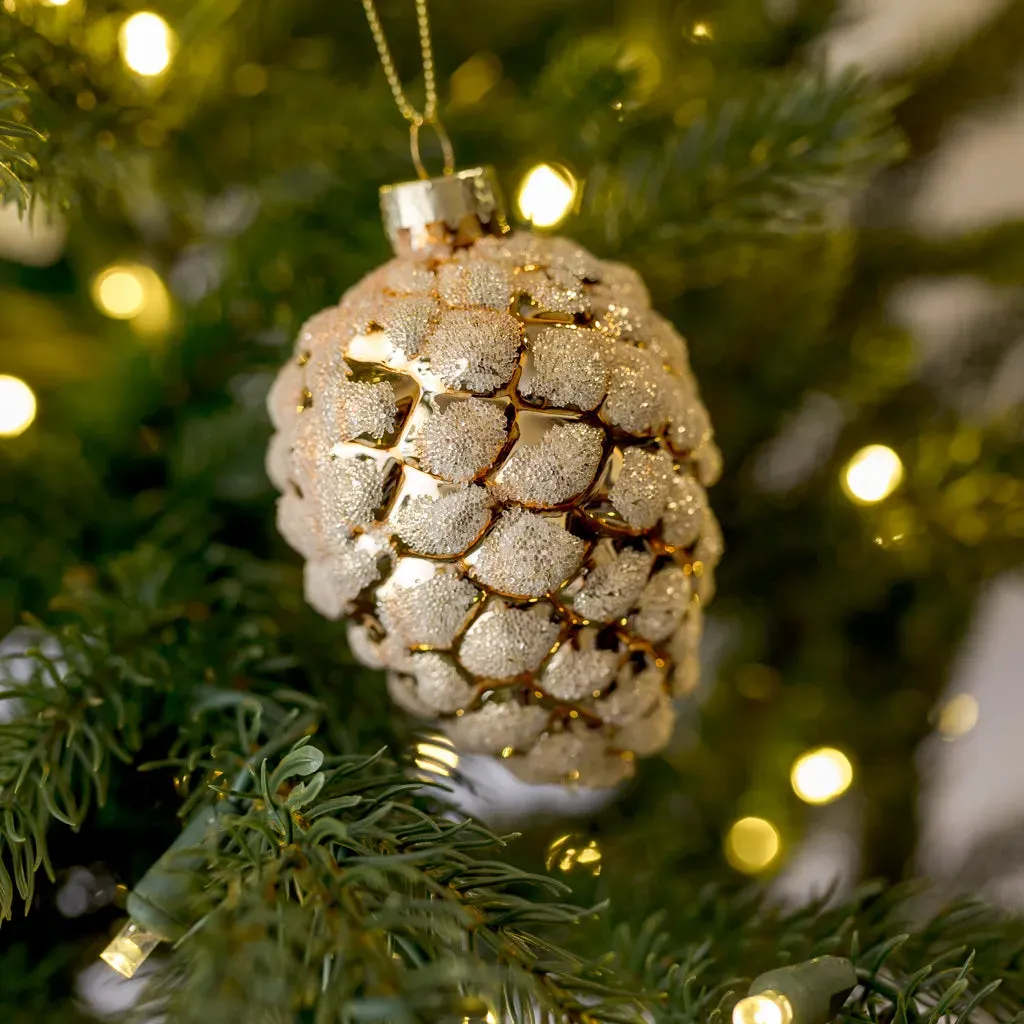
Two temperatures, one frame: the deep cool green of the needles against warm gold and warm yellow light. That contrast is what makes the ornament pop instead of blend, and it’s why this look photographs so beautifully in a dim room. Put the same pinecone on a white-flocked tree and it goes flat — there’s nothing for the gold to push against.
20. A Black Lantern Filled with Candles and Glittered Pinecones
- Set the candle in the lantern first and light it — everything else gets arranged around that height.
- Pour a 2-inch bed of pinecones into the base to hide the candle’s foot.
- Tuck glittered cones at three heights, leaning a few against the glass.
- Add greenery behind, not in front — glass plus greenery equals fog.
- Keep pinecones at least 3 inches from the flame, or use a battery pillar and skip the worry.
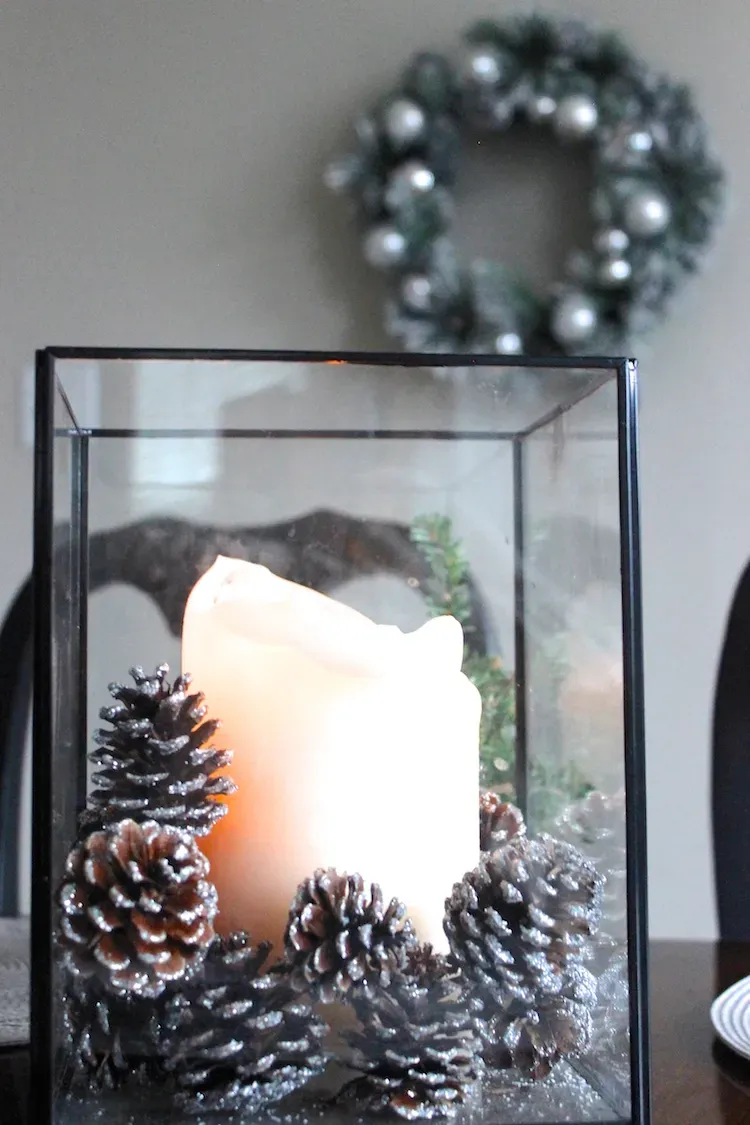
Ten minutes, and the pinecones do all the work.
A $6 thrifted lantern sprayed matte black looks nearly identical to the $40 version, because the glass is the expensive part and thrifted lanterns usually still have it. Glitter-dusted pinecones run about $1 each at a dollar store versus $4 to $6 at a craft chain. Total build under $20. Compare with Idea #22 for the taller, more formal version.
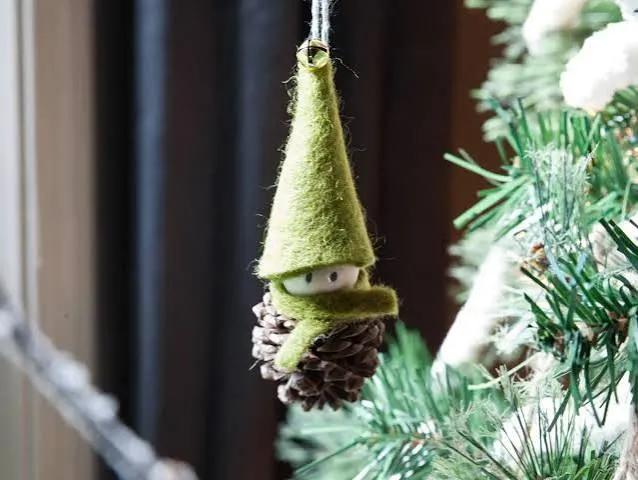
21. A Pinecone Gnome in a Red Felt Santa Hat
A pinecone gnome lands around 4 to 5 inches tall, right in the sweet spot for a full-size tree — small enough to hang in the gaps, big enough to read from across the room. Space them 6 inches apart minimum; gnome clusters get claustrophobic fast. On a tabletop tree, two is plenty. They also work propped on a shelf, which is where most people end up putting them anyway.
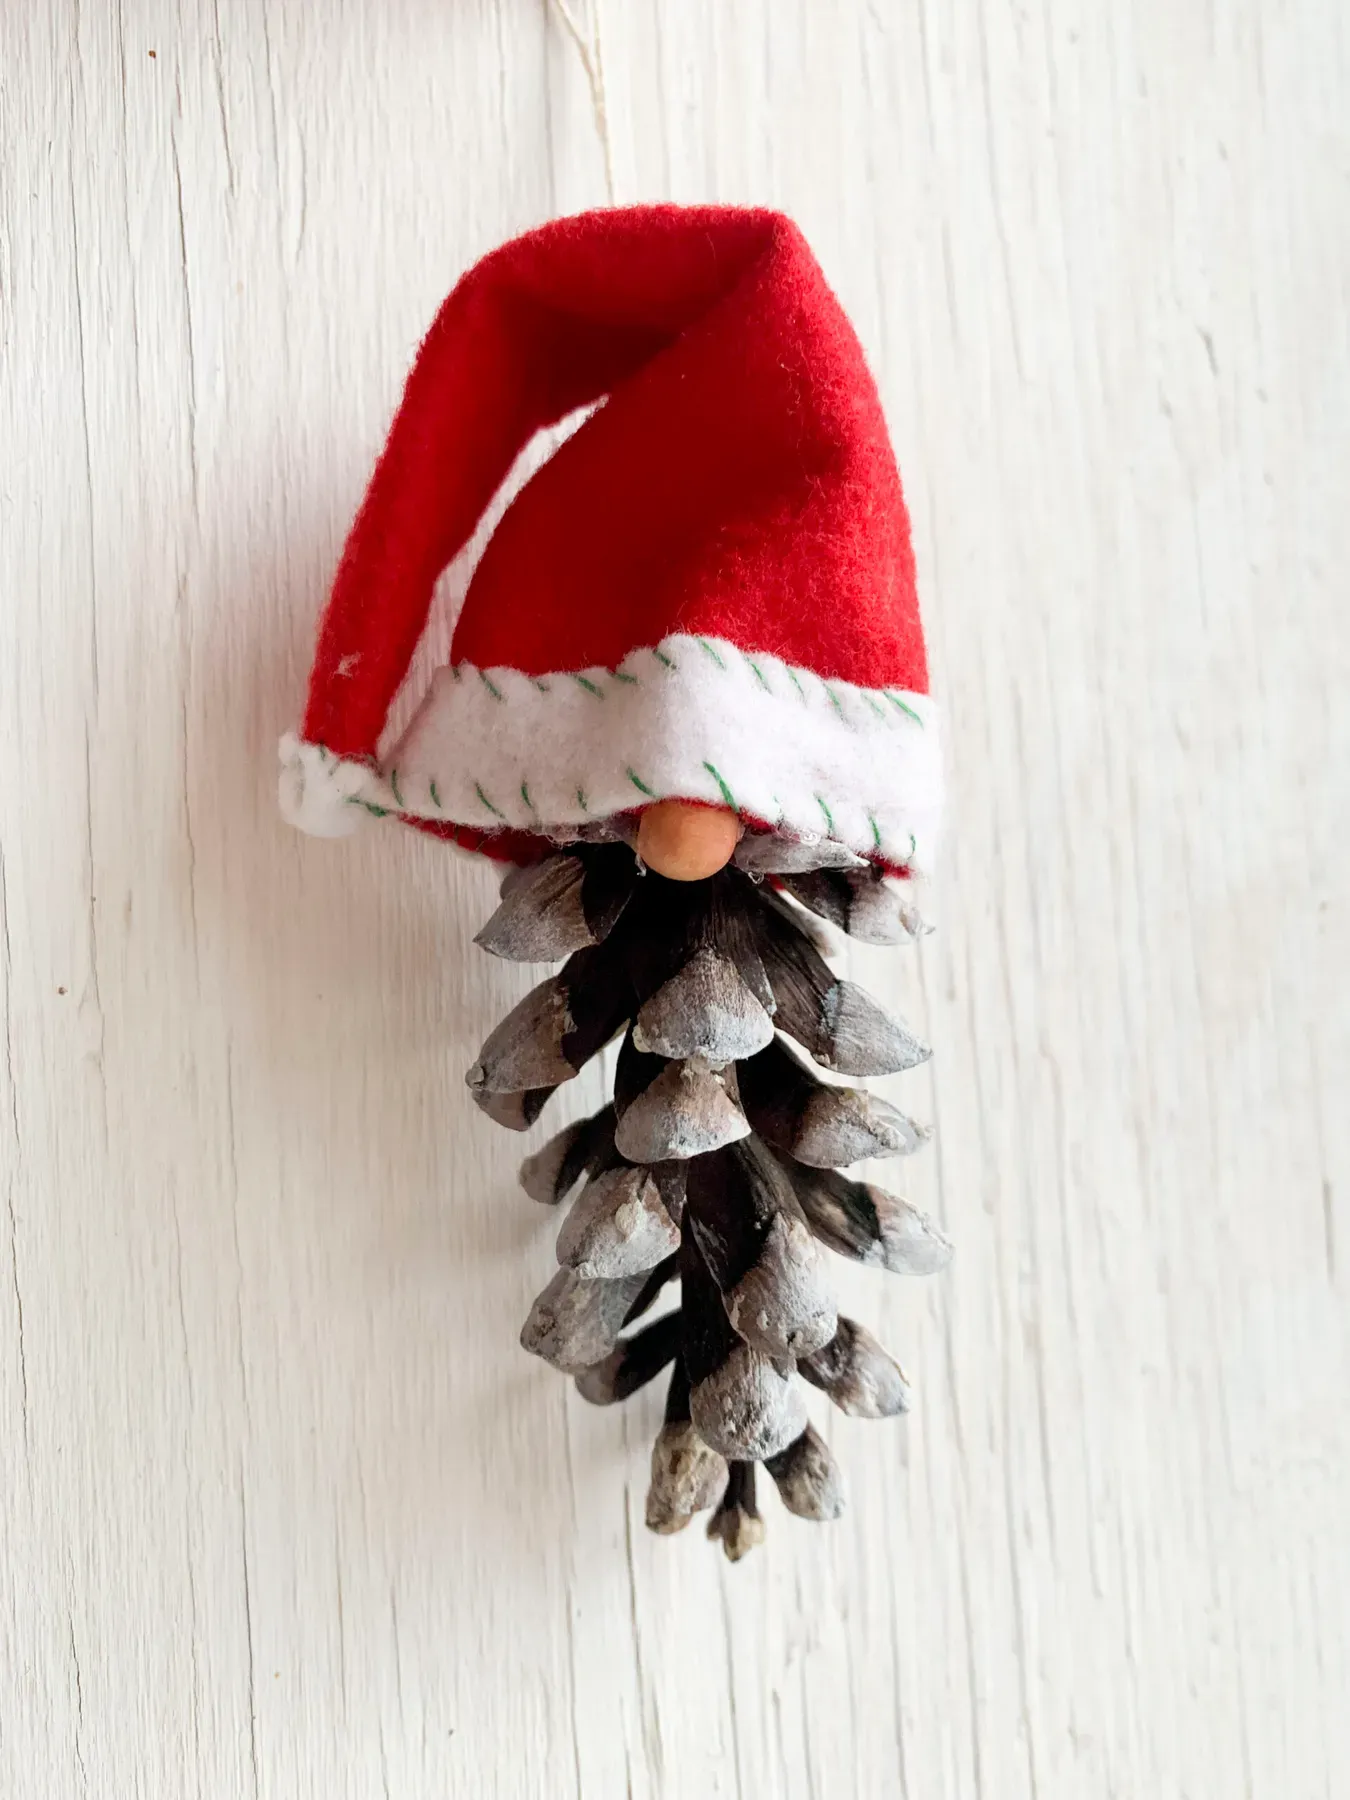
Felt and hot glue are fair-weather friends. In a cold room the glue pulls away from felt within a season, so rough up the felt with a little sandpaper first and use a generous bead. The white fuzzy brim collects dust like a lint roller — press on a piece of tape and peel it off. And wrap these when storing; the bead nose dents easily.
22. A Tall Black Lantern with a Gold Candle Stand
Height layering is what separates a styled lantern from a stuffed one. Put the candle on a 2- to 3-inch riser so the flame sits above the pinecone bed, then build greenery behind at the candle’s midpoint. Anything taller than the flame blocks the glow; anything at the same level flattens it. Leave a third of the glass clear — negative space reads expensive.
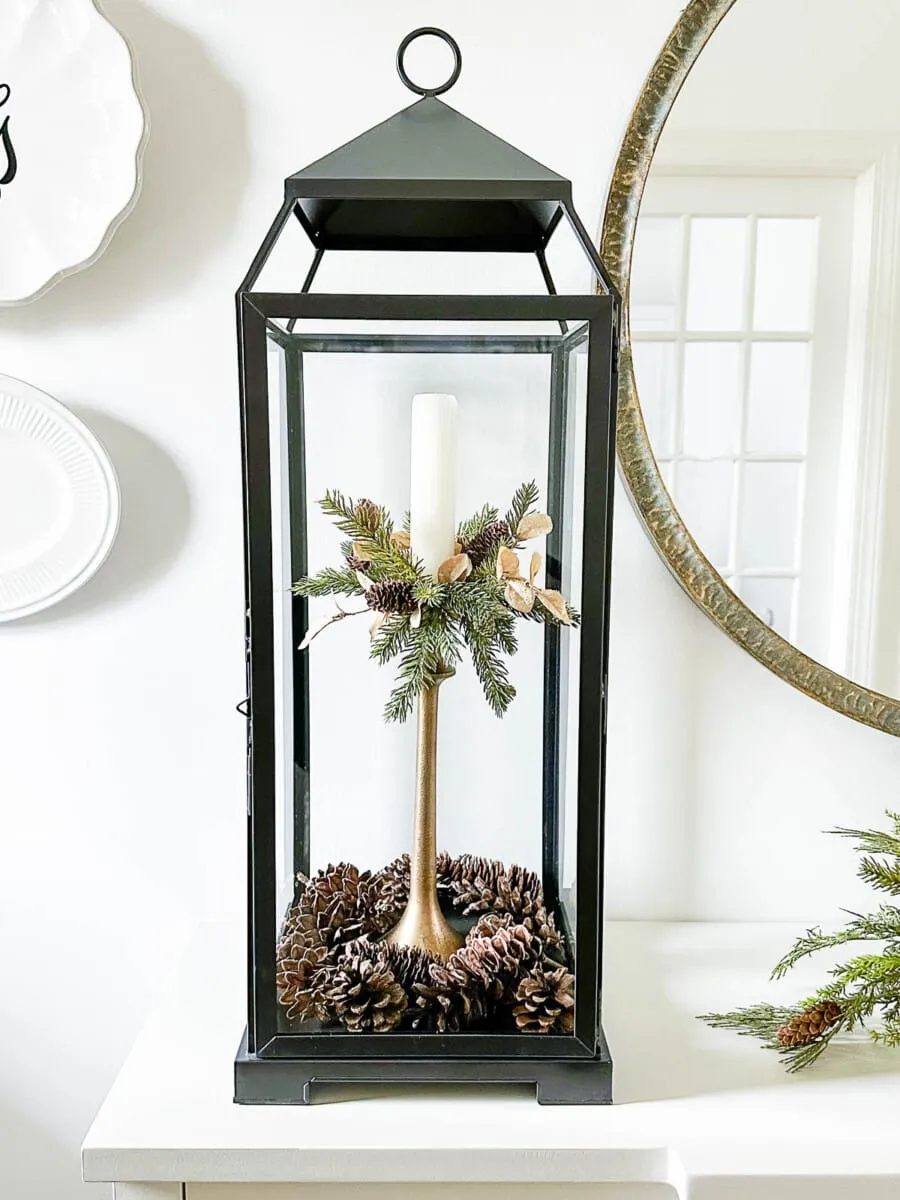
- Tall black metal lantern, 16–20 inch: $25–45
- White pillar candle, 3×6 inch: $6–12
- Gold candle stand or riser: $5–10
- Faux pine branches and pinecones: $10–16
- Small round gold mirror: $8–15
Total: $54–98. Budget alternative: a battery pillar removes the flame-height worry, and a thrifted frame painted gold makes the mirror for about $6.
23. A Pinecone Snowman in a Knitted Beanie and Scarf
Four things to sort out before you start gluing.

- Your pinecone is wide enough at the base that the snowman stands without wobbling.
- You have a 1-inch white fabric ball for the head — foam wrapped in batting works too.
- The knit hat is small enough to look like a hat, not a sweater.
- You’ve got fine-tip black paint for the face and a steady 20 minutes.
But the face is what actually sells it. Everything else is a pinecone with a hat; the stitched smile, the two black button eyes, and the dot of pink blush are what turn it into a character. Do the eyes first and step back — if the expression doesn’t read from three feet away, go slightly bigger. Oversized features are almost always cuter than realistic ones at this scale.
24. Plaid Fabric Pinecones with a Patterned Ribbon Loop
One plaid, one solid, one pattern in the ribbon — that’s the rule keeping this from becoming a fabric scrap pile. If your pinecone is a busy red-and-green tartan, keep the ribbon motif quiet. If the pinecone is a simple check, go ahead and use the berry-print ribbon. The loop should be about 6 inches and slightly narrower than the pinecone’s widest point.
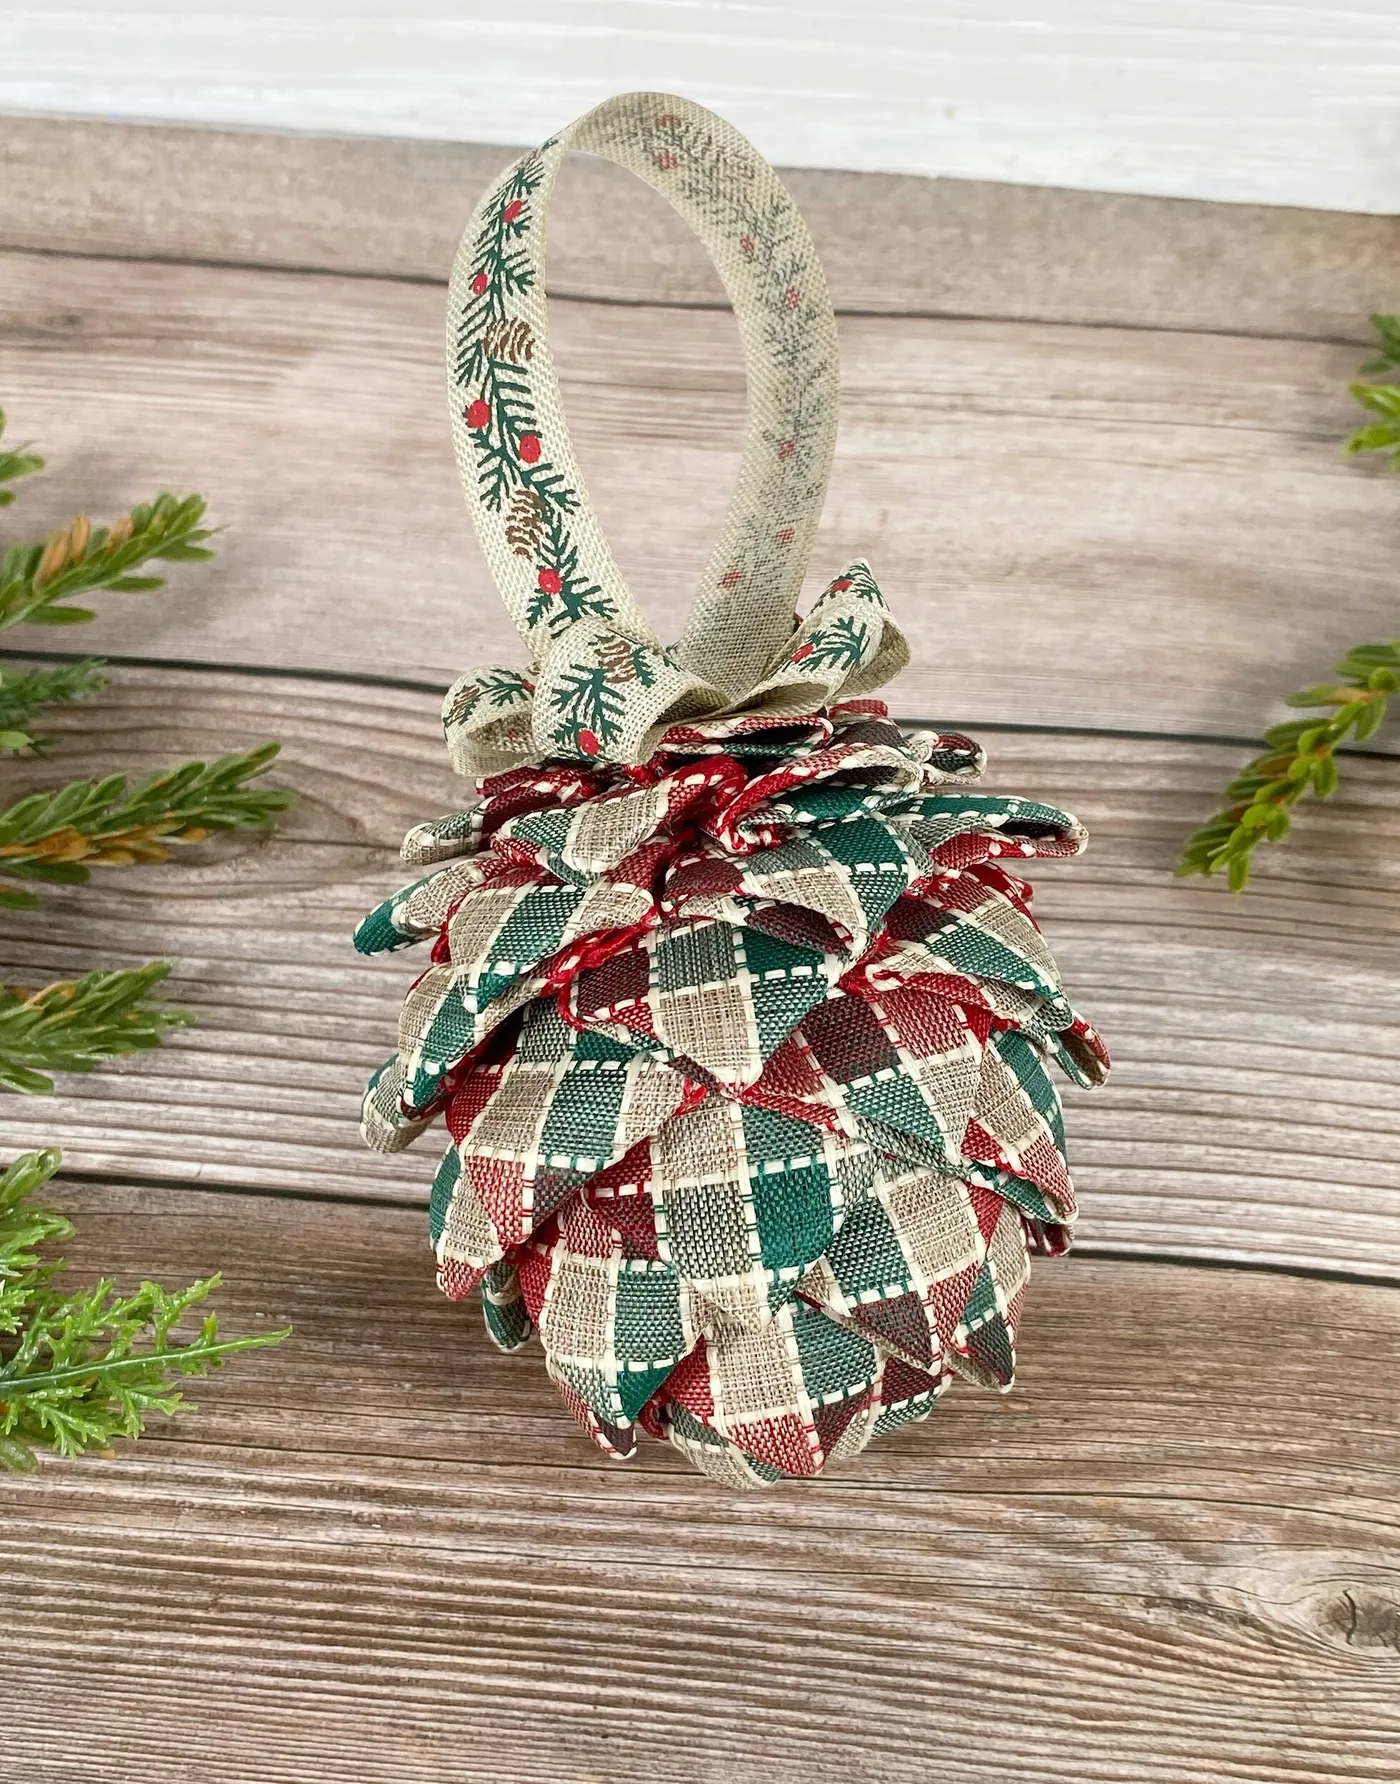
Cut fabric frays, and a pinecone made of forty small squares has a lot of edges. Pinking shears solve it in one pass, or a dab of fabric glue on each raw edge if you’d rather not buy another tool. Fabric pinecones also hold dust and can’t be washed — vacuum with a brush attachment or hit them with a hairdryer on cool. Store them flat, not bagged with heavier ornaments.
25. Pinecone Angels Hanging from a White Chandelier
Hanging them at eye level from something unexpected does all the work. A chandelier gives you height, negative space, and a reason to look up — three things a crowded tree can’t offer. The white wings and fluff also give a dark pinecone something to contrast against, which is why these read clearly from across the room even at four inches tall.
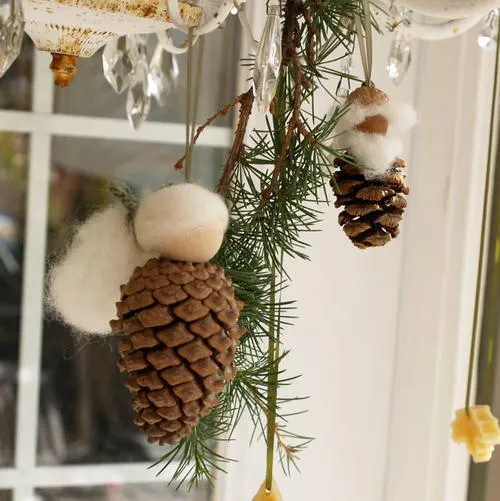
- Glue a 1-inch beige felt ball to the top of the pinecone as the head.
- Cut two wing shapes from white felt or faux fur, roughly 2 inches long.
- Pinch the wing bases and glue them to the back, angled slightly outward.
- Knot a 6-inch length of twine into a halo loop above the head.
- Hang from a chandelier arm, spacing them 5 inches apart.
Fifteen minutes each and about $5 in materials.
26. Frosted Pinecones, Red Berries, and Evergreen Sprays
Berry picks are where holiday decor gets marked up hardest. A $2 dollar-store bundle cut into three-berry sprigs fills the same gaps as a $12 stem from a craft chain. Pinecones are free if you gather them, and the little white stars can come from a $4 pack of wooden shapes with a coat of white paint. The whole arrangement lands around $15.
Never tuck a whole berry stem into an arrangement — it looks like a stem. Cut it into three-berry sprigs with wire cutters and place each one individually so the berries appear scattered rather than bunched. Same with the white stars: three visible from the front, one tucked low and half-hidden. Hidden details are what make a centerpiece feel gathered rather than assembled.
27. Pinecone Scales Arranged into a Flower
This one is a patience project, not a nap-time craft. Individual scales snap if you pull them while dry, so soak the pinecone in warm water for an hour first, then work with sharp snips and a bowl to catch the pieces. Expect to lose about a third of the scales to breakage. Start with the largest outer scales and save the small pale ones for the flower’s center.
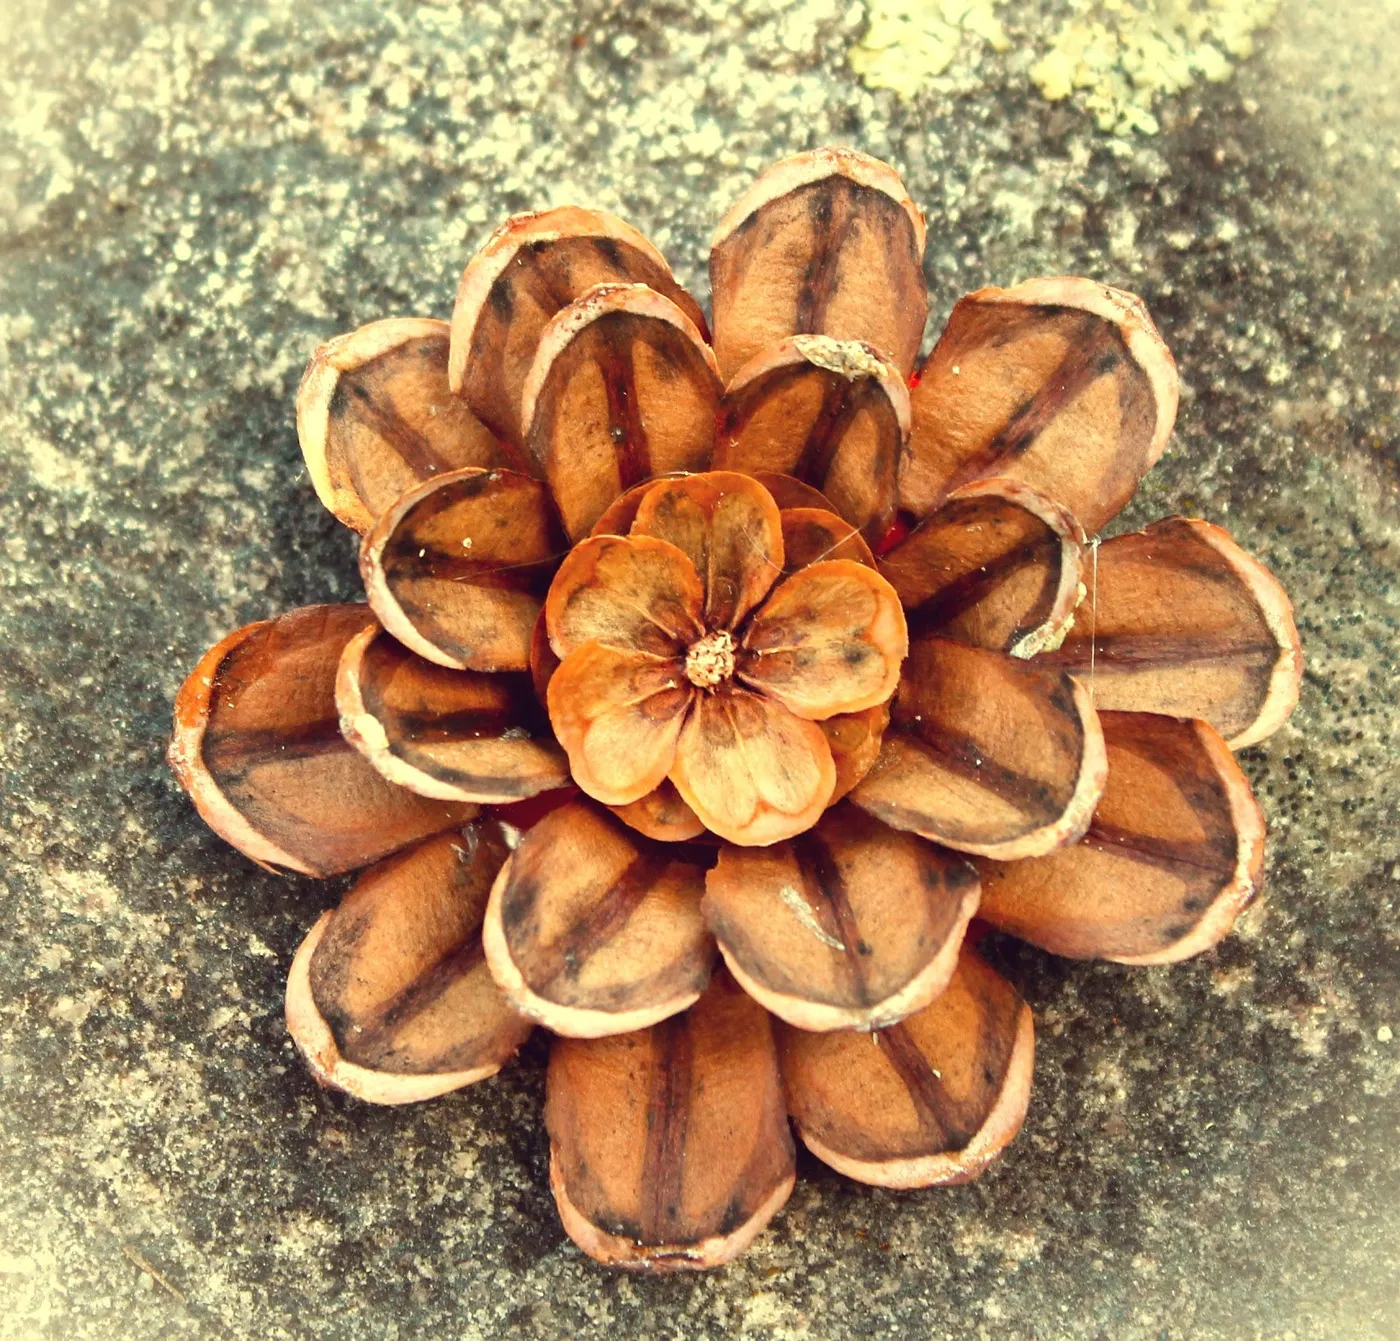
Pinecone-scale flowers have been circulating in the botanical craft world for a couple of years, and they’re having a real moment in 2026 as decor leans toward natural materials that don’t look manufactured. The appeal is that it’s genuinely handmade looking — no two come out alike. It’s also the kind of slow, tactile project that’s replaced doomscrolling for a lot of people this winter.
28. A Bronze-Highlighted Pinecone on Faux Fur
An 8- to 10-inch pinecone ornament is a statement piece and needs room. It works on a 9-foot tree, in a wide bowl, or propped on a console — never on a 6-foot tree, where it throws off the scale of everything around it. Give it at least 12 inches of clear space on all sides. For a smaller version of this same look, drop back to Idea #5.
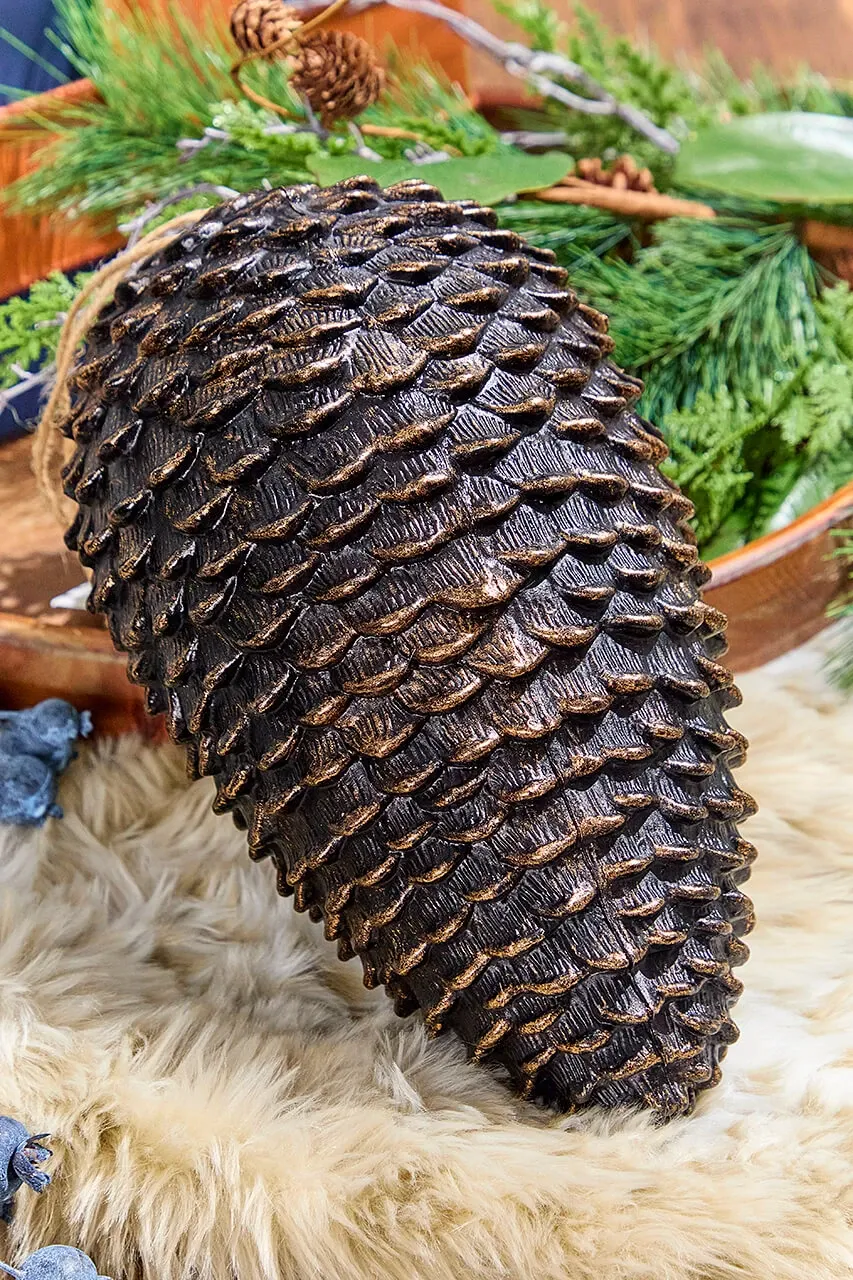
- Oversized pinecone or ornament, 8–10 inch: $18–35
- Metallic bronze or copper rub-on wax: $8–12
- Faux fur throw or remnant: $12–25
- Faux pine branches: $8–14
- Blue berry picks: $4–8
Total: $50–94. Budget alternative: a thrifted faux fur jacket gives you the same plush surface for under $10, and a plain pinecone plus a $6 tube of wax gets the metallic finish.
29. A Purple-Hatted Pinecone Gnome with Pipe-Cleaner Arms
The pipe-cleaner arms are the detail that turns a pinecone with a hat into a character doing something — one arm holding a frosted sprig, the other hanging loose. Real twigs would snap; pipe cleaners bend and hold. Twist them into the lower scales so they emerge naturally, and wrap the ends in felt for mittens instead of gluing on separate pieces.
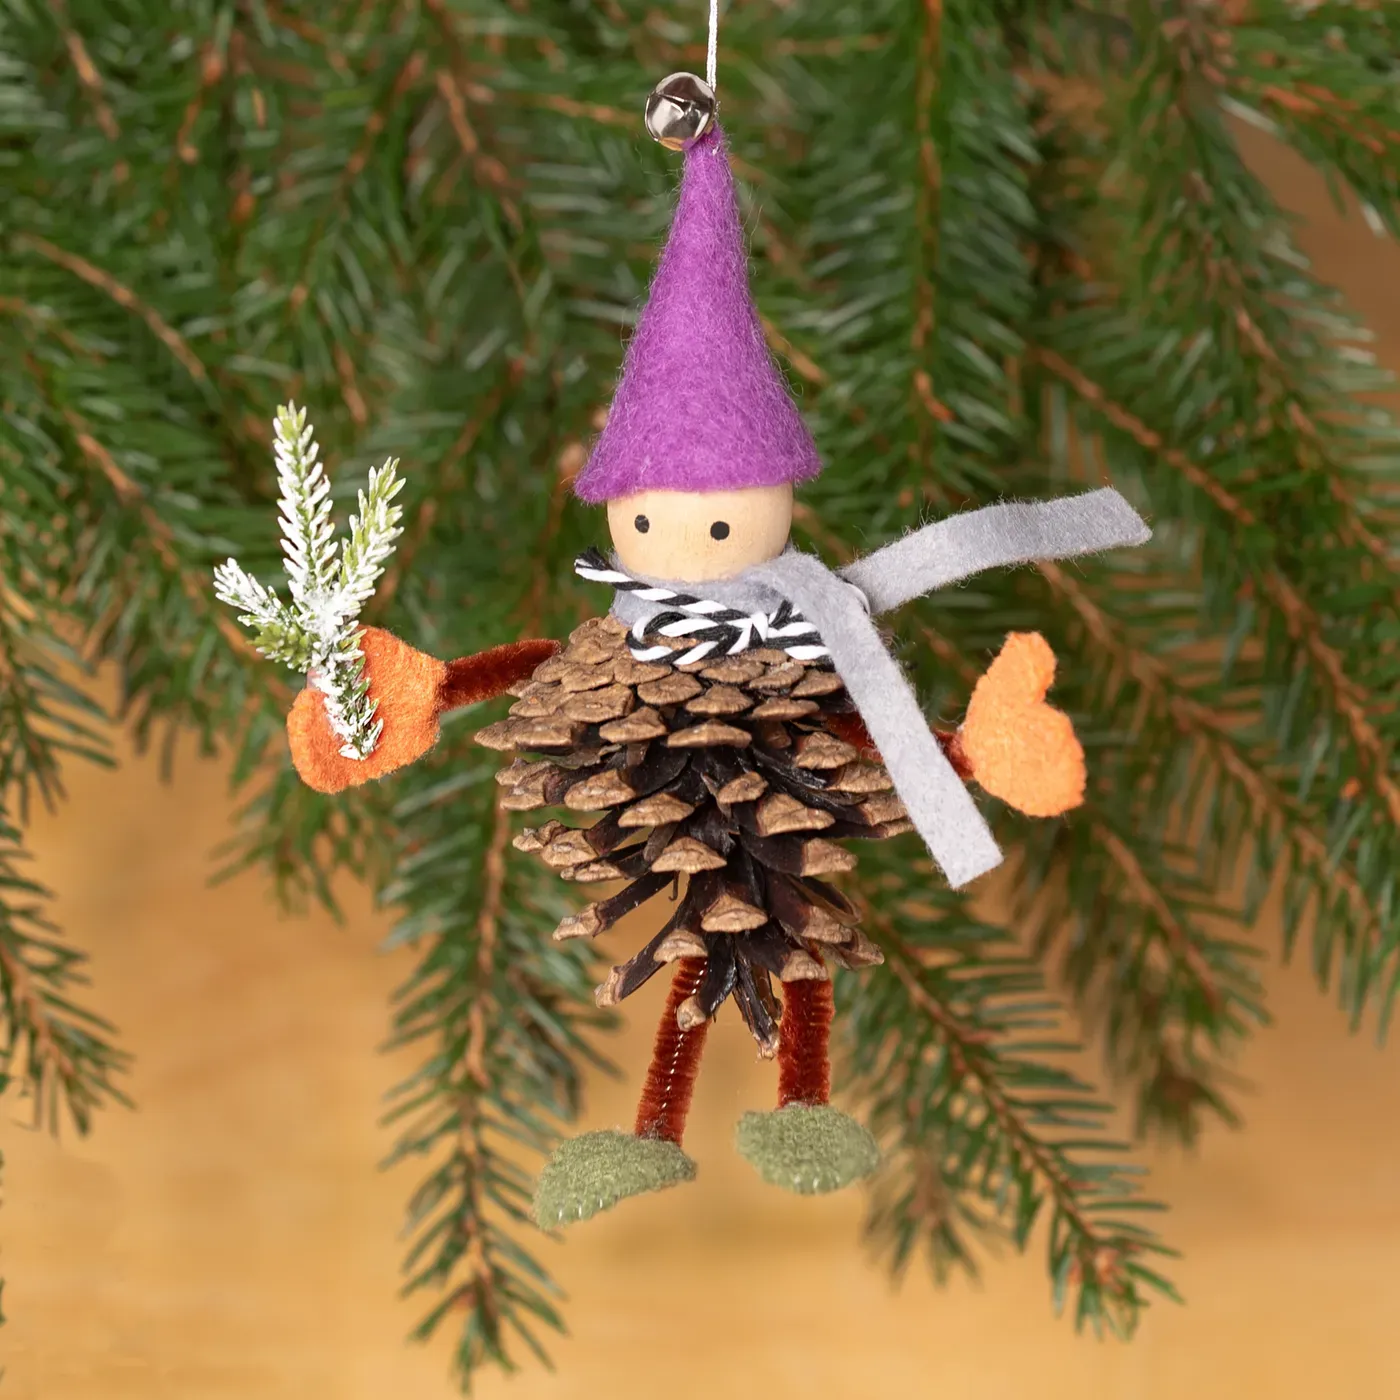
Color opposites in a tiny package. Purple against natural brown is an unusual pairing most holiday decor avoids, which is exactly why it catches the eye on a tree full of red and green. The silver bell at the hat’s tip adds a second unexpected note, and the orange mittens a third. Three accent colors on a four-inch ornament sounds like chaos — it works because the pinecone brown does the calming.
From Forest Floor to Front Door: Your Pinecone Season Starts Now
Start with one project — the cork-based trees or a single glittered ornament — and let the rest of the season happen around it. Pinecones are forgiving, cheap, and genuinely hard to ruin, which makes them the best possible place to begin. Snap a photo of what you make and pin it next to these ideas so next year’s version is even better.