
Fairy Garden Ideas 2026: 44 Magical DIY Indoor & Outdoor Miniature Designs For Backyards, Pots, Trees & More
In 2026, fairy gardens are having a real moment on Pinterest—partly because they’re small, soothing projects, and partly because they make even an ordinary patio or windowsill feel like a storybook set. The best versions aren’t fussy; they’re personal, a little whimsical, and designed to survive real life weather (or a curious pet). Below are 22 fresh fairy garden ideas you can copy, tweak, and scale up or down. You’ll get styling direction, plus image prompts to help you visualize each setup.
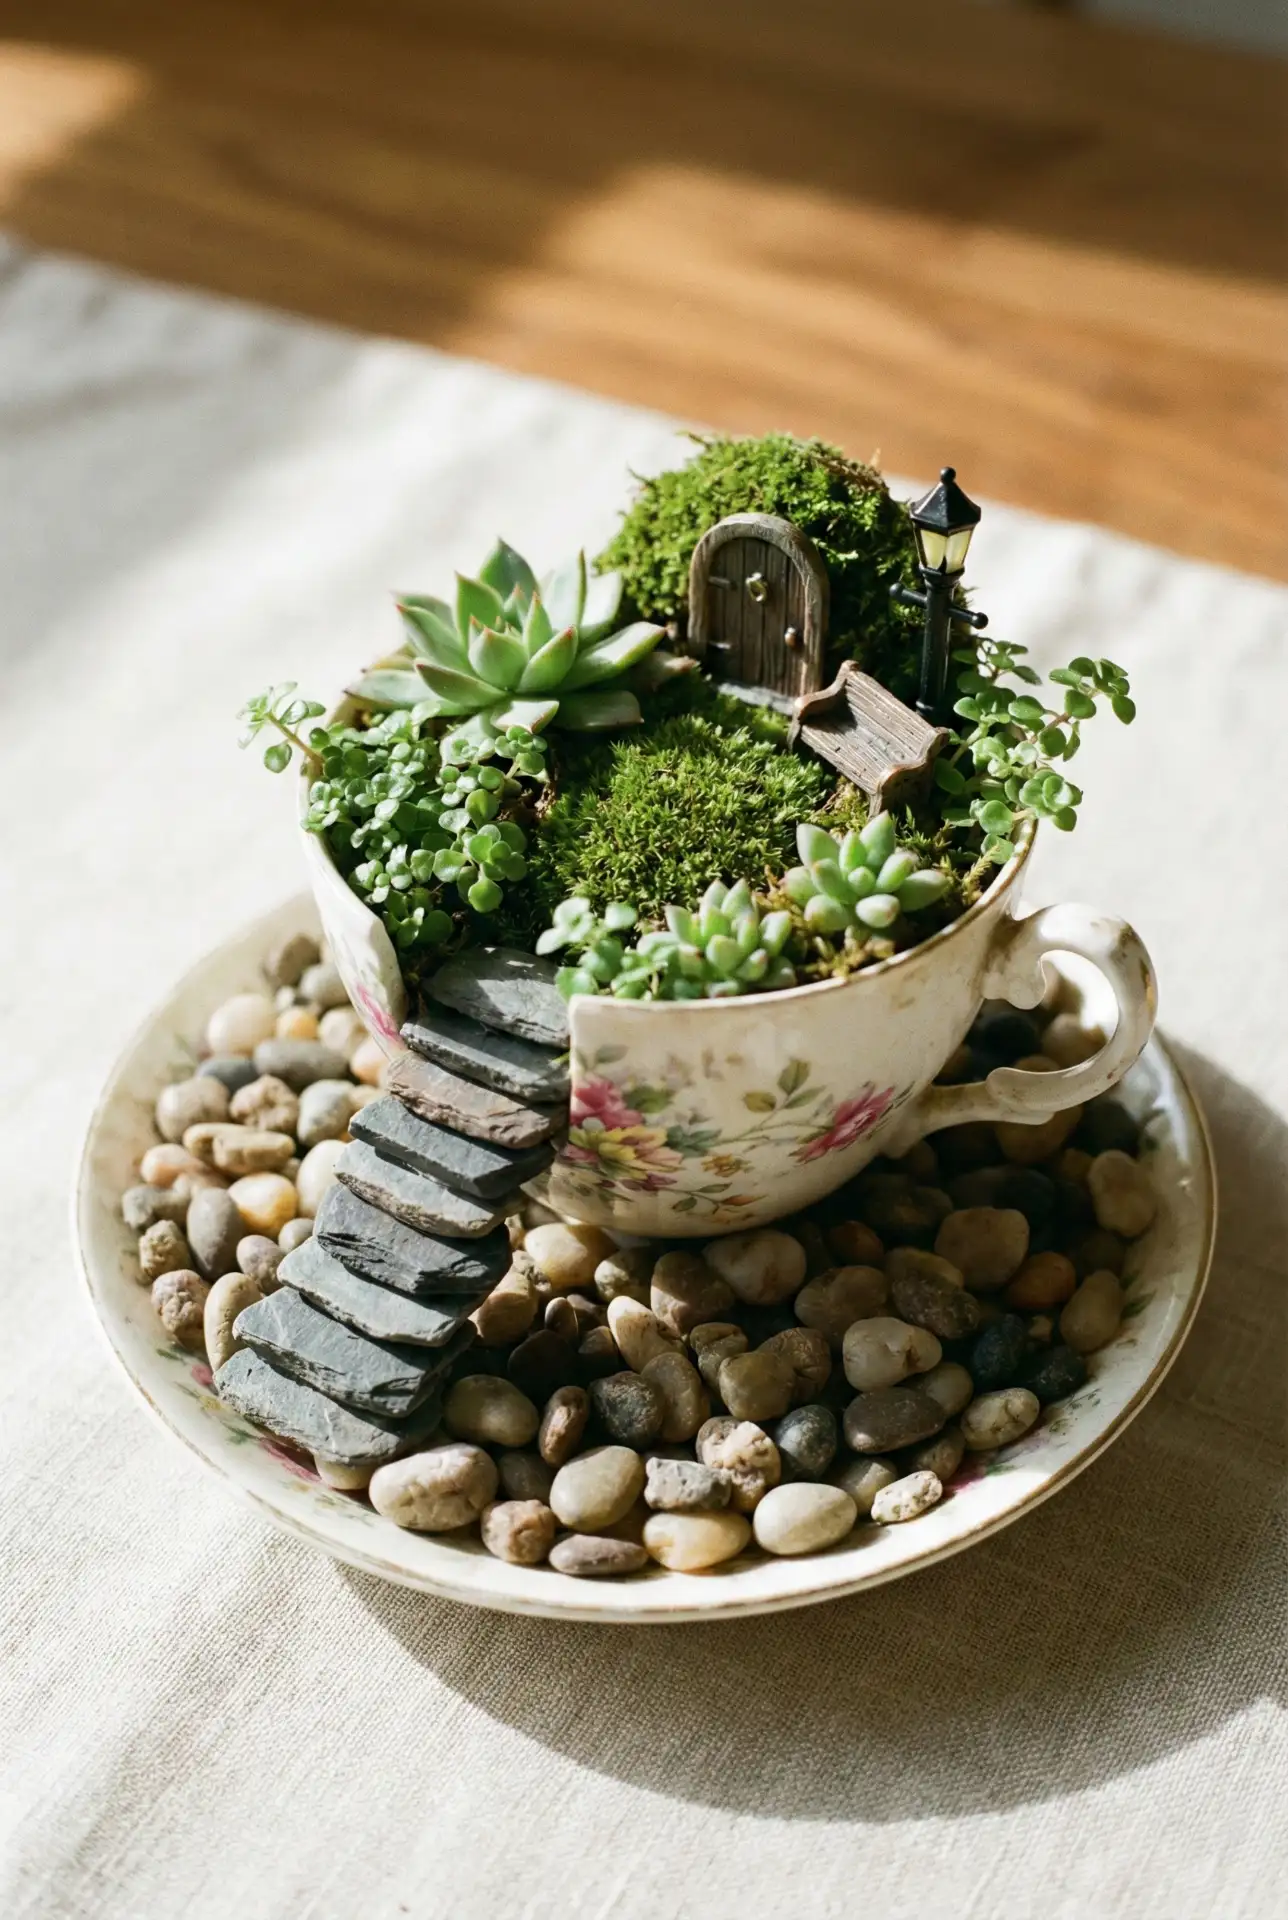
1. Teacup Windowsill Cottage Scene
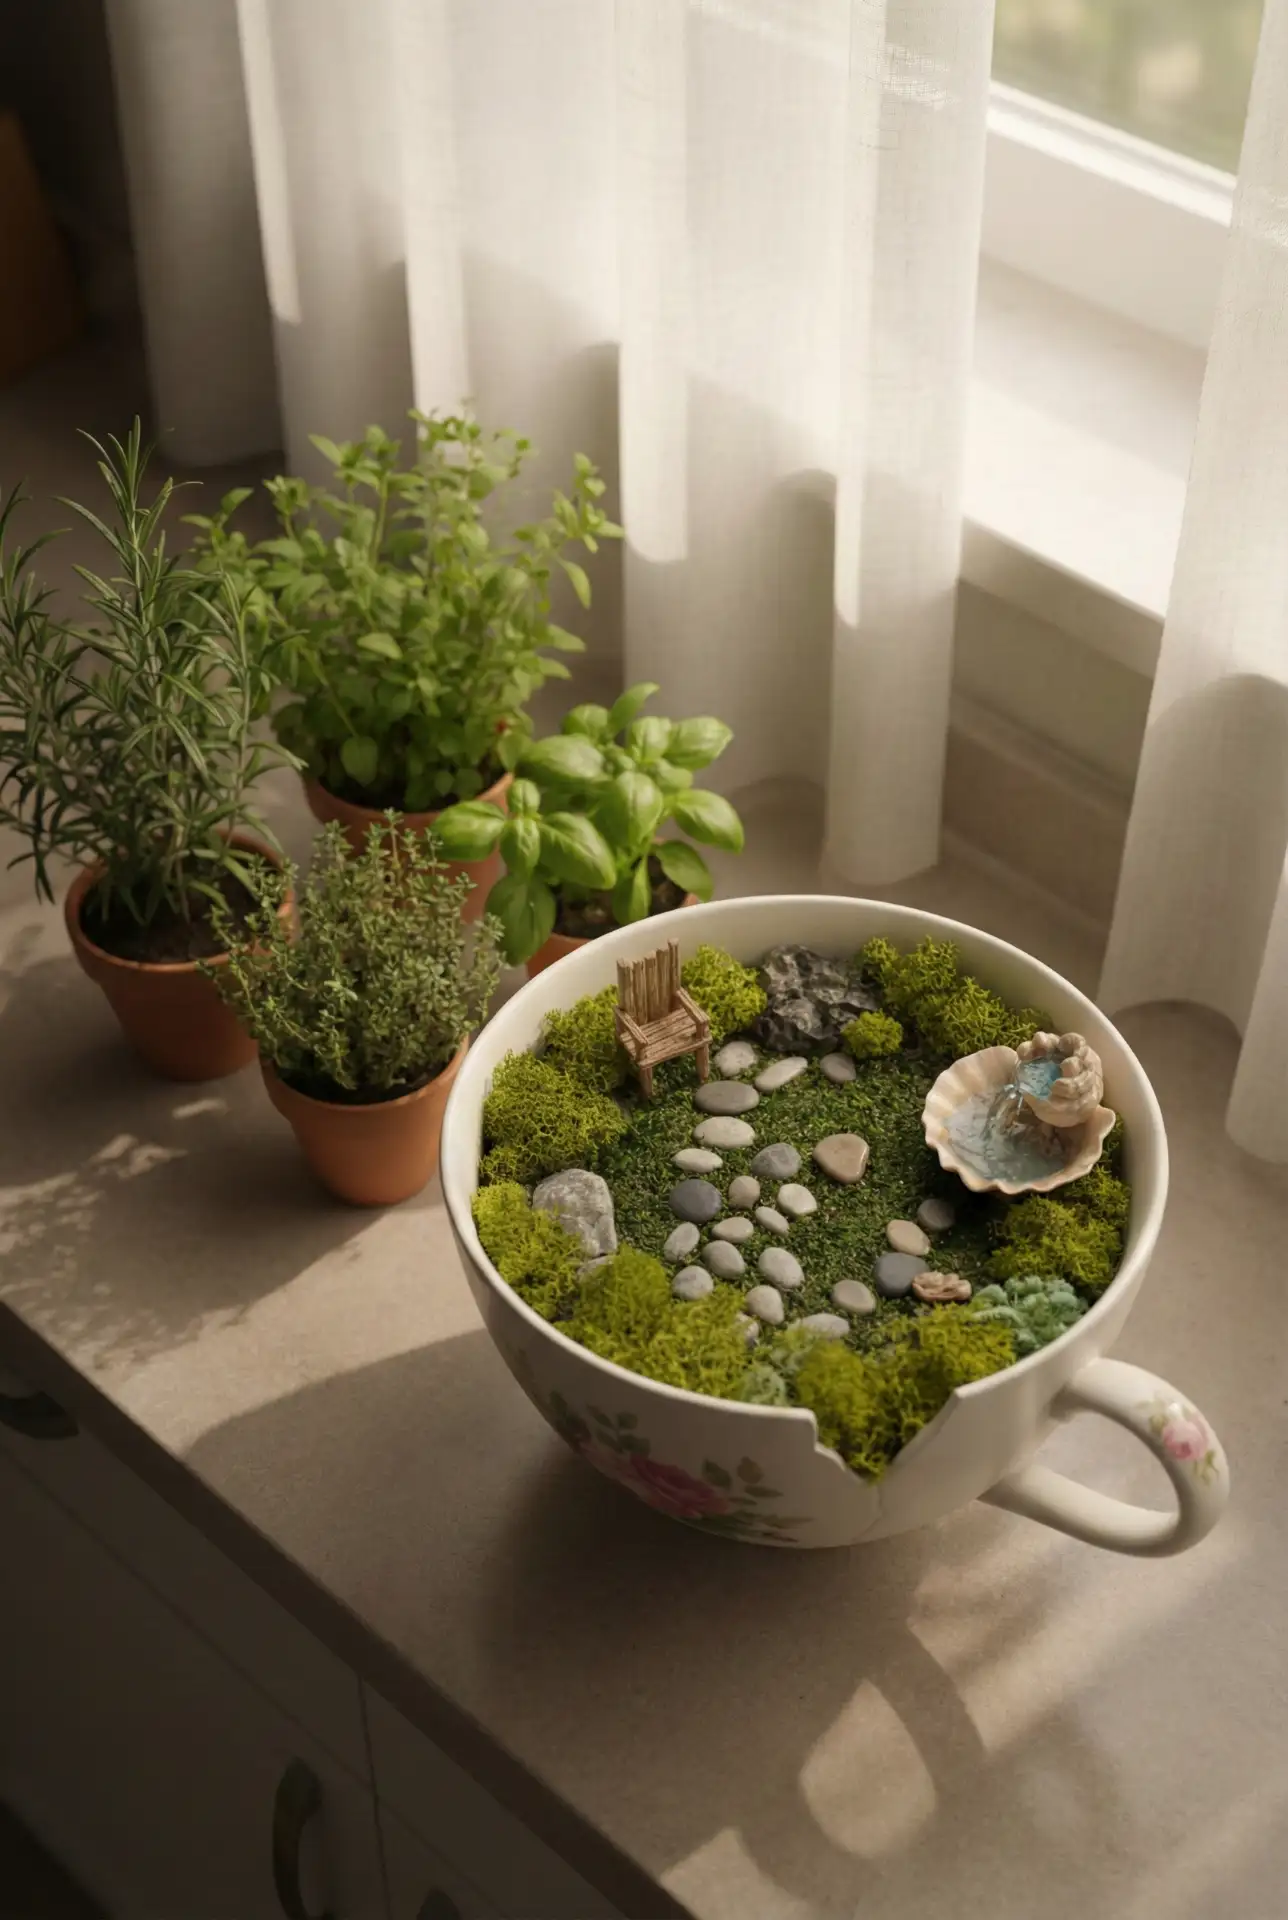
A sunny kitchen ledge is the perfect spot for an Indoor fairy garden that feels charming, not cluttered. Start with a vintage Teacup, then build a tiny “front yard” using moss, pebbles, and a Miniature door leaned against a sugar bowl or a small stone. The scale stays sweet because the container naturally limits you.
Practical insight: seal the inside of the cup with a clear, water-safe coating and add a thin drainage layer of gravel before moss goes in. Without it, the setup can get swampy fast, especially near a steamy sink. If you want low maintenance, use preserved moss and a few dry accents so you’re not babysitting moisture every day.
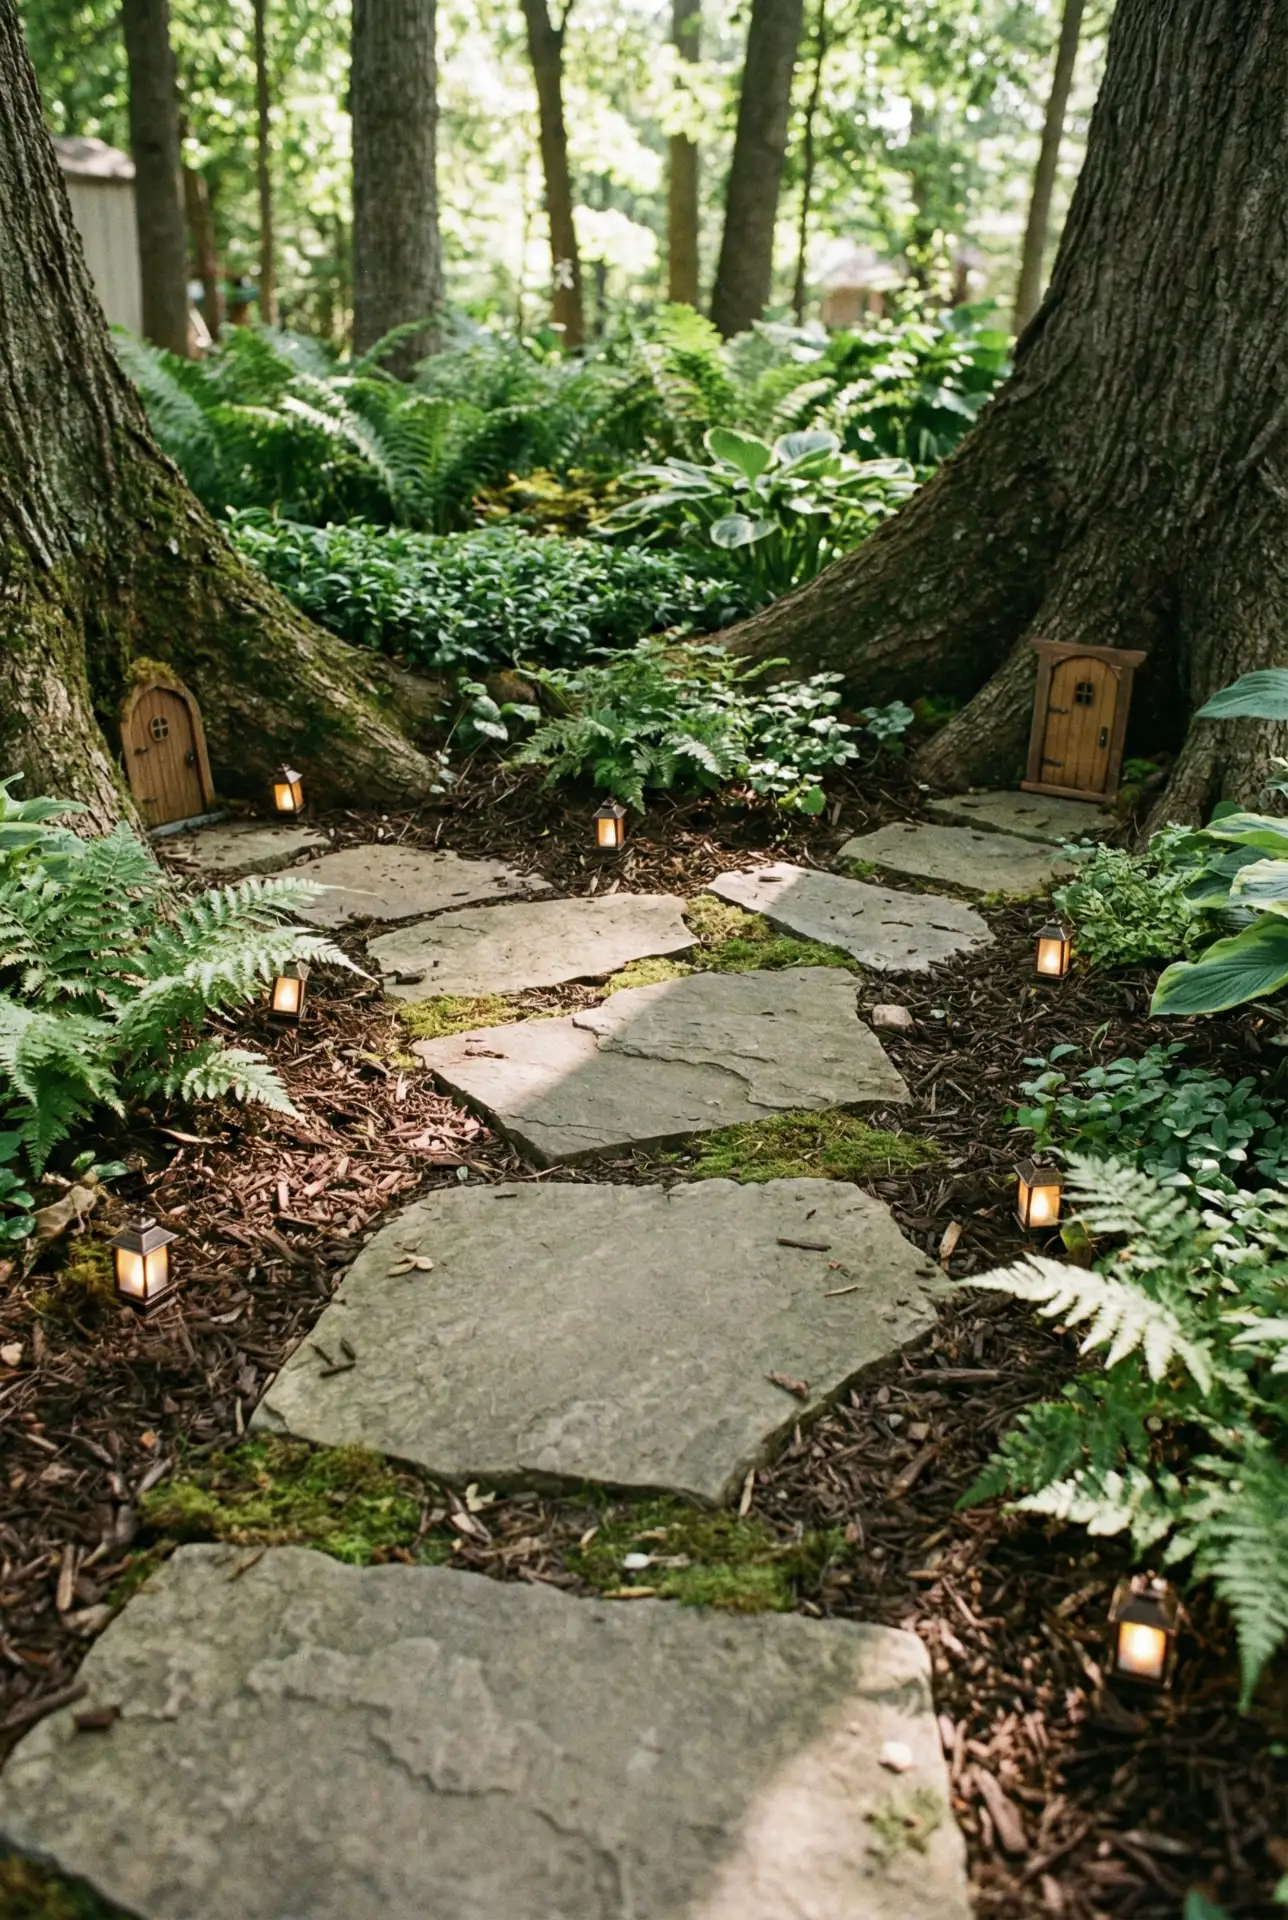
2. Enchanted Forest Ring Around A Tree
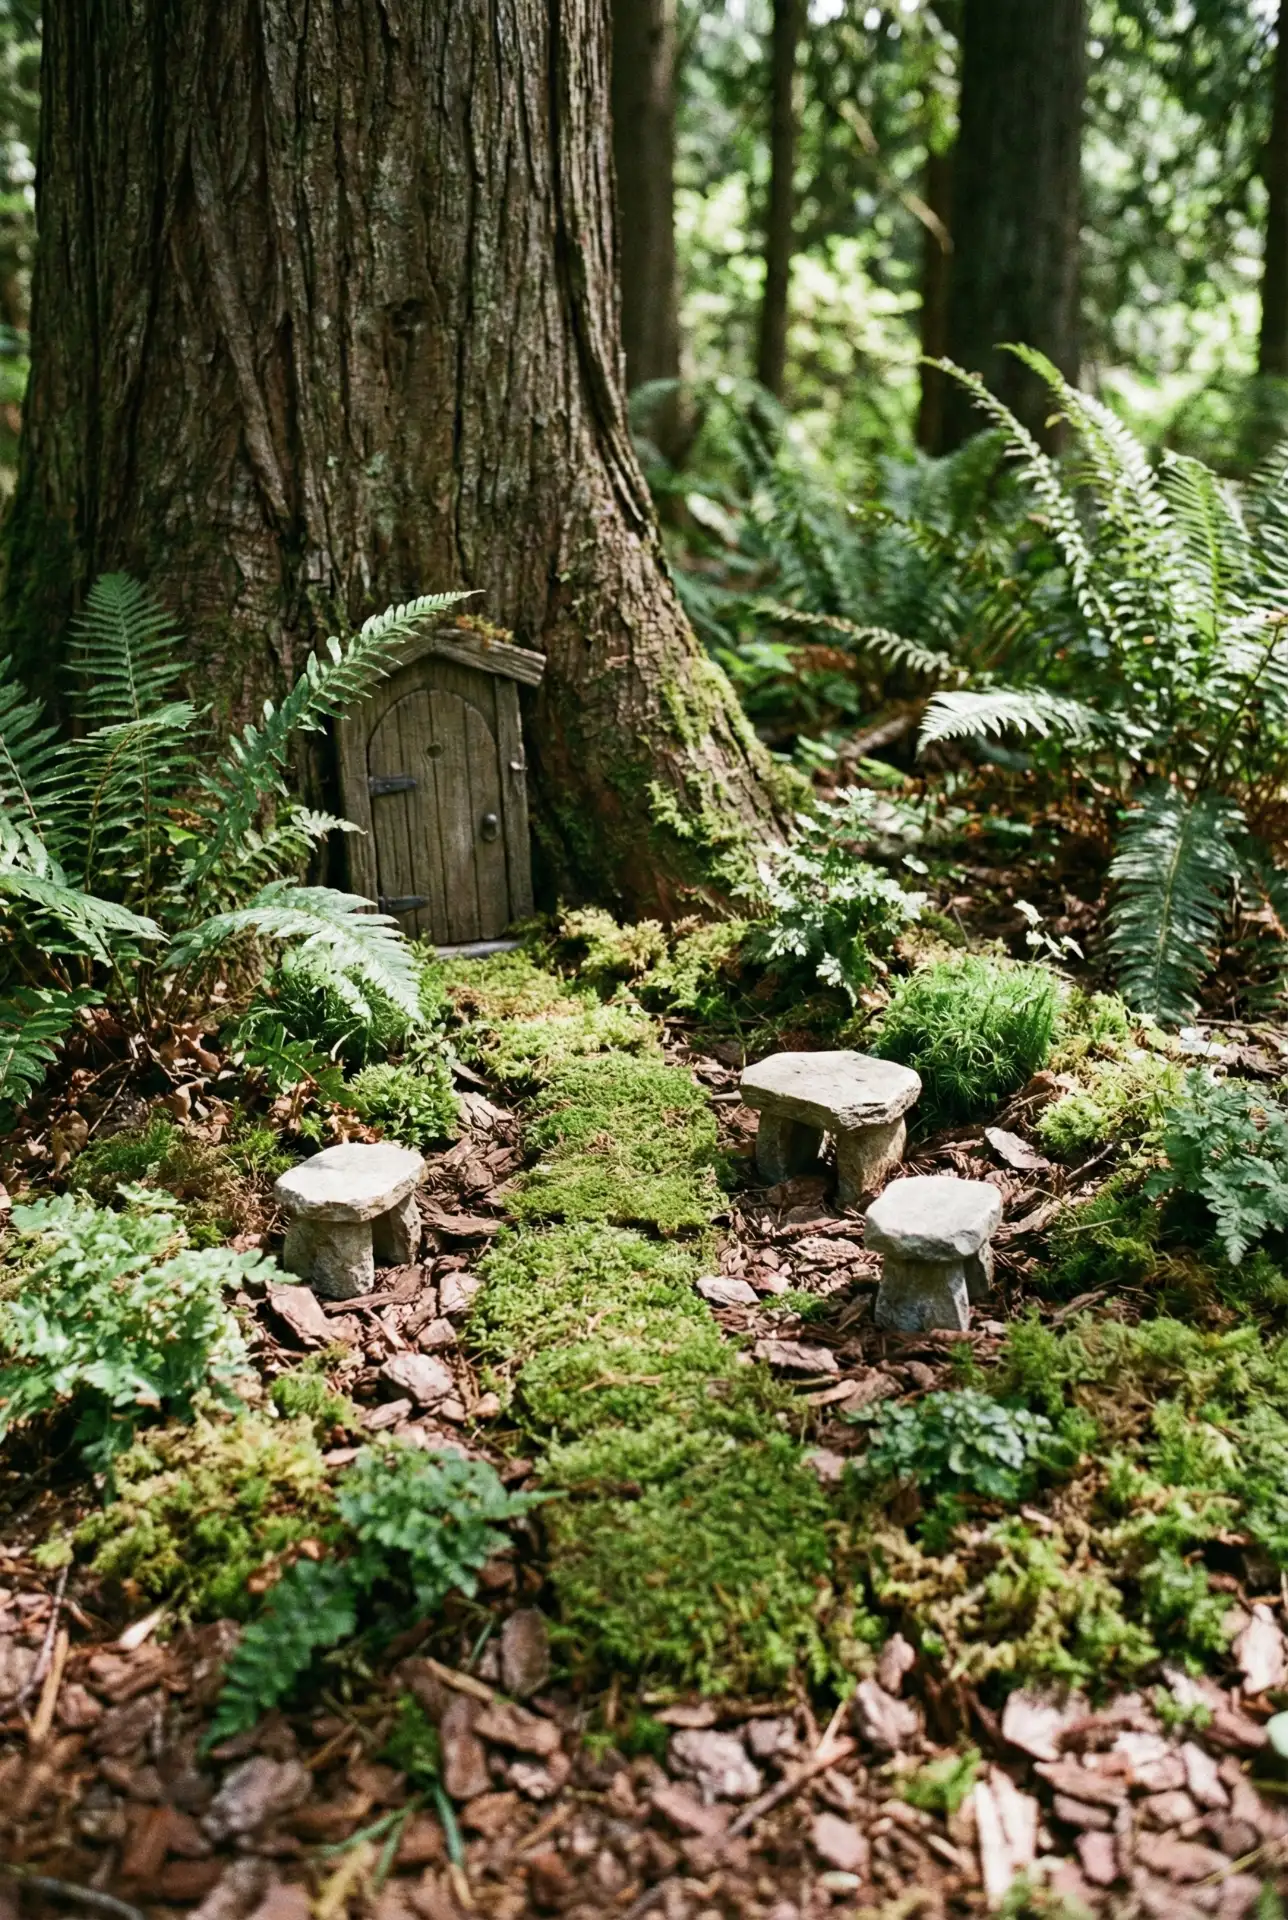
This is the outdoor version that stops people mid-walk: a mossy path circling the trunk, dotted with tiny doors and stone “stools.” Choose a shady tree and build Outdoor around a tree magic with bark chips, ferns, and a few Outdoor resin accents. Lean into an Enchanted forest feel—natural textures read more believable than glitter.
Where it works best: pick a tree that naturally stays a little damp—near a downspout splash zone or a shady side yard—so your moss and ferns don’t crisp up. In hot, full-sun spots, swap moss for low ground cover or pea gravel and use heat-safe décor. The goal is “storybook,” not “sun-baked terrarium.”
3. Dollar Tree Fairy Garden Party Favor Bar
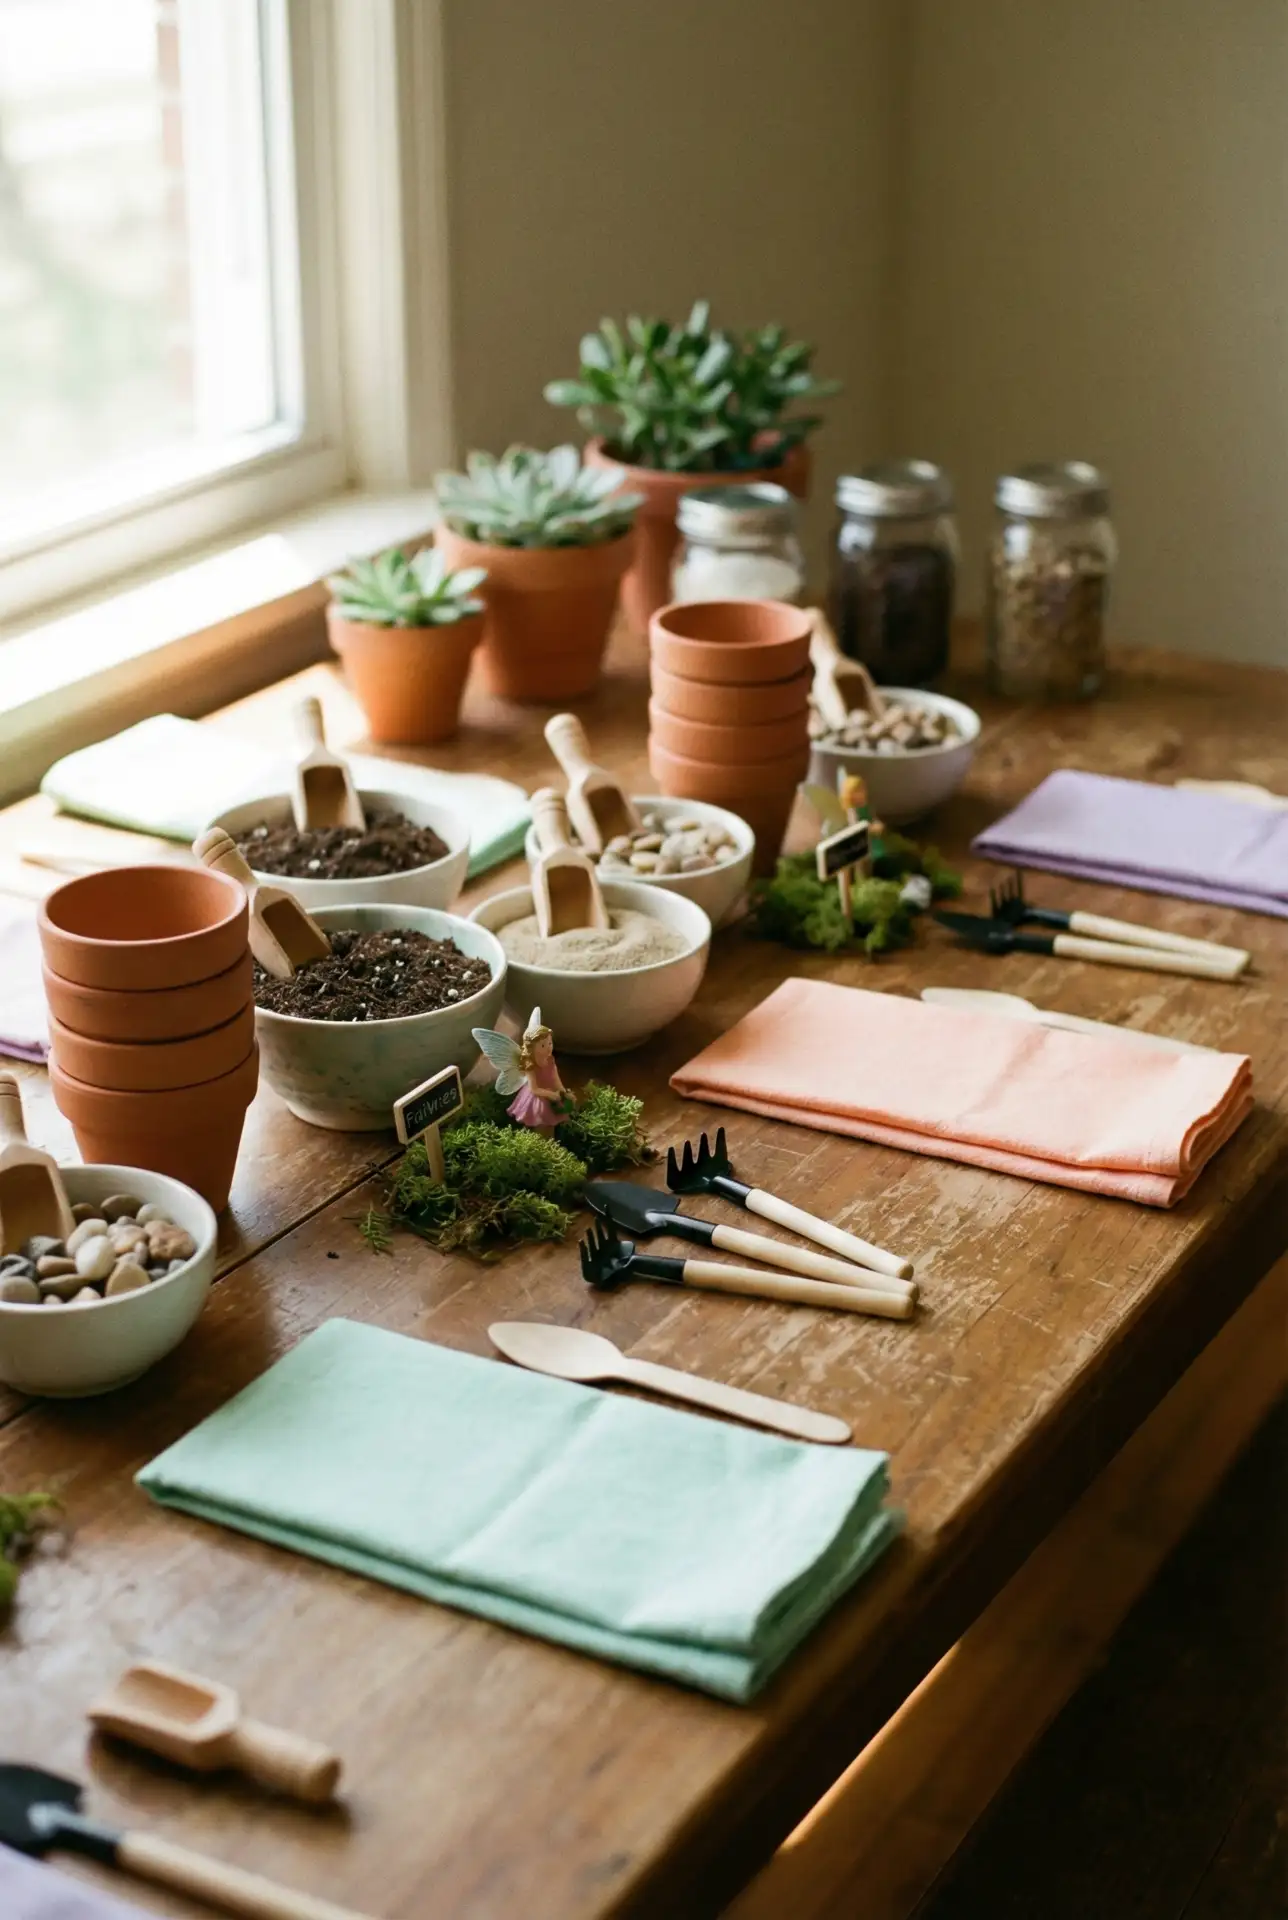
For birthdays or spring get-togethers, set up a build-your-own station that feels crafty but polished. Use Dollar tree containers, mini stones, and faux florals to keep it Easy, then let guests assemble a tiny scene to take home. Add a “mix-in” tray of shells, bark, and tiny fences so every party garden looks different.
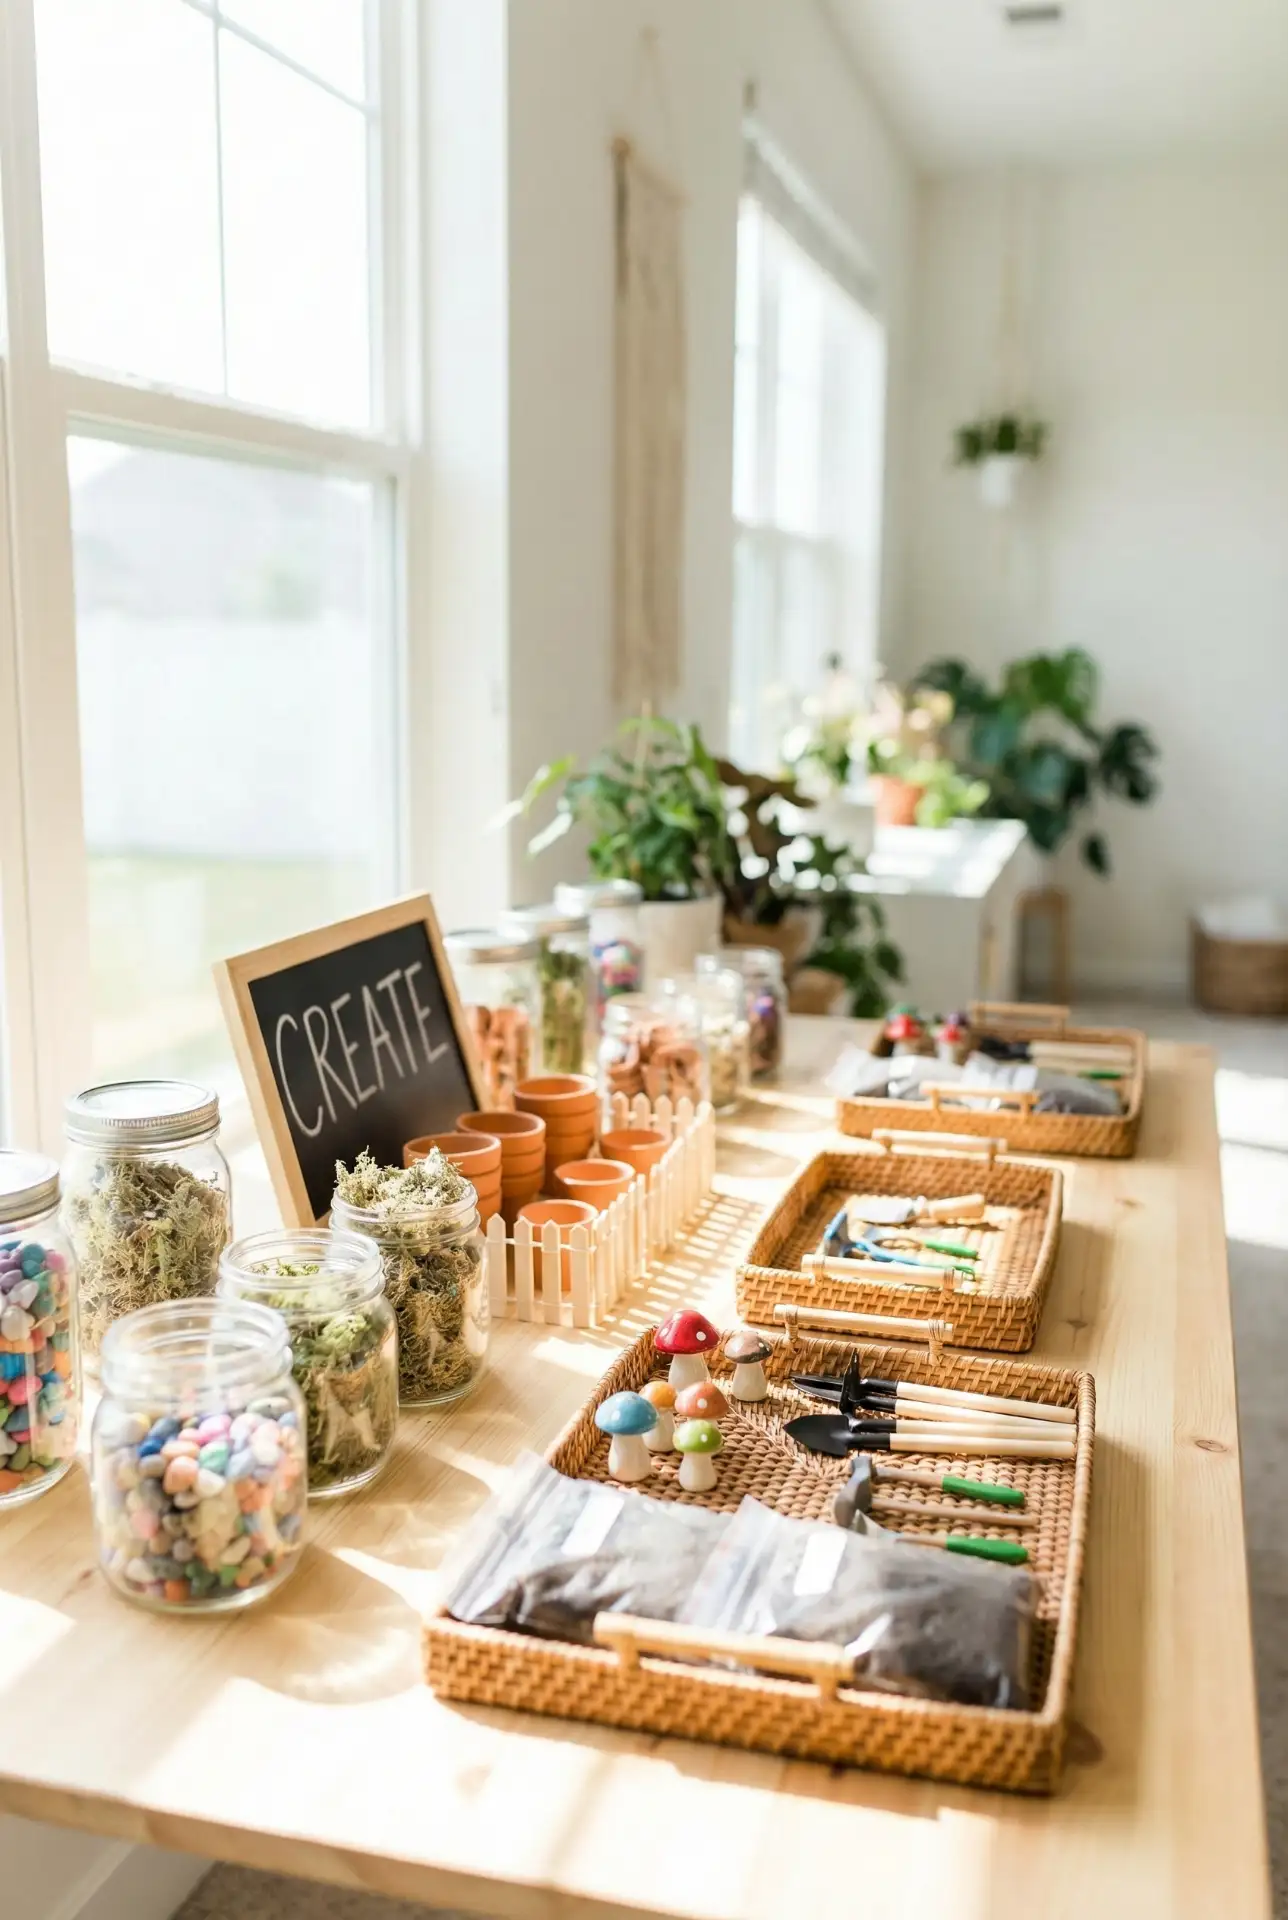
Budget/price angle: pre-portion “starter kits” in small bags so you don’t overbuy (or watch half the moss disappear into one masterpiece). A simple kit can be container + pebbles + moss + two figurines, and your “upgrade tray” becomes the fun add-on. It reads generous but stays controlled and affordable.
4. Bird Bath Fairy Island Centerpiece
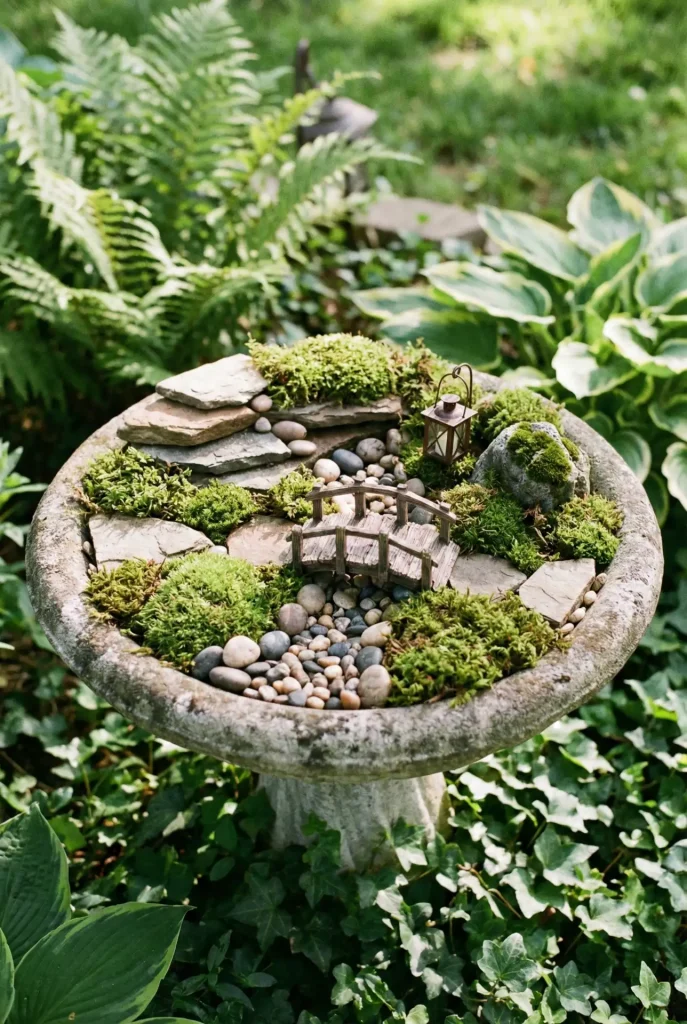 Turn a tired yard feature into the most photographed corner of your backyard. Drain the Bird bath, then layer river stones, moss, and a tiny bridge so it reads like a little “island world.” This style fits the Pinterest vibe of outdoor fairy garden ideas because it’s elevated—literally—so the details are easy to see from a patio chair.

Real homeowner behavior: people actually keep this one going because it’s easy to admire daily—right from the kitchen window or patio table. Add a removable tray insert so you can lift the whole scene out for cleaning or seasonal swaps. When maintenance is painless, the garden stays cute past the first weekend.
5. Outdoor Flower Bed Fairy Border Path

Instead of one contained setup, create a “peekaboo” trail along an outdoor flower bed edge—tiny doors tucked between hostas, stepping stones weaving through mulch. This approach feels Homemade in the best way, especially when you use collected twigs and stones. Keep it DIY and subtle so it blends with your real planting plan.
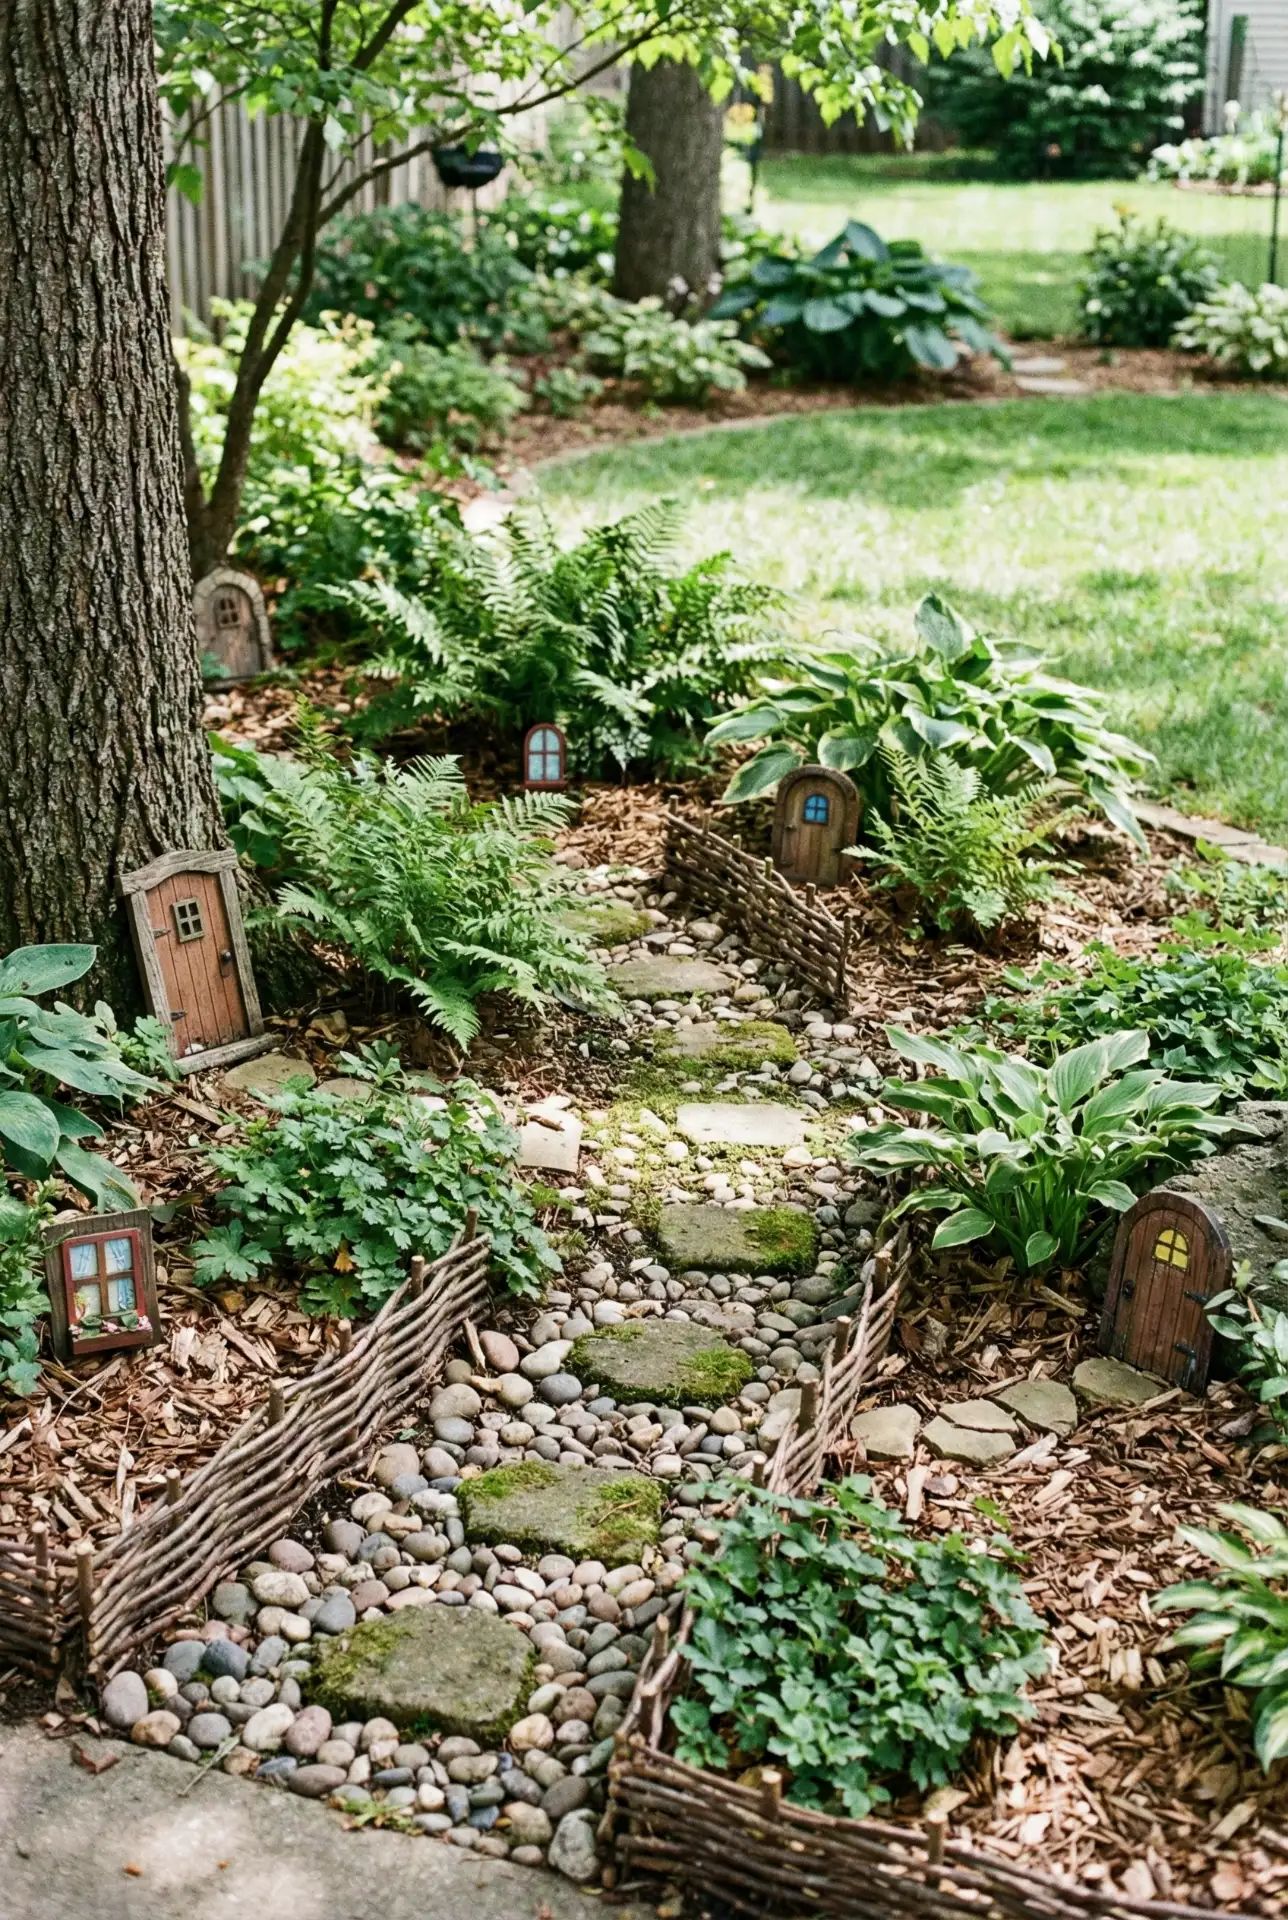
Practical insight: choose weatherproof accents and avoid anything lightweight that’ll become yard confetti after one storm. Stake small fences, nest décor slightly into mulch, and keep glue outdoor-rated. The fastest way this idea falls apart is when pieces sit on top like props instead of being anchored like part of the landscape.
6. Halloween Spooky Miniature Porch Pot
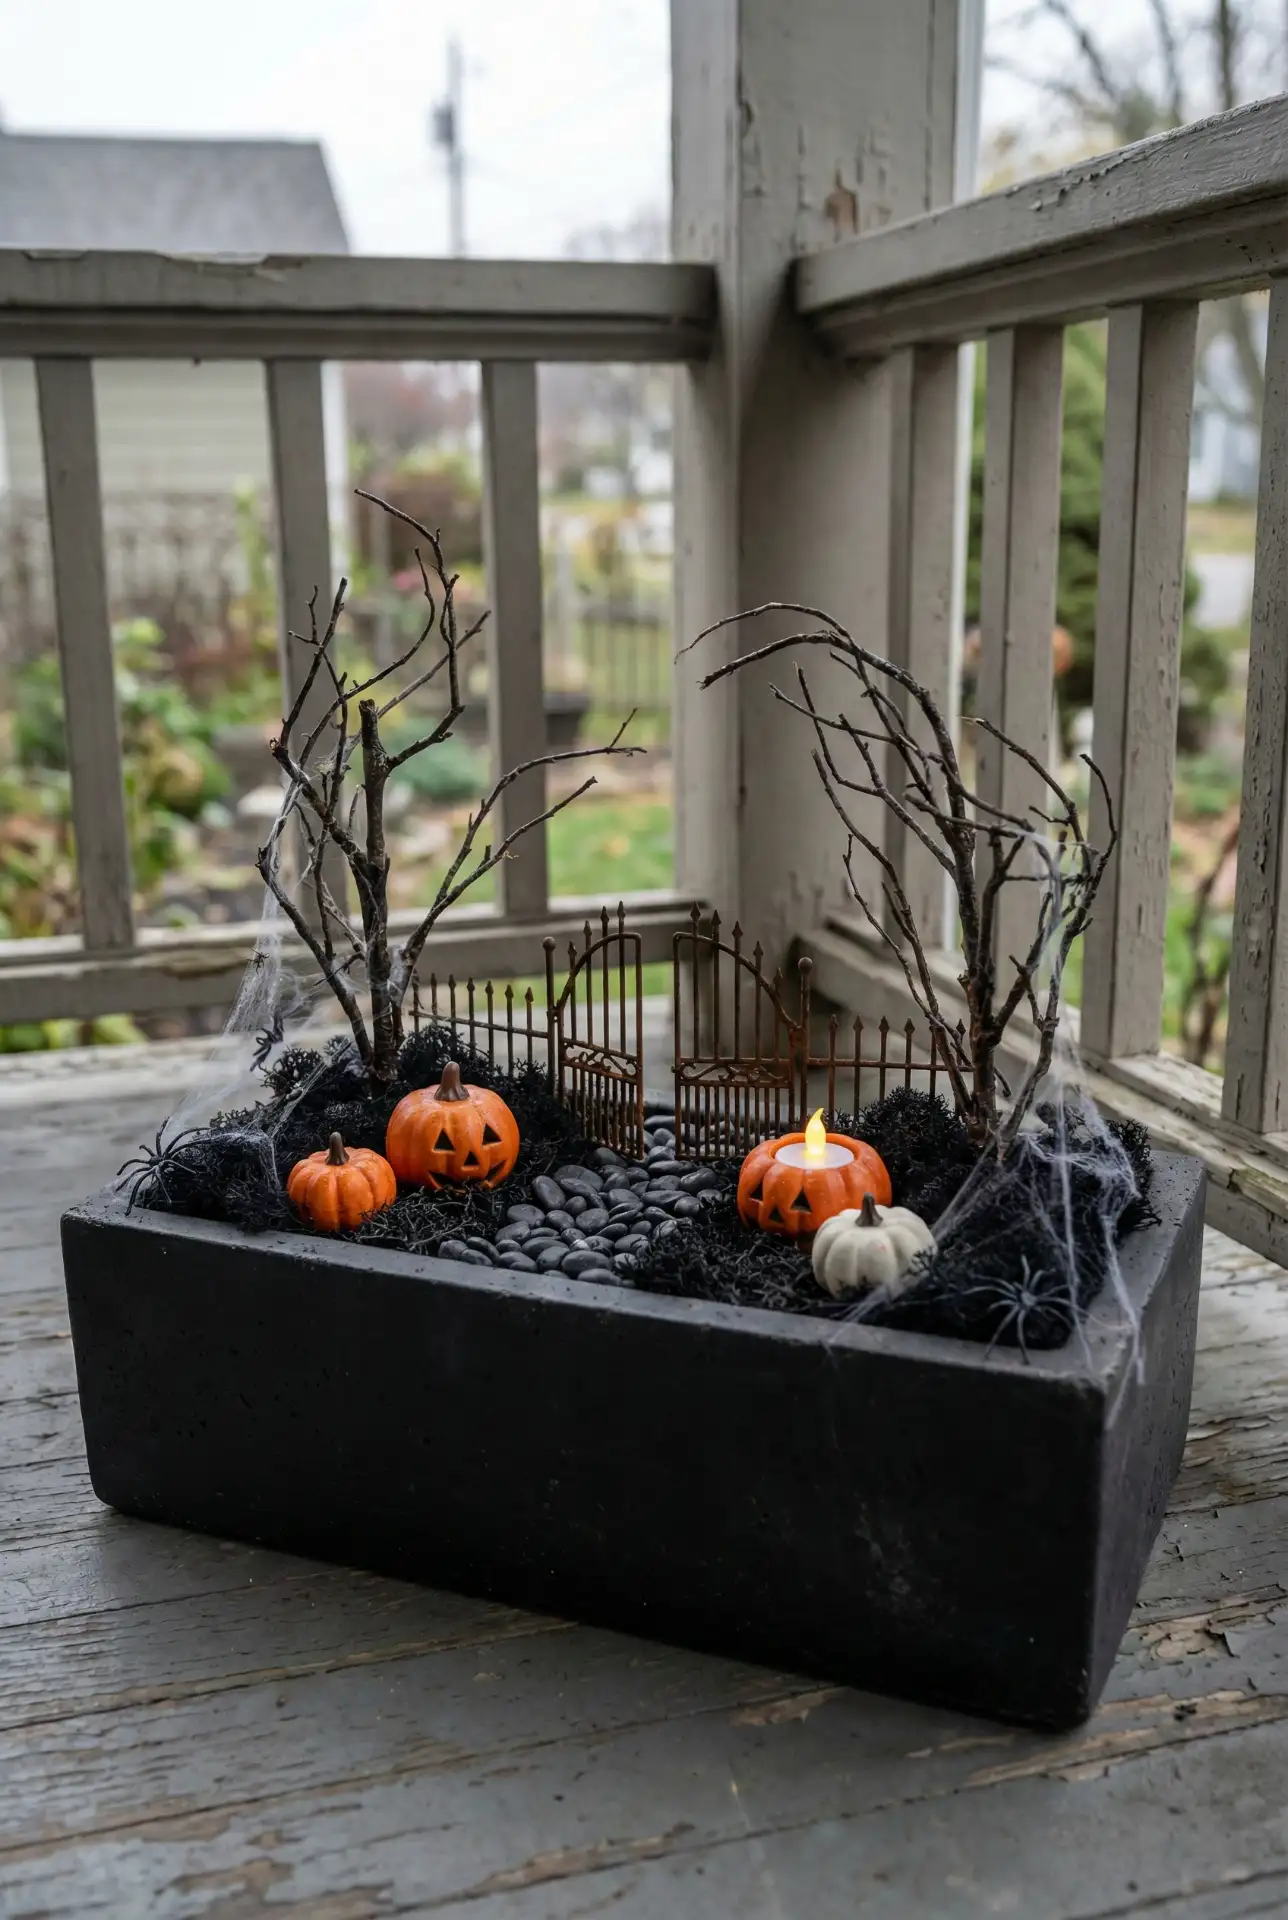
A seasonal swap keeps fairy gardens fresh, and a spooky version is irresistible in October. Use a charcoal planter, dark moss, and a few twig “trees” for a moody base, then add Halloween minis like tiny pumpkins or a little gate. If you like planning, sketch a quick drawing first so the miniature pieces look staged, not scattered.

Micro anecdote: The first time I tried this, I went too cute—until a neighbor suggested one “mystery corner” with taller twigs to create shadows. Instantly better. Keep one area intentionally darker and less detailed; it gives the eye a place to pause, which makes the whole scene feel cinematic.
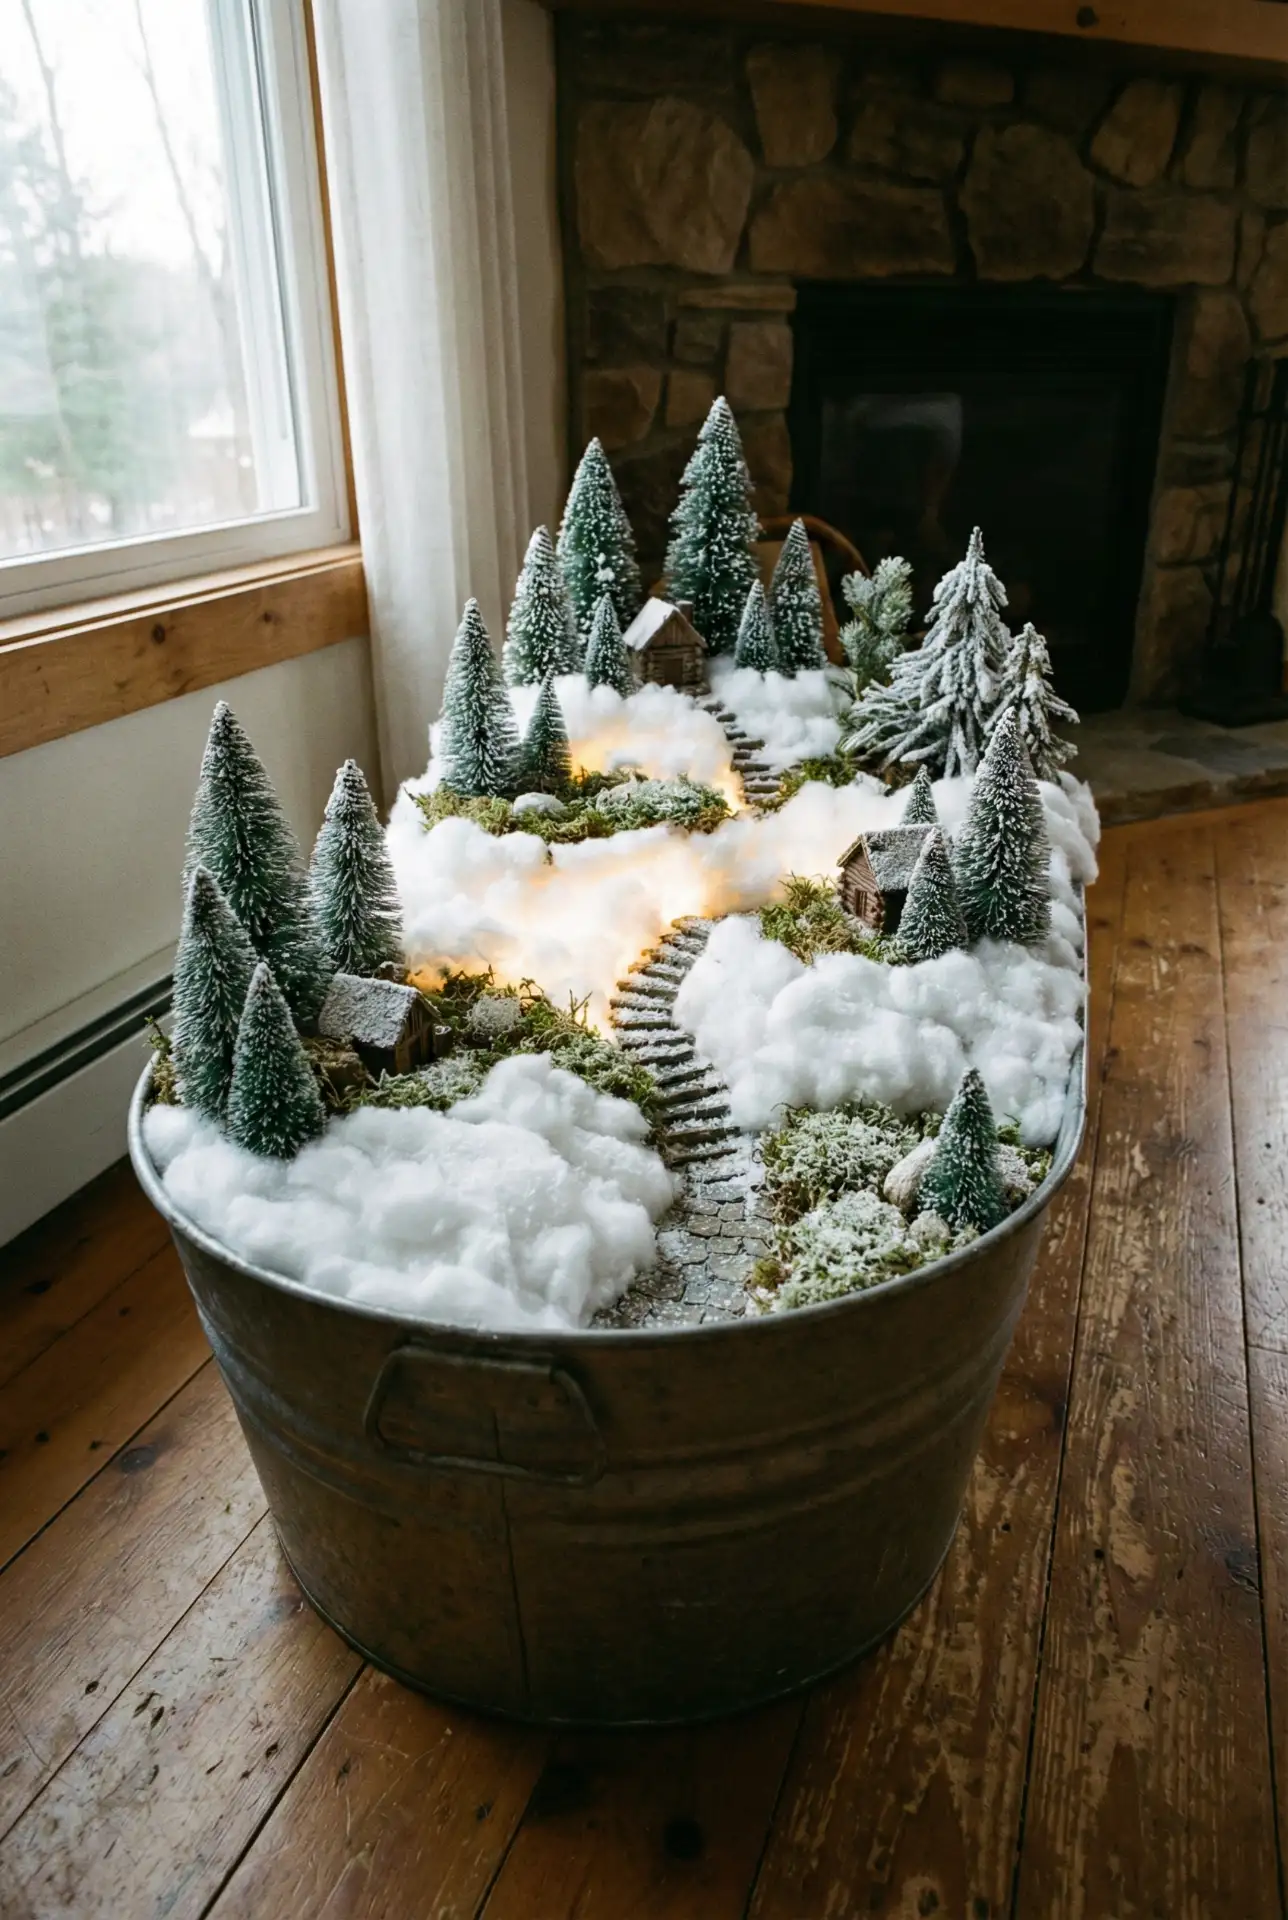
7. Christmas Snowy Fairy Garden In An Outdoor Large Tub
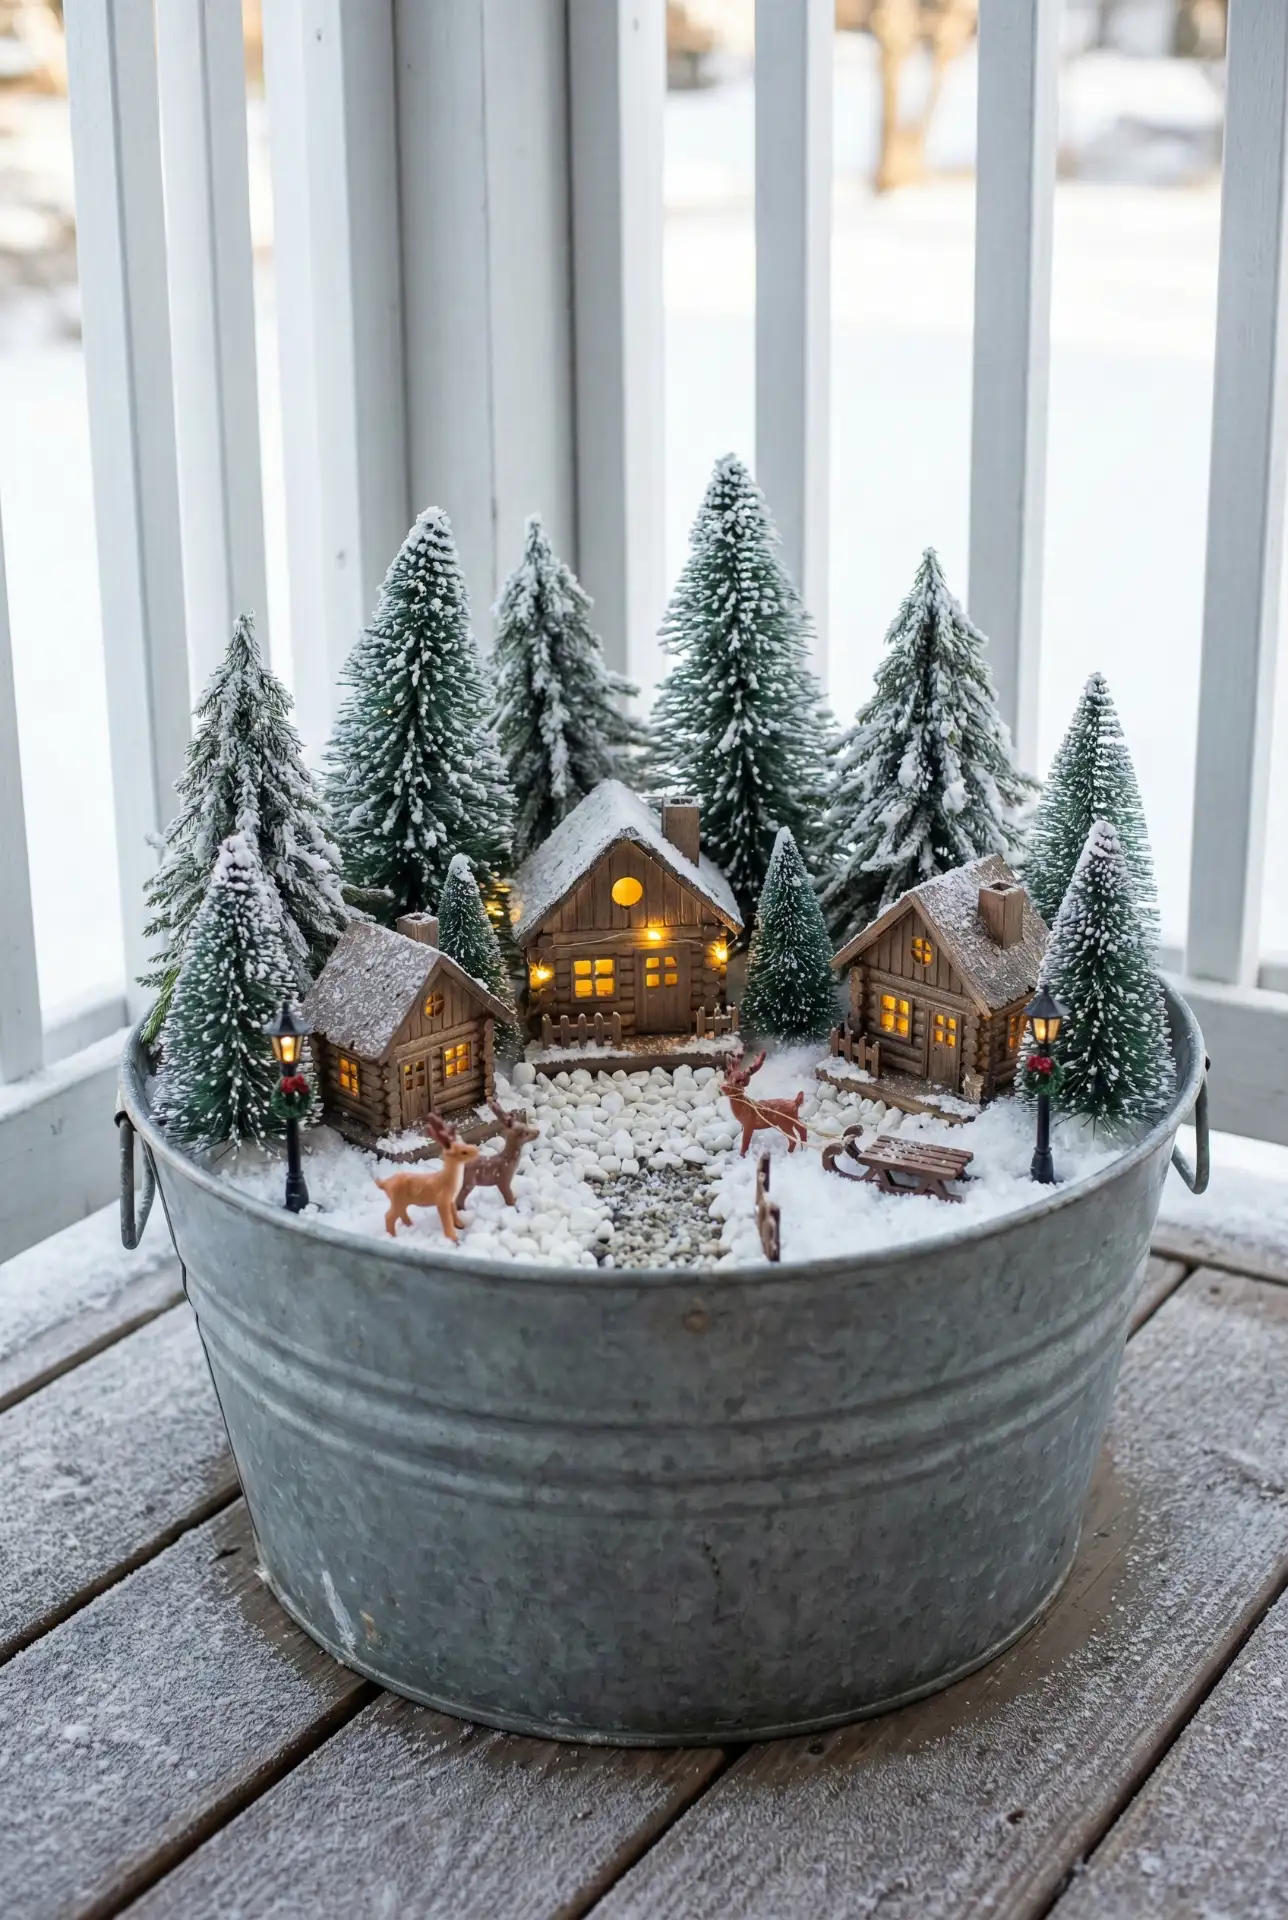
Go big for winter: a galvanized tub becomes a snowy village that reads from the driveway. Use faux evergreens, white gravel, and warm-toned mini lights woven low (hidden under moss) for glow. This is one of those Outdoor large setups where Christmas details shine, especially when the container is truly large enough to layer hills and paths.
American lifestyle or regional context: if you’re in snowy states, plan for melt-refreeze cycles—use materials that won’t turn to mush, like gravel and resin. In warmer regions, lean into “winter garden” styling with silvery foliage and pinecones instead of faux snow. Either way, keep the palette calm so it feels festive, not busy.
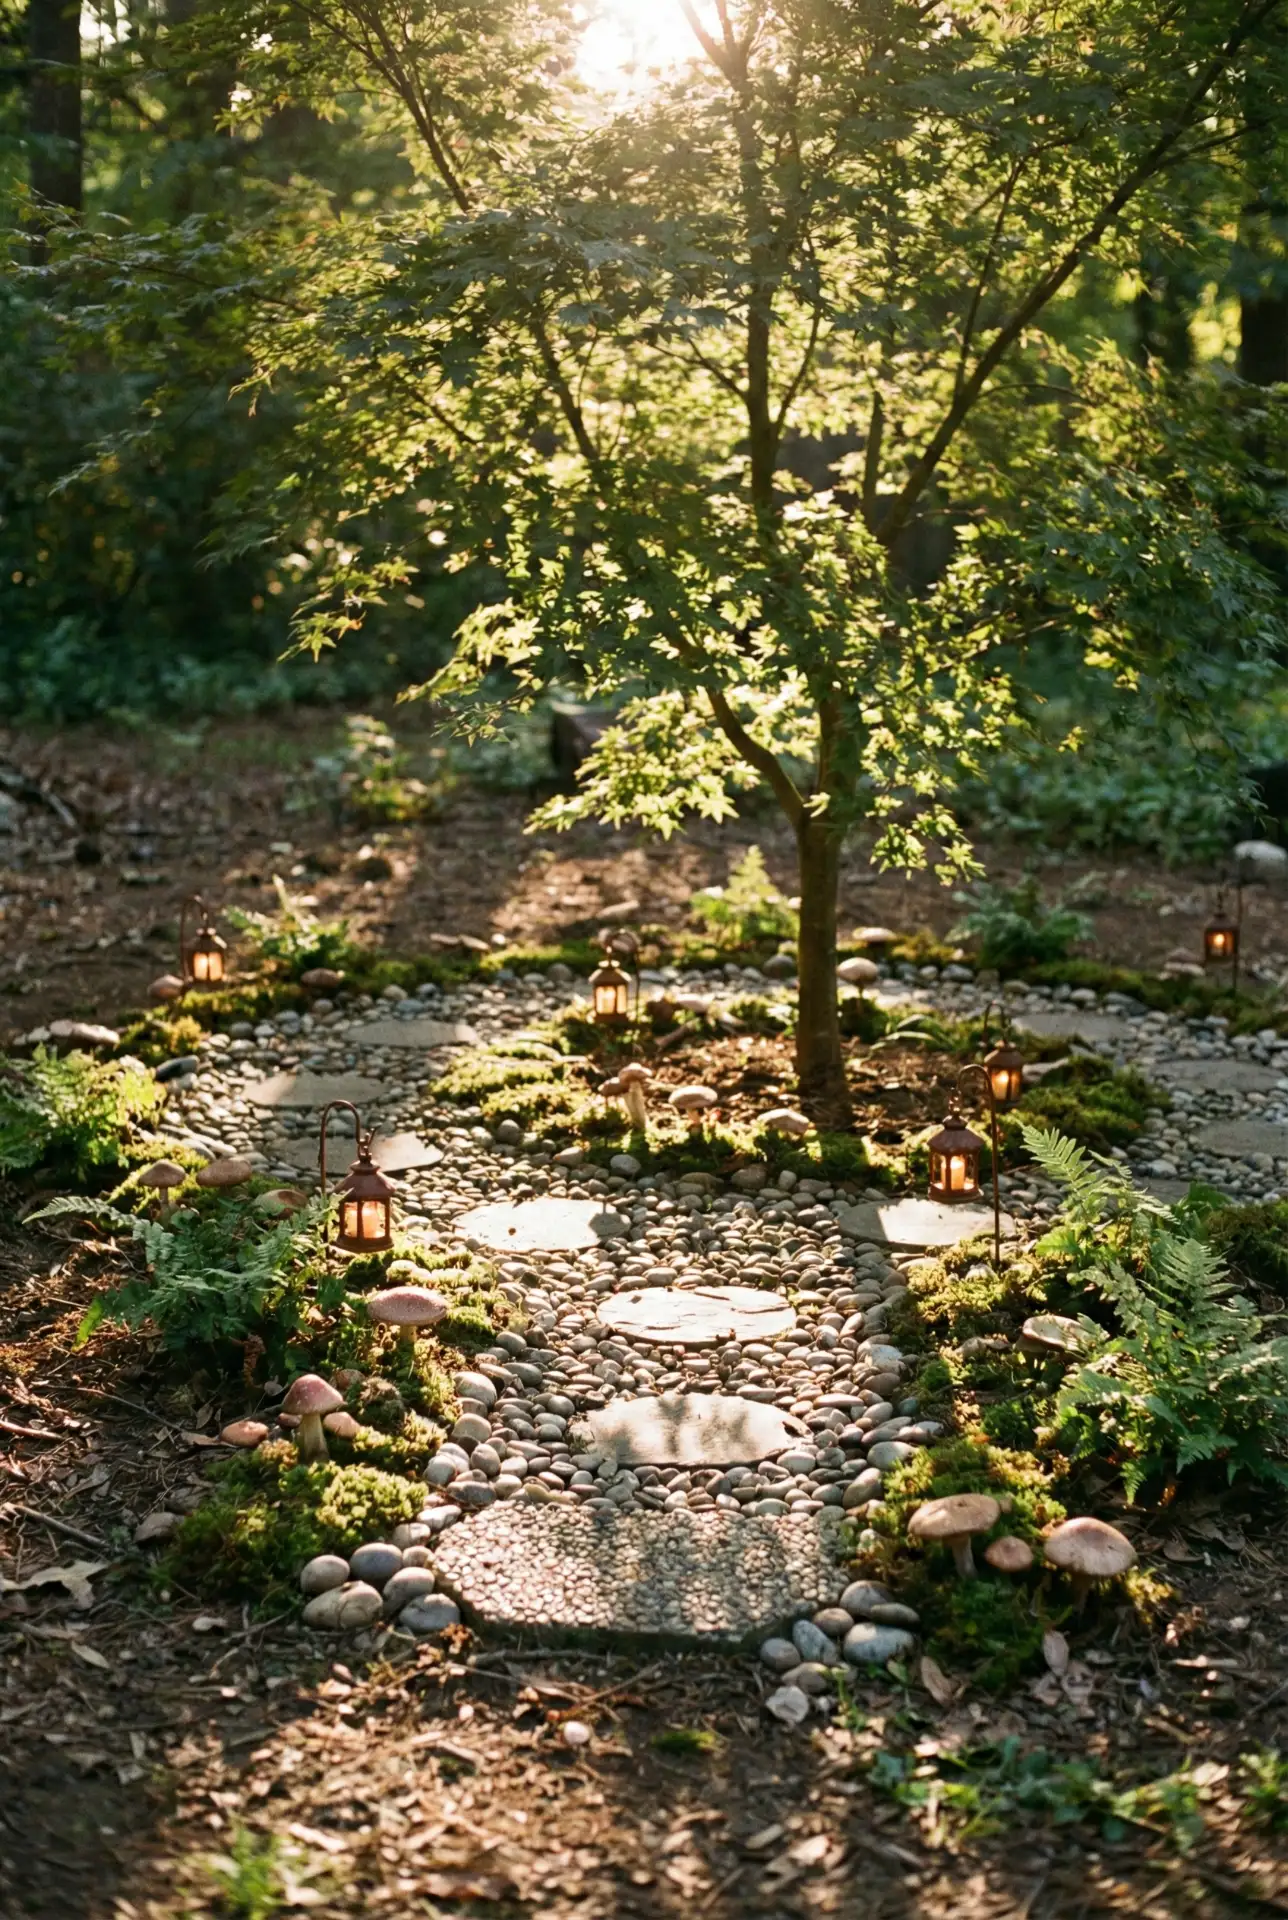
8. Backyard Enchanted Forest Path With Large Stones
For a statement project, build a meandering “fairy trail” that looks like it has always existed. Start with large stepping stones set into mulch, then tuck tiny lanterns and doors into the edges. This works beautifully in a backyard that already has trees or tall shrubs. Keep the vibe quietly magical—more woodland than theme park.
Common mistakes and how to avoid them: don’t line everything up like a border—nature is irregular. Vary spacing, rotate stones, and group small décor in clusters rather than a neat row. Also avoid bright plastic accents in full sun; they fade fast and pull the eye in a way that breaks the illusion.
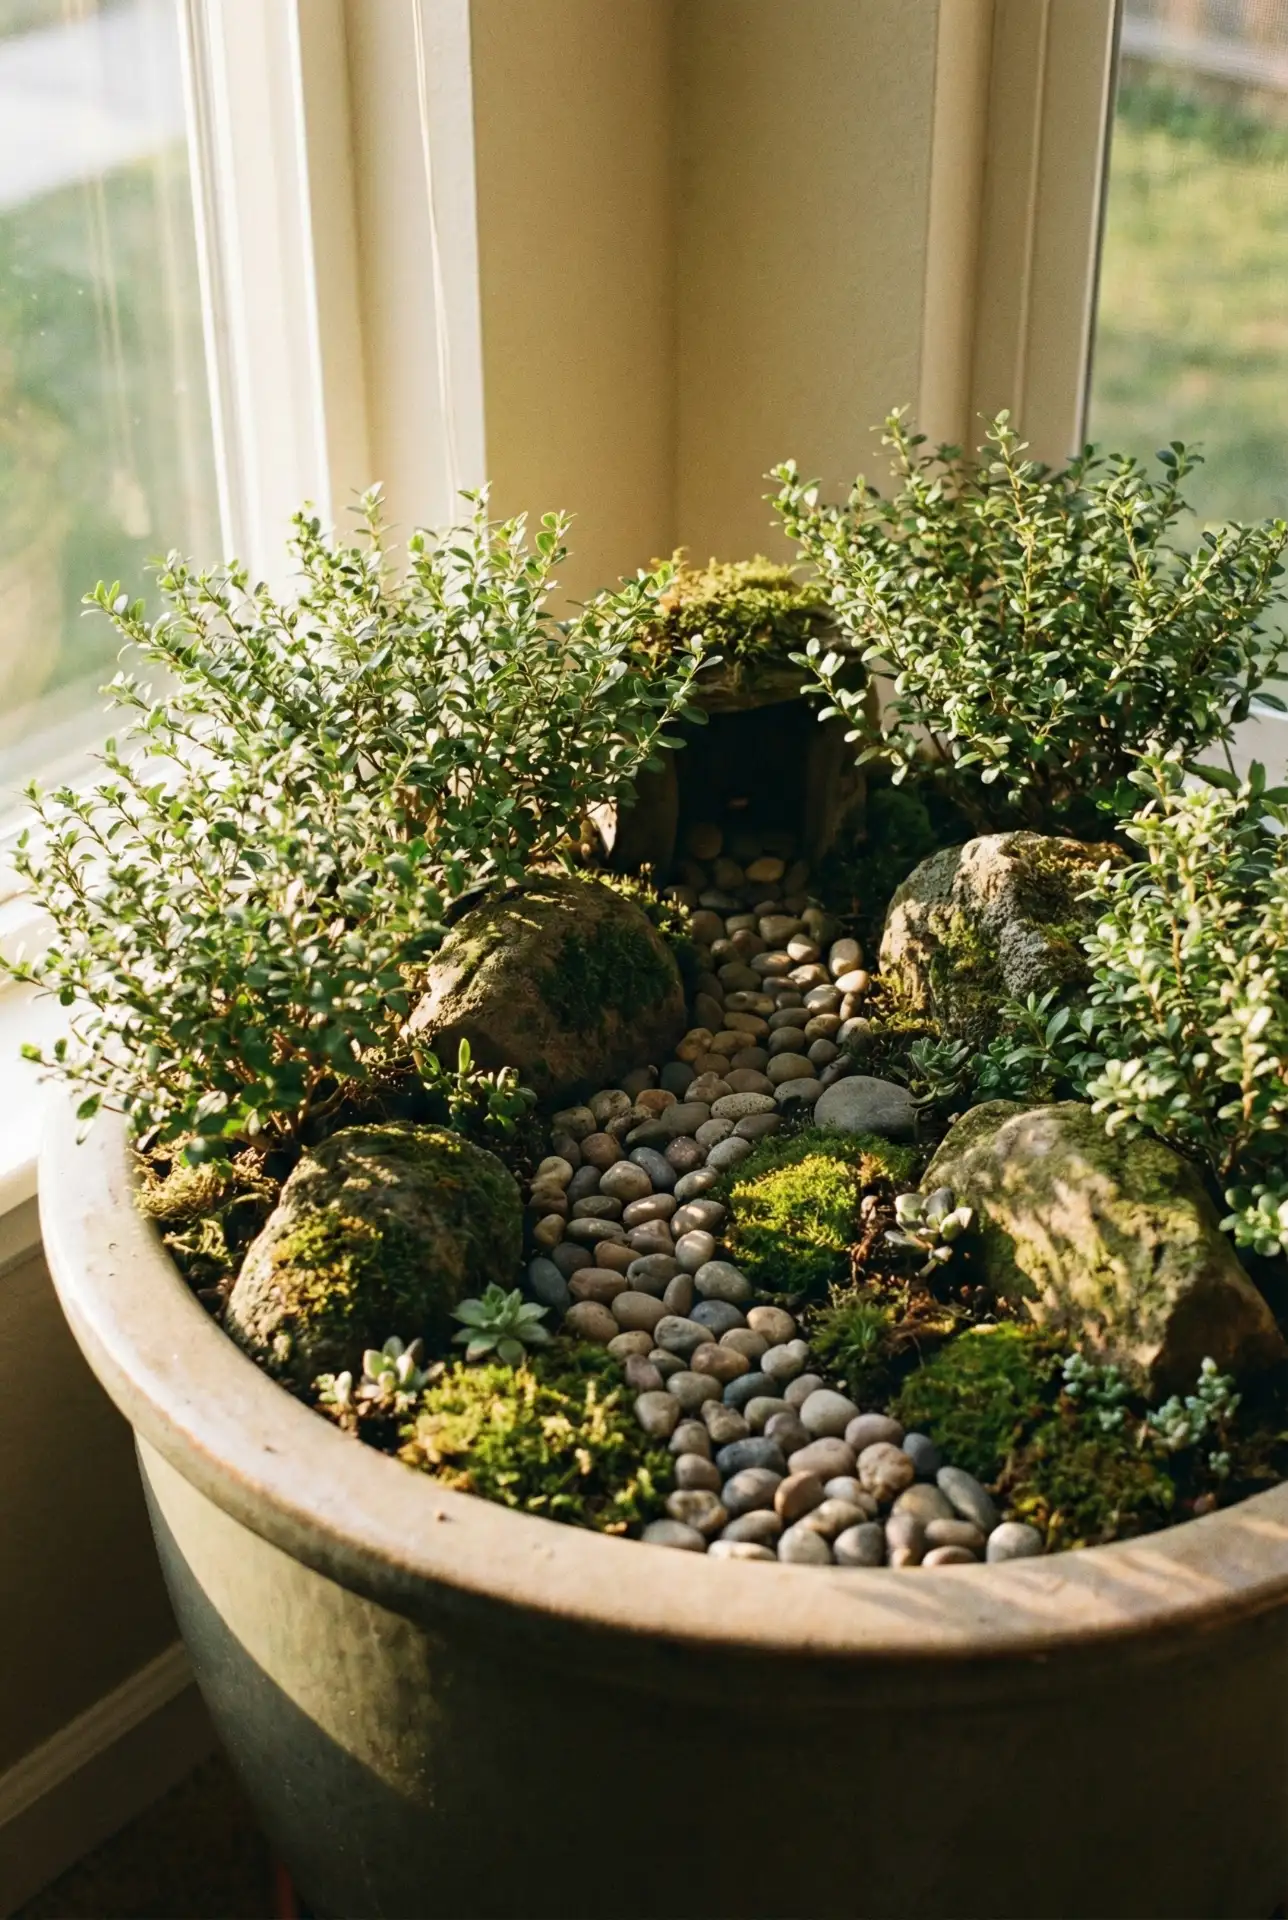
9. DIY Homemade Fairy Garden Blueprint Wall Shelf
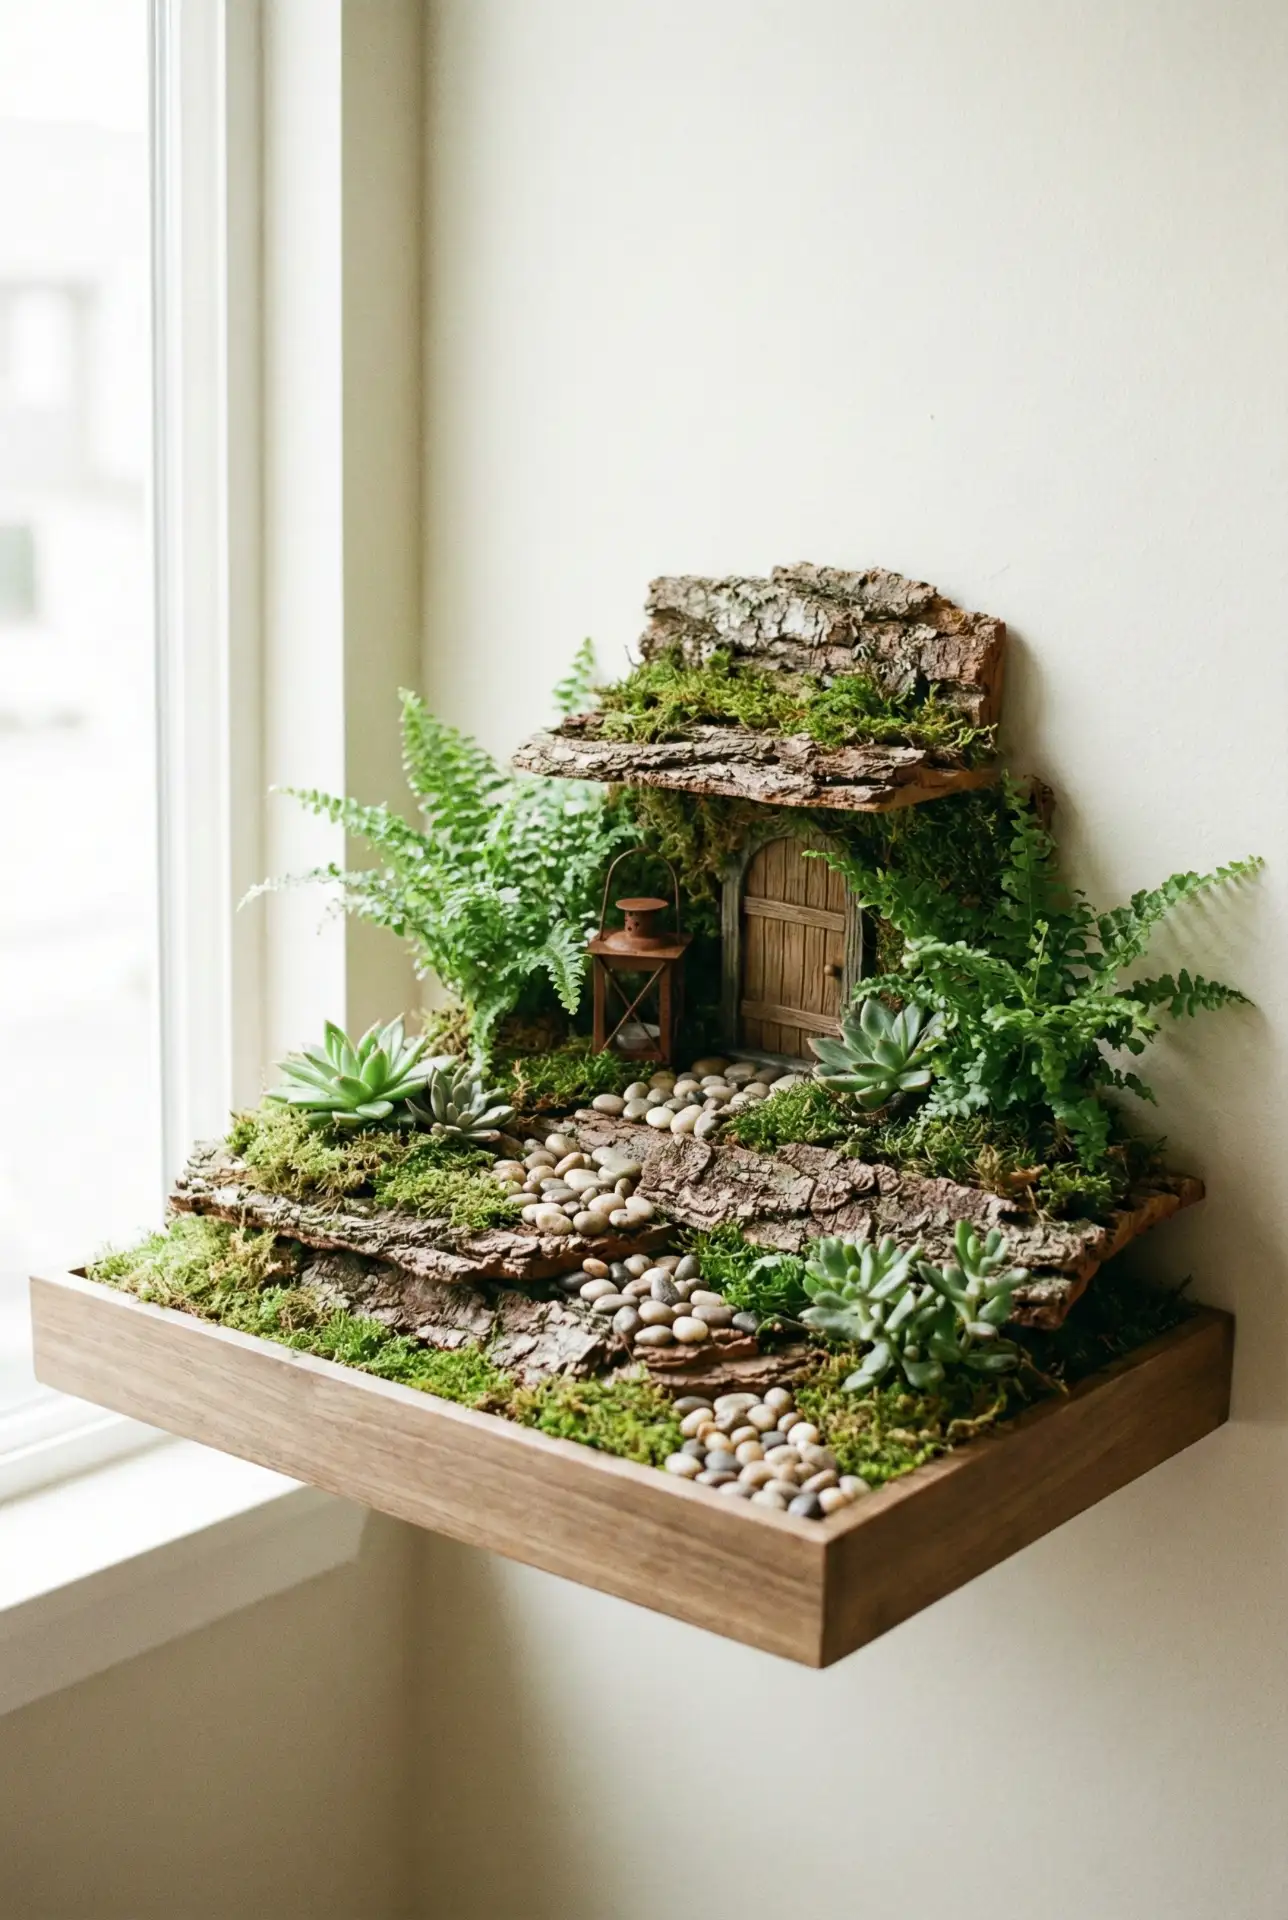
When outdoor space is limited, treat fairy gardening like a tiny set design on a wall shelf. Start with a shallow tray, then build levels using bark “platforms” and pebble paths. A simple DIY approach looks surprisingly polished when it’s homemade with cohesive materials. Do a quick drawing layout first so your paths and focal point feel intentional.
Real homeowner behavior: people keep these on shelves because they double as décor—like a living vignette you can tweak when you’re rearranging the room. Store a small “seasonal swap” box nearby (a few minis, stones, and moss), and you’ll actually refresh it. When updates are easy, the display stays loved, not forgotten.
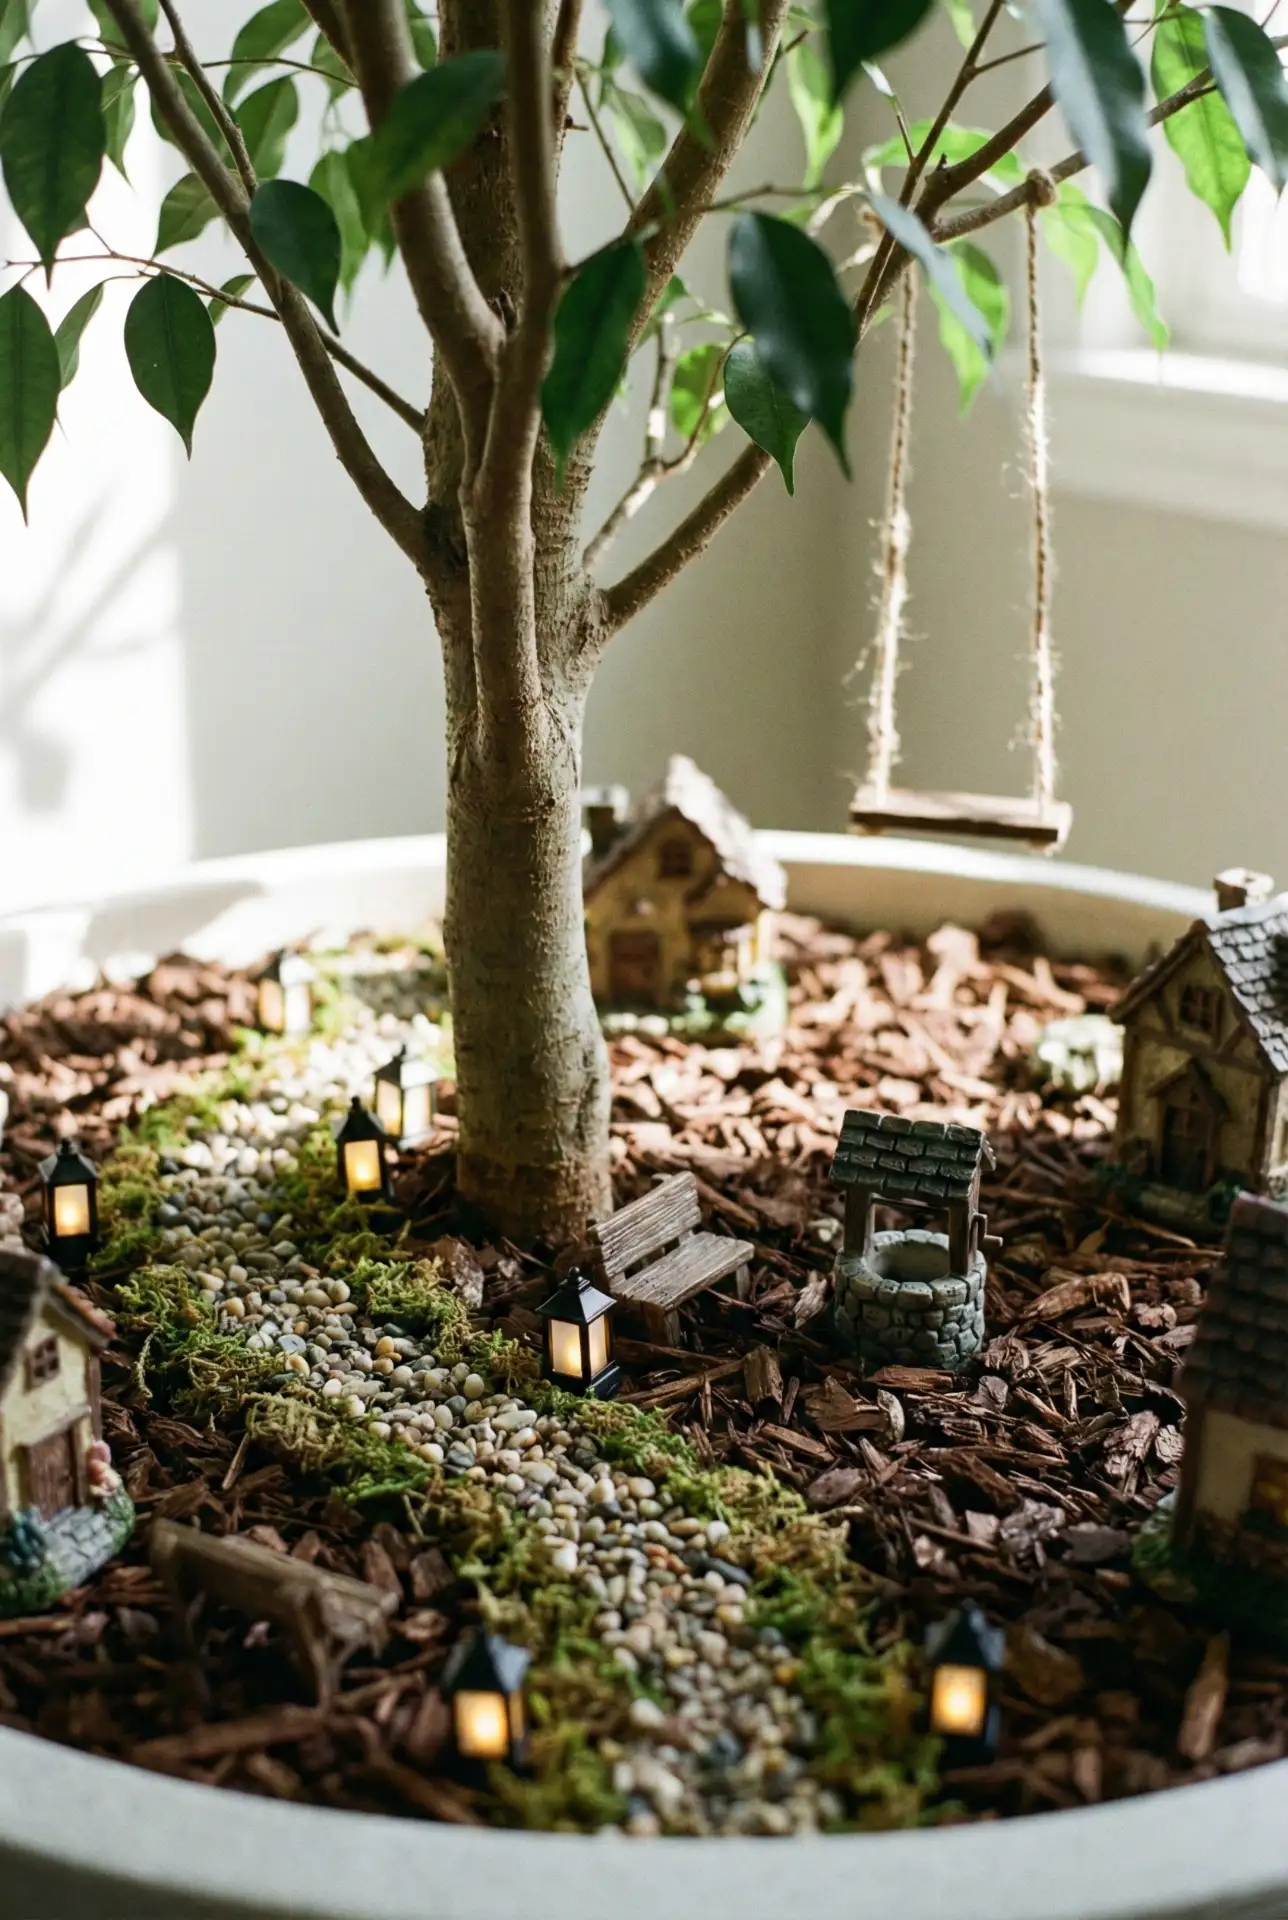
10. Outdoor Large Wheelbarrow Fairy Meadow
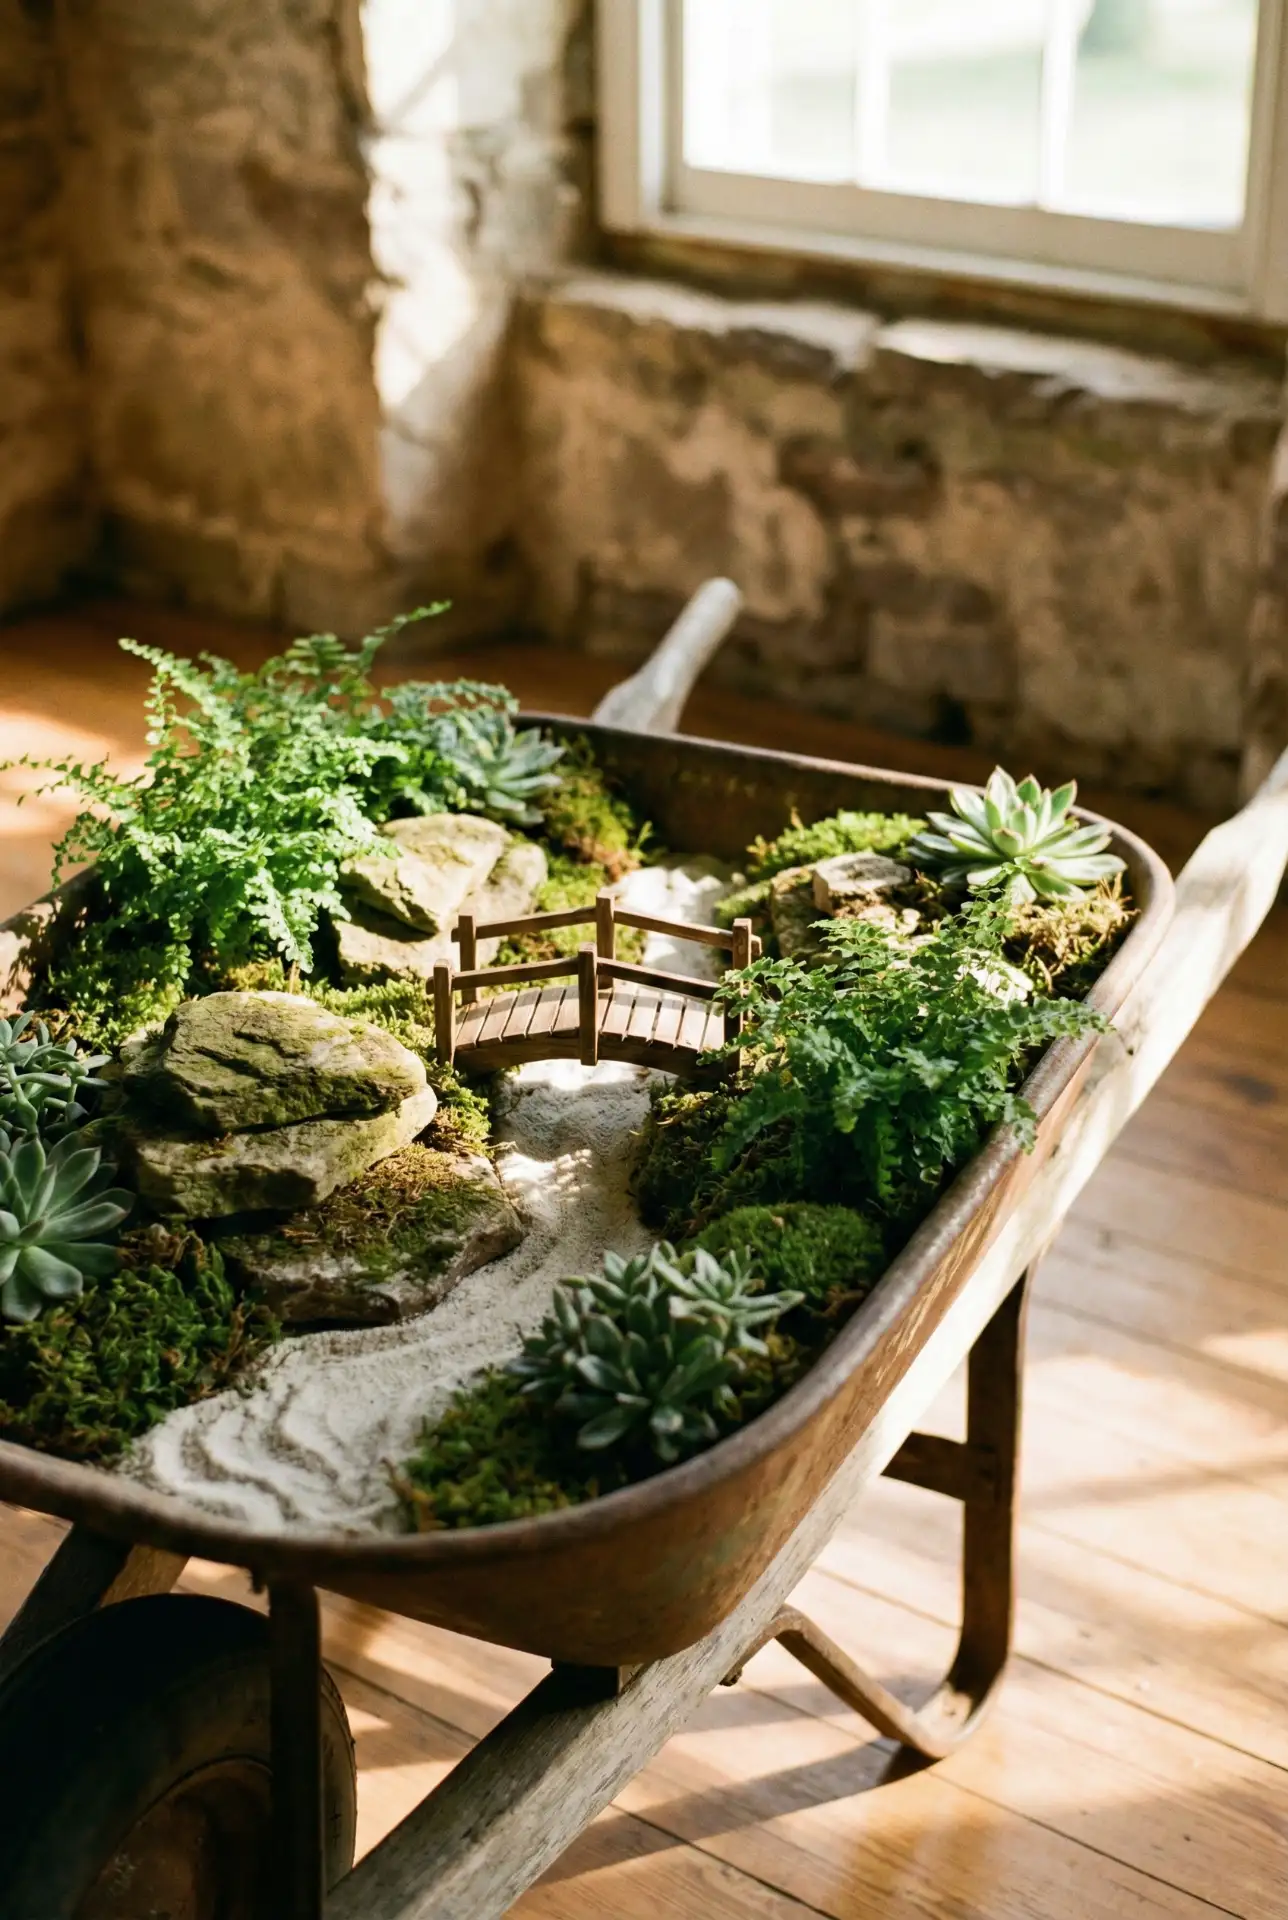
A wheelbarrow makes a playful base for large outdoor fairy gardens because it feels like a roaming little landscape. Fill it with soil, mound it into gentle hills, and add a pebble path that winds past a tiny cottage and wild-looking greenery. This is one of those outdoor setups that looks charming from the curb yet still rewards close-up detail.
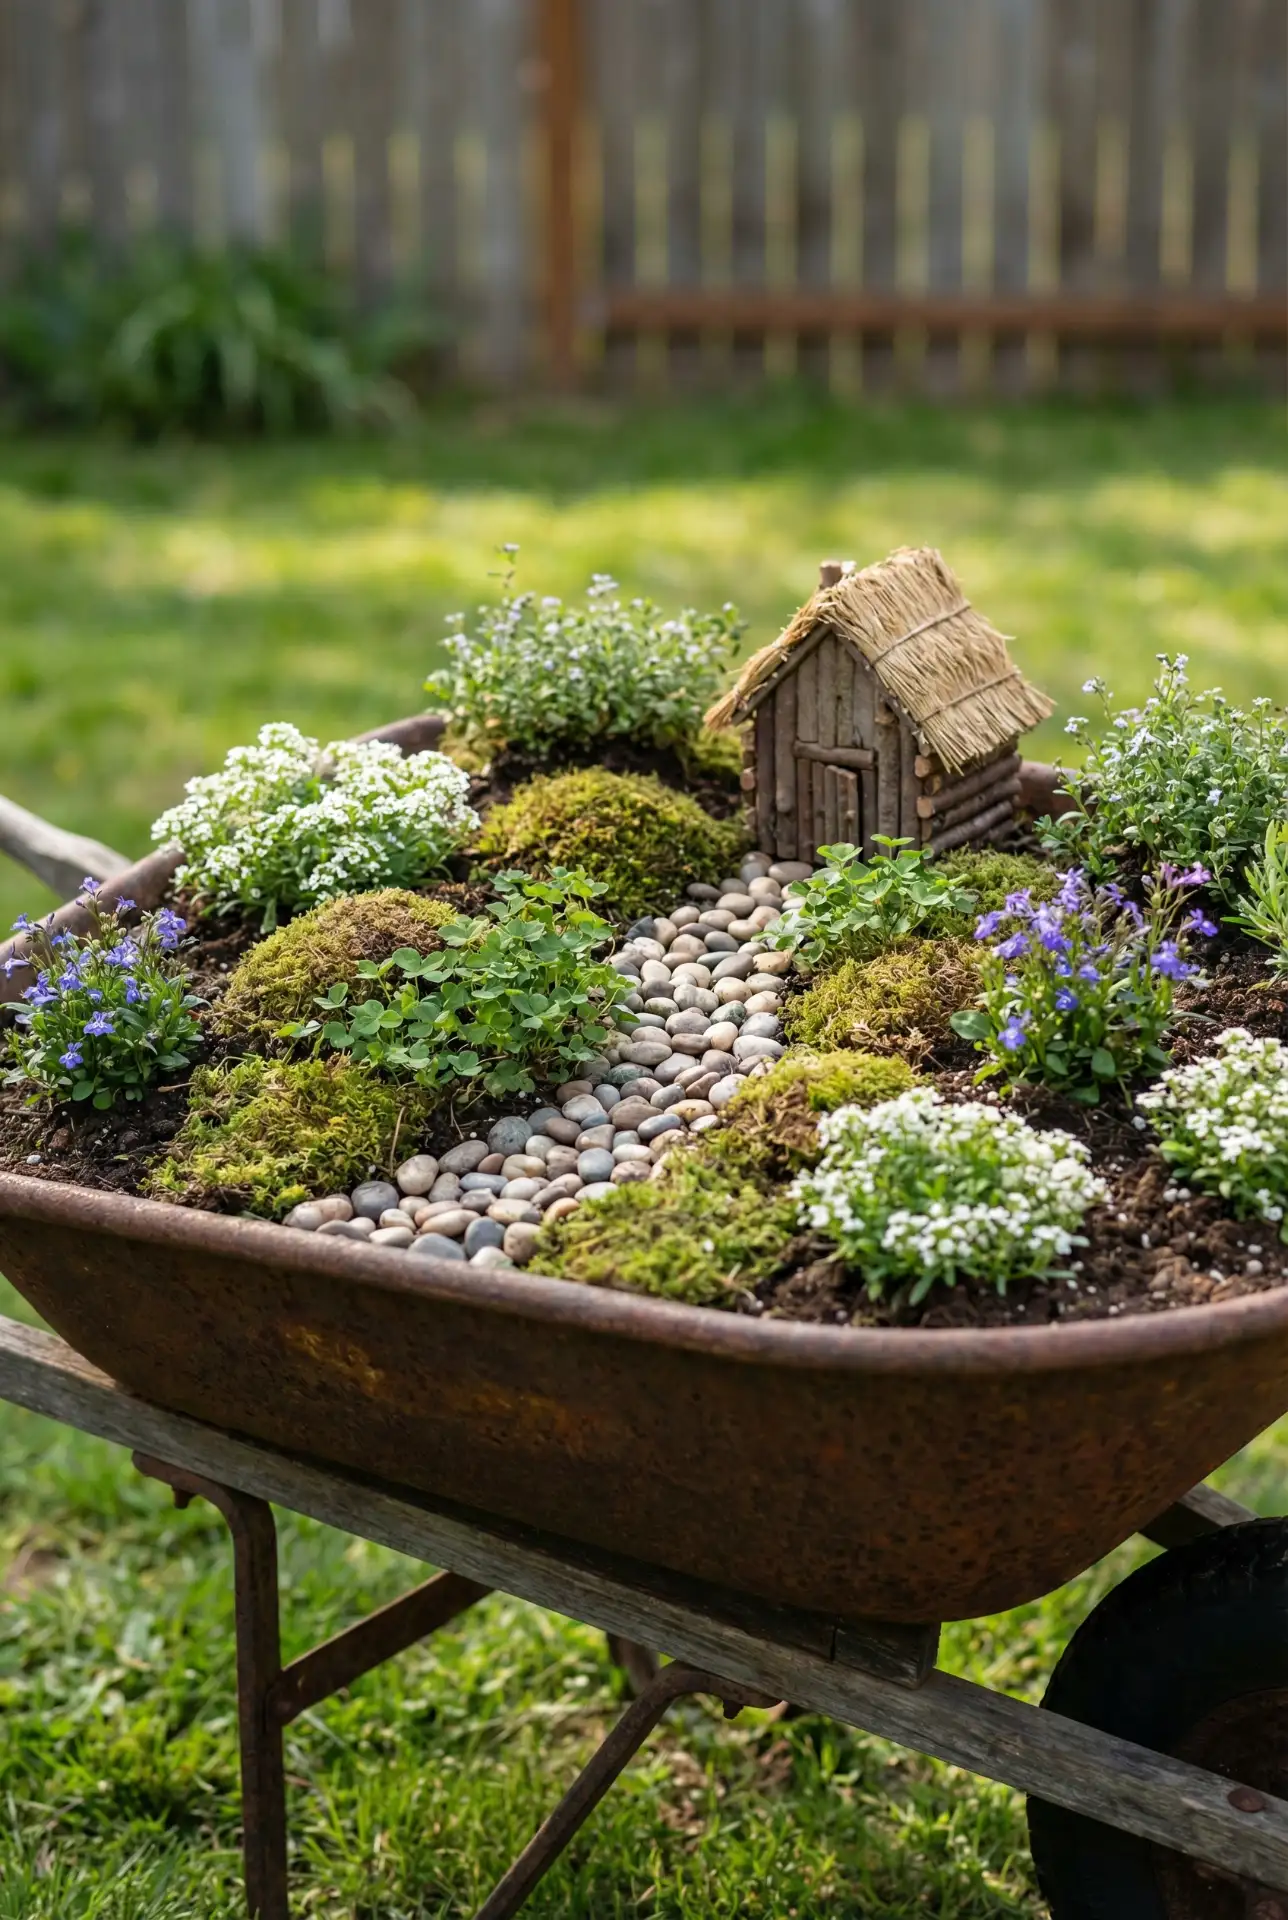
Where it works best: park it where you’ll actually see it—near a front walk, patio, or by the garage door—so it becomes part of daily life. If it’s tucked behind the shed, it tends to dry out and get ignored. A little visibility is the secret ingredient that keeps it maintained.
11. Dollar Tree Terracotta Pot Stack Village
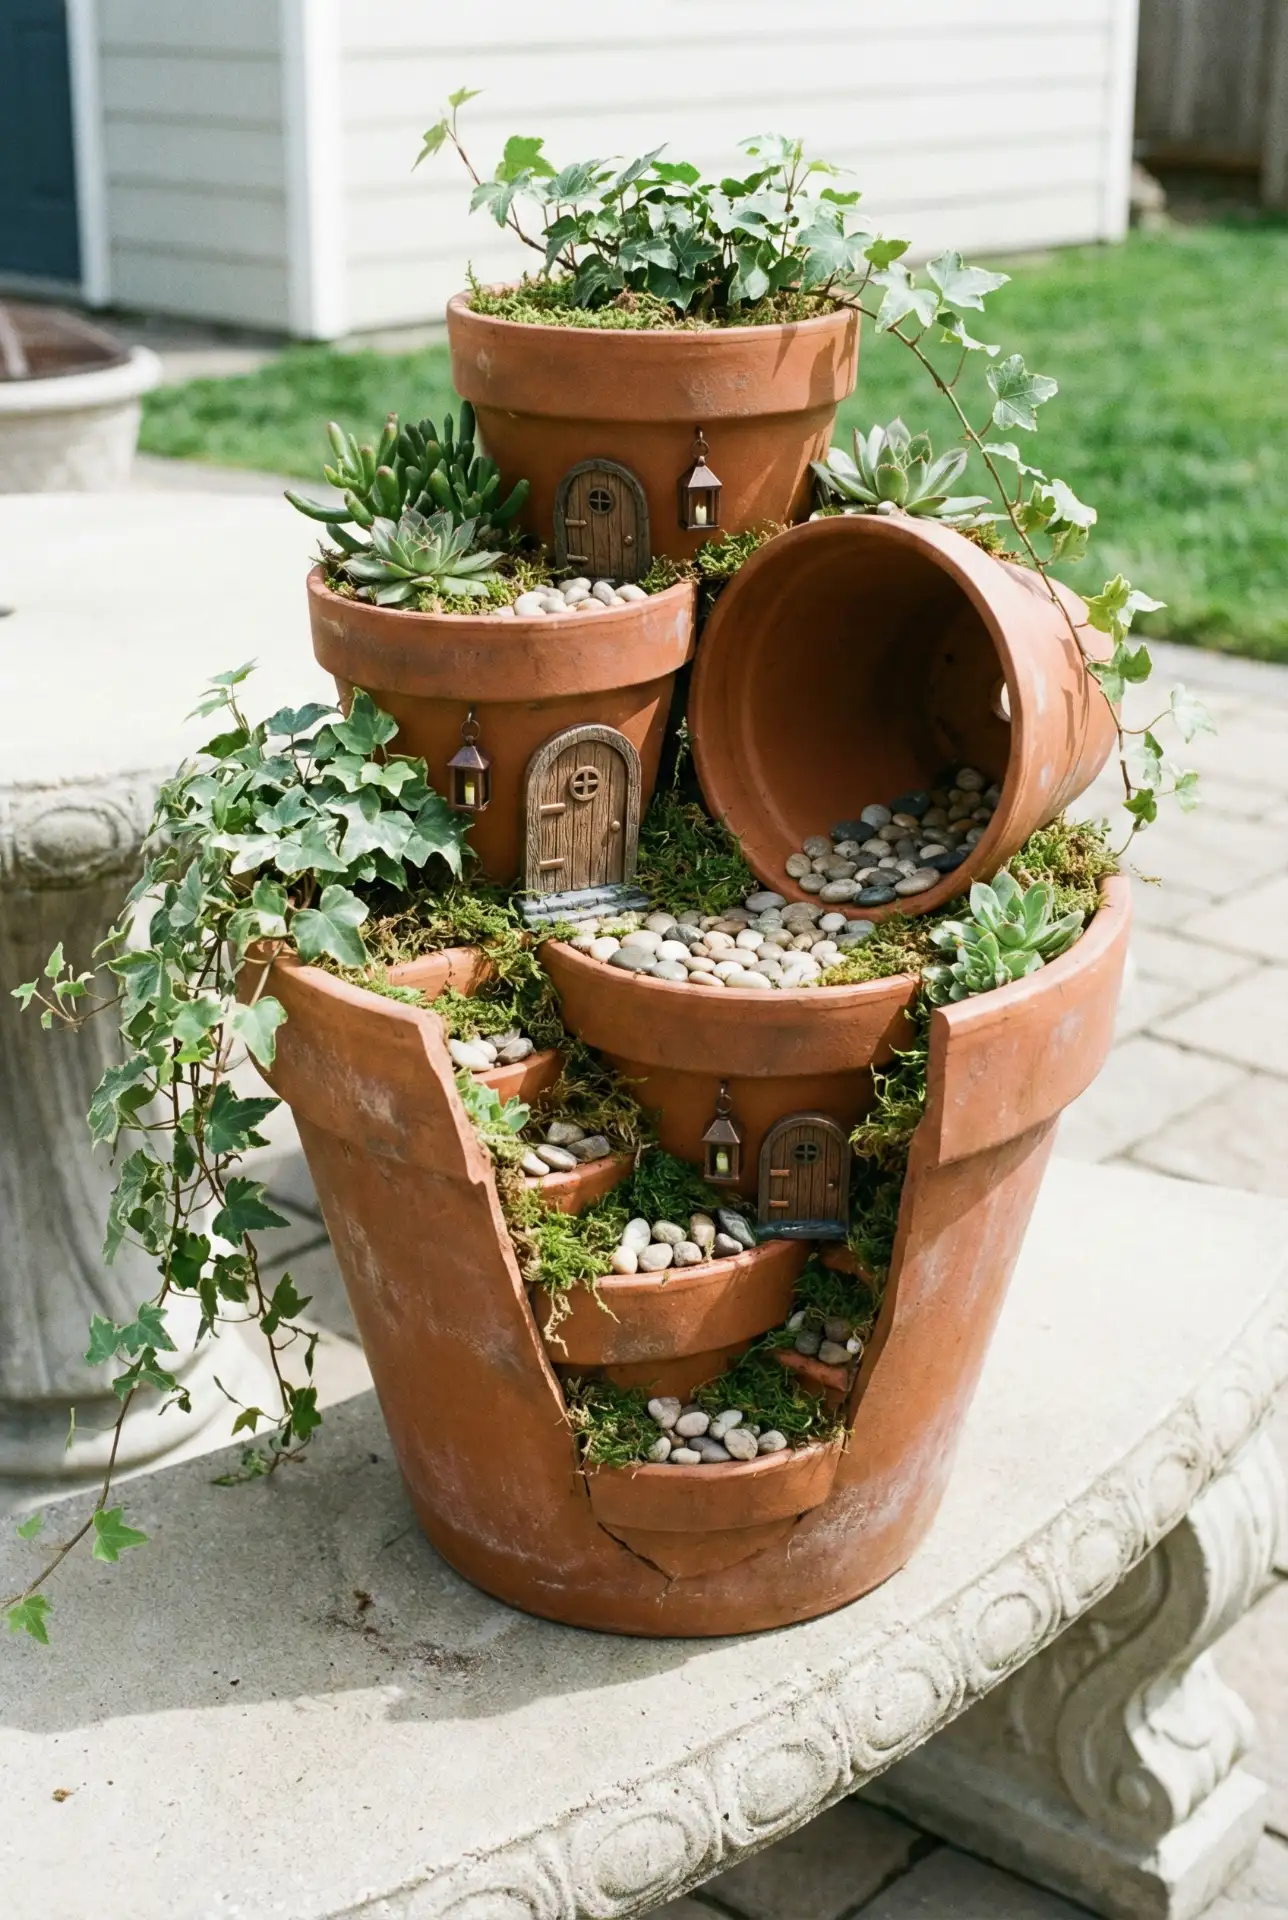
Stacked terracotta pots create instant “levels,” making a fairy village look designed instead of flat. Grab Dollar Tree pots, tip one on its side as a tiny tunnel, and plant trailing greens to soften the edges. It’s easy to build and easy to refresh: swap minis, add new stones, or shift plantings without rebuilding the whole structure.

Budget/price angle: terracotta stacks look expensive, but they’re often cheaper than a single big planter—especially if you mix new pots with thrifted ones. Skip specialty “fairy gravel” and use aquarium stones or pea gravel by the bag. The structure is what sells the look, not pricey miniature accessories.
12. Indoor Glass Cloche Miniature Desert World
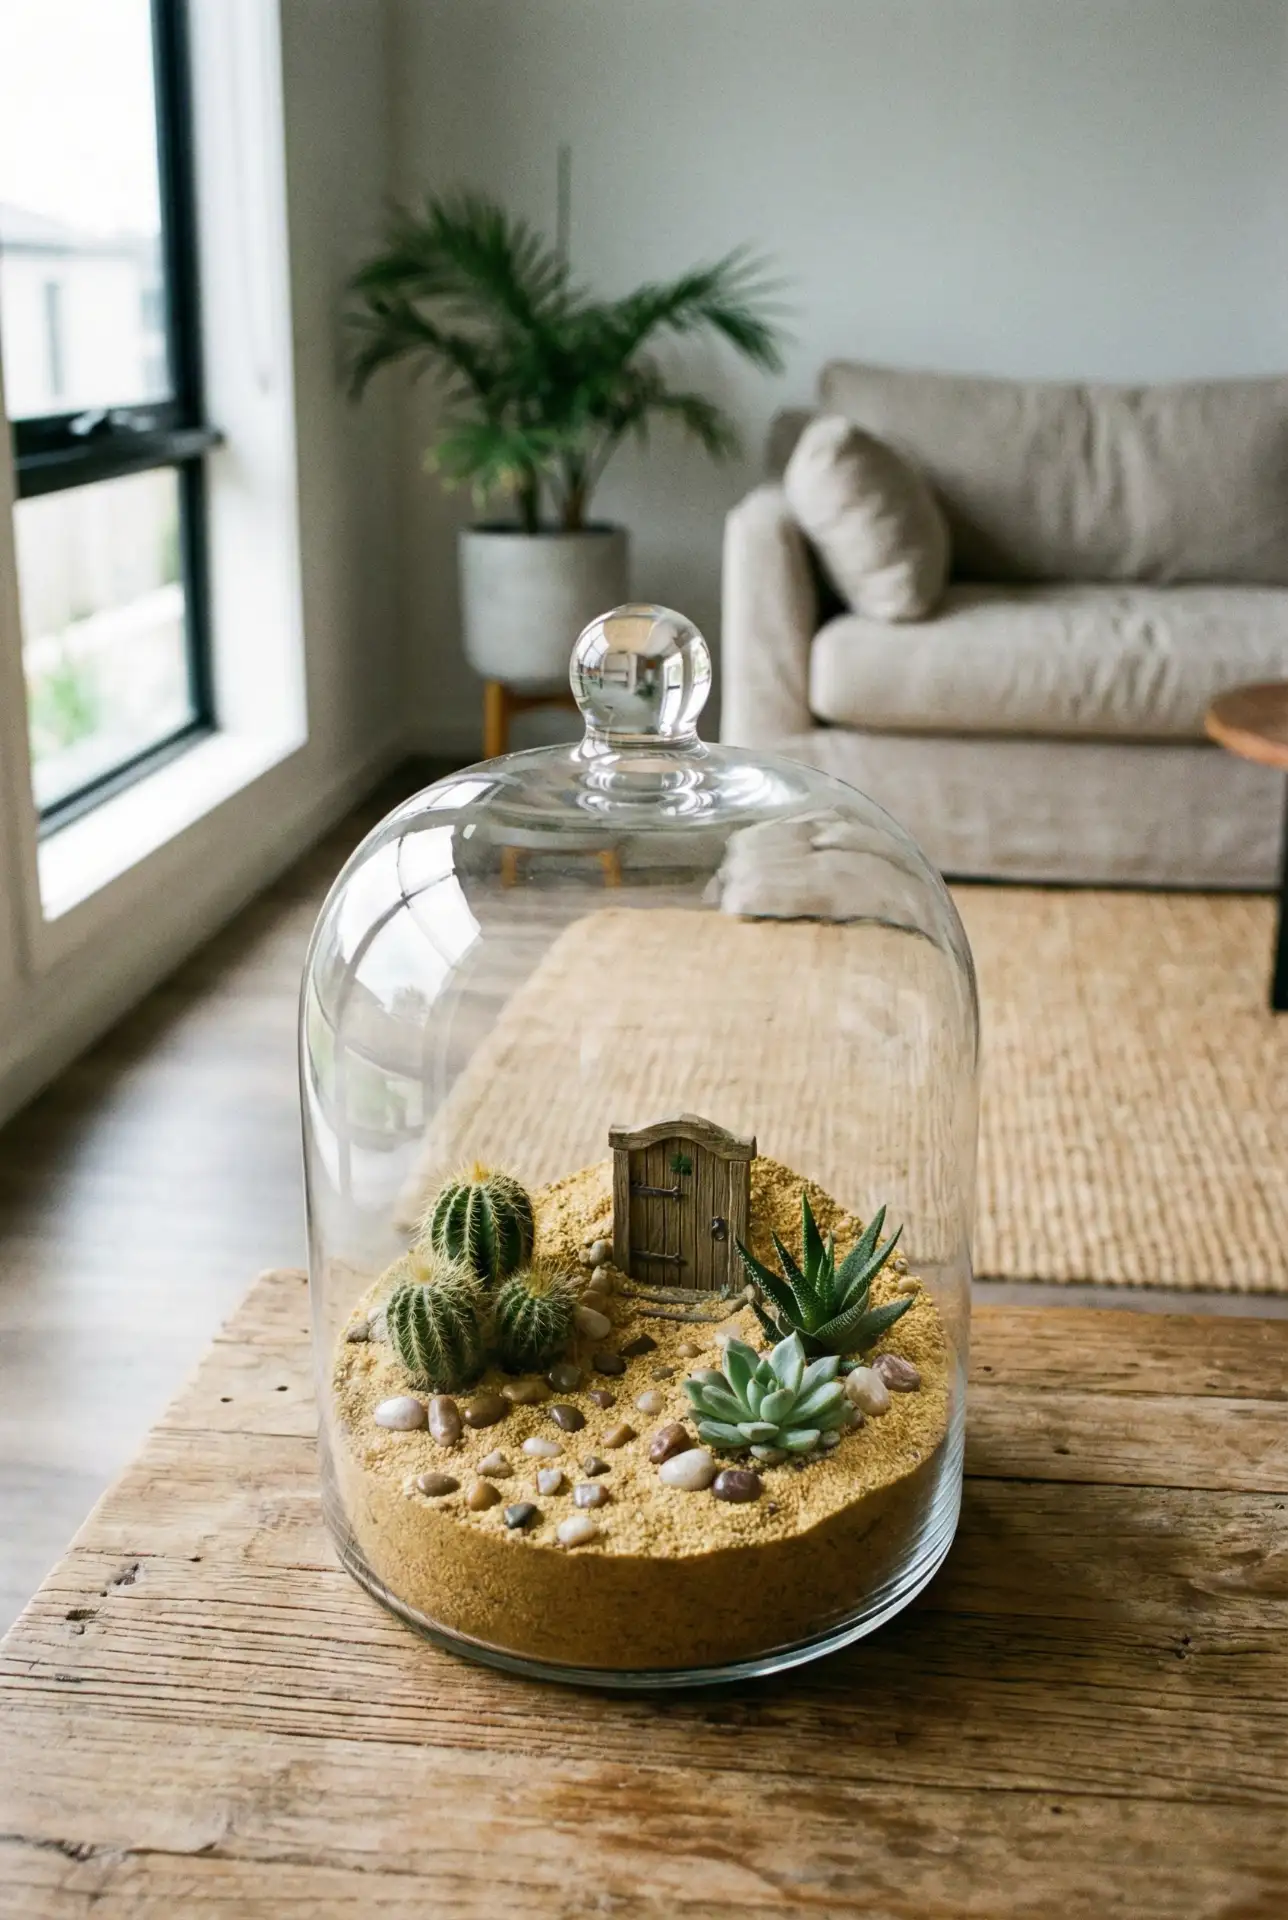
This indoor idea is made for side tables and bookshelves: a glass cloche over a sandy miniature scene. Use fine sand, small stones, and a few tiny cacti accents for a clean “desert fairy” vibe. The enclosed shape keeps it tidy, and the miniature elements look museum-like when the glass catches soft window light.
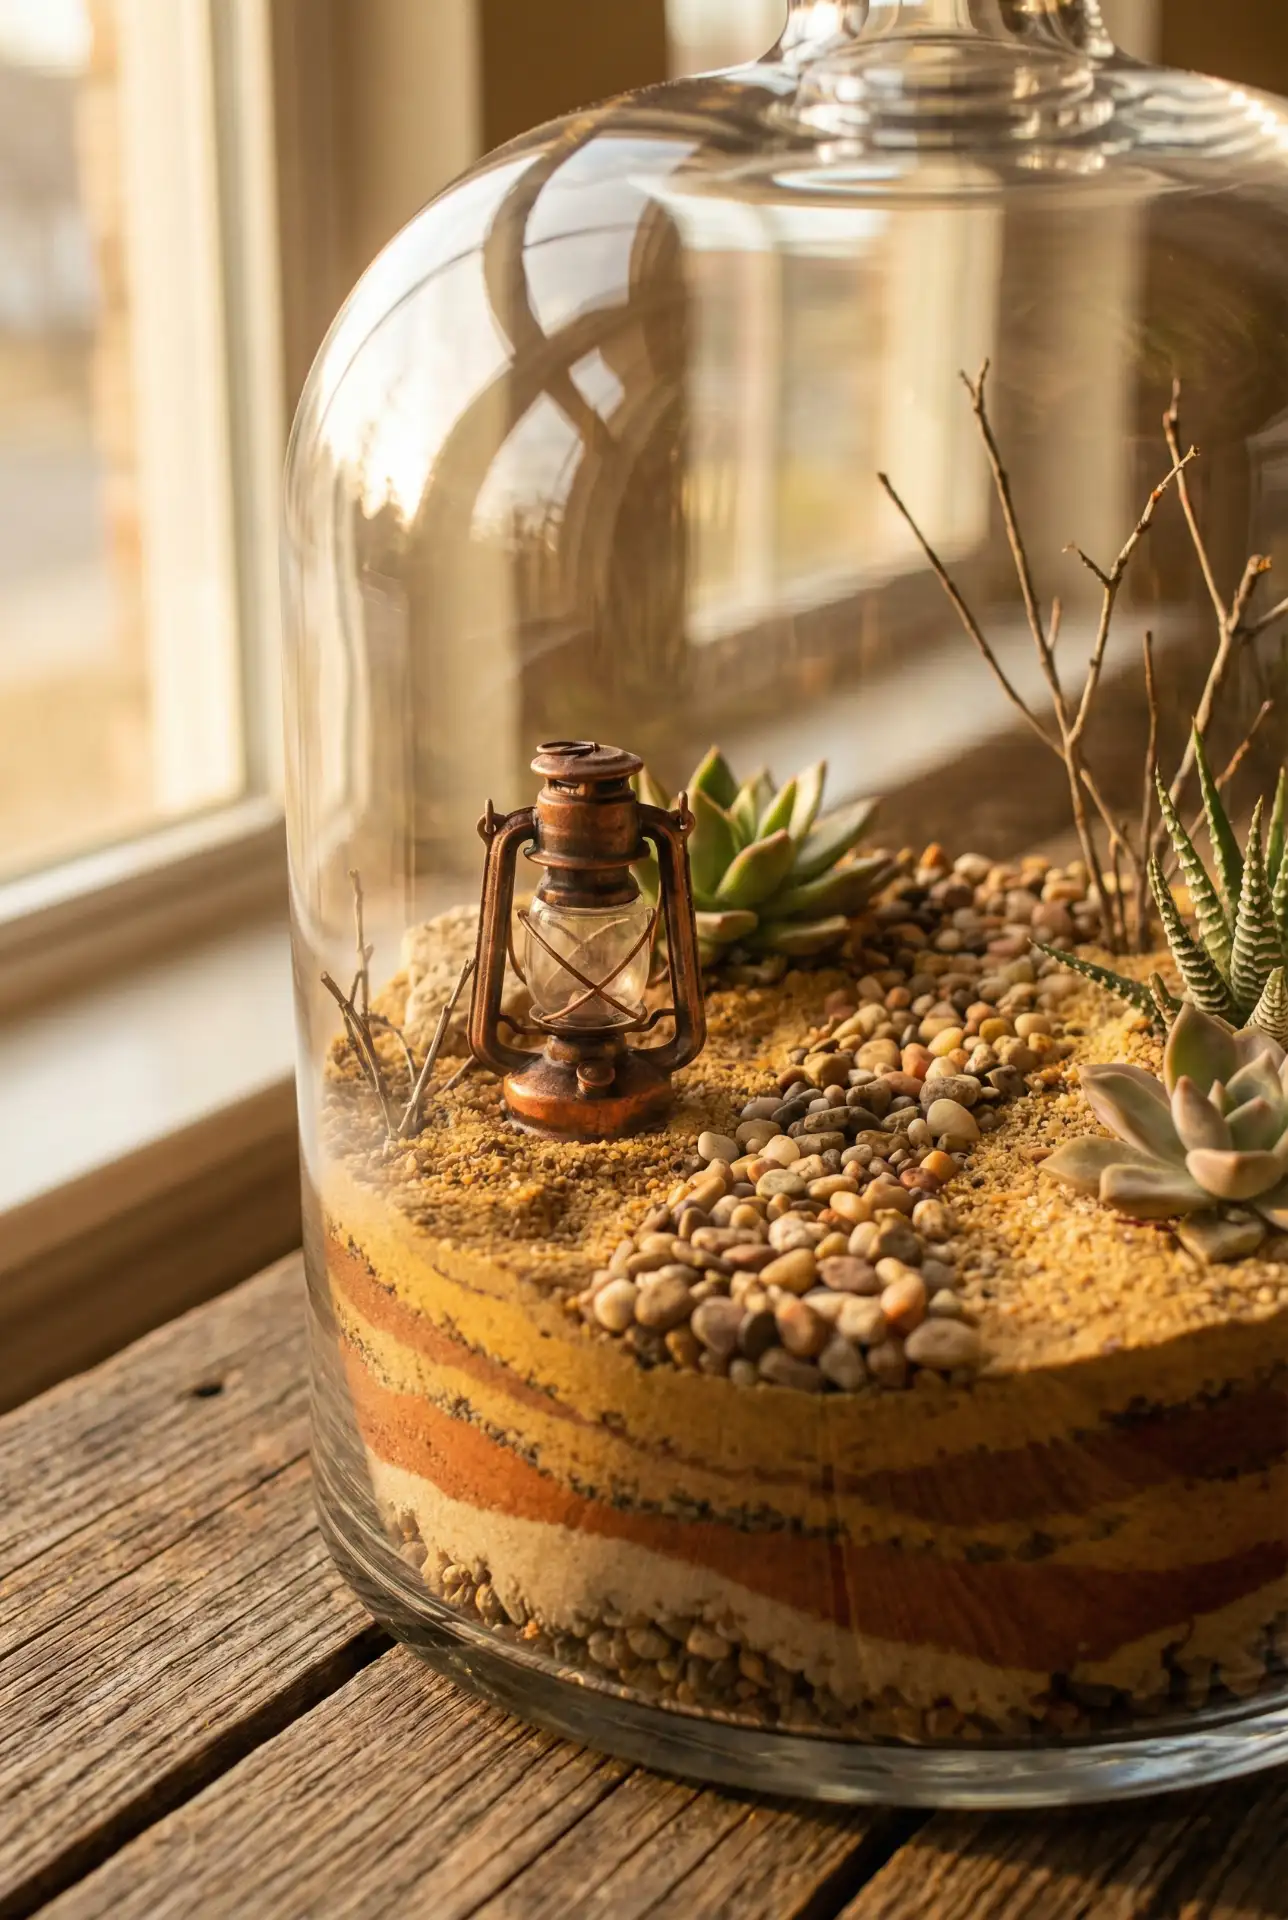
Expert-style commentary: Cloches work best when you treat them like a still life—limit the color palette and repeat shapes. Two or three focal pieces beat ten tiny trinkets. The glass already adds visual “drama,” so the scene underneath should be calm, graphic, and intentionally sparse.
13. Outdoor Flower Bed Succulent Fairy Border
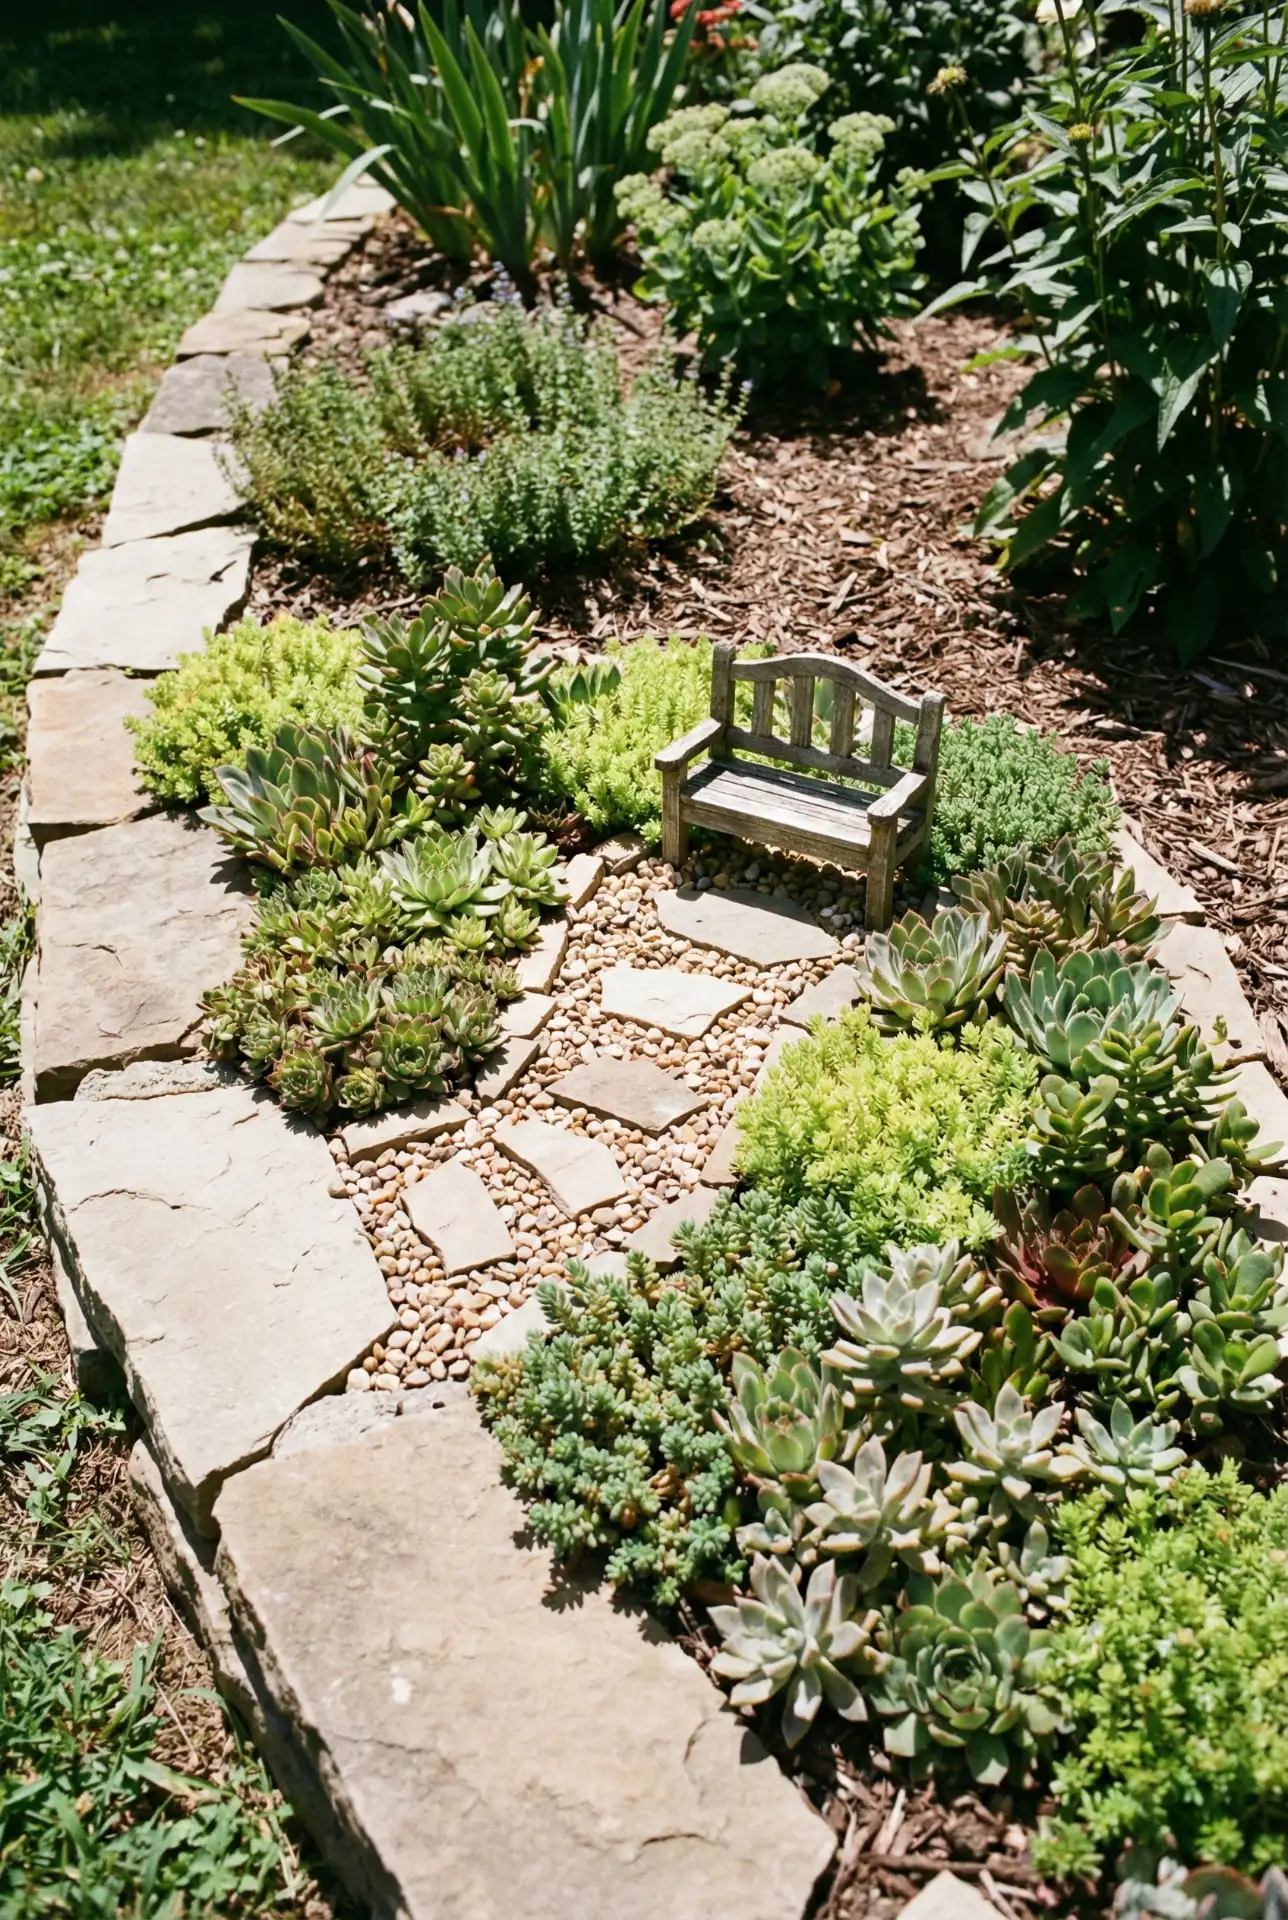
If your garden bed gets strong sun, build a fairy scene that loves heat. Tuck succulent clusters into an outdoor flower bed, then edge the area with flat stones for a tiny “courtyard.” Add a simple miniature bench and a short path that disappears under foliage. It’s a realistic look—like a hidden garden room, scaled down.
Common mistakes and how to avoid them: don’t mix thirsty shade plants with succulents just because they look cute together. The watering needs fight each other, and something always loses. Keep the palette cohesive and dry-friendly—gravel, stone, sedum, and hardy minis—so the scene stays crisp all season.
14. DIY Enchanted Forest Stump House Nook
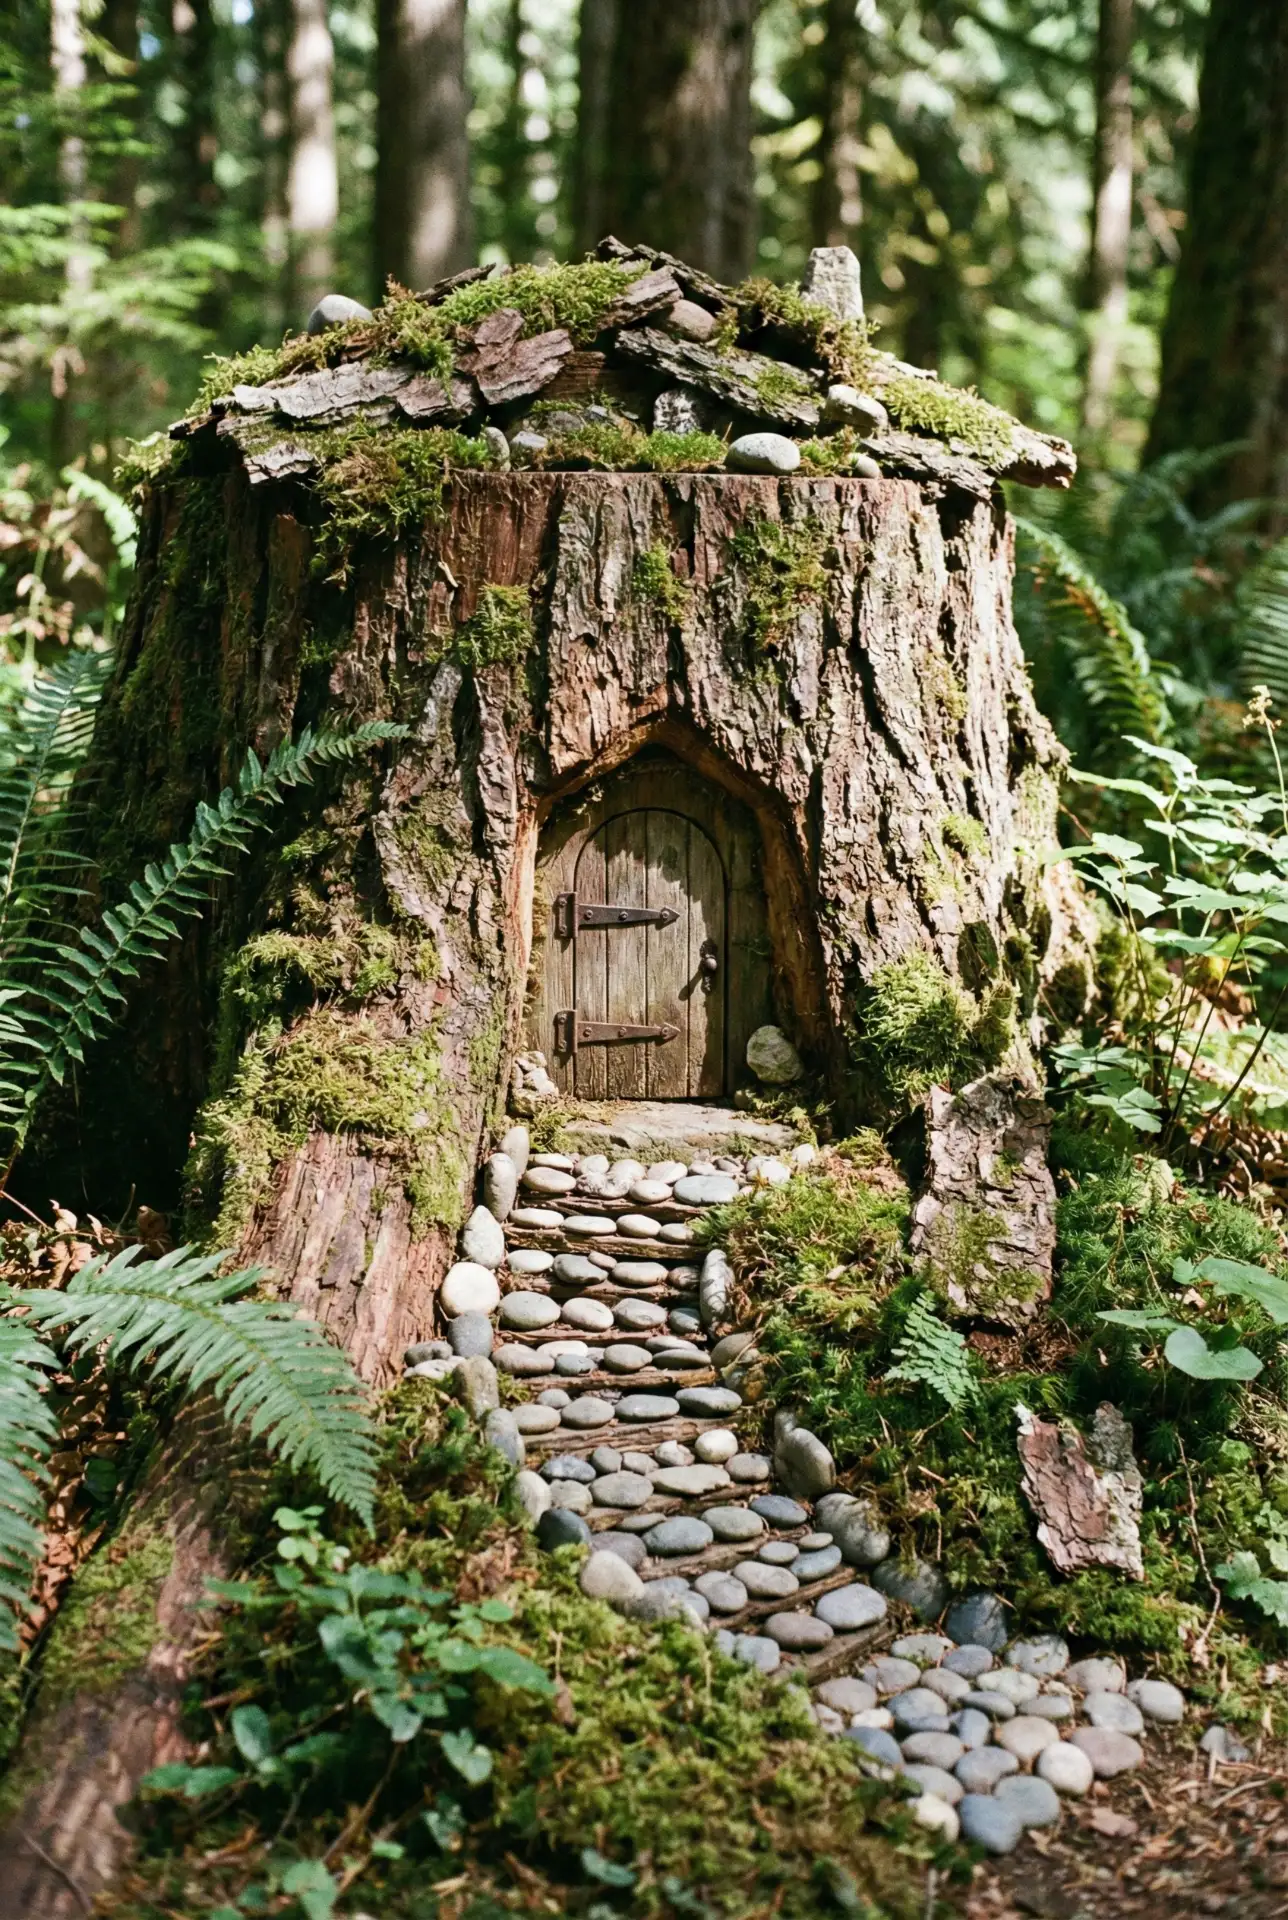
A cut stump or fallen log becomes instant architecture: it already looks like a fairy could move in tomorrow. Carve a shallow niche, add moss, and place a tiny door so the “house” feels built-in. Lean into Diy charm with bark shingles and twig details, and keep the palette woodland for a true Enchanted forest mood outdoors.
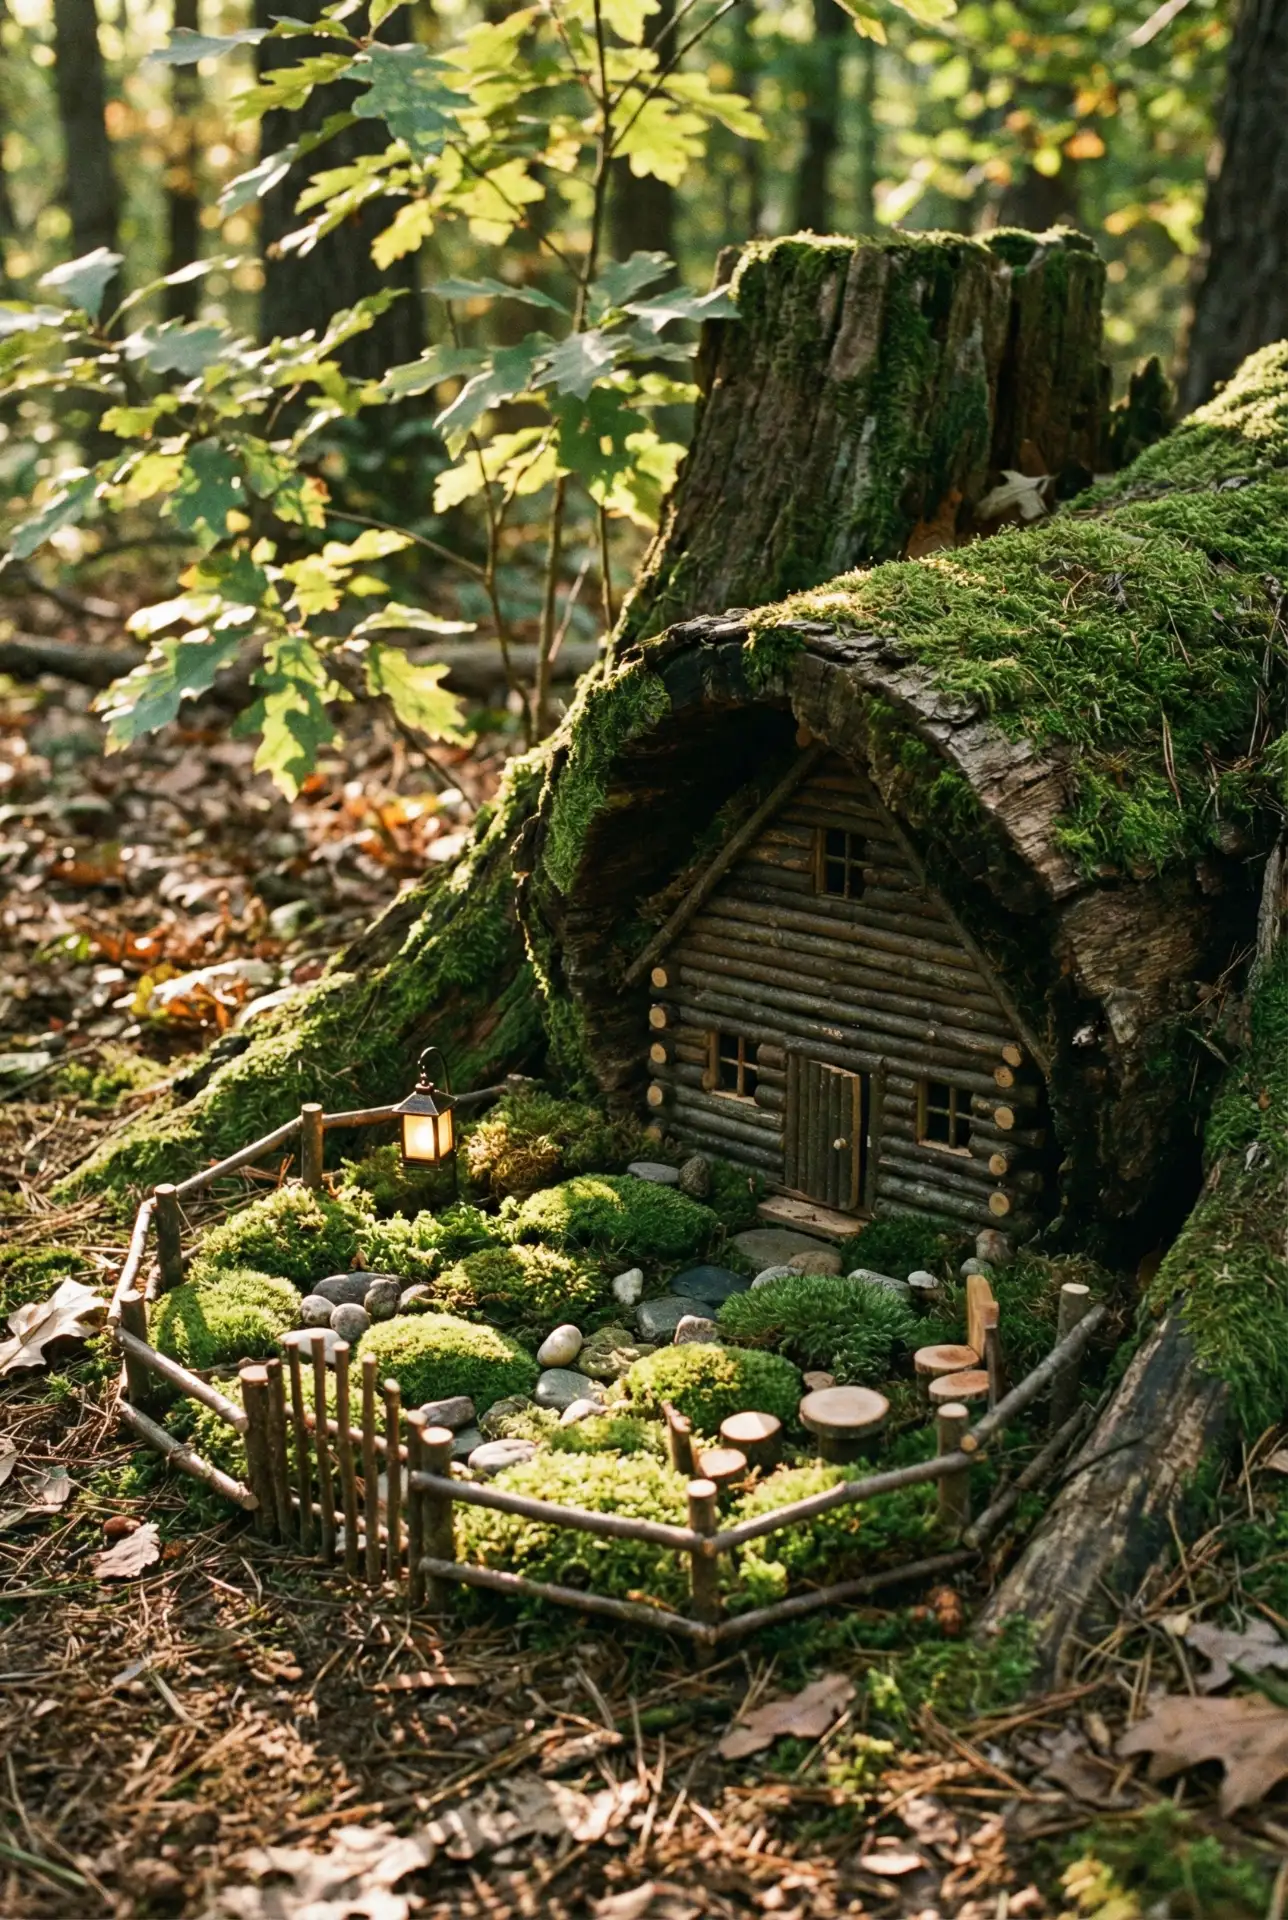
Practical insight: treat the wood first so it doesn’t rot into mush. A clear outdoor sealant (used sparingly) helps it last, and placing the scene on a slightly raised bed of gravel improves drainage. You’ll still get the organic look, just with a setup that can survive more than one rainy season.
15. Backyard Fairy Garden Around A Tree Swing Seat
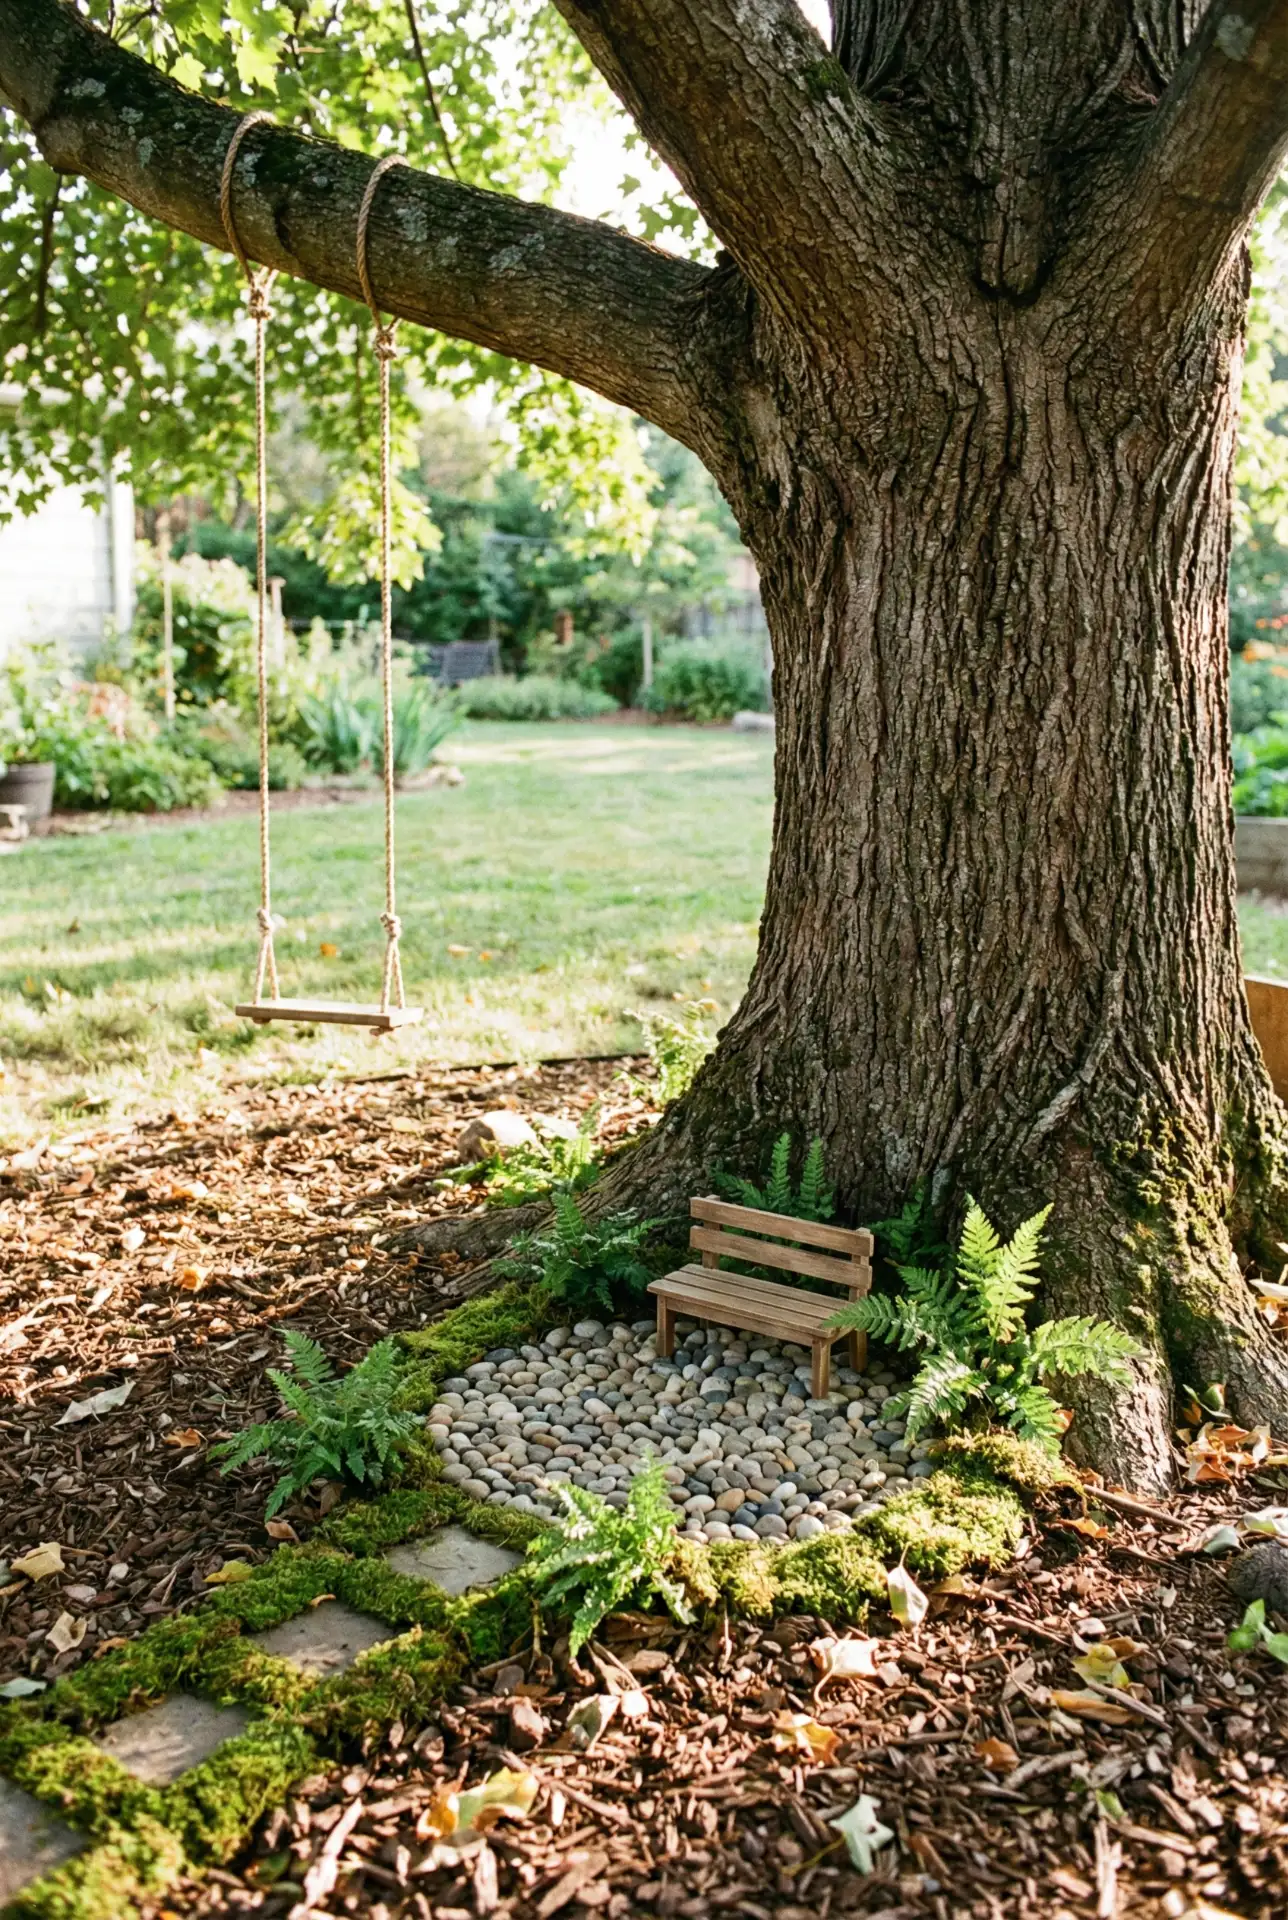
Turn the space under a swing into a tiny “village square.” Place a miniature bench facing the trunk, add a little stone circle like a gathering spot, and wrap the base with mossy paths. This outdoor-around-a-tree idea works especially well in a family backyard because it feels integrated with play, not separate. Keep accents sturdy for real-life traffic.
Micro anecdote: I’ve seen this stay intact longest when homeowners use heavier stones and fewer fragile figurines—kids notice it but don’t accidentally demolish it. One neighbor even made it a tradition to “add one new tiny thing” each month. The slow build keeps it meaningful.
16. Outdoor Large Stone Planter Fairy Fountain Moment
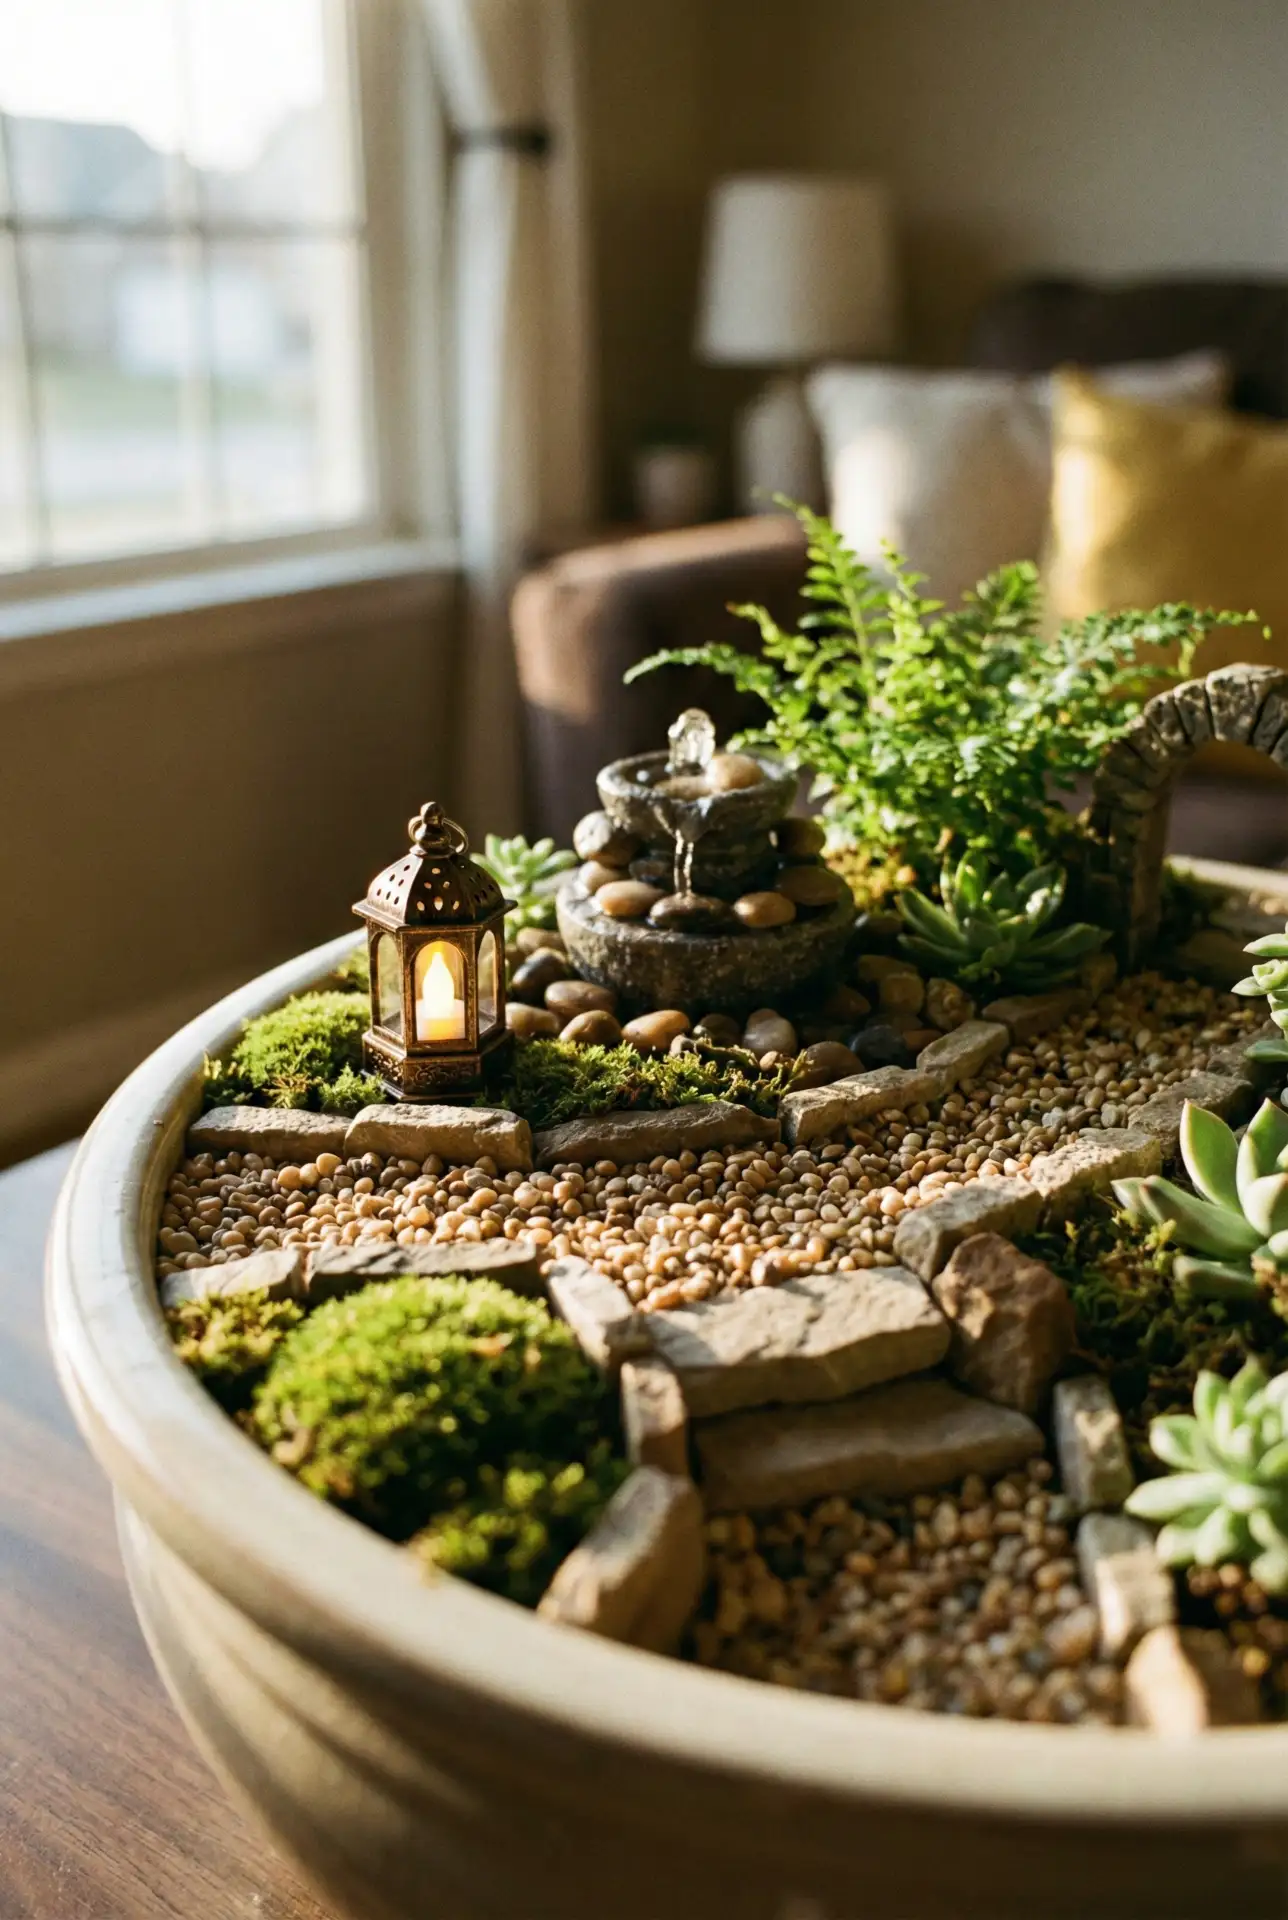
A deep, outdoor stone planter can mimic a miniature courtyard with a central “fountain” effect. Use a shallow bowl of pebbles as the focal point, then create paths and planting pockets around it. The scale feels luxe when the container is large and the materials are natural—stone, gravel, and moss—so it reads like a tiny estate garden.
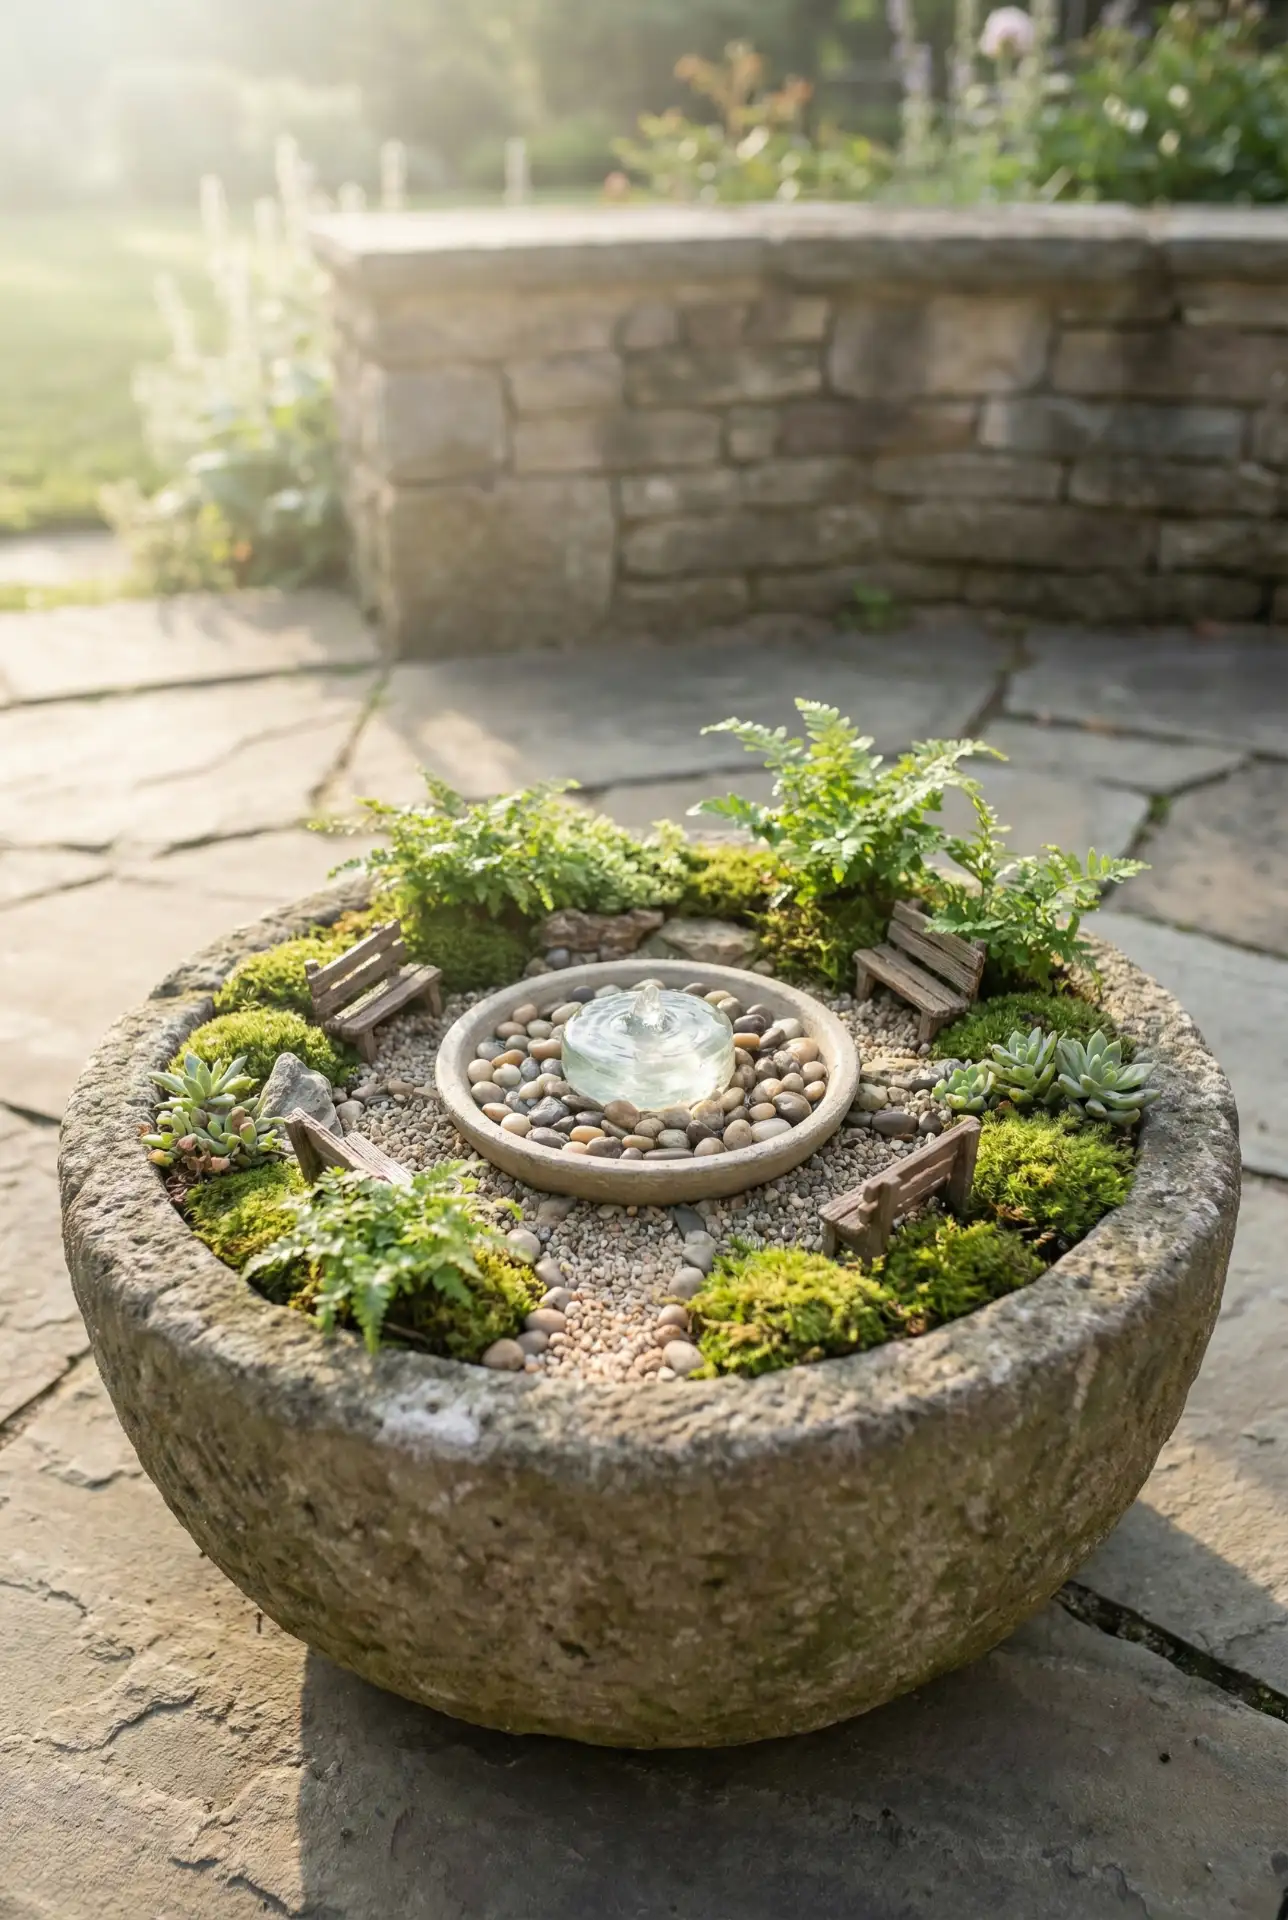
Where it works best: near an entry path or outdoor seating area where guests naturally pause. Because the container is heavy and stable, it’s great for windy patios. Add one taller plant to create a “back wall” so the scene feels framed and finished, like a real garden vignette.
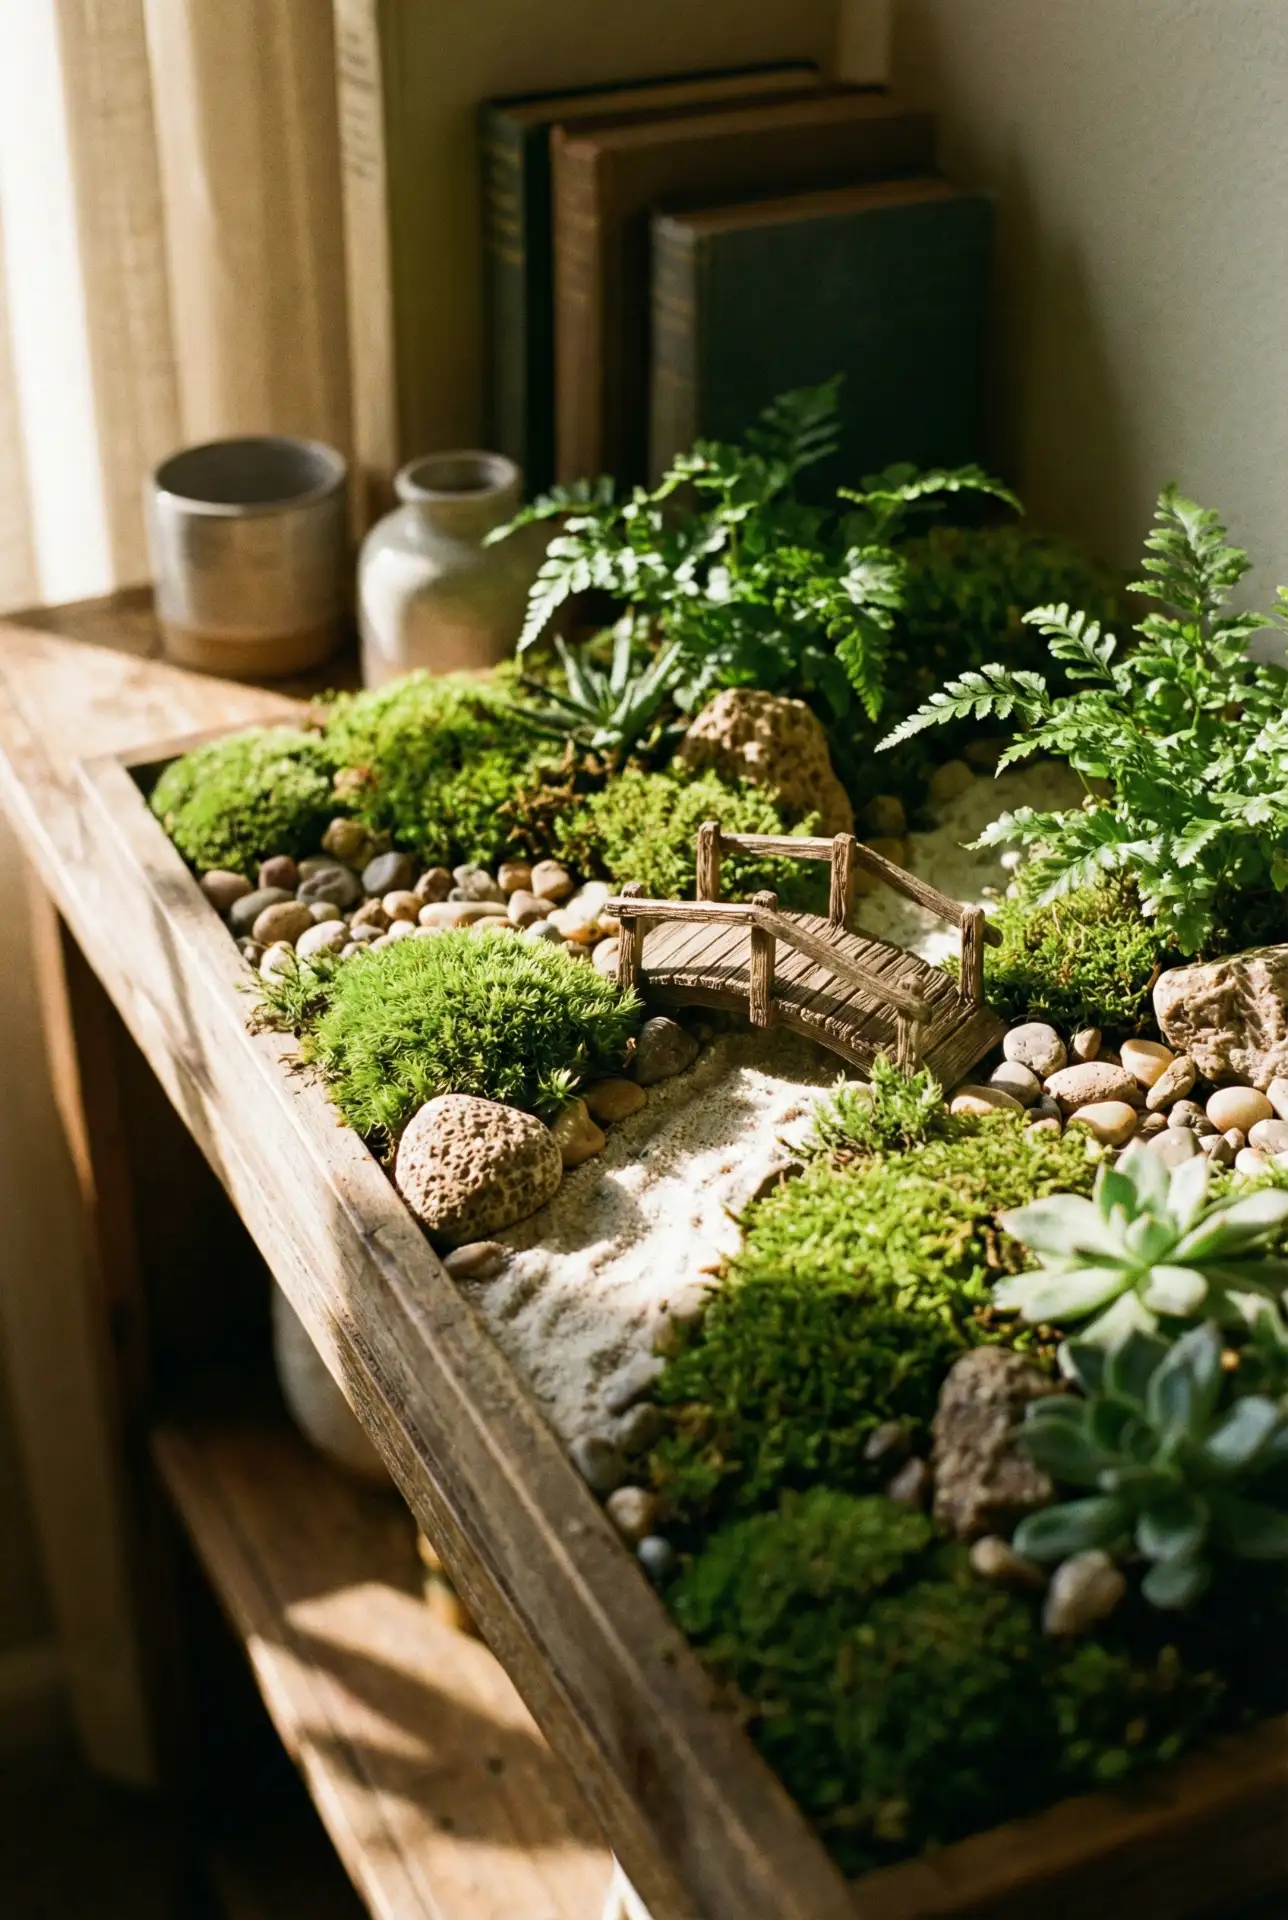
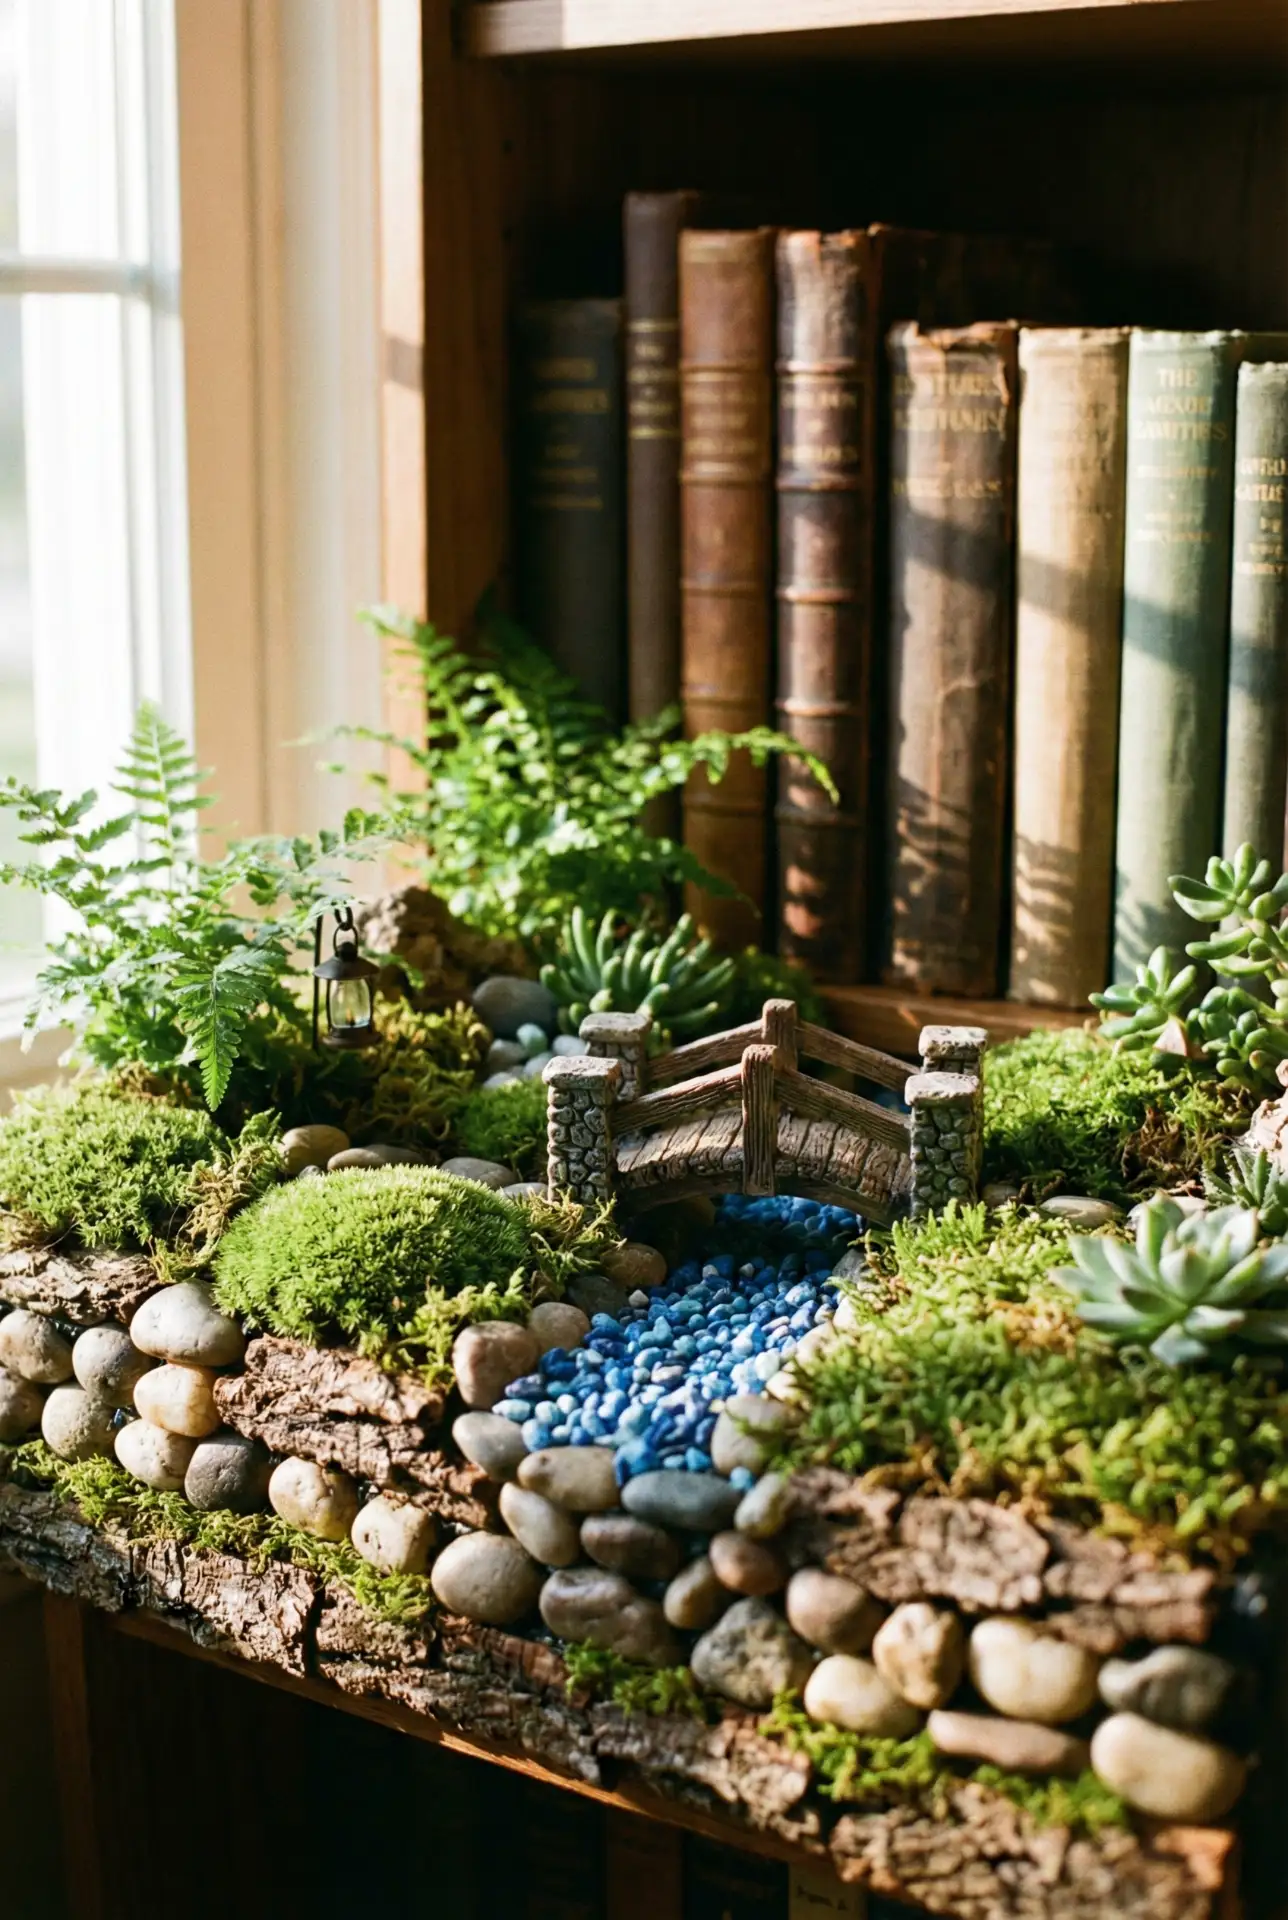
17. Indoor Miniature Book Nook Fairy Garden Shelf
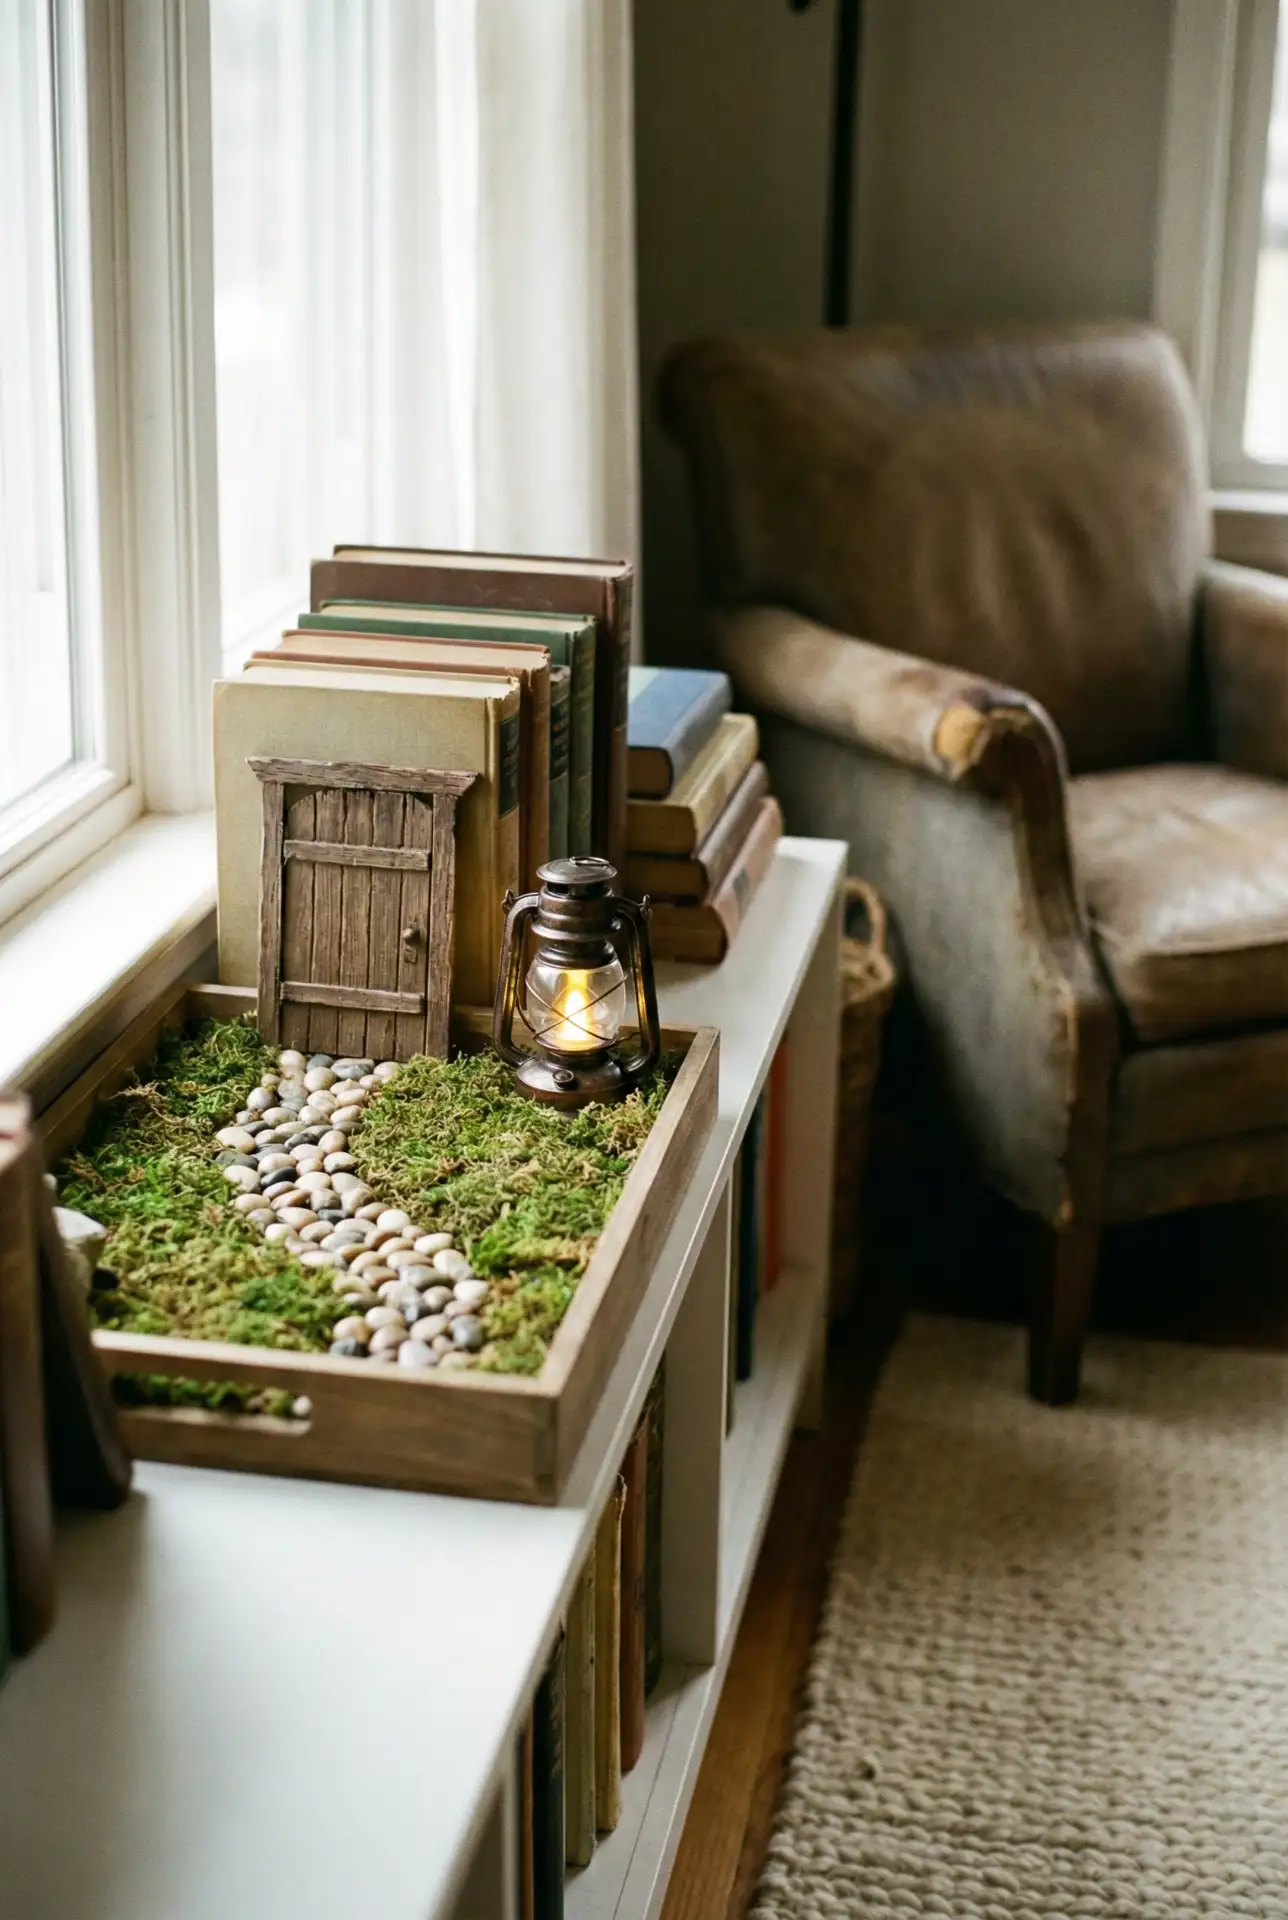
Think of this as décor first, craft second: an indoor fairy nook tucked between books. Use a shallow tray, tiny stones, and moss to create a miniature path that “leads” into a small door propped against a stack of novels. The miniature scale looks extra magical when it’s surrounded by grown-up textures—linen spines, wood shelves, ceramics.
Real homeowner behavior: shelf fairy gardens last because they’re easy to dust and adjust—no weather drama, no soggy soil. Keep the tray removable so you can lift it out when you restyle the shelf. When it fits into normal cleaning habits, it becomes part of the home, not a forgotten craft.
18. Outdoor Flower Bed Fairy Gate At The Path Entrance

Create a tiny “threshold moment” by placing a miniature gate right where your real garden path begins. It’s subtle, but it makes guests smile as they step into the yard. Use Outdoor flower bed plantings as the backdrop and tuck small stones like a welcome walk. This fits outdoor fairy garden ideas perfectly because it feels integrated, not staged.
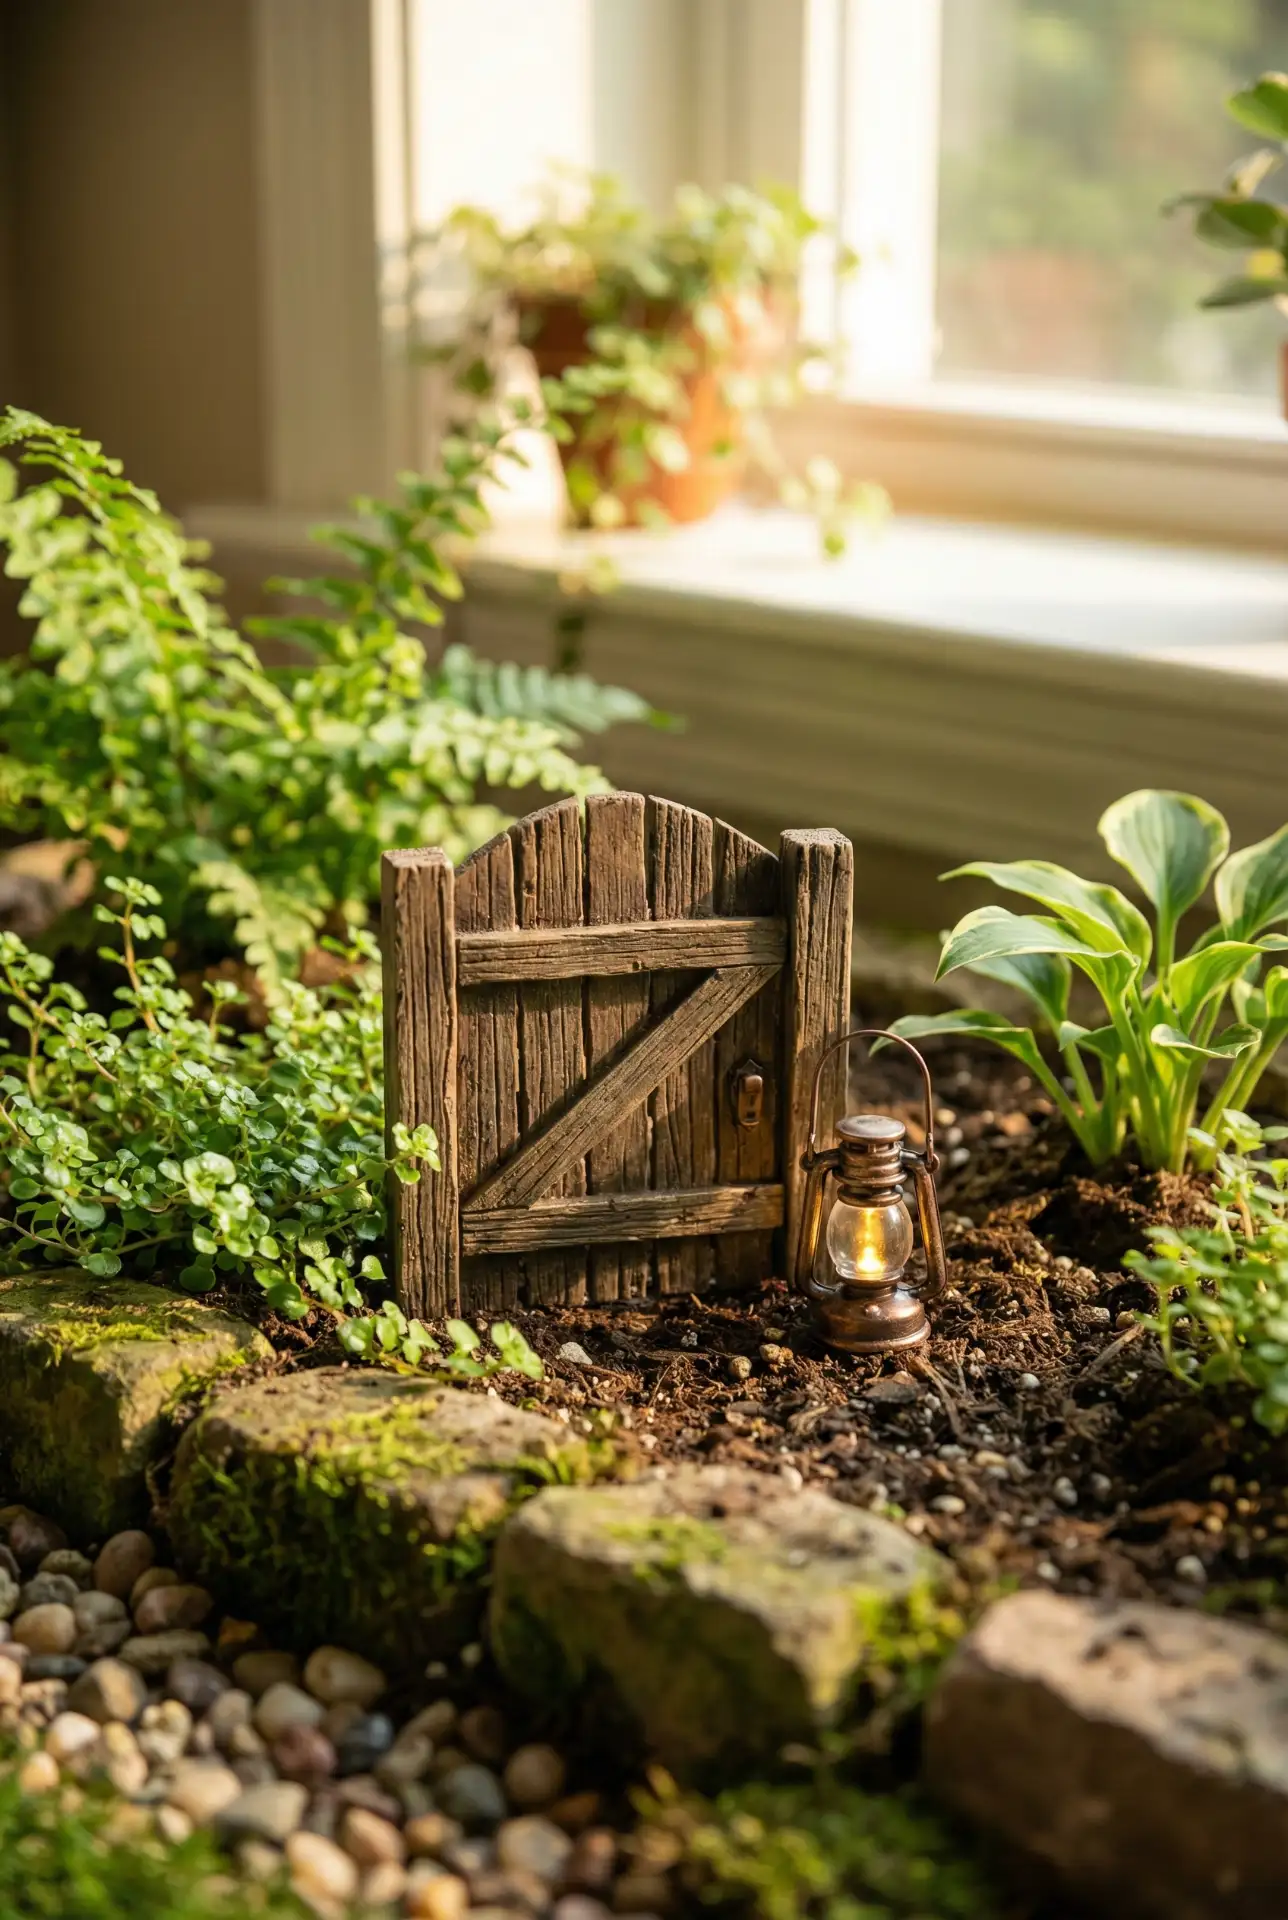
Expert-style commentary: good garden design has a sense of “arrival,” and a miniature gate delivers that at almost no cost. Keep it visually quiet—weathered wood tones, simple shapes—so it complements your landscaping. The most elegant fairy details whisper; they don’t shout.
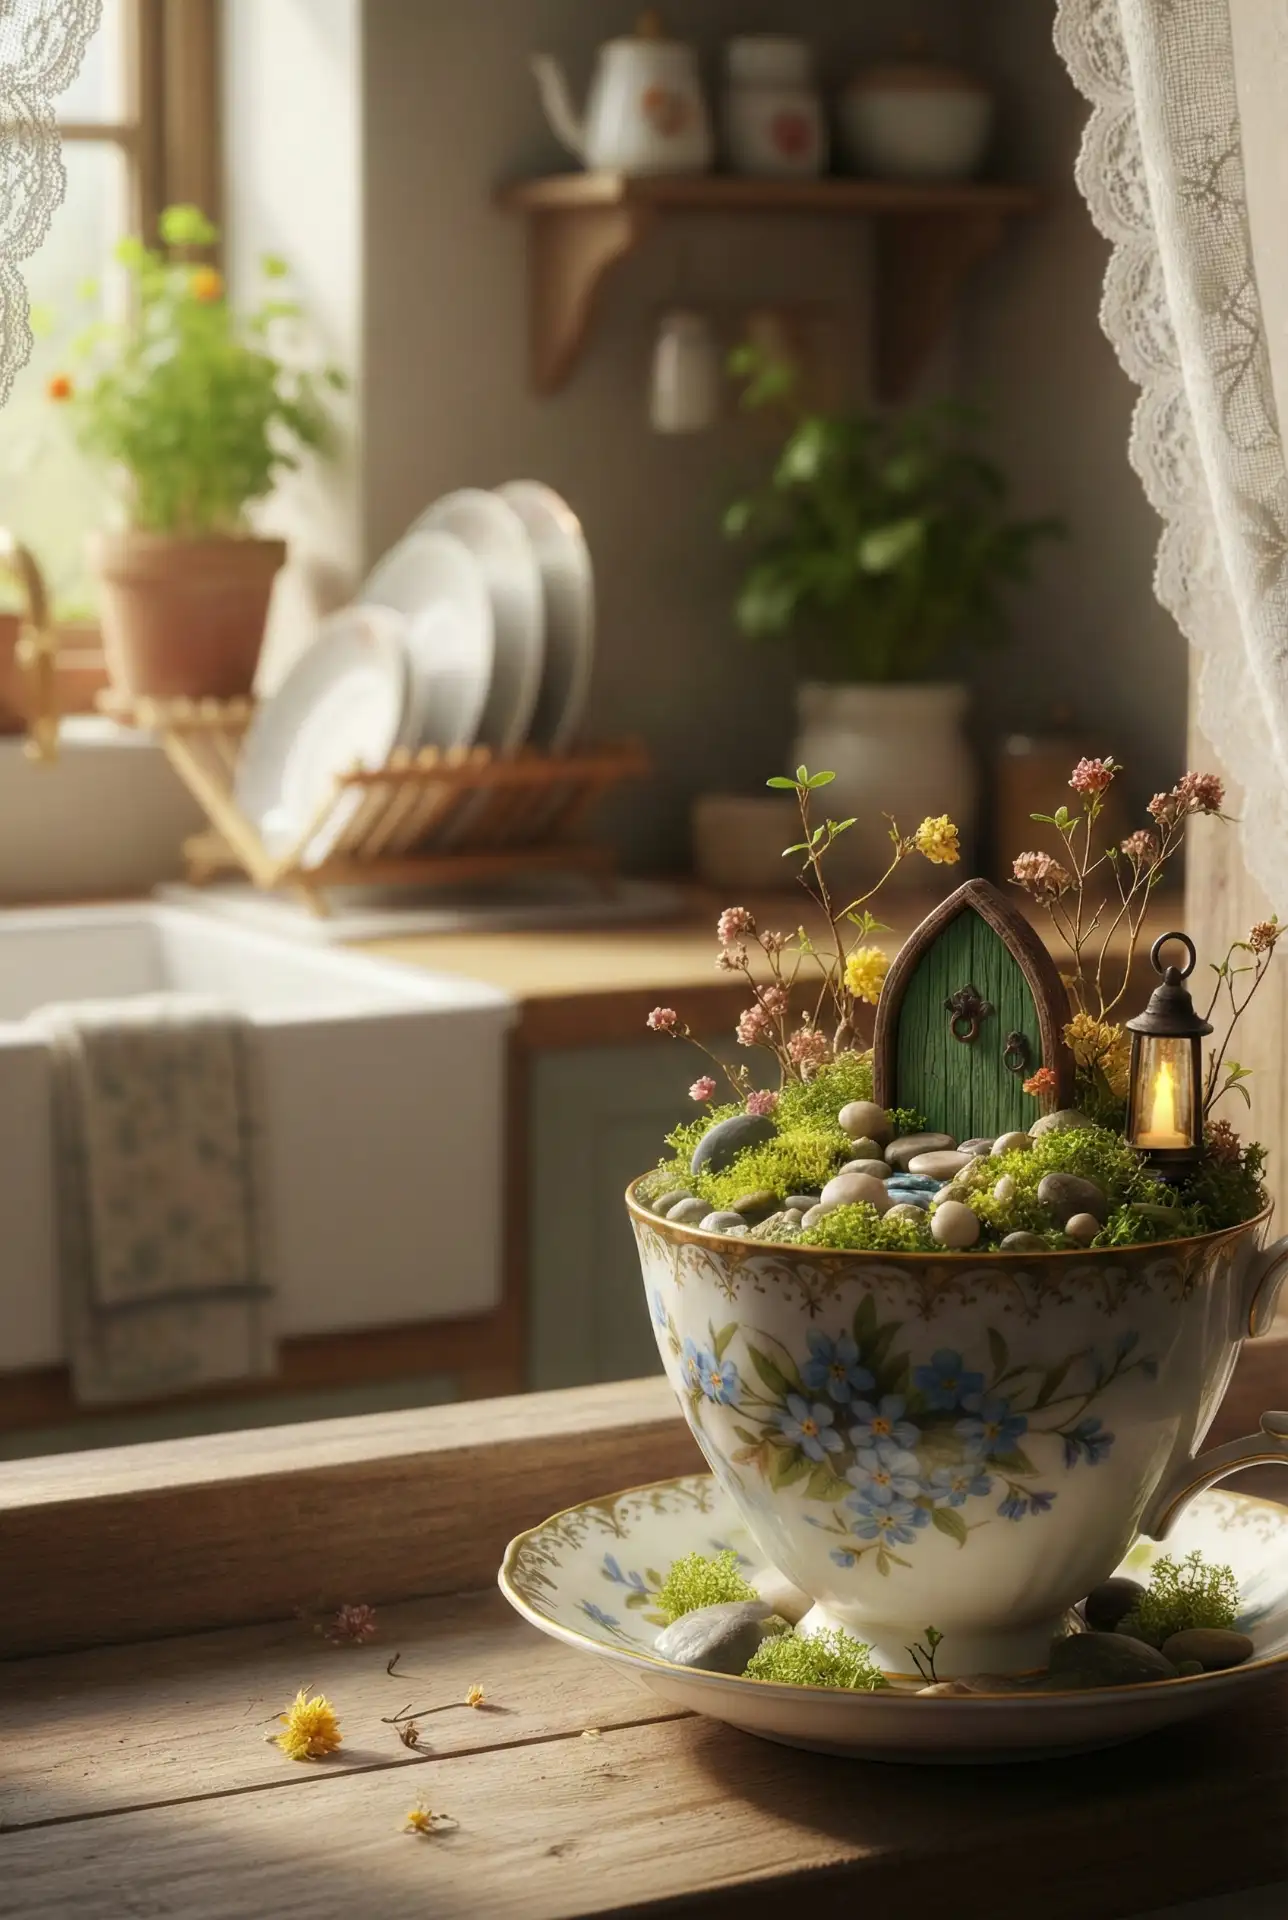
19. Homemade Miniature Fairy Studio In A Teacup Saucer Set
If you want a project that feels personal, build a tiny “studio” scene using a cup-and-saucer set. The saucer becomes a patio, the teacup becomes the house, and a few stones create a walkway between them. This is delightfully homemade and looks sweet as a gift or tabletop accent. Add one tiny plant for life without maintenance overload.
Common mistakes and how to avoid them: don’t overload the saucer with too many tiny items—everything starts to look like clutter. Choose one focal piece (a chair, a lantern, a door) and let negative space do the work. Also avoid lightweight glitter or confetti; it migrates everywhere and cheapens the look fast.
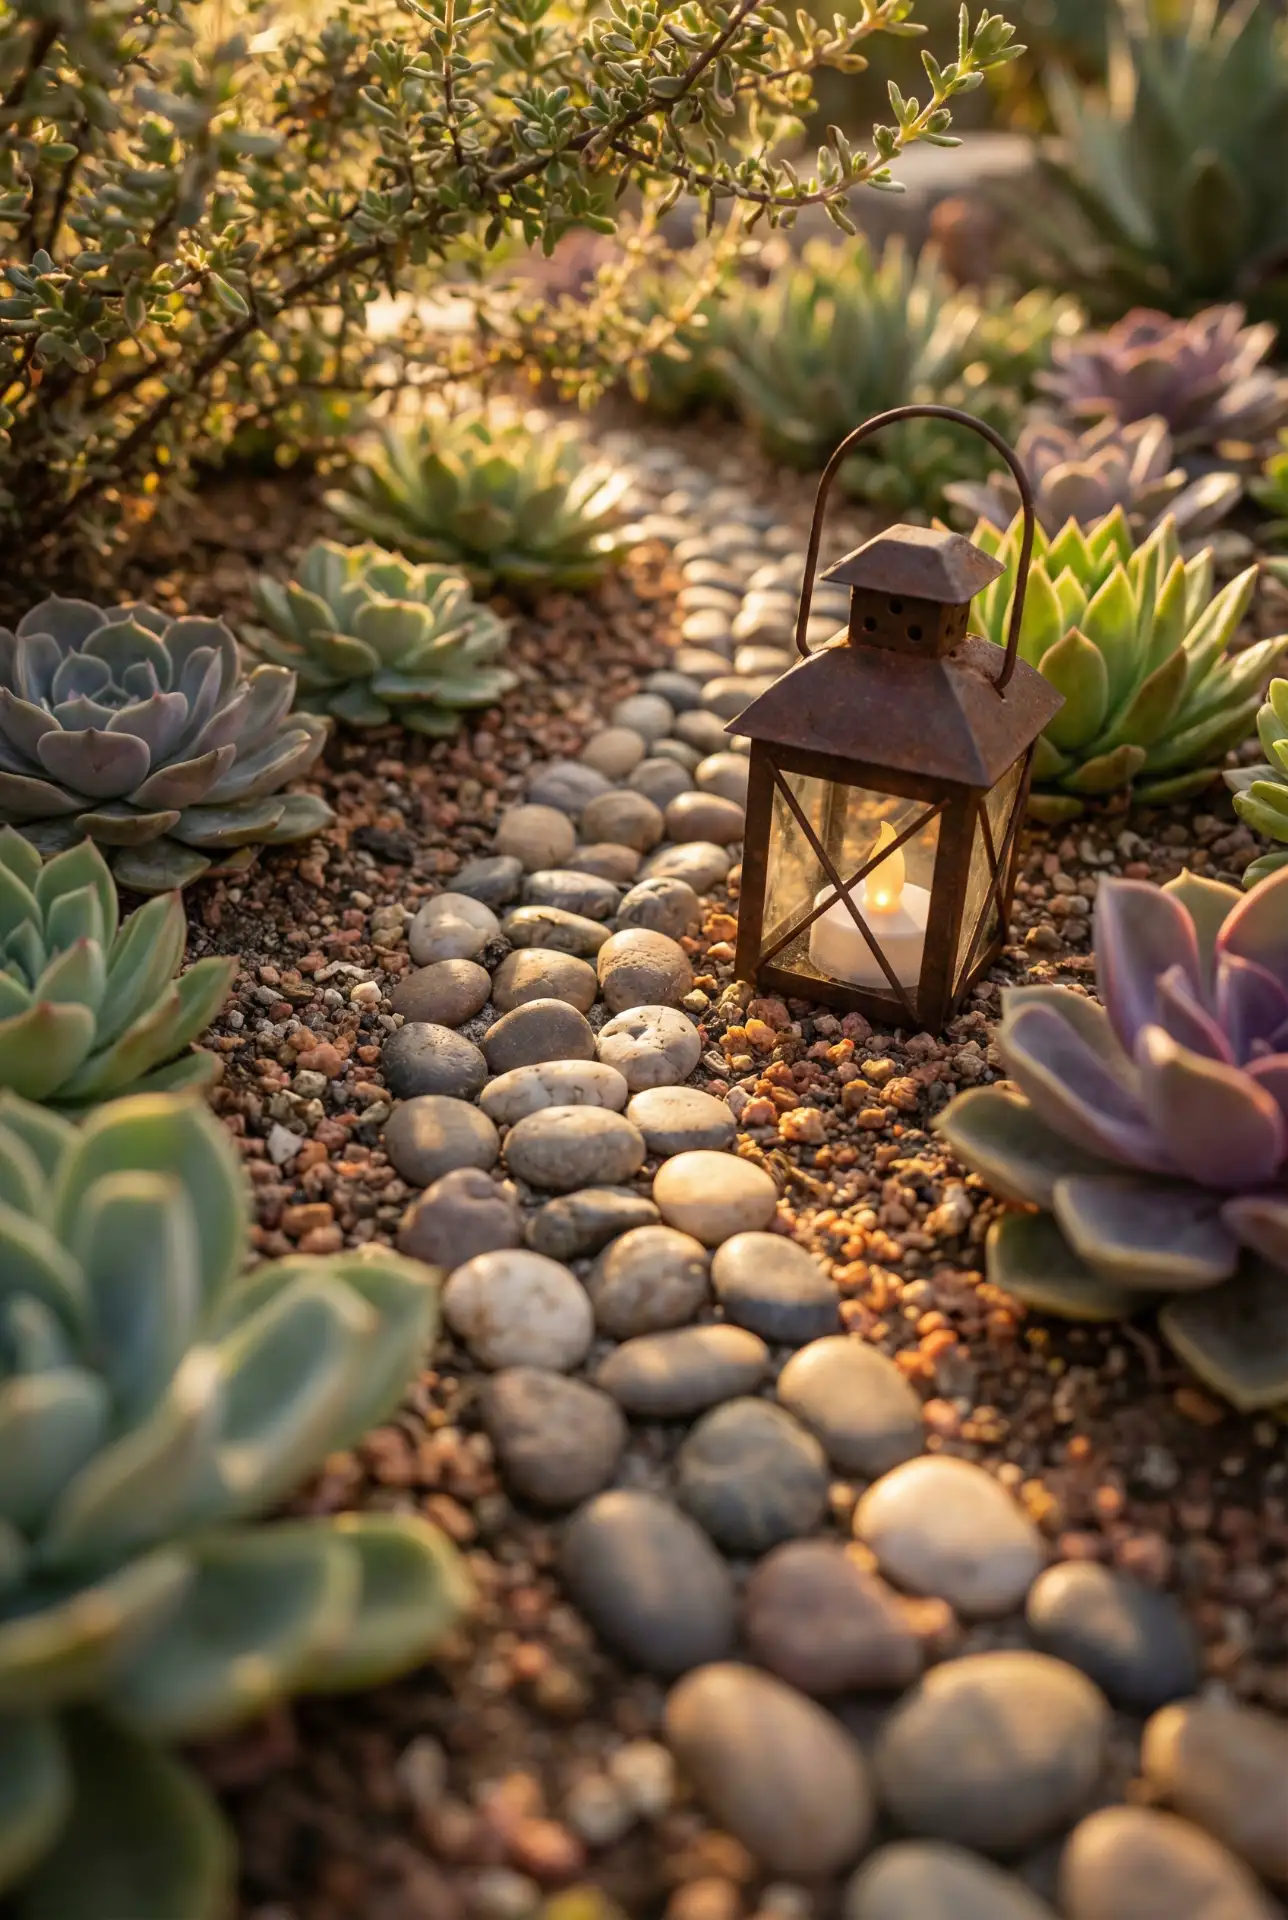
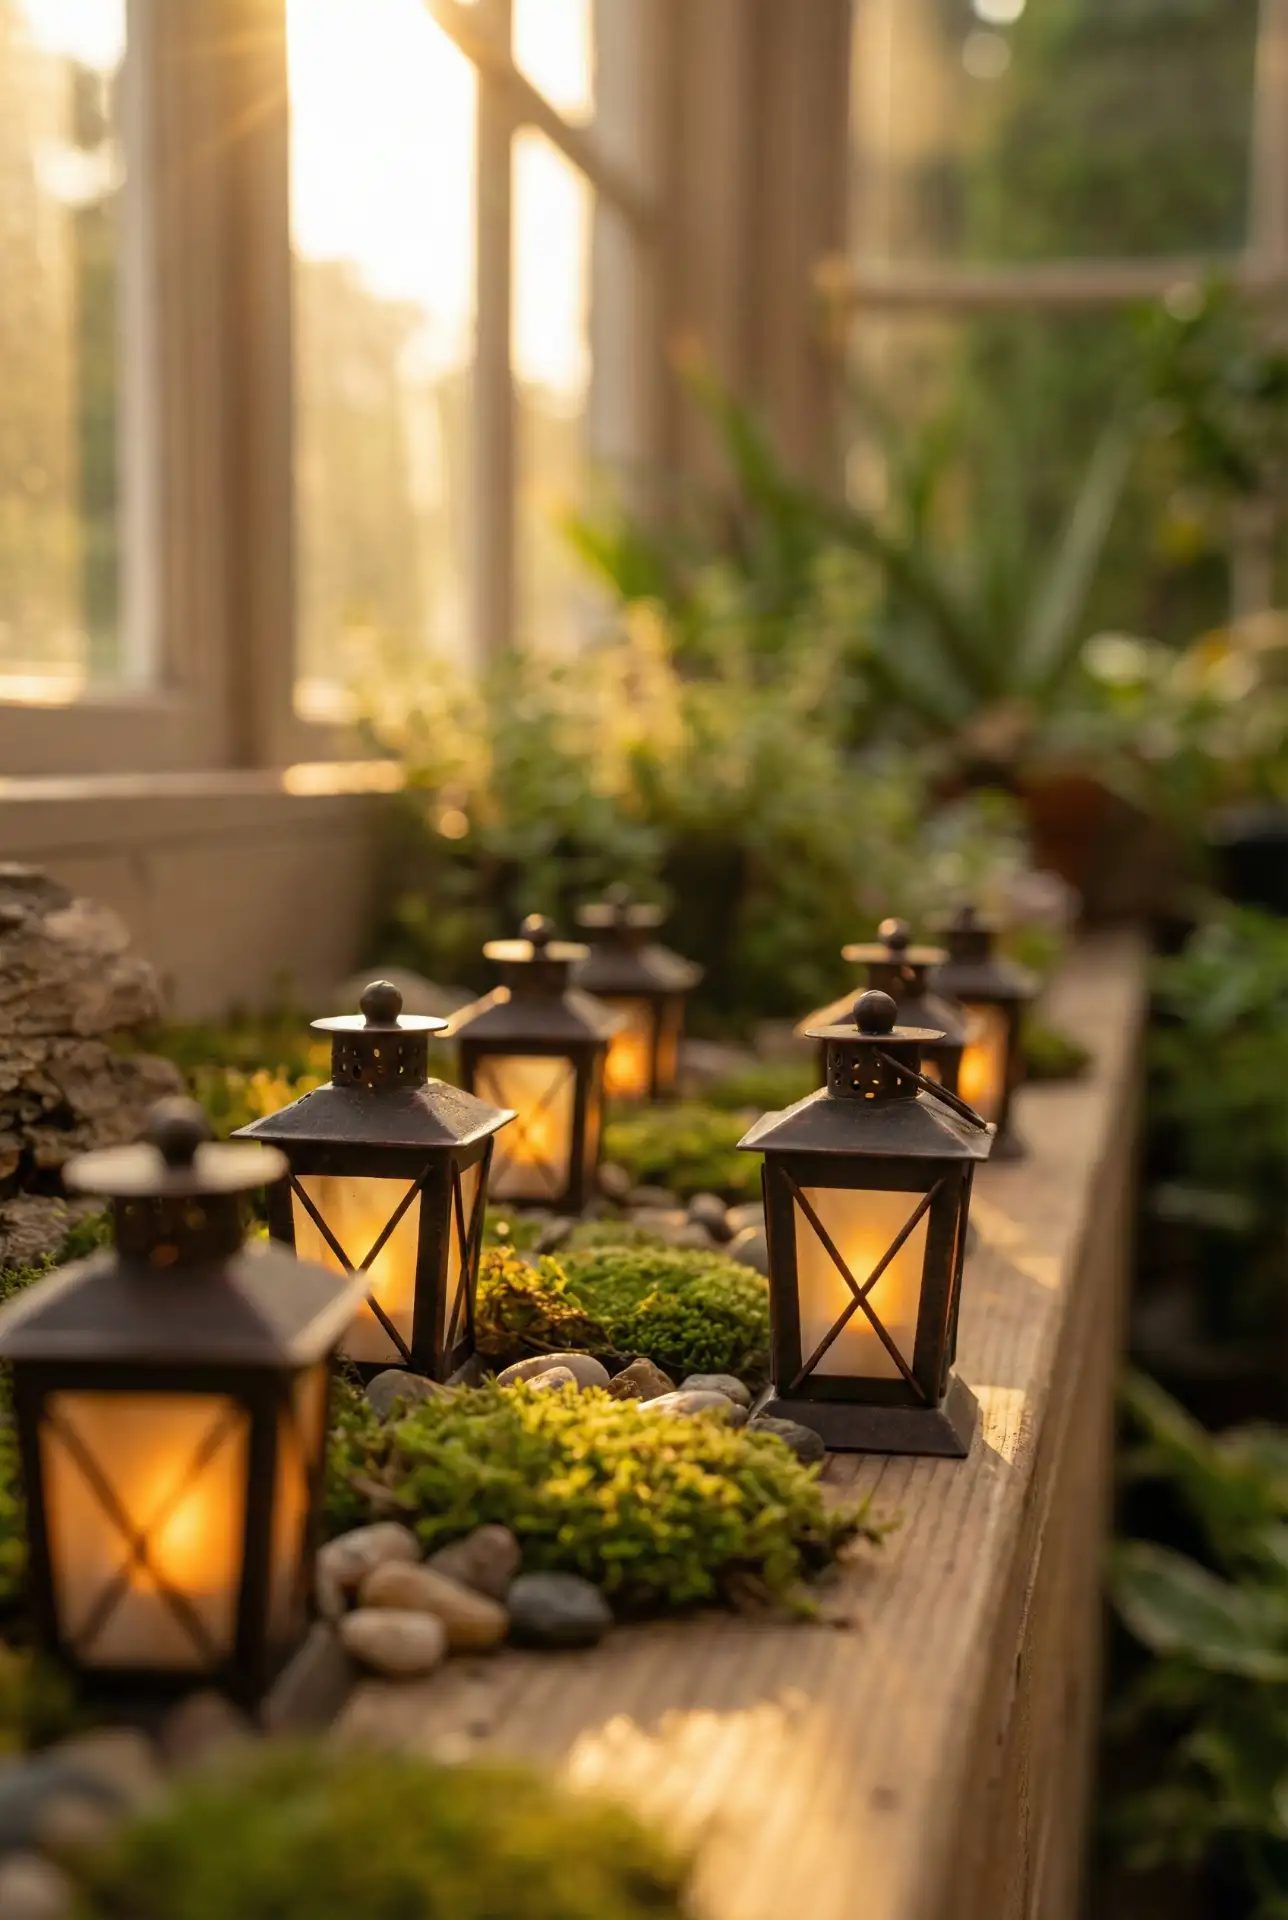
20. Outdoor Flower Bed Fairy Lantern Line
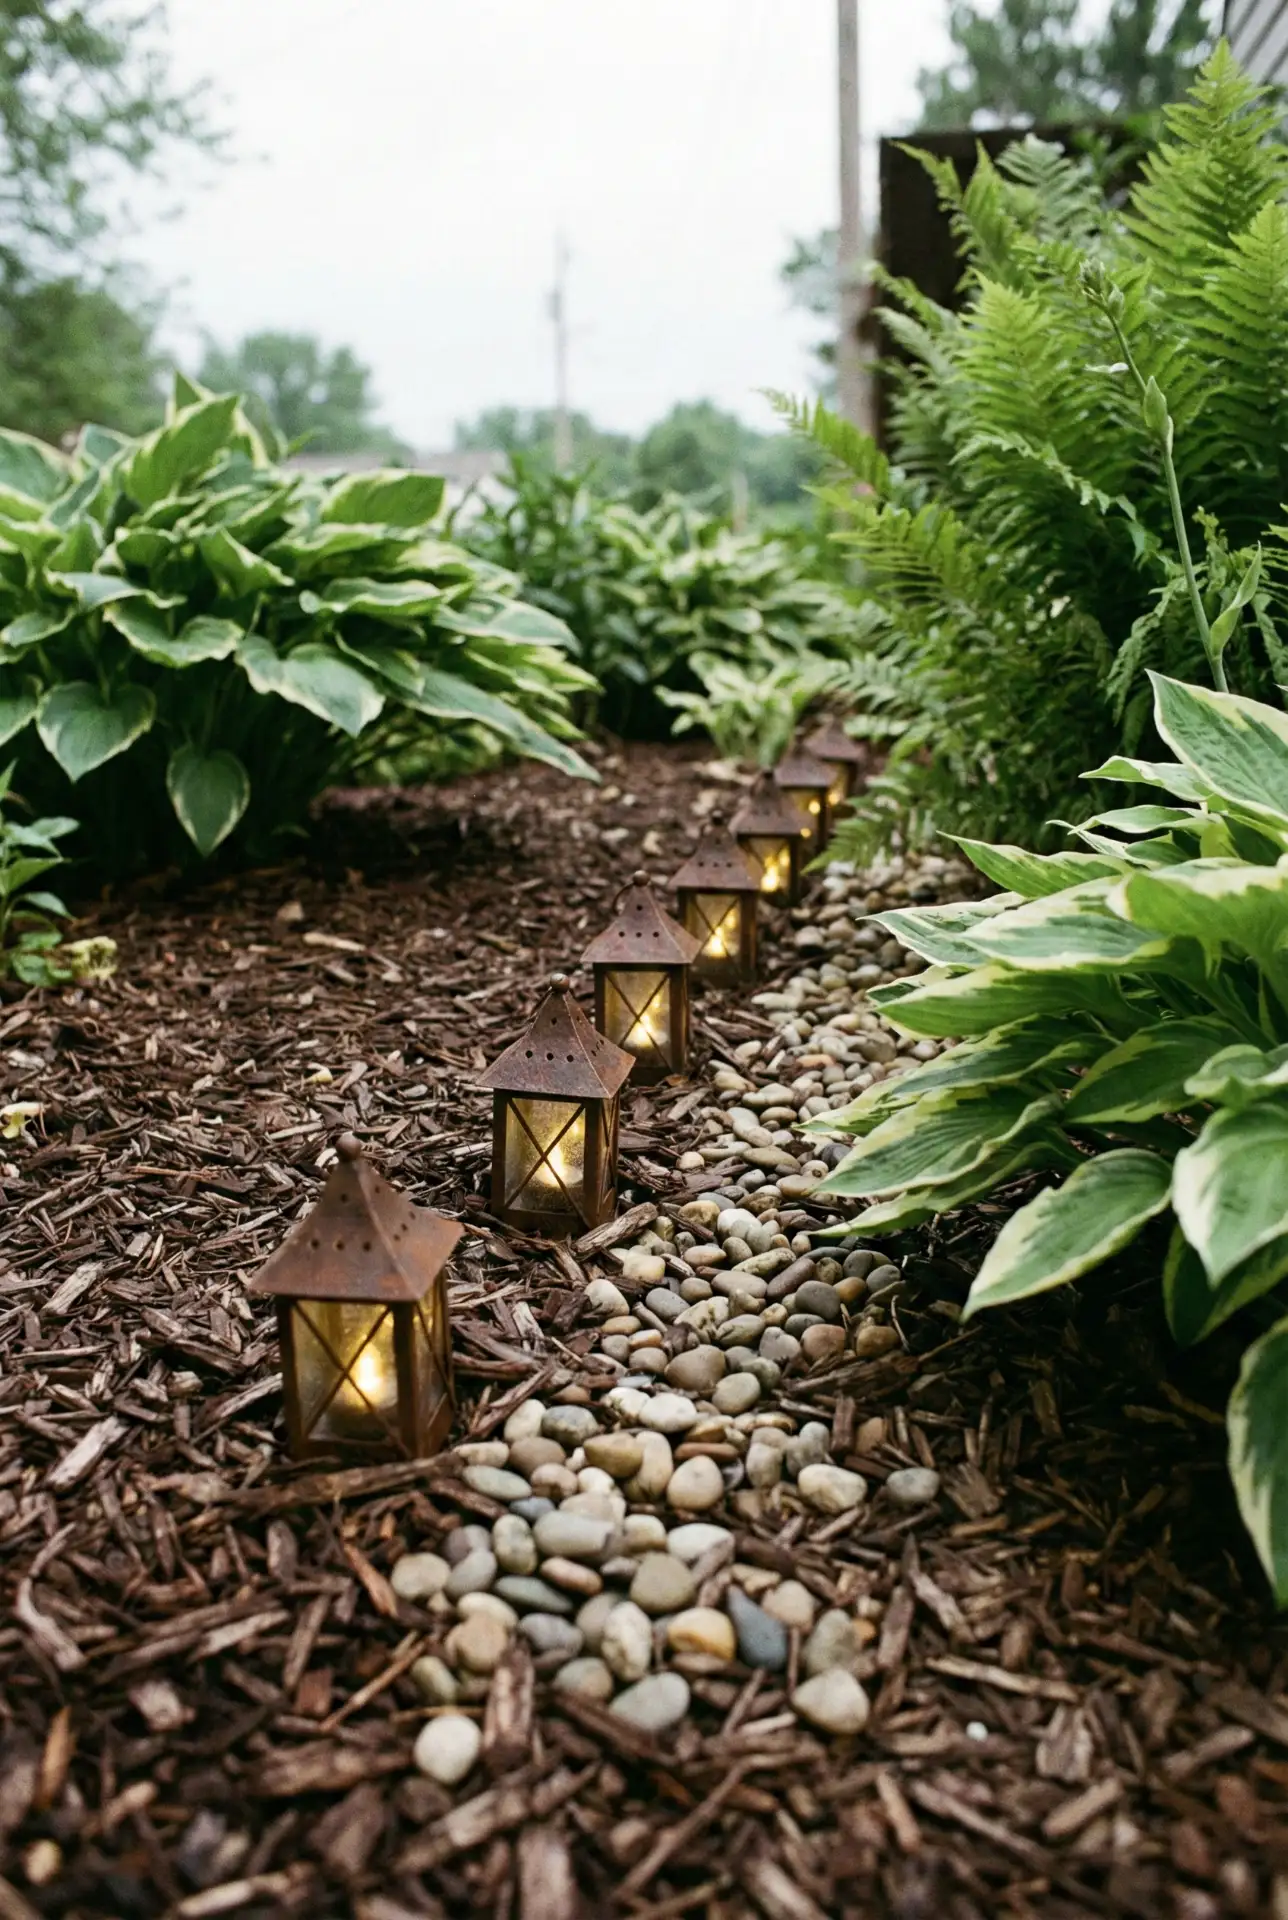
Turn an ordinary bed edge into a twilight story by spacing tiny lanterns along the mulch like a miniature runway. This works beautifully in an Outdoor flower bed where low plants can “hide” the bases, and it pairs naturally with Outdoor styling that already includes pathway lighting. Keep the accents minimal so the scene feels like a secret, not a display.
American lifestyle or regional context: in many U.S. suburbs, front beds are the most “seen” part of the yard, so a lantern line is an easy way to add personality without redoing landscaping. In windy or rainy regions, choose heavier resin or metal minis and nest them slightly into mulch so they don’t tip during storms.
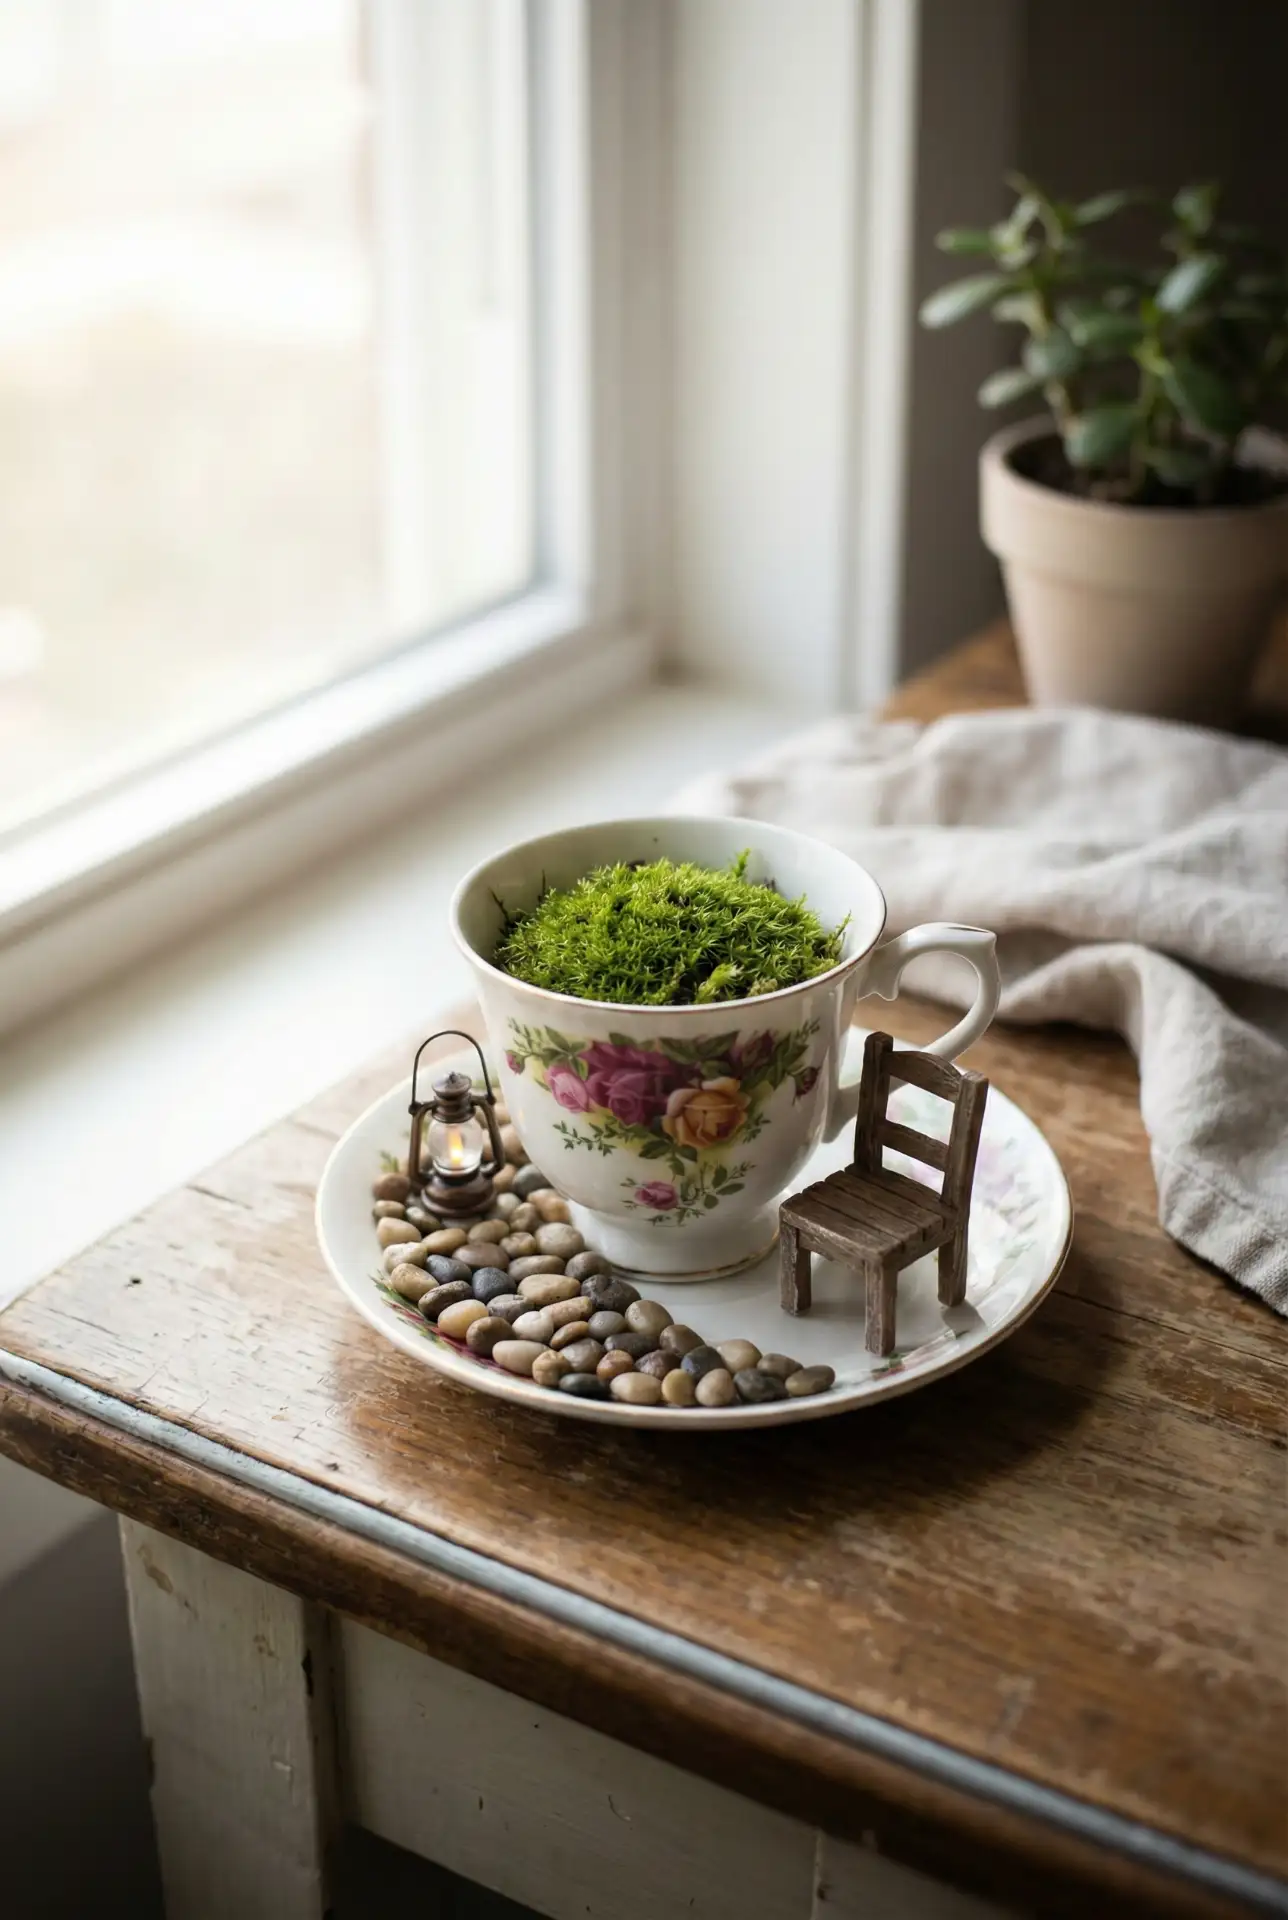
21. Indoor Miniature Teacup Fairy Reading Corner
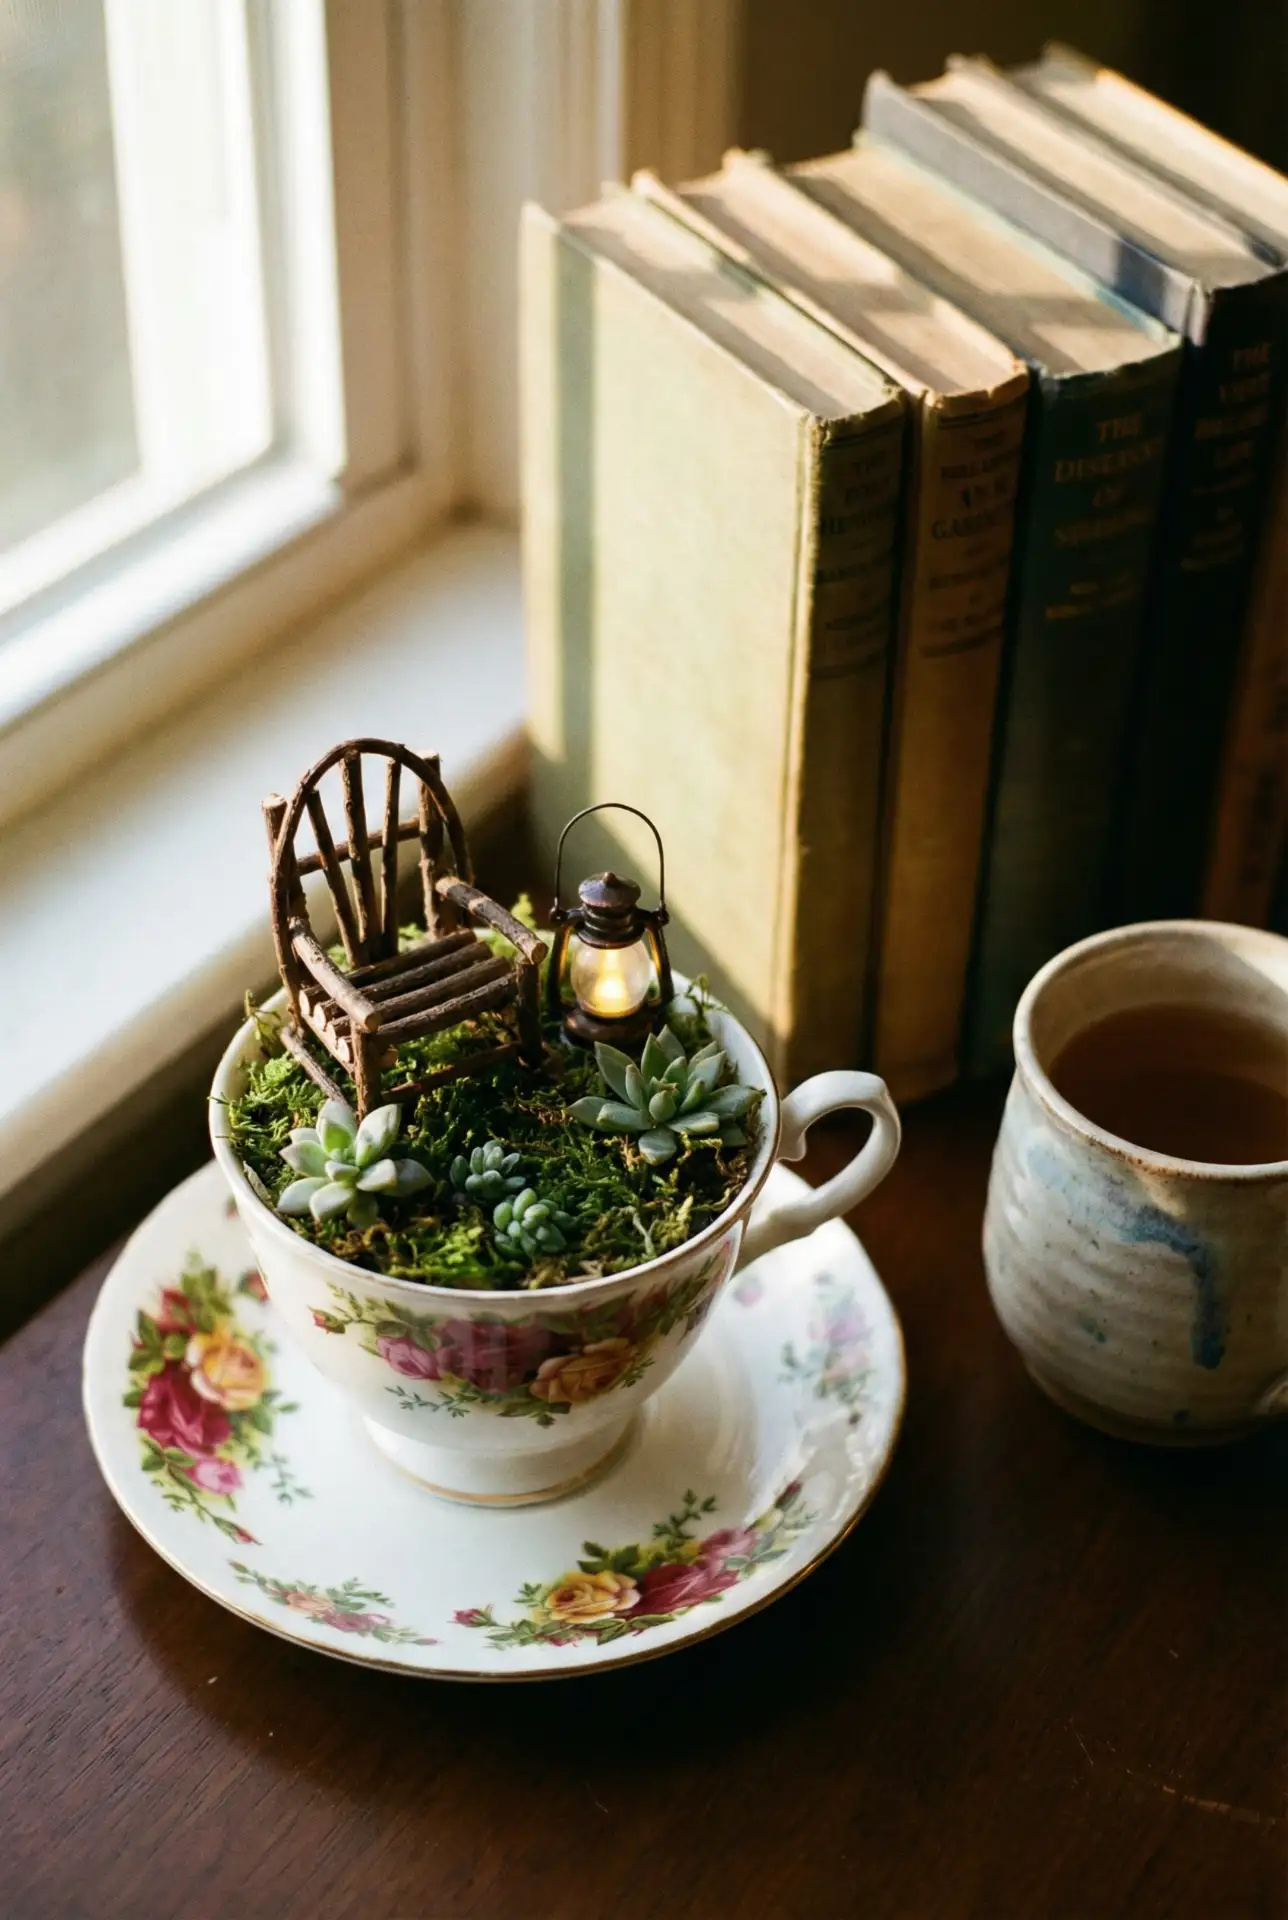
Create a cozy scene that feels like a tiny Sunday afternoon: a teacup filled with moss, a pebble “rug,” and a miniature chair with a tiny stacked-book detail. This Indoor idea works on nightstands, desks, or shelves because it’s contained, clean, and charming. Add a small faux plant for height so the vignette has a real focal point.

Micro anecdote: I once made a version of this as a hostess gift, and it landed better than flowers—because it felt personal and lasted. The trick is restraint: two or three tiny pieces max. When it’s not overloaded, the teacup reads elegant, like a little collectible rather than a craft project.
22. DIY Dollar Tree Miniature Supply Cart For Fairy Gardens
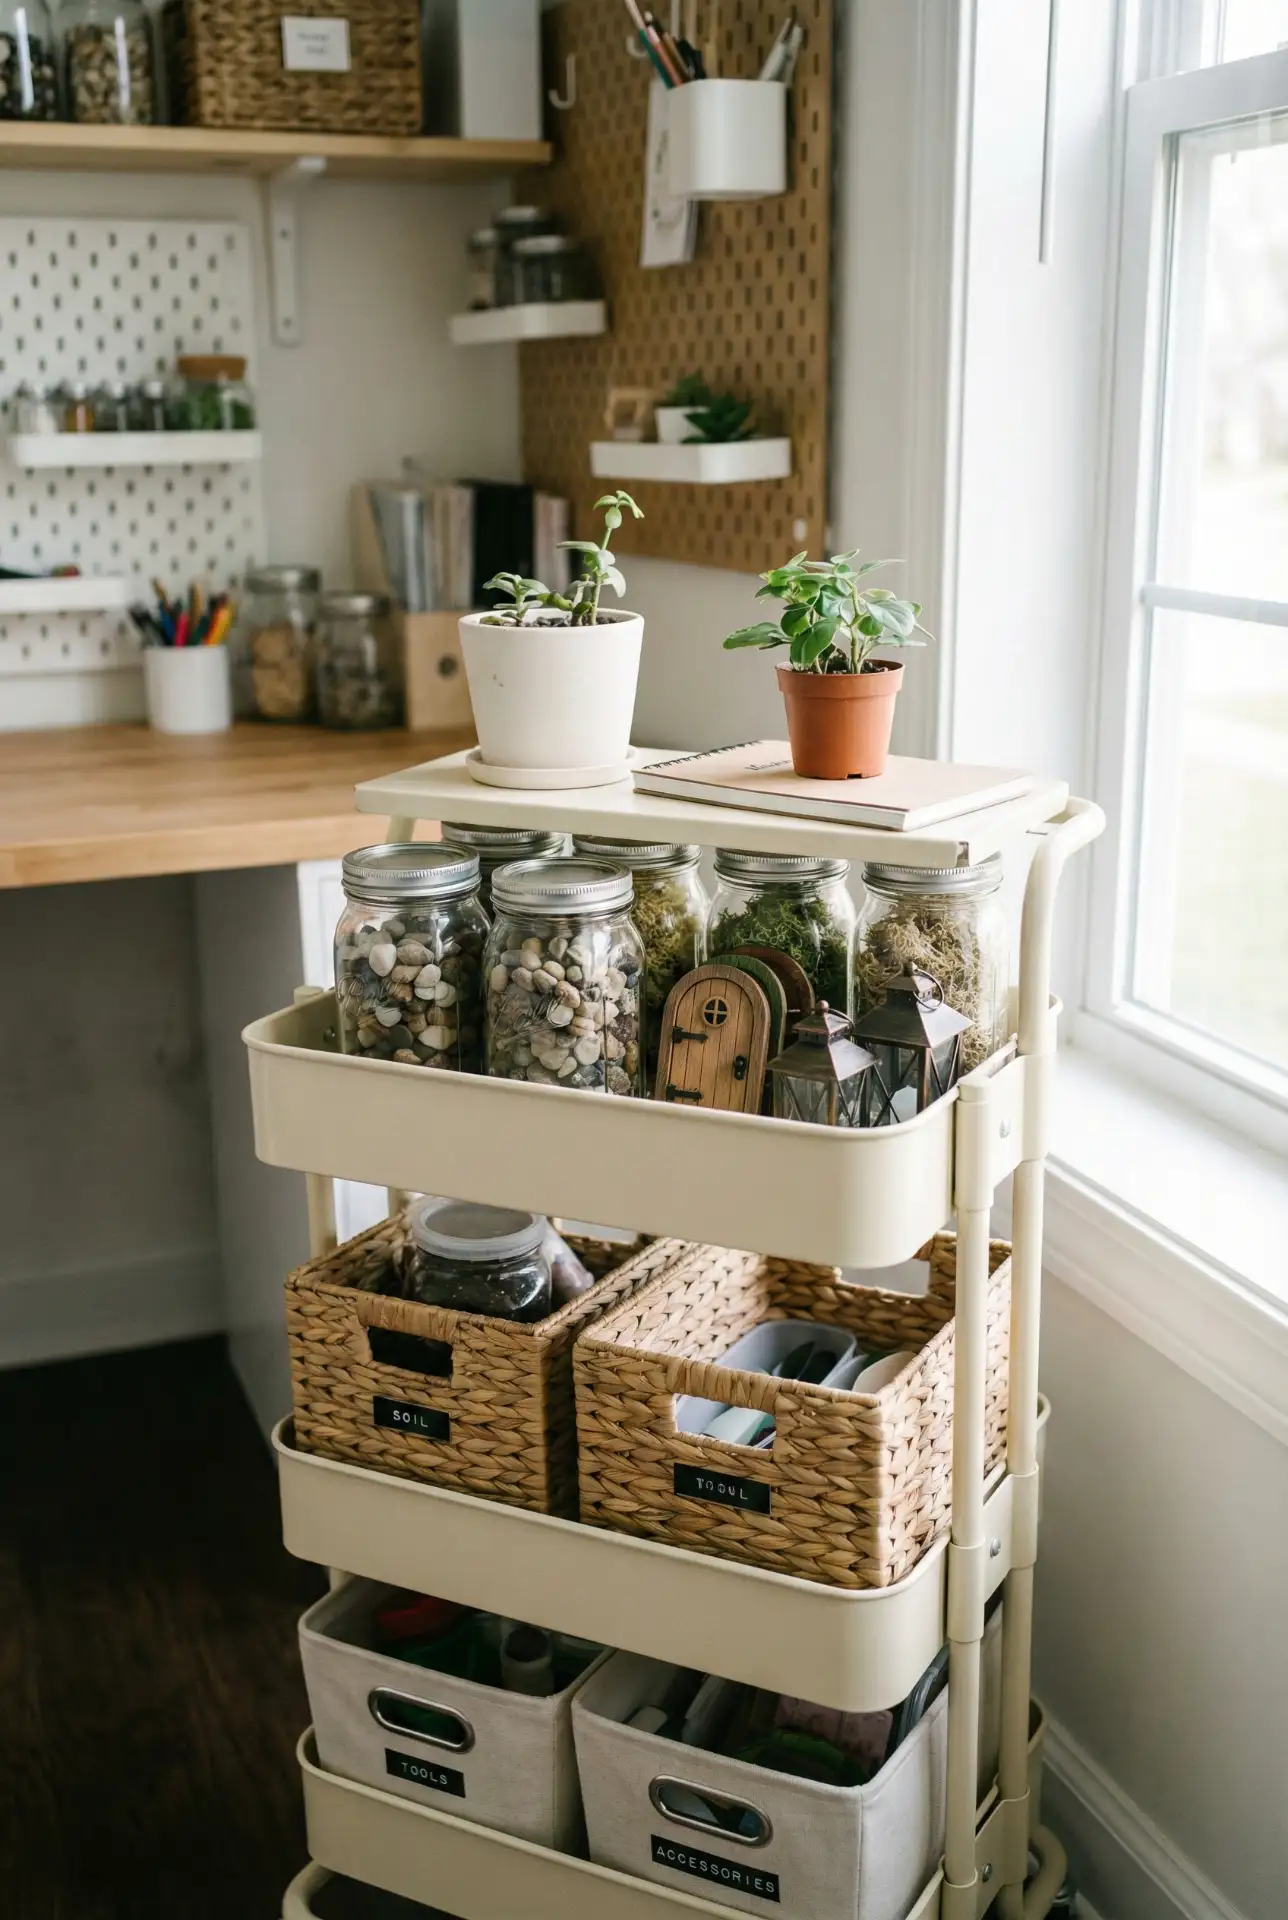
If you make fairy gardens often, the secret to staying creative is having materials ready to grab. Build a small rolling caddy using Dollar Tree bins and jars, then sort stones, moss, and minis by size. It keeps your next project Easy, and it’s especially helpful for quick Diy refreshes—like swapping seasonal accents without hunting through drawers.

Practical insight: store moss and natural materials in breathable containers so they don’t trap moisture and grow funk. Keep a small “current project” tray on the top level and everything else below—this prevents the cart from becoming a clutter magnet. When your system is simple, you actually use it.
Fairy gardens work because they’re small enough to start today, but imaginative enough to keep evolving—one tiny path, lantern, or seasonal swap at a time. If you try any of these fairy garden ideas 2026, tell me which setup you made and where you placed it, and share any clever materials you used. I’d love to hear what your “little world” looks like in the comments.