
Most green Christmas tree guides get it wrong — they show you a beautifully styled tree and never mention the ribbon width, the ornament ratio, or the $12 trick that actually made it work. We combed through Target, IKEA, and Michaels to bring you only what’s worth your attention this year, from $45 sets to $1,200 showpieces.
Inside are 21 curated ideas, from traditional red-and-white to flocked rustic, coastal teal, and jewel-tone maximalism — with budget and luxury versions compared side by side, and every idea shoppable. 2026’s shift is toward real, layered trees with generous ribbon and mixed texture instead of matchy-matchy boxed sets.
And stay until the end — we break down the most common mistakes that can ruin these looks. Some links here are affiliate links, which means we may earn a small commission at no cost to you. Save this post now — you’ll want it when you’re ready to shop.
1. A Green Tree Framed by Garland-Draped Glass Doors
The thing that makes this entryway sing isn’t the tree itself — it’s the white ribbon. Wide white loops woven through the branches pick up the white trim on the glass doors and the white baubles, so the tree reads as part of the architecture instead of a decoration parked in a corner. Take the ribbon away and the gold ornaments start competing with the dark wood pedestal table and the brown velvet ottoman, and the whole corner goes heavy. Keep it, and everything from the garlands over the staircase to the red-berry wreaths feels like one continuous thought.
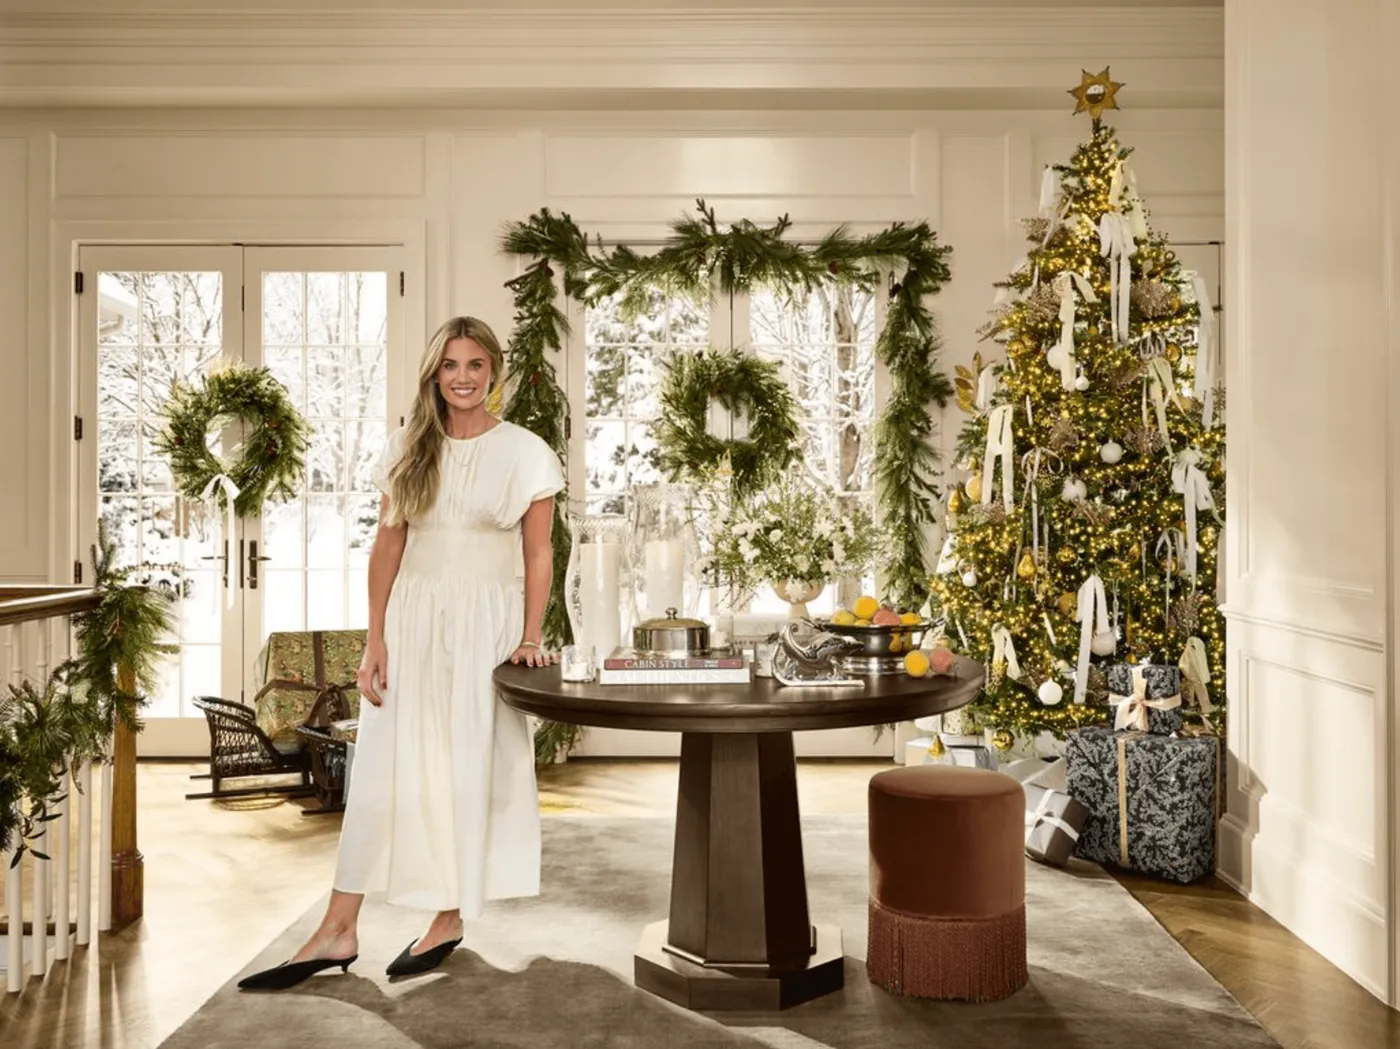
This setup needs room to breathe: a foyer or entry of at least 8 x 10 feet with 9-foot ceilings, plus about 30 inches of clear walkway on both sides of the tree. A 7- to 7.5-foot tree is the sweet spot — anything taller crowds the staircase garland. If your entry is narrower than 8 feet, borrow the mood from Idea #10, where a dark green tree works in a snug corner. Tall entries can go to 9 feet and still keep the garlands visible above the doorframes.
2. Beaded and Velvet Ornaments, Seen Up Close
Here’s the rule behind those two ornaments: pair one light-absorbing finish with one light-throwing finish in every cluster. The velvet segments swallow the glow from the warm bulbs, while the beaded sphere and the iridescent bands bounce it back. On a 7.5-foot tree, hang ornaments at least 3 inches wide on the outer third of the branch — no deeper than 6 inches — or the silhouette goes flat. Leave 8 to 10 inches between clusters so the lights stay visible.
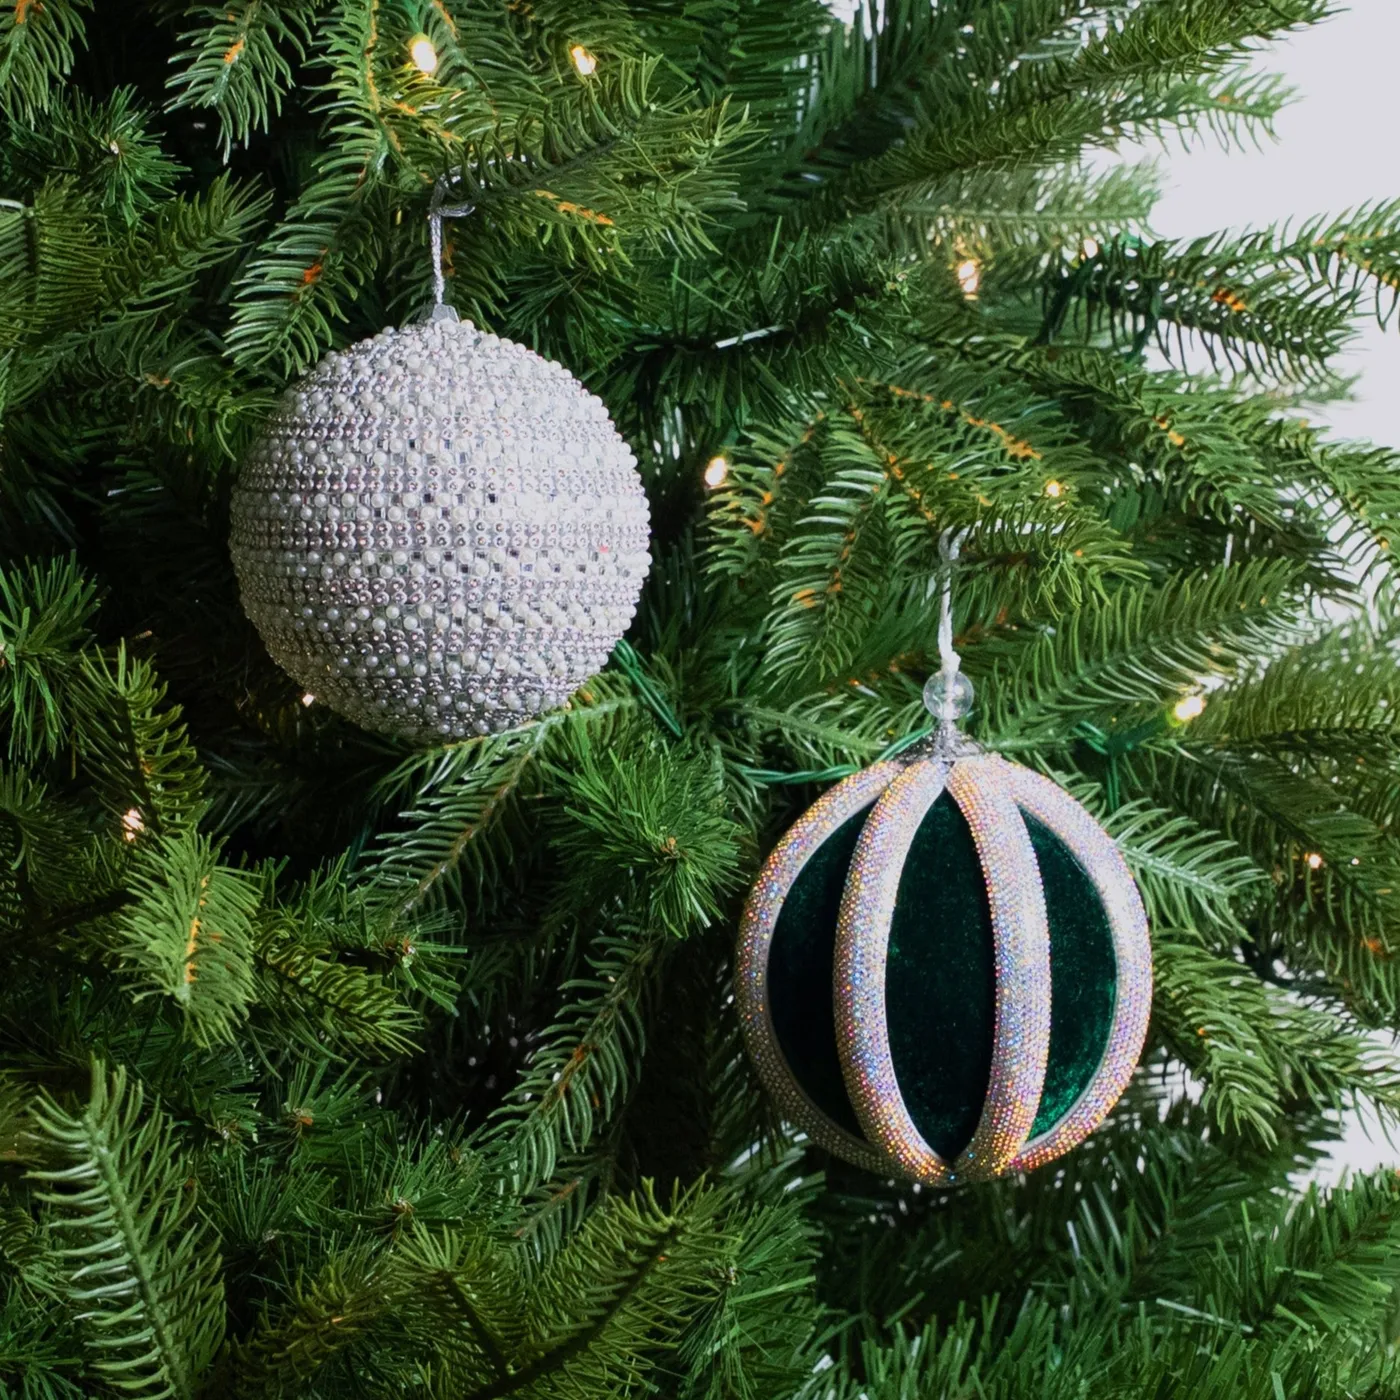
Three things are doing the work. Material contrast comes first — matte velvet against beaded and iridescent surfaces creates depth without adding a single new color. Second, cool silver against a deep green base: the two sit close enough on the wheel that nothing fights, but the metallic keeps the green from going flat. Third, warm white bulbs rather than daylight white, which is exactly why the green reads rich instead of gray. Swap the bulbs and the whole branch turns cold in photos.
3. Emerald, Gold, and Black-and-White Striped Ribbon
The formula here is roughly 60% green (tree, emerald velvet ribbon, green ball ornaments) + 25% gold (glitter ribbon, gold baubles) + 10% white (the fluffy skirt, white ornaments) + 5% black-and-white stripe. That last 5% is the entire reason this tree looks designed instead of decorated — it’s the only high-contrast element in a room with soft gray walls. To swap it: hold the 60/25/10 and trade the stripe for a thin navy gingham, or for blush ribbon if your walls are warm white rather than gray.
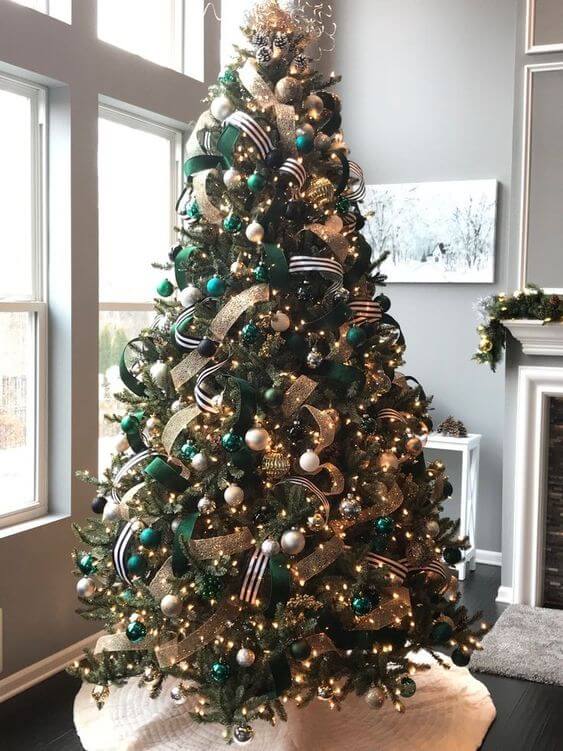
Gray walls are gorgeous with emerald, but they pull warm white lights cooler than you expect. Turn the tree on before you commit to the room’s overhead lighting. The fluffy white skirt is the other thing to know: it photographs beautifully and collects every bit of pet hair, glitter, and needle drop. Shake it out weekly and hit it with a lint roller; a flat cream linen skirt gives you 80% of the look with a fraction of the upkeep.
Ribbon is what separates this tree from a store display, and it’s a 45-minute job with about $30 of ribbon.
- Buy three ribbons in different widths: 4-inch gold glitter, 2.5-inch emerald velvet, and 1-inch black-and-white stripe — about 10 yards each for a 7.5-foot tree.
- Start at the top and work down in a loose spiral, tucking rather than wrapping.
- Push the ribbon into the branches every 8 to 10 inches so it looks woven, not draped.
- Layer the stripe ribbon last, over the wide gold, in short 12-inch runs.
- Step back and check that you can see ribbon from every angle.
4. Teal Seashells and Frosted Pinecones on a Coastal Tree
Coastal Christmas used to mean starfish and rope. In 2026 it’s more interesting: teal seashells and frosted pinecones on the same branch, a beach motif filtered through a blizzard. It’s part of a bigger move toward region-blending — designers are mixing two themes that shouldn’t work and letting texture hold them together. The payoff is that this tree doesn’t read as a theme tree, so it doesn’t feel dated by January. Nothing in it is a trend you’ll have to apologize for in three years.
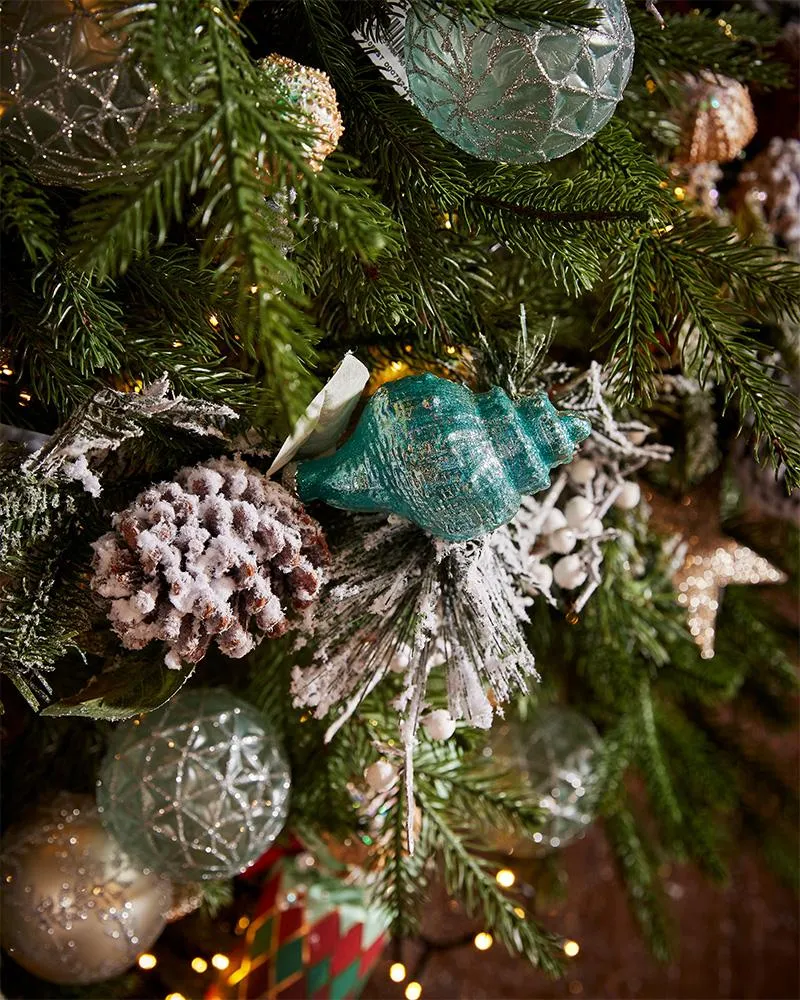
Two contrasts hold it together. The first is temperature: warm yellow bulbs against cool teal and frosted white keep the tree from reading like an aquarium. The second is texture — matte pinecones and frosted berry clusters next to smooth, glittery glass. That’s the same matte-versus-shine principle at work in Idea #2, just with a coastal vocabulary. If you copy only one thing, copy the frosted berry clusters; they soften the hard edges of the glass ornaments.
5. A Heavily Flocked Tree Dressed in Burlap and Plaid
You don’t need a $700 flocked tree for this. Walmart’s 7.5-foot flocked trees run about $99 in season, and a roll of burlap plus a roll of plaid is roughly $20 at Michaels with a coupon. Pinecones are free if you gather them on a walk and bake them at 200°F for an hour to kill anything living in them. Bells and brass ornaments turn up constantly at thrift stores for $1 to $3 each. Total spend for the whole look: $180 to $250, versus $900+ for the designer version.
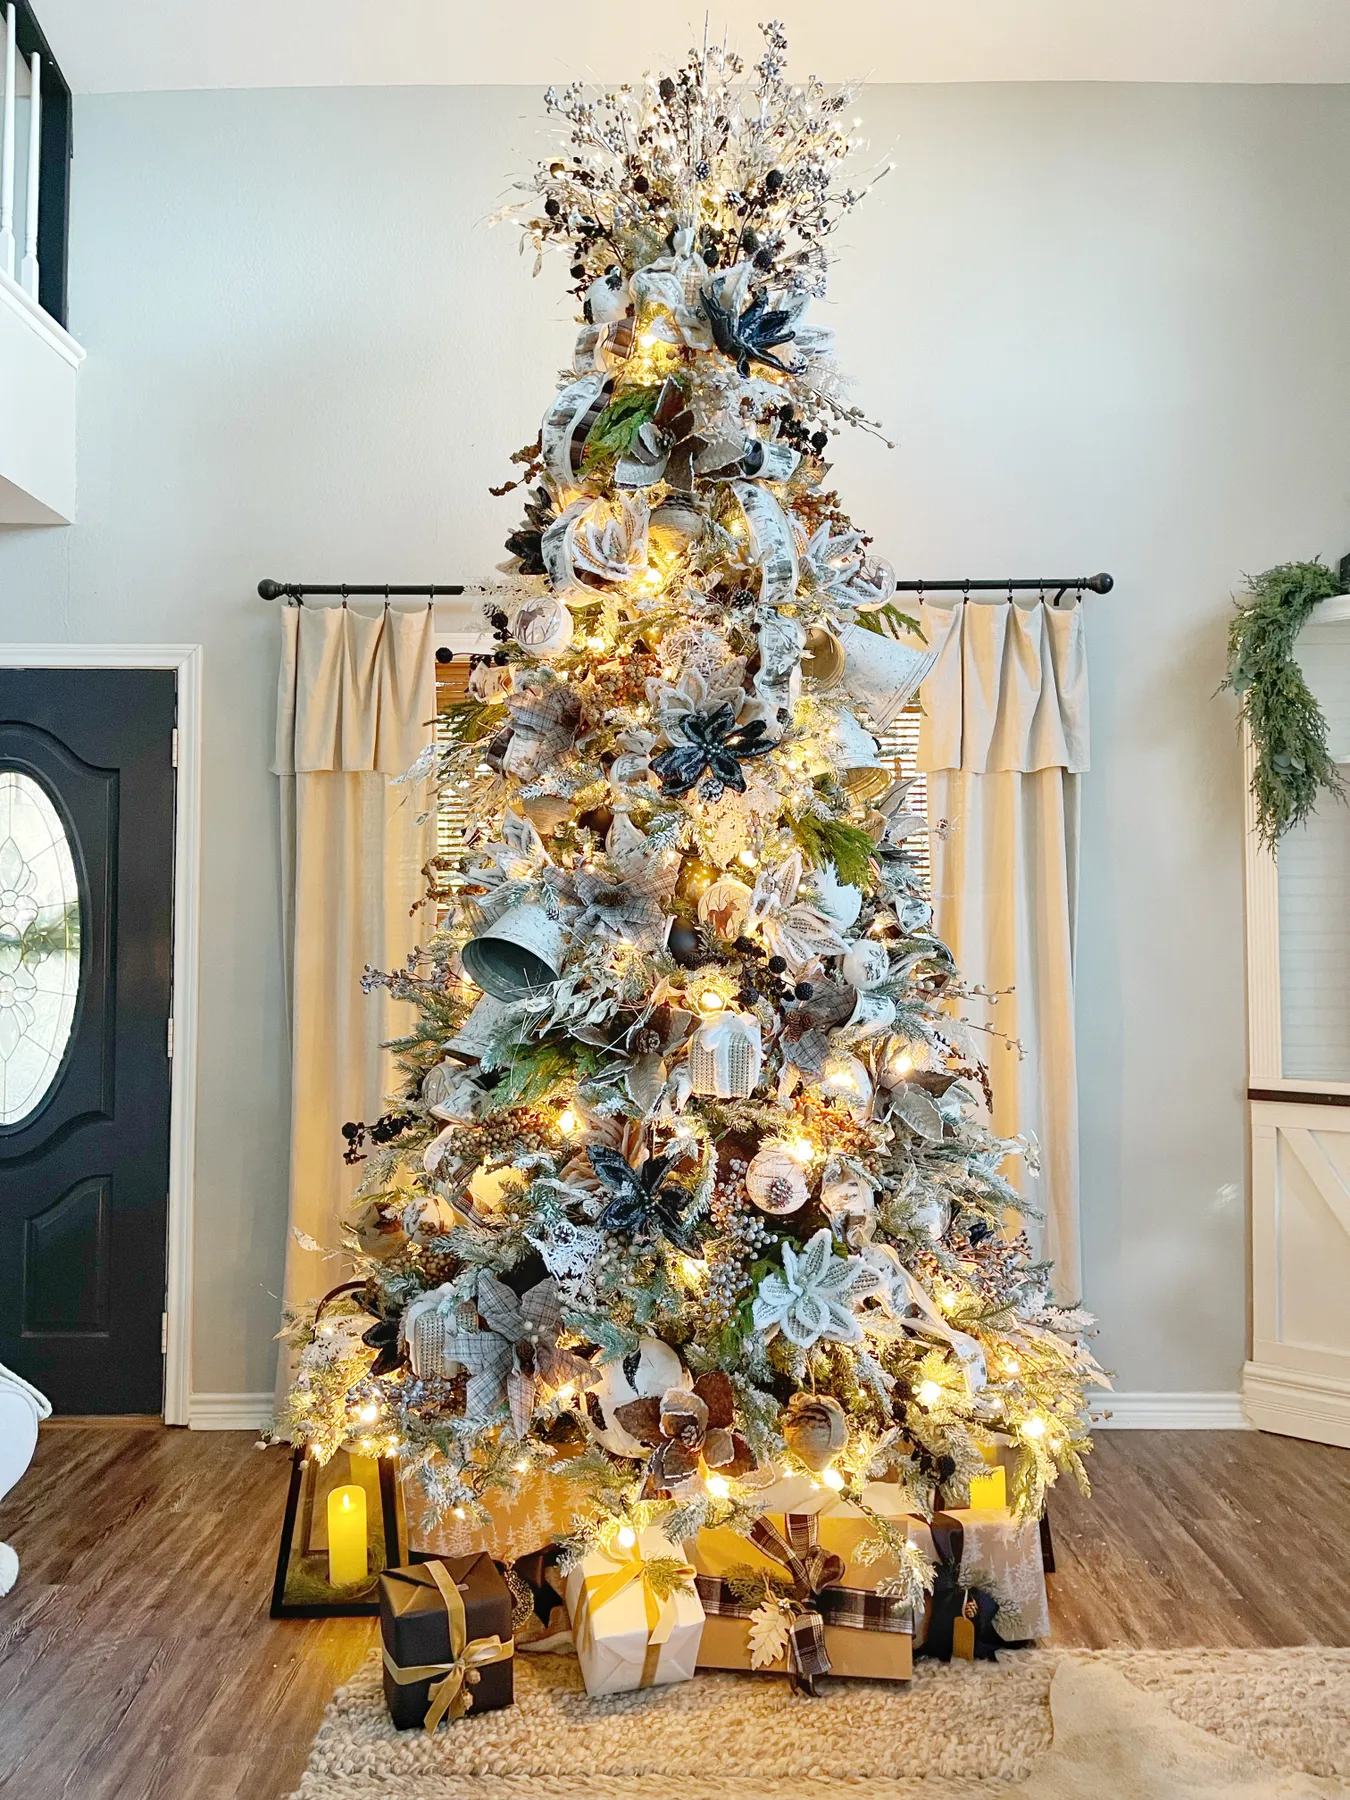
Flocking sheds. Expect a light dusting of white on your rug every time you move the tree, and vacuum with a brush attachment rather than a beater bar. Burlap also sheds fibers and gets fuzzy with handling, so keep it off the high-traffic side of the tree. Store plaid ribbon rolled, never folded — creases in a wide plaid are nearly impossible to steam out. If shedding would drive you up a wall, a plain green tree with the same plaid and burlap reads 90% as cozy.
A quick ribbon formula: multiply your tree’s height in feet by 0.5 and you get the widest ribbon that will read properly. A 7.5-foot tree tops out around 4 inches; a 9-foot tree handles 4.5 to 5. Any wider and it looks like a gift-wrap accident. Also, anchor plaid and burlap with a wired edge — unwired burlap droops within a day and you’ll be re-tucking it all December.
6. Green and Champagne Beside a Natural Wood Bay Window
The move you’d miss if you removed it: the tree isn’t the only green thing in the room. Sage-green patterned pillows on the window seat and a glass vase of green foliage on the dining table repeat the tree’s palette at two other heights. That repetition is what makes this read as a designed room rather than a tree that happens to be standing in one. Take the pillows and the centerpiece away and you’d have a very pretty tree in a beige dining room. The echo is the idea.
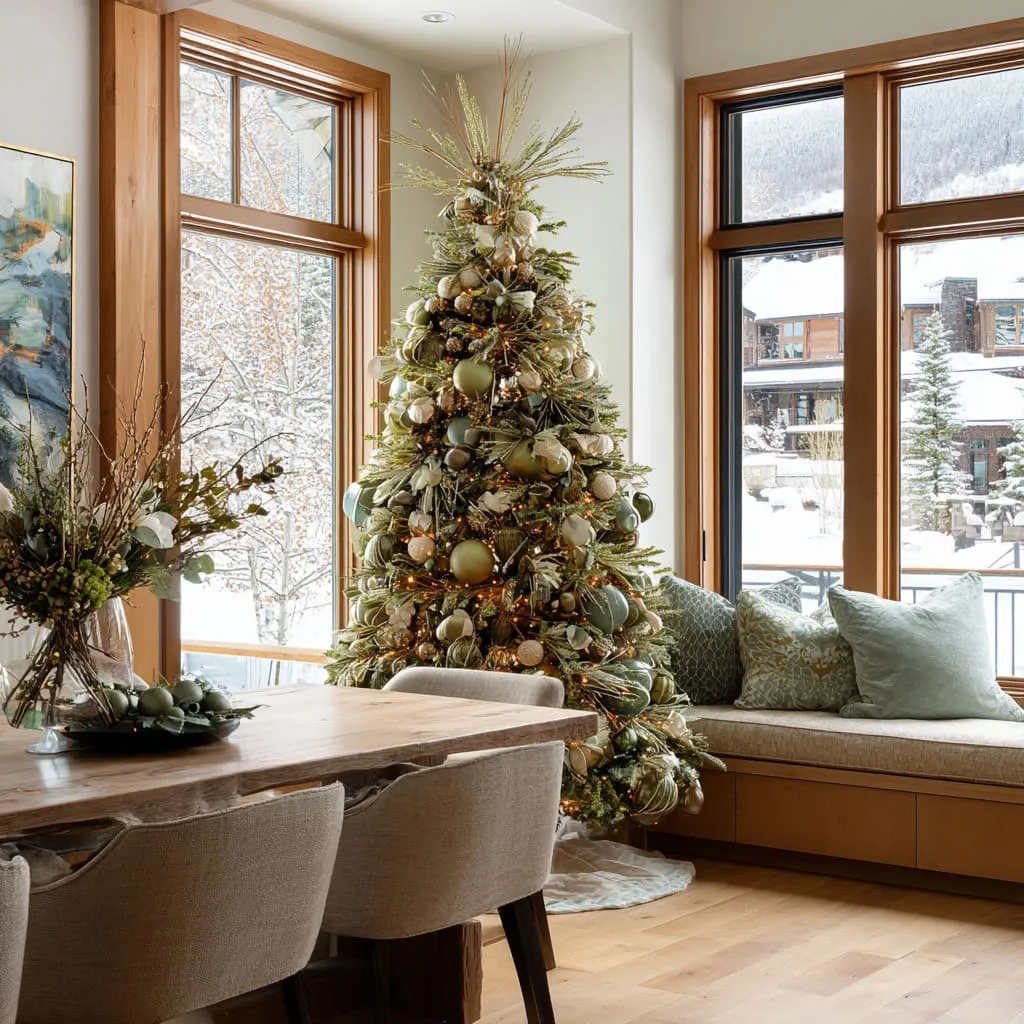
This one needs a dining room, or at least a dining zone, of about 12 x 14 feet so the tree can sit beside the bay without blocking the table. Nine-foot ceilings are plenty; the bay is doing the real work, adding depth and daylight that make champagne ornaments sparkle. Below 11 feet wide, move the tree to a corner and keep the chairs clear. For smaller dining spaces, the kitchen-island approach in Idea #12 delivers the same festive feel in half the footprint.
7. Glitter Teal and Glossy Emerald Ball Ornaments
Ball ornaments read best when they follow the tree’s own weight: 4-inch balls at the bottom and on the outer branches, 2-inch balls toward the top and pushed slightly inward. Anything else makes a 7.5-foot tree look top-heavy. And buy one color in three finishes — glossy, glitter, matte — rather than three shades of green. Same color, different finish is what makes a monochrome tree look expensive, and it’s the cheapest way to fake a designer tree using a box-store ornament set.
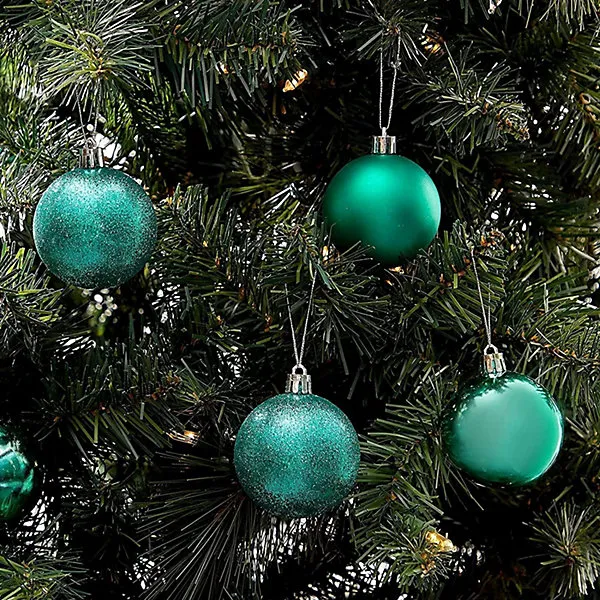
Strip it down and this is 70% dark green base + 20% teal-and-emerald ornaments + 10% sparkle, which here comes from glitter texture and silver hangers rather than from ribbon or garland. That 10% does all the work: without glitter, dark ornaments on dark needles simply disappear. To swap colors, hold the 70/20/10 and move the accent to burgundy or copper — the formula travels. Just never let the accent exceed a quarter of the tree, or the base stops reading as green at all.
8. A Maximalist Gold Tree with Sage Ribbon Bows
What makes a crowded tree feel intentional instead of chaotic is repetition of one small element. Here it’s the sage green ribbon bows, placed at roughly even intervals. Your eye catches one, follows it around the tree, and a hundred gold ornaments become texture instead of noise. The glass spike topper does the same thing vertically — it’s narrow, so it never competes with the tree’s width. And the white walls and multi-pane windows give all that gold a clean, quiet backdrop. Busy tree, calm room.
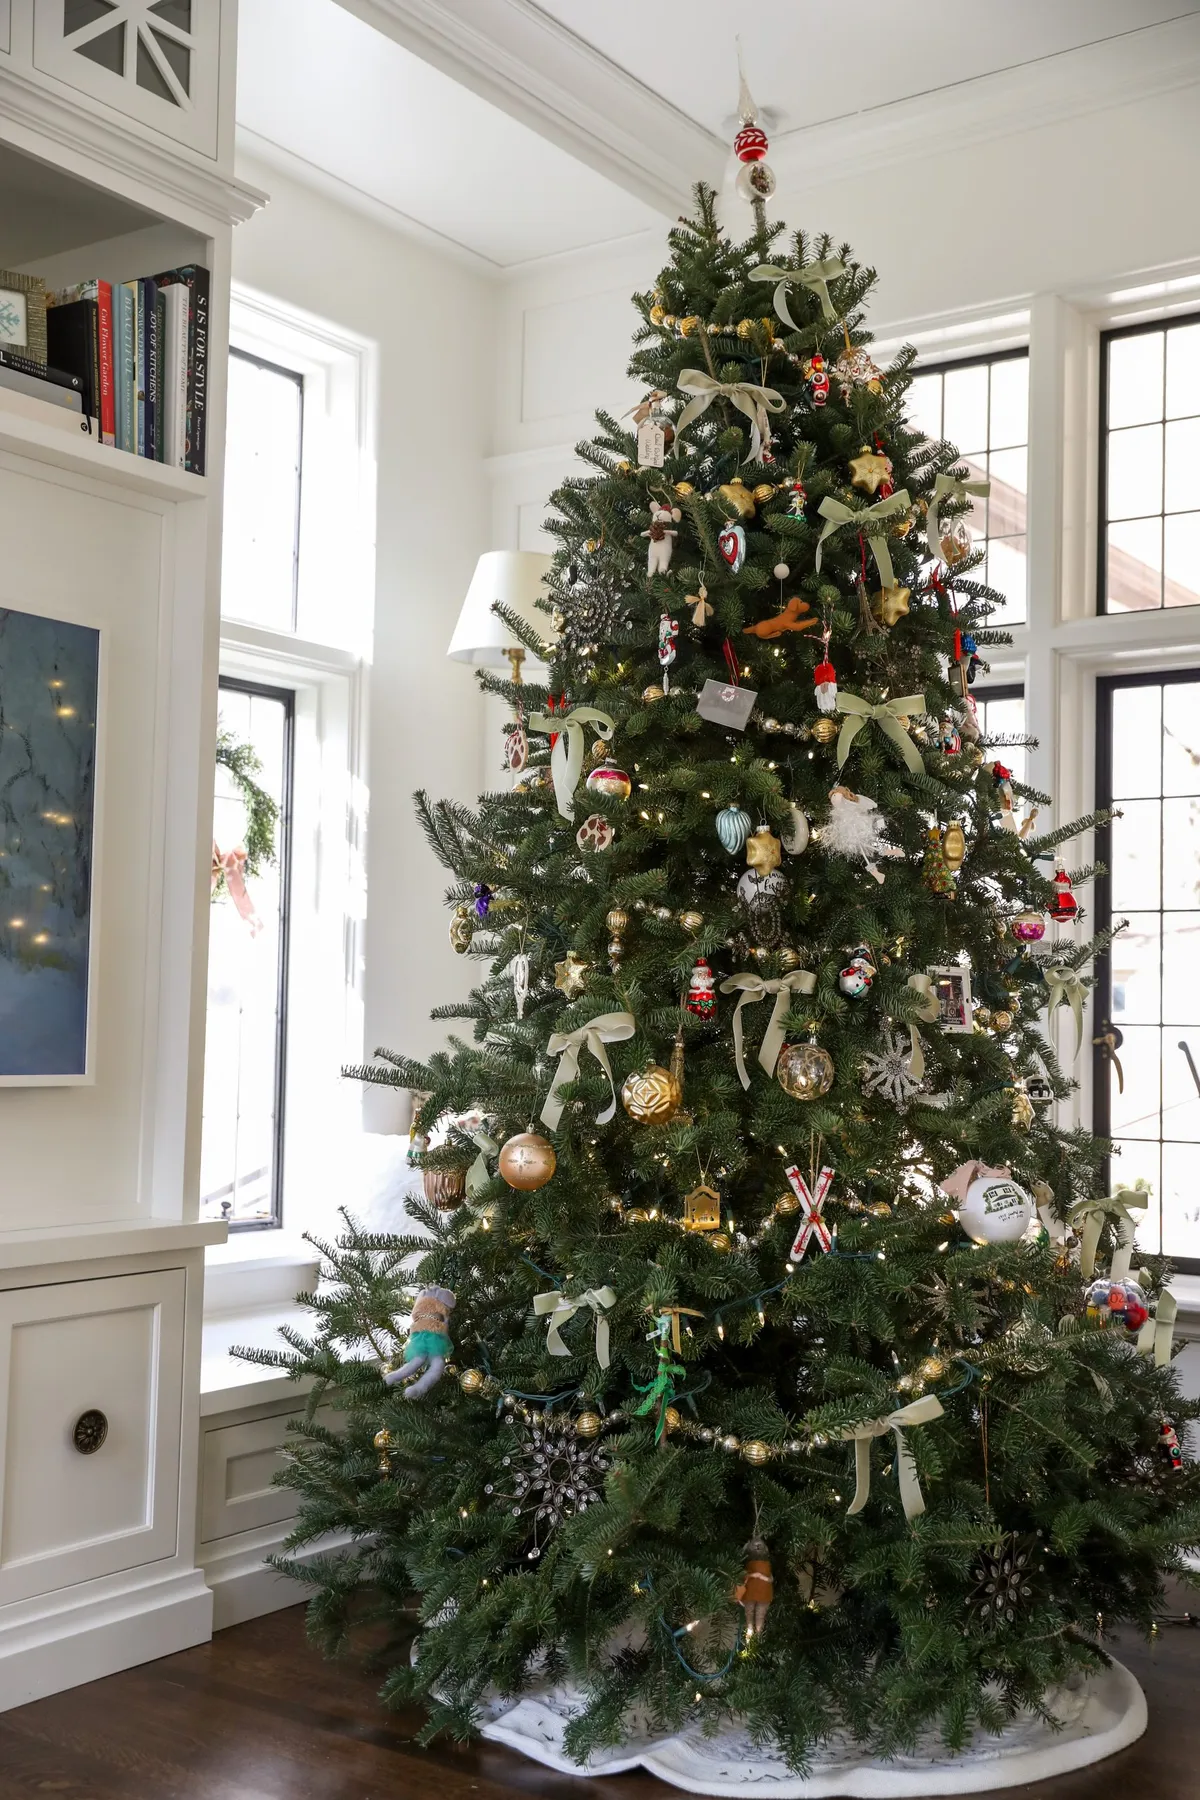
- Full 7.5-ft green tree: $150–$400
- Ornaments, roughly 150 mixed gold and metallic pieces: $120–$300
- Sage green ribbon, 2.5-inch, 4 rolls: $30–$60
- White embroidered tree skirt: $40–$90
- Glass spike topper: $25–$70
- Warm white string lights, 600 count: $25–$45
Total: $390–$965. Budget alternative: buy gold ornaments in bulk thrift lots (often $5 a bag), use IKEA ribbon at $3 to $5 a roll, and skip the embroidered skirt for a flat white cotton one — about $180 for the same density.
Density has a cost. A hundred-plus ornaments adds real weight, so check your tree’s branch rating and spread heavy pieces across multiple branches rather than clustering them in one spot. Storage is the other issue — this is a two-bin tree, minimum. And a glass spike topper is top-heavy; on a tree with pets or toddlers, swap it for a felt star until they’re older. Nothing here is hard to live with, it’s just not a five-minute pack-up.
9. Deep Green Velvet Ornaments on Gold Chain Hangers
The gold chains are the whole idea. Take them away and you’ve got a dozen dark green ornaments that vanish into a dark green tree — you’d lose the ornament entirely. The chains do three jobs at once: they lift each piece off the needles so light passes behind it, they add a vertical line, and they echo the warm bulb glow so nothing feels stuck on like a sticker. If you’re buying one thing for a monochrome green tree, buy cord or chain hangers, not more ornaments.
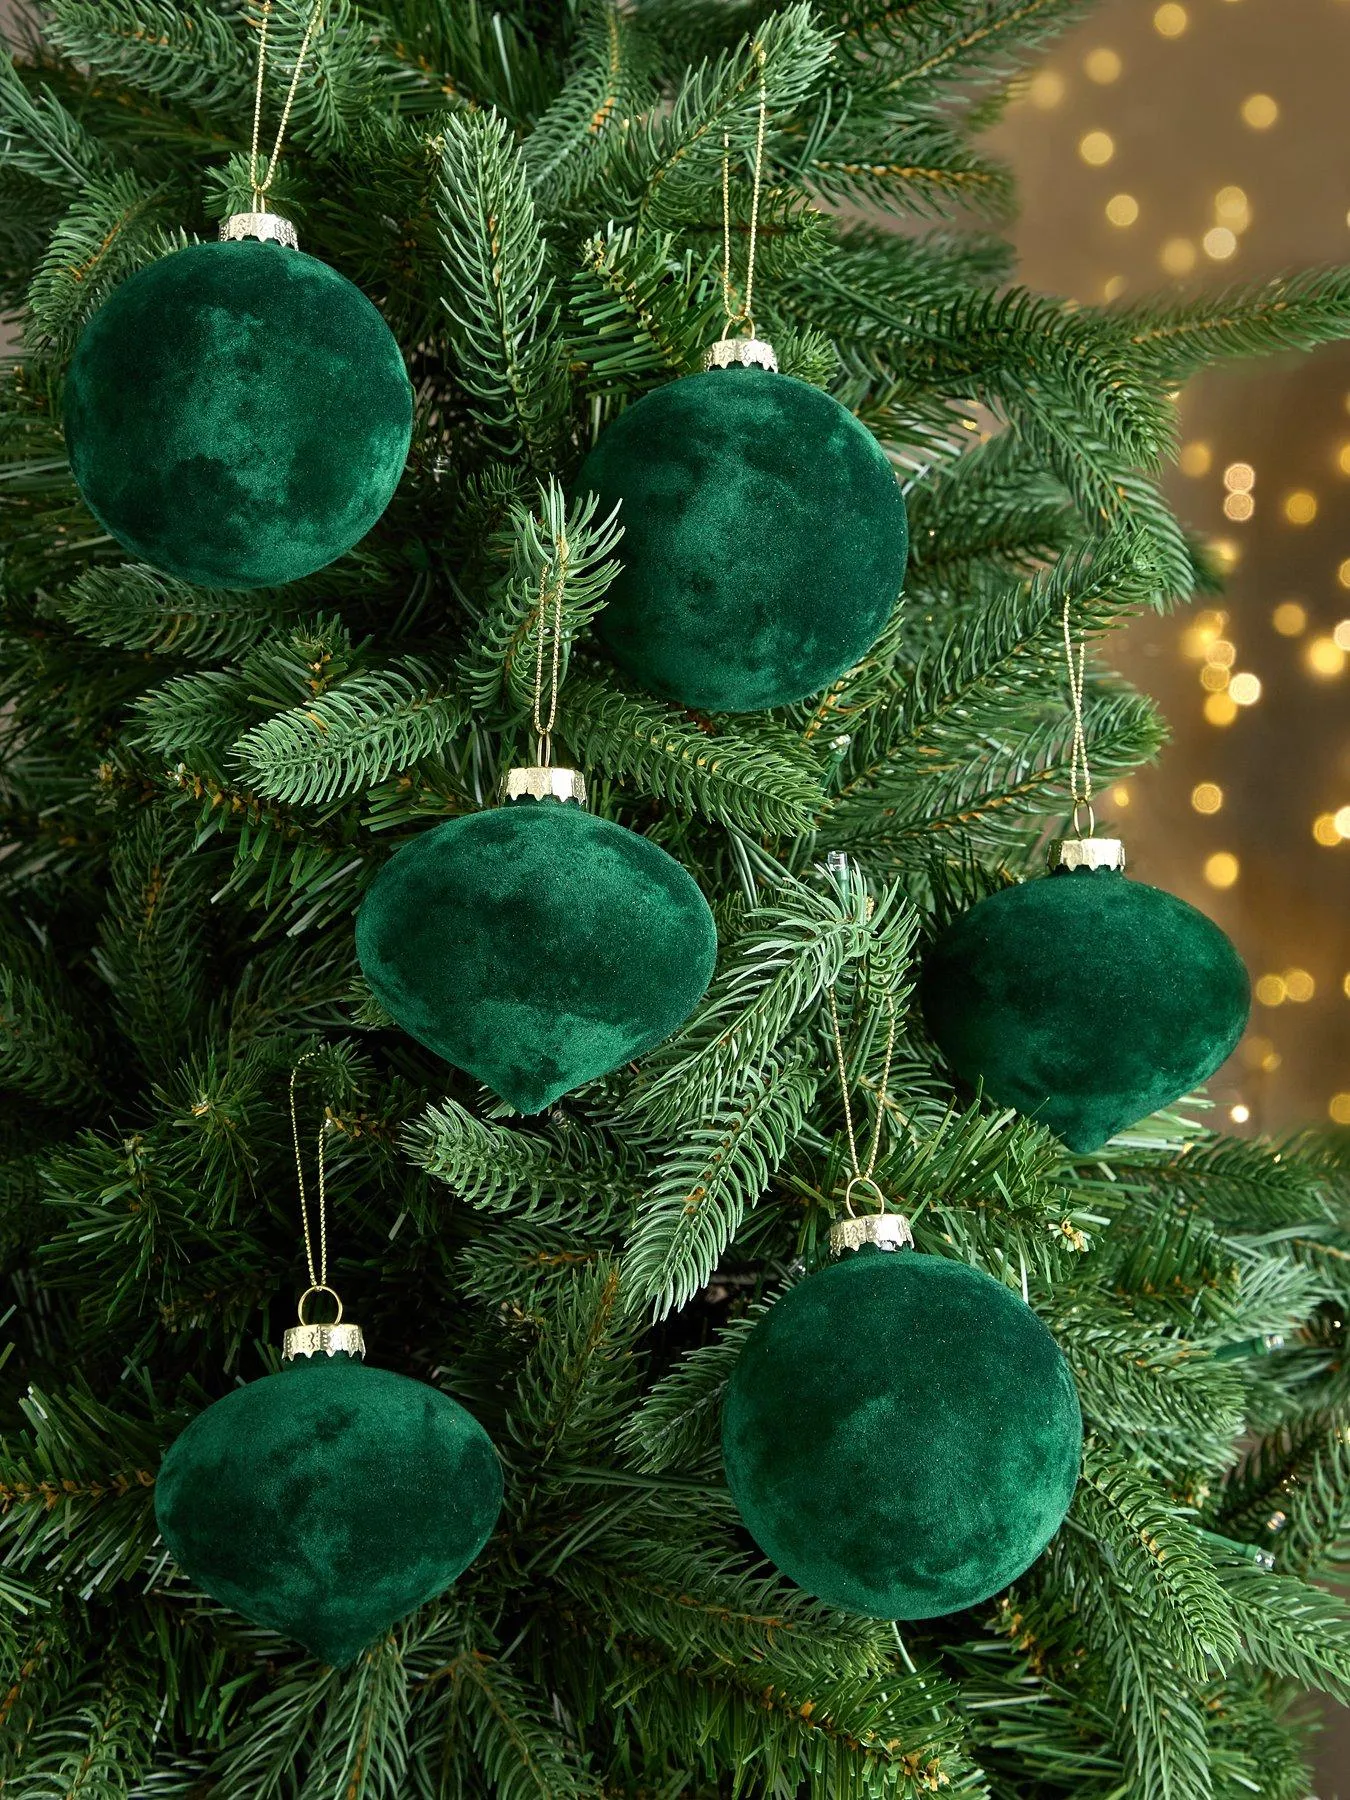
Velvet-wrapped baubles with chain hangers are a two-hour DIY, roughly $25 for a dozen.
- Start with smooth foam or paper-mâché ball forms, 3 to 4 inches.
- Cut stretch velvet into strips and wrap them around the form, overlapping and gluing as you go.
- For teardrops, use an egg form and taper the strips to a point at the bottom.
- Glue a small cap on top, then thread gold chain or cord through it.
- Knot and trim, then hang low enough that the chain stays visible against the needles.
10. A Barely-Dressed Dark Green Tree and Brown Paper Gifts
This is the least expensive look in the whole roundup, and it’s also the one guests compliment most. A 6.5- to 7-foot unlit tree runs $60 to $120 at Target or Walmart right after Thanksgiving. Brown kraft paper is about $8 a roll and honestly looks better than foil. The illuminated star and the house-shaped lantern are the kind of thing that turns up at HomeGoods or T.J. Maxx for $15 to $25 each. Add thrifted pillar candles and you’re under $30 more. Whole corner, roughly $150.
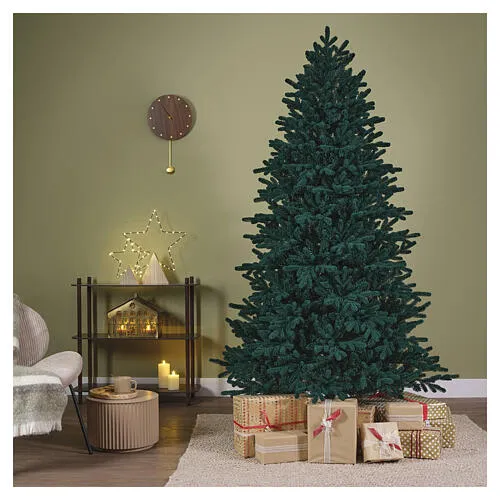
Check these before you commit to the minimalist route:
- Measure the wall — the shelving unit and the tree need at least 6 feet combined, with 3 inches of clearance from the tree’s widest branch.
- Test the olive green wall in evening light; olive can go muddy brown under warm bulbs.
- Confirm the tree is out of the path to your thermostat, vents, or a frequently used doorway.
- Decide now whether the tree gets lights — an unlit tree in a dark corner reads sad, not Scandinavian.
11. An All-Green and White Flocked Tree
The formula is monochrome with a value spread: 50% pine green, 25% emerald, 15% lime green, 10% white. Because every ornament is green, the tree only reads if the greens sit at different values — light, mid, dark. The white arrives as flocking, candy cane stripes, and the glitter on those little boot ornaments. Swap to blues and the same structure holds: navy, teal, sky, white. No single value should take more than half the tree, or the whole thing flattens into one blob of color.
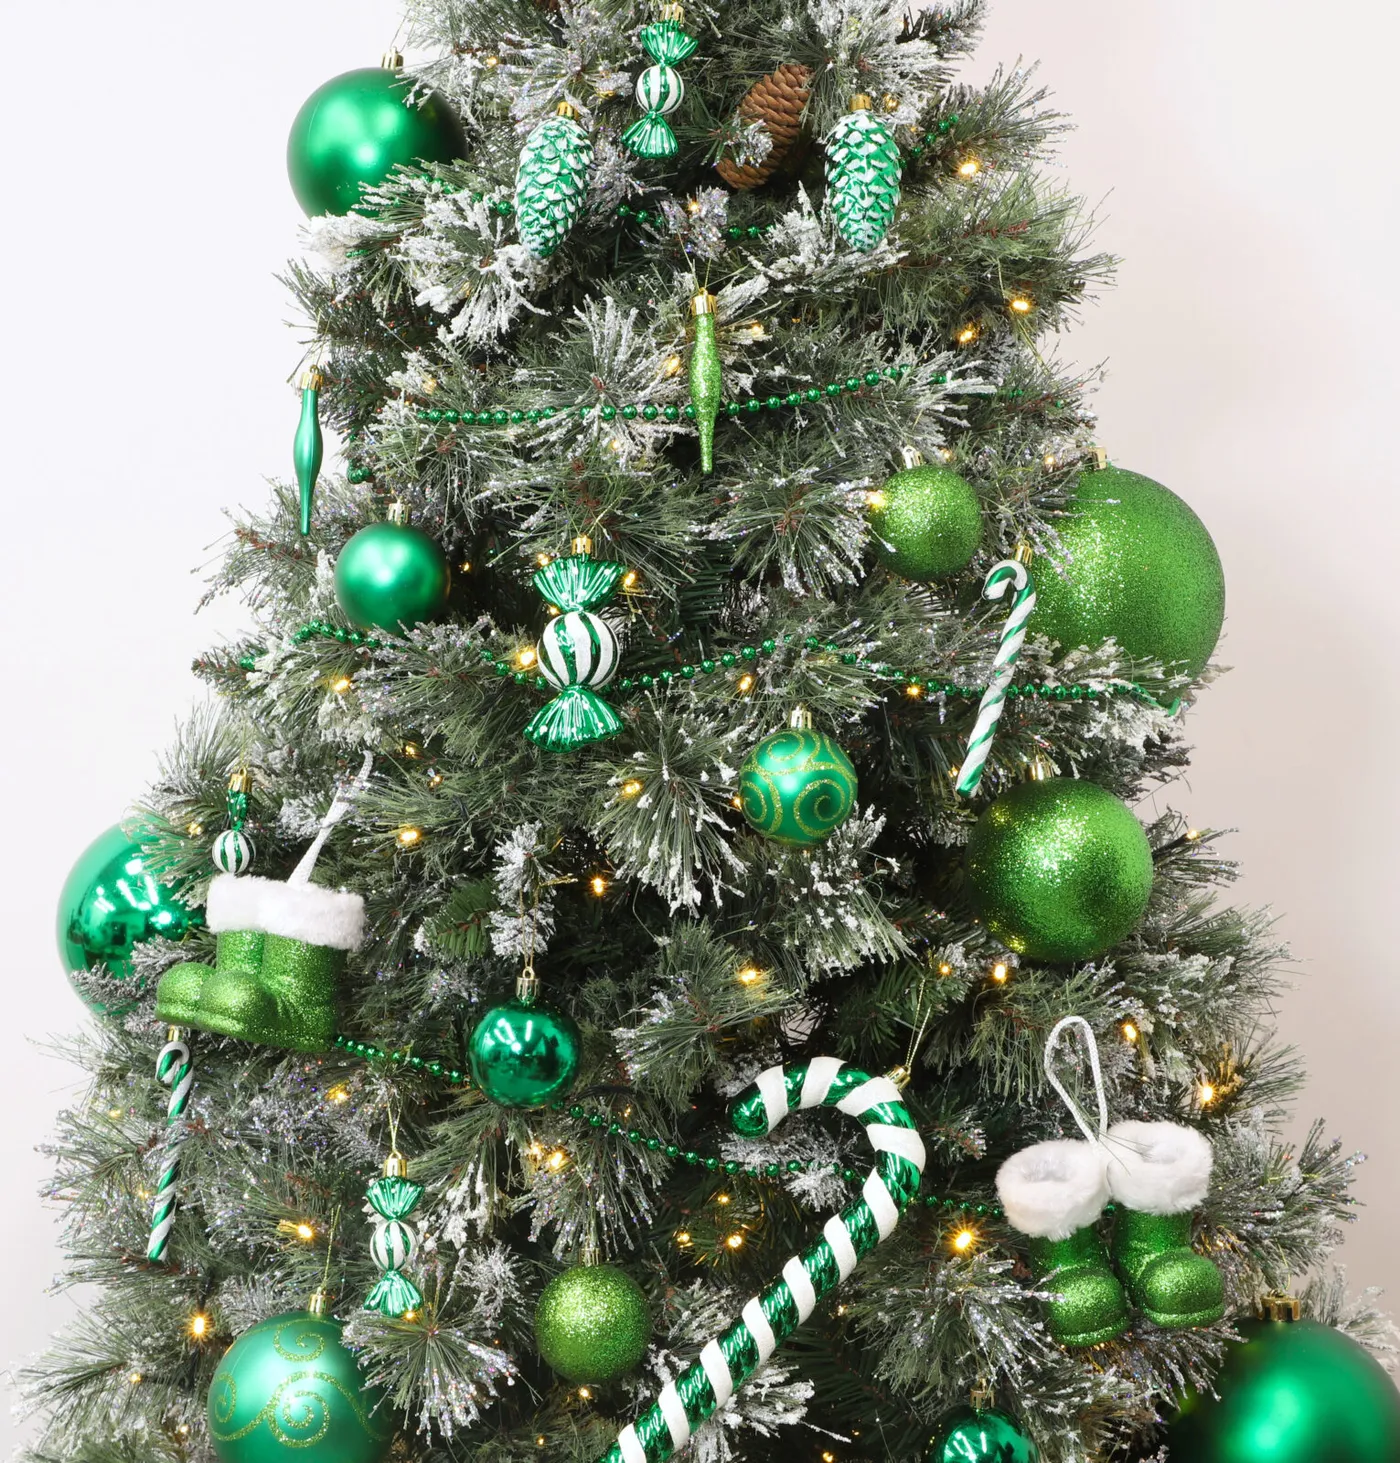
Heavy flocking plus a heavy ornament load equals a top-heavy tree. If yours isn’t pre-lit and weighted at the base, add a sandbag or wrap the trunk with a 10-pound plate. Also: green-on-green is the hardest palette to shop online, because screens shift greens badly. Buy ornaments in person, or order from one brand at a time so the tones actually match. And keep a lint roller near the tree — flocking plus glitter equals a floor mess by December 20th.
When every ornament is one color, garland becomes your pattern. Beaded garland strung in tight, even swags about 12 to 14 inches wide gives the eye a rhythm that ornaments alone can’t. Candy-shaped pieces should hang singly, near the outer branches, never in pairs — pairs read as a matching set instead of a collection. Odd numbers, uneven spacing, and one repeated shape is what makes this tree feel gathered rather than purchased.
12. A Flocked Tree in the Kitchen with Wreaths on Bar Stools
Mini wreaths on bar stools take 20 minutes and about $30 for three.
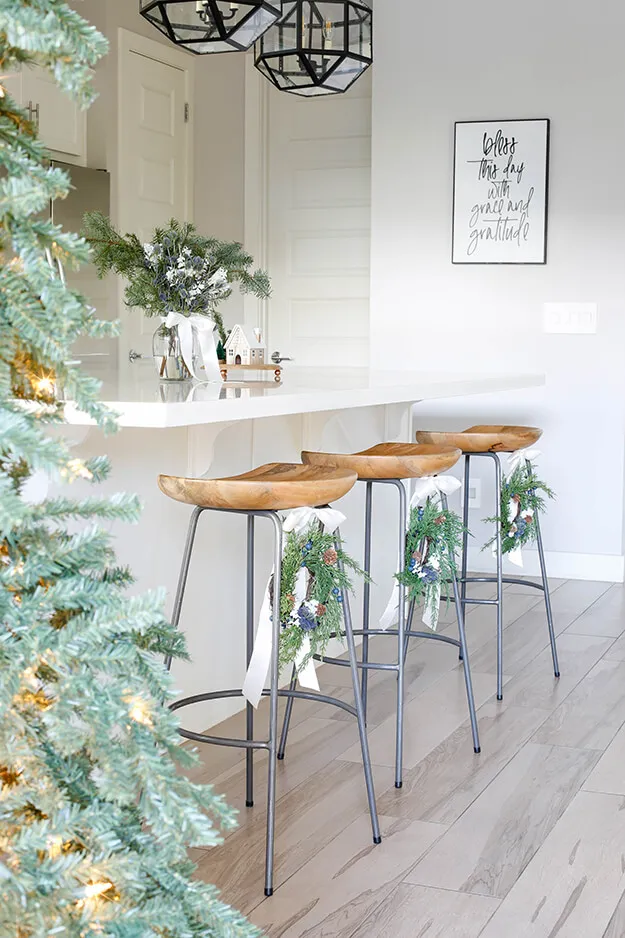
- Buy 6- to 8-inch faux evergreen wreaths — dollar store or craft store, $6 to $10 each.
- Run a 24-inch length of white satin ribbon through each wreath and knot it at the top.
- Tie the ribbon around the stool’s backrest, knotting at the rear so the hardware doesn’t show.
- Trim the tails into a 4-inch V and hot-glue the ends so they don’t fray.
- Fluff the branches outward so each wreath reads round from the kitchen side.
This works in kitchens from about 100 square feet up, as long as you keep 36 inches of clear walkway around the island — the number that keeps a kitchen functional when two people are cooking. The tree sits slightly outside the work triangle, framing the island rather than standing in the middle of it. If your kitchen is tighter than 10 x 10 feet, a tabletop version on the island is the honest answer. See Idea #6 for the dining-room version of this same green-and-natural-wood palette.
13. One Textured Green Ornament Under Warm String Lights
Notice how the lights sit inside the branches rather than on top of them. That single decision is why this close-up reads warm and expensive instead of like a lit-up wire frame. Pushing bulbs 2 to 3 inches into the needles diffuses the glow through a layer of green, so what you see is light coming from within the tree. The textured dark green ornament sits close to the camera and the gold and red pieces blur behind it — depth of field created by placement, not by a photography trick.

Two principles are at play. First, layering: bulbs behind needles, ornaments in front of needles, background ornaments out of focus — three distinct planes. Second, restraint in color. This is a dark green tree with a single deep green ornament in focus, and the gold and red behind it are supporting cast. There’s no ribbon anywhere. If you want this mood, resist the urge to add. Warm white lights, textured ornaments, and pinecones get you there faster than a themed set ever will.
14. Frosted Blue-Green Branches with Bronze and Gold
Frosted branches are the least forgiving finish you can buy. The flocking yellows if you store the tree somewhere warm or damp — a garage in a humid climate will do it in two seasons — so a climate-controlled closet or a sealed bag in a dry attic is worth the effort. Beaded garland catches dust and pet hair like a net; run it through a mesh laundry bag on a gentle cycle at season’s end. And metallic finishes scratch, so wrap silver and bronze baubles individually in tissue rather than tossing them in one bin.
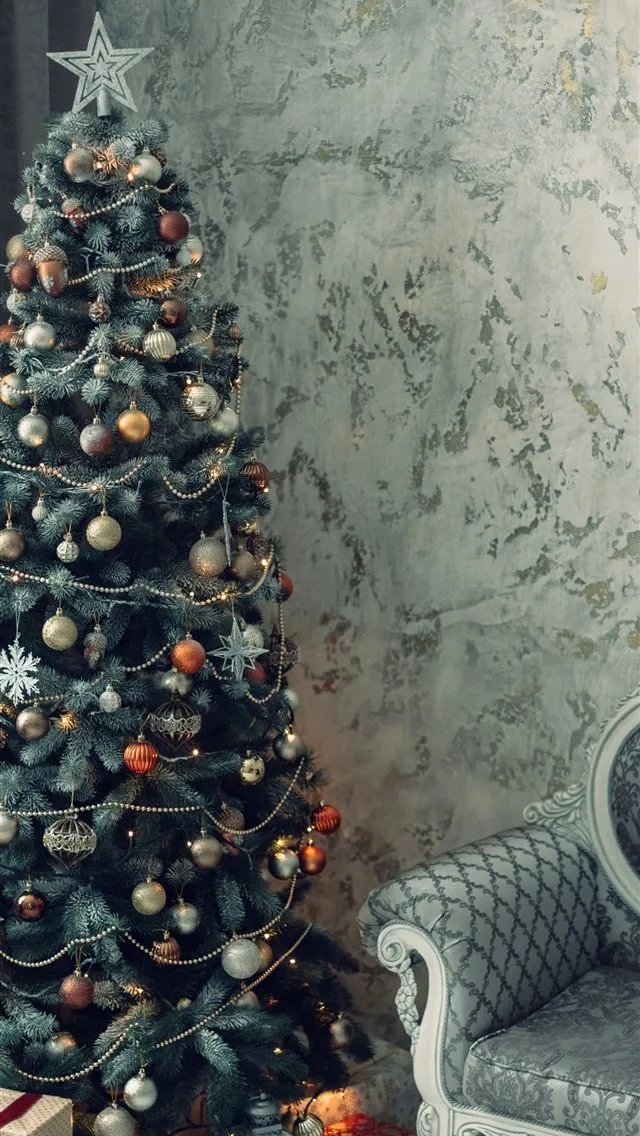
The distressed gray wall with gold flecks is doing something very 2026 — patina as a design choice. Instead of chasing a perfect backdrop, this room leans into a wall that looks aged and slightly imperfect, then piles on silver, gold, and bronze. It’s the same instinct behind the rise of unlacquered brass and raw plaster. If you want this look long-term, don’t repaint that wall flat white. The imperfect surface is what makes the ornate carved armchair and the frosted tree read as collected rather than staged.
Mixing silver, gold, and bronze on one tree only works if you assign roles: one metal dominates (here, silver at roughly 60%), one supports (gold at 30%), and one accents (bronze at 10%). Random thirds look like a clearance bin. Keep the metals connected by a shared texture — beaded, hammered, or glittered — so the eye reads them as one family. Assign the roles before you hang anything.
15. Copper, Matte Gold, and a Single Shiny Black Ornament
Call it 65% green + 30% warm metallics + 5% black. Break the metallic down further: roughly half copper, a third matte light gold, and a fifth textured dark gold. The single shiny black ornament is the punctuation mark — one black piece on an entire tree reads deliberate; three read like a mistake. If your room runs cool, swap copper for pewter and keep the same percentages. If there’s no black anywhere else in your space, skip it and let the dark gold carry the contrast instead.
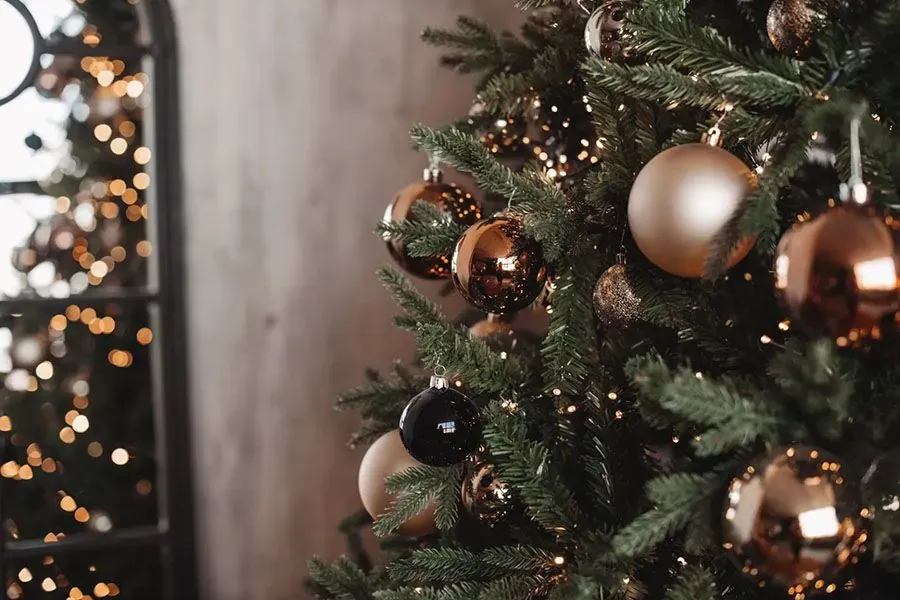
Copper is the most lighting-dependent metallic there is. Under warm bulbs it glows; under daylight LEDs or beside a bright east-facing window it turns orange, and orange next to forest green is a very specific choice you may not have made on purpose. Test your ornaments with the tree lit, in the evening, before you buy a second box. One more thing: matte gold shows fingerprints and dust far more than glossy does, so keep a microfiber cloth in the ornament bin.
16. Classic White and Silver on a Full Green Tree
White-and-silver is the cheapest palette to fake, because plain white always looks intentional. Target’s 50-piece shatterproof white and silver sets run $15 to $25, and a 100-count string of fairy lights is about $8 at Walmart. Silver star toppers start around $10, and a plain white sheet from a thrift store makes a credible tree skirt for $3. Wrap gifts in white kraft paper with silver ribbon — about $12 total. Whole tree, ornaments and all, stays under $120 if you already own the tree.
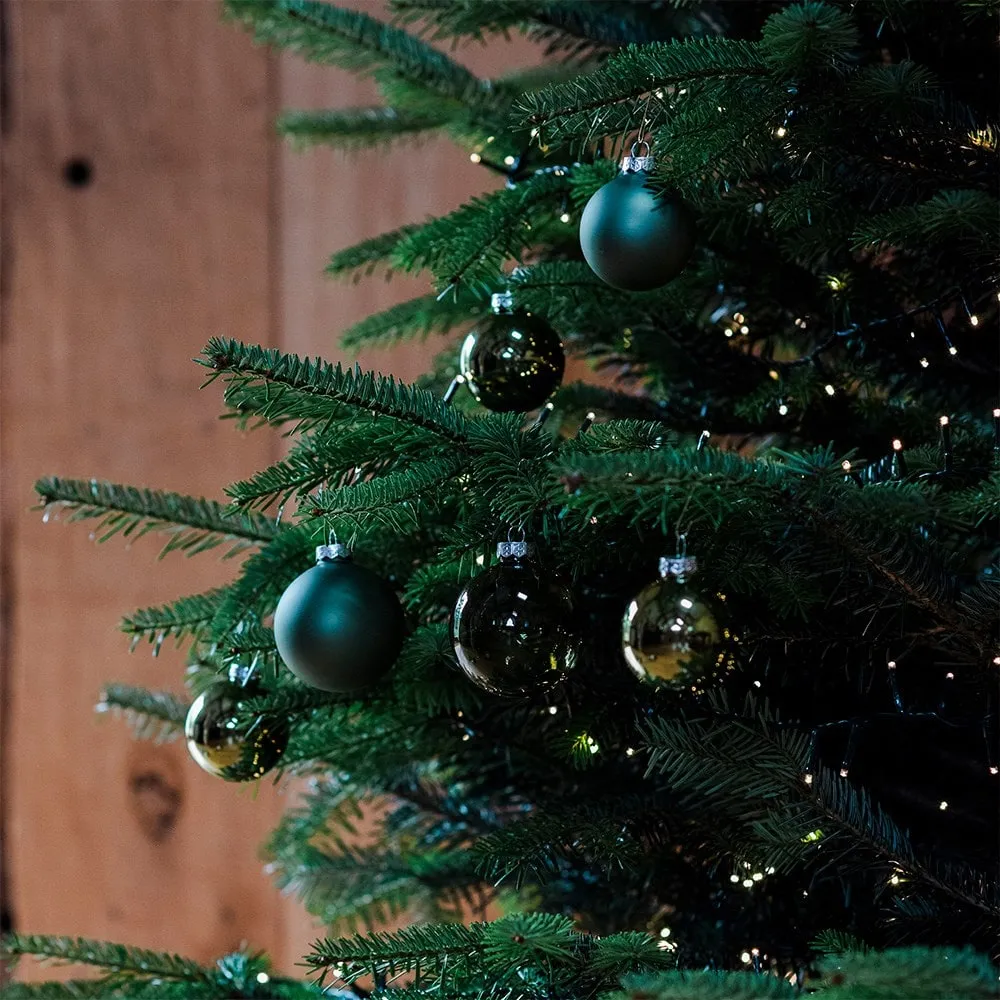
This is the most forgiving setup in the roundup: it works in living rooms from 10 x 12 feet up, with 8-foot ceilings, as long as there’s 30 inches between the tree and the sofa so nobody shoulder-checks an ornament on the way to the couch. A 6.5- to 7.5-foot tree fits most apartments. Bigger rooms can handle a 9-foot tree beside a sectional. If your living room is under 100 square feet, look at the small-space approach in Idea #10 instead — same classic mood, less footprint.
Wrapping gifts in a single palette takes about 90 minutes and roughly $40 of paper and ribbon.
- Choose two papers only: solid white and one silver pattern.
- Alternate them under the tree so no two neighbors match.
- Use one ribbon width and one finish — silver satin is the safe pick.
- Skip bows on half the boxes so the pile looks organic rather than store-bought.
- Stack tall boxes at the back and flat ones in front so the tree skirt stays visible.
17. The Candy-Shaped Green and White Glitter Ornament
A statement ornament needs a buffer. This candy-shaped piece is nearly twice the size of the surrounding baubles, and it works because nothing within about 8 inches of it competes — no other glitter, no second novelty shape, just needles and lights. When you build a tree, place your three or four largest ornaments first, roughly evenly spaced and no closer than 12 inches apart, then fill in around them. Novelty ornaments clustered together stop reading as special and start reading like a pile of tchotchkes.
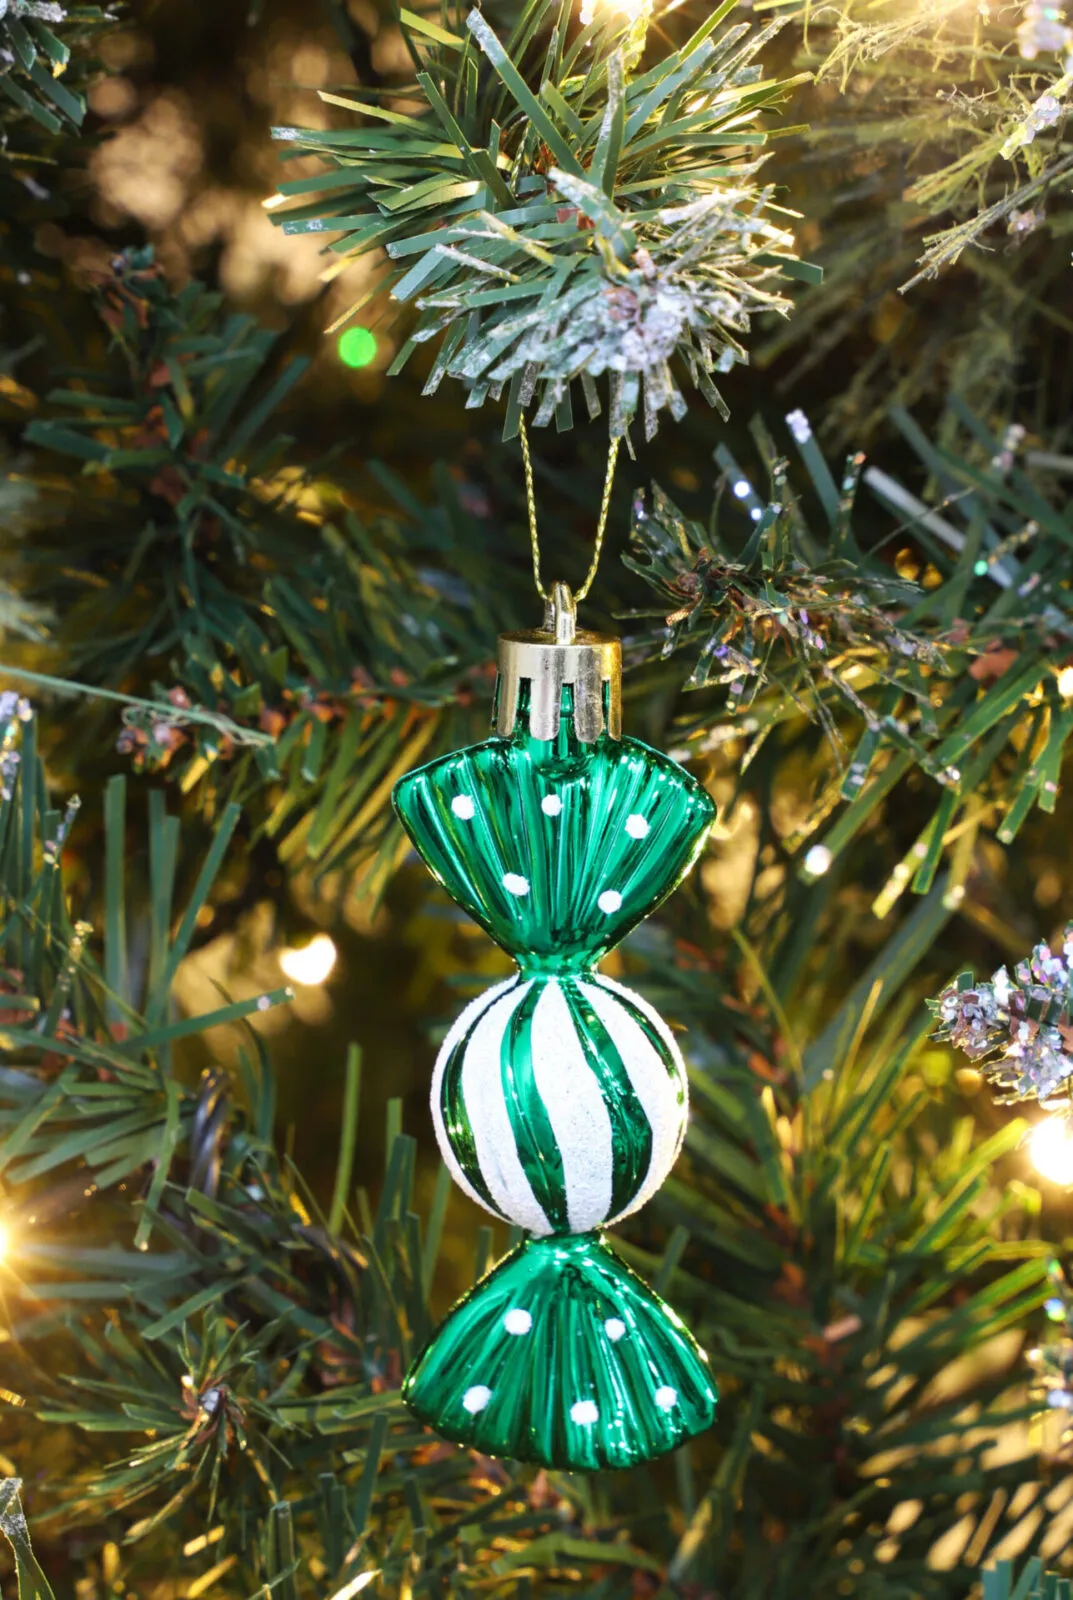
The proportions are doing more than the color. A candy shape is narrow and vertical, which repeats the tree’s own silhouette rather than fighting it — round ornaments are the safe default, so anything elongated reads as a deliberate choice. The green flutes match the needles so closely that at a glance the ornament seems to grow out of the tree, while the white center section breaks the green just enough to catch light. The gold string ties it to the glow around it.
18. An Emerald Bauble with Silver Glitter and Crystal Facets
The crystals are the difference between a nice ornament and one people photograph. Silver glitter alone would read as texture; clear faceted pieces on the top half catch the warm bulbs and throw tiny highlights, so the ornament changes as you walk past it. Notice the asymmetry too — embellishment concentrated on the upper half, smooth emerald below. That contrast is why it reads hand-finished rather than printed. If you’re DIY-ing a set, place the crystals last and only on the top third.
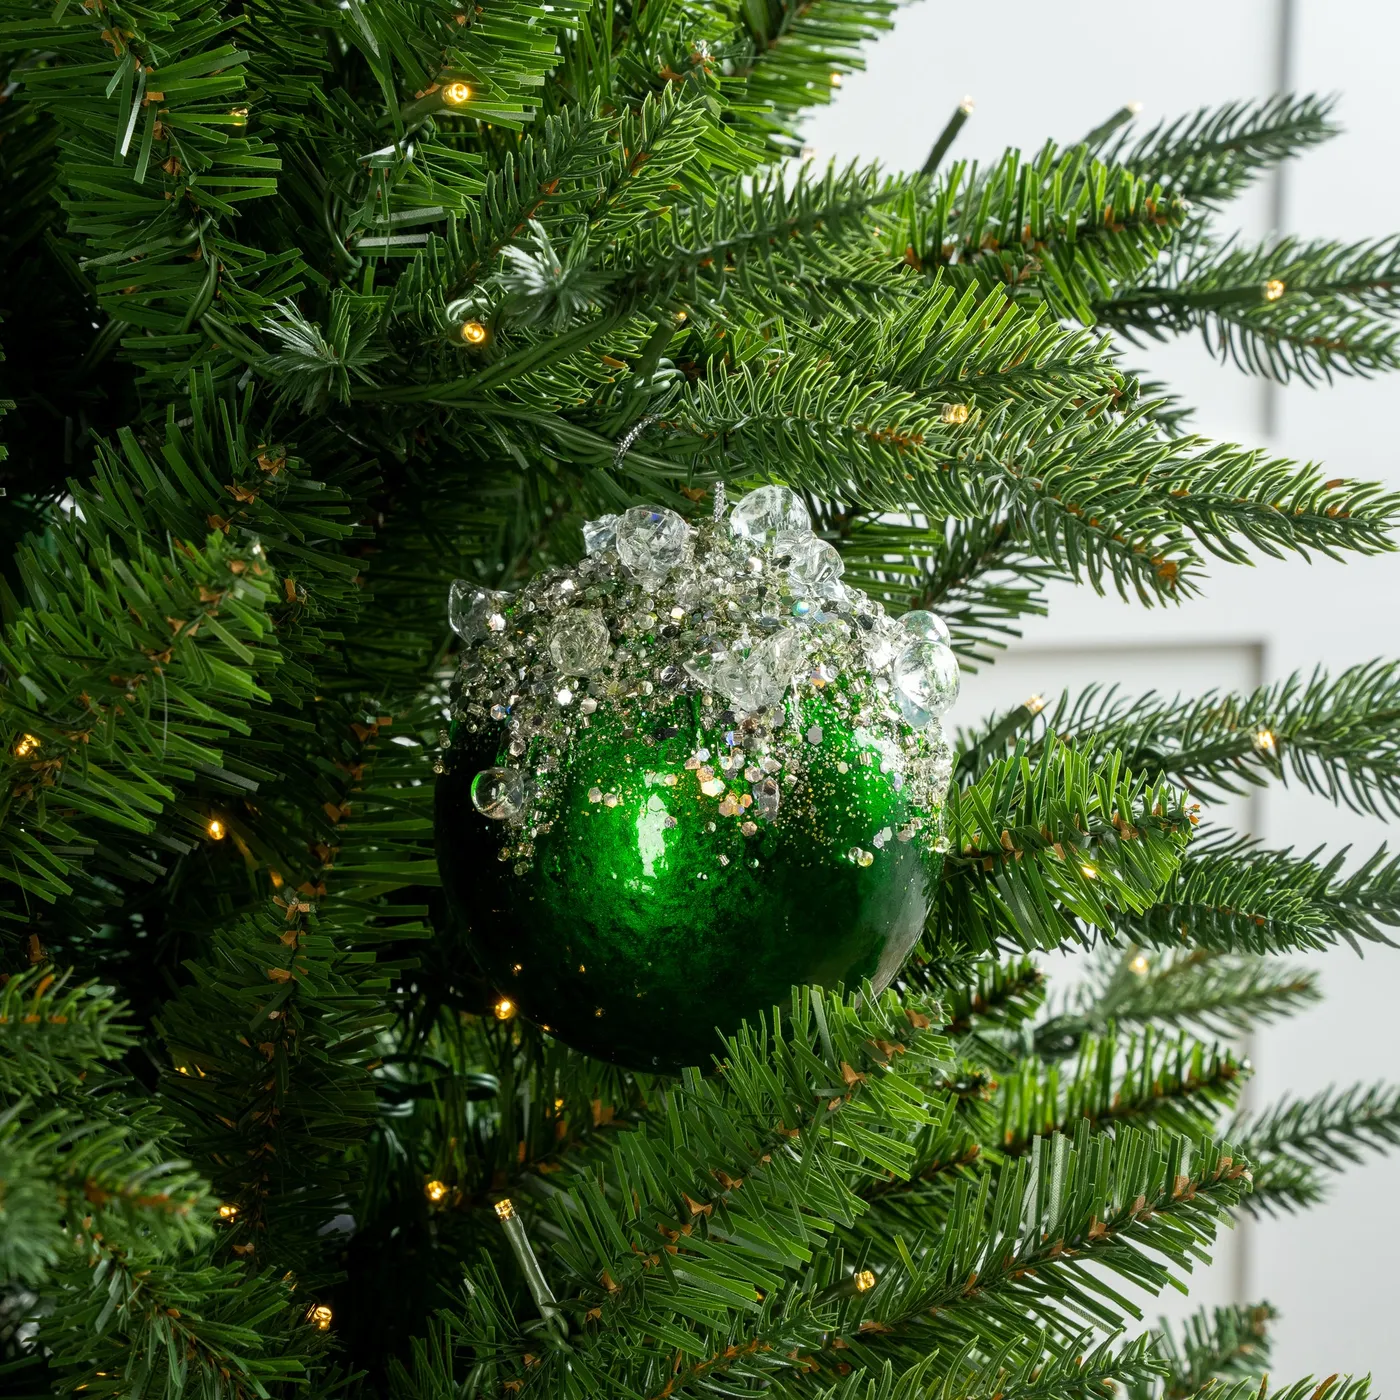
These read best on a tree at least 6.5 feet tall; below that, a 4-inch ornament starts to look like it’s swallowing the branches. On a 7.5-foot pre-lit tree, spread 8 to 12 statement pieces across the visible front and sides and keep the back plain. If your tree is 9 feet or taller, scale up to 5-inch ornaments or they’ll disappear. In a small room, the same effect works with three statement pieces and a lot of warm light — see Idea #13 for how that reads up close.
19. Deep Teal Glass on Snow-Dusted Fir Branches
Scale this one down and it’s 75% forest green + 15% deep teal + 10% gold, with white arriving as snow texture rather than as a color. The teal does double duty as both accent and cool contrast against warm bulbs. To shift the mood without rebuilding: swap teal for plum for a rich, moody tree, or for blush if you want something softer. Keep the gold cap and the white ribbon no matter what — the gold connects to the lights, and the white ribbon keeps the dark ornament from disappearing into dark green.
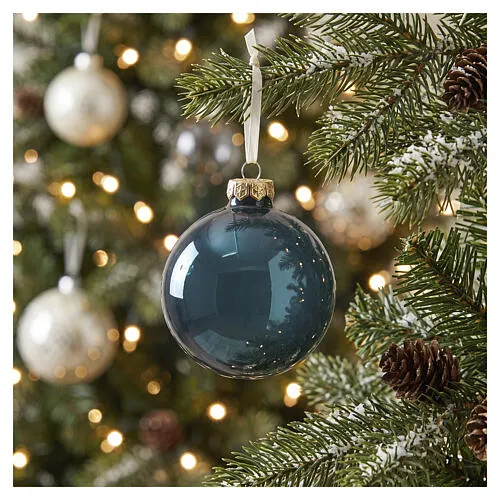
- 6.5-ft green tree: $90–$250
- Snow spray and flocking powder: $15–$30
- Faux snow-covered branches and pinecones: $20–$45
- Teal glass ornaments, 12 count: $30–$70
- White satin ribbon, 2 rolls: $12–$24
- Warm white string lights, 400 count: $20–$35
Total: $187–$454. Budget alternative: skip the snow spray and flock your existing branches with a $10 can, hang teal ornaments from Target’s $12 glass sets, and use real pinecones from a walk plus dollar-store ribbon — about $75 all in.
20. Red and White Candy Canes on a Classic Green Tree
Red and white is the palette everyone’s grandmother had, and in 2026 it’s having a genuine comeback — partly as a reaction to five years of beige minimalism, partly because peppermint stripes photograph so well on Pinterest. The difference now is scale: modern versions use bigger ornaments, fewer patterns, and warm white lights instead of the multicolor strands of the nineties. Nostalgia, edited. It’s also the easiest palette to shop after Christmas, when everything red drops to 70% off.
Red ornaments are the least forgiving when it comes to fading. Cheap red dye pinks out under UV, especially on a tree near an east or south window. If yours sits in direct sun, rotate it mid-season or add a sheer curtain. Candy canes are a real problem with dogs — peppermint oil is toxic to them — so keep edible ones above nose height or use plastic versions. And red plus green tips into clashing fast: stay in the true-to-slightly-blue red range and avoid orange-red next to forest green.
With a 7- to 7.5-foot tree, plan on at least 24 inches of clearance from the armchair so it feels generous rather than crammed, which puts this in a living room of roughly 12 x 14 feet or larger. A round side table on the open side balances the visual weight nicely. Nine-foot ceilings let you go to an 8-foot tree and still keep the white star topper in view. In a smaller room, the palette in Idea #21 gives you the same red-and-gold warmth at a reduced scale.
21. Red Balls, Gold Accents, and an Off-White Skirt
Shiny red and gold ornaments show everything: fingerprints, dust, water spots from a humidifier. Wipe them with a dry microfiber cloth when you pack them, not in December when you’re hanging them. An off-white tree skirt is the other upkeep item — it’s going to show footprints and needles, so either wash it if it’s machine-safe or shake it out every week. Store shiny finishes in a single layer or a divided bin; scratched red glass is the fastest way for a traditional tree to look tired.
Red and gold is the easiest palette to buy cheap, because it’s the most manufactured. Walmart and Target both run 100-piece red and gold shatterproof sets for $20 to $35, more than enough for a 7.5-foot tree. A plain off-white cotton flat sheet from a thrift store makes a better skirt than most $50 versions and costs $4. Wrapping paper runs $6 to $10 a roll, or use plain kraft with a $3 gold ribbon. Under $70 for the whole look, tree excluded.
With only two colors, proportion matters more than quantity. Aim for roughly 70% red, 25% gold, and 5% white — which means the gold ornaments should be noticeably smaller than the red ones so they read as accents rather than equals. Cluster red balls in twos and threes on the outer branches, and place the small gold pieces singly, close to the lights so they pick up the glow. That ratio is what keeps a two-color tree from looking like a store display.
One Green Tree, Twenty-One Ways to Make It Yours
You don’t have to pick a single look and commit forever — most of these ideas are just a ribbon swap, a color shift, or a different ornament finish away from each other. Start with the palette that matches what’s already in the room, then borrow the tricks: ribbon proportions, light placement, and that important 70/25/5 ornament math.
📌 Pin your favorite green Christmas tree idea now so you can find it again when the boxes come down from the attic — and send this to whoever you decorate with.