
Christmas 2×4 wood crafts are having a serious moment on Pinterest right now — and one look at a six-dollar board turned into a painted, lit-up tree explains the obsession.
We spent a few weekends (and a fair amount of sawdust) combing Hobby Lobby, Home Depot, Walmart, and Lowe’s, plus resale sites, covering everything from $5 scrap-bin cutoffs to a $180 full-yard display. You’ll find 30 curated projects here, mostly in the rustic, minimalist, folk-art, and distressed-farmhouse lanes — with budget and step-up versions of the same build compared side by side.
In 2026 the draw is simple: store-bought trees all look alike, and a 2×4 doesn’t. And stay until the end — we break down the most common mistakes that can ruin these looks. 📌 Save this to Pinterest for later — you’ll want to revisit these ideas. This post contains affiliate links, which means we may earn a small commission at no cost to you.
1. A Red-Stained Plank Tree Built From Stepped Angles
Five planks, cut at matching angles, stacked from longest to shortest — that’s the whole build. What makes it read as a tree instead of a pile of lumber is repetition: the same angle, the same overhang, repeated until the silhouette does the work. The flat rectangular base keeps it grounded so the peak feels deliberate rather than accidental. And because it stands a few inches off the wall, a lamp behind it throws a stepped shadow that basically doubles the shape after dark.
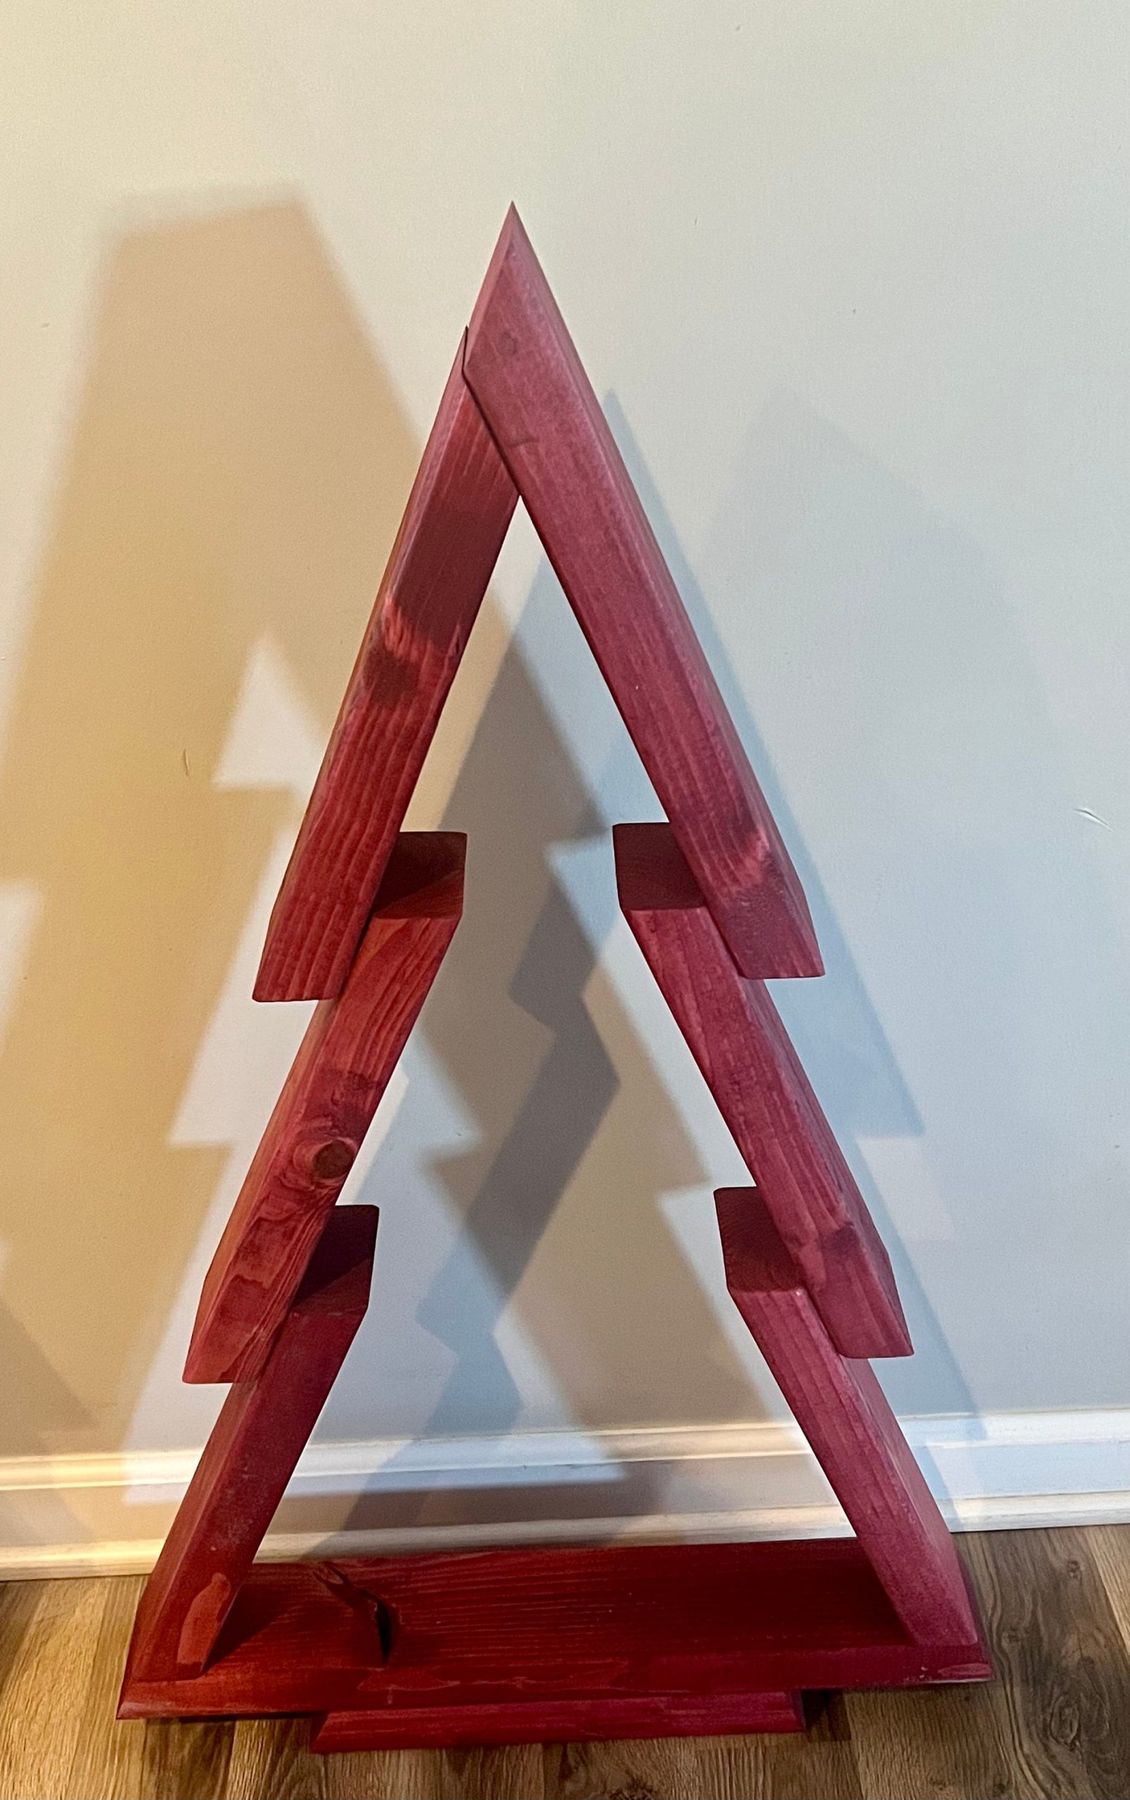
Keep every plank at the same 30-degree cut and shorten each one by exactly 2 inches as you go up — inconsistent angles are what make these trees look homemade in the wrong way. Sand to 220 before staining, then wipe the stain on with a rag instead of brushing it. Two thin coats, wiped back after five minutes, keep the grain visible instead of drowning it in color.
2. Stacked Green Blocks on a Stained Backing Board
- Cut a 1×8 backing plank to 30 inches and sand the face to 150 grit.
- Cut five pine blocks, each 2 inches narrower than the one below, starting at 10 inches wide.
- Paint the blocks with two coats of muted green and let them cure overnight so they don’t stick together.
- Center the blocks on the backing, widest at the bottom, leaving about 1½ inches between them. Glue and nail from behind.
- Screw a small red metal star into the board just above the top block.
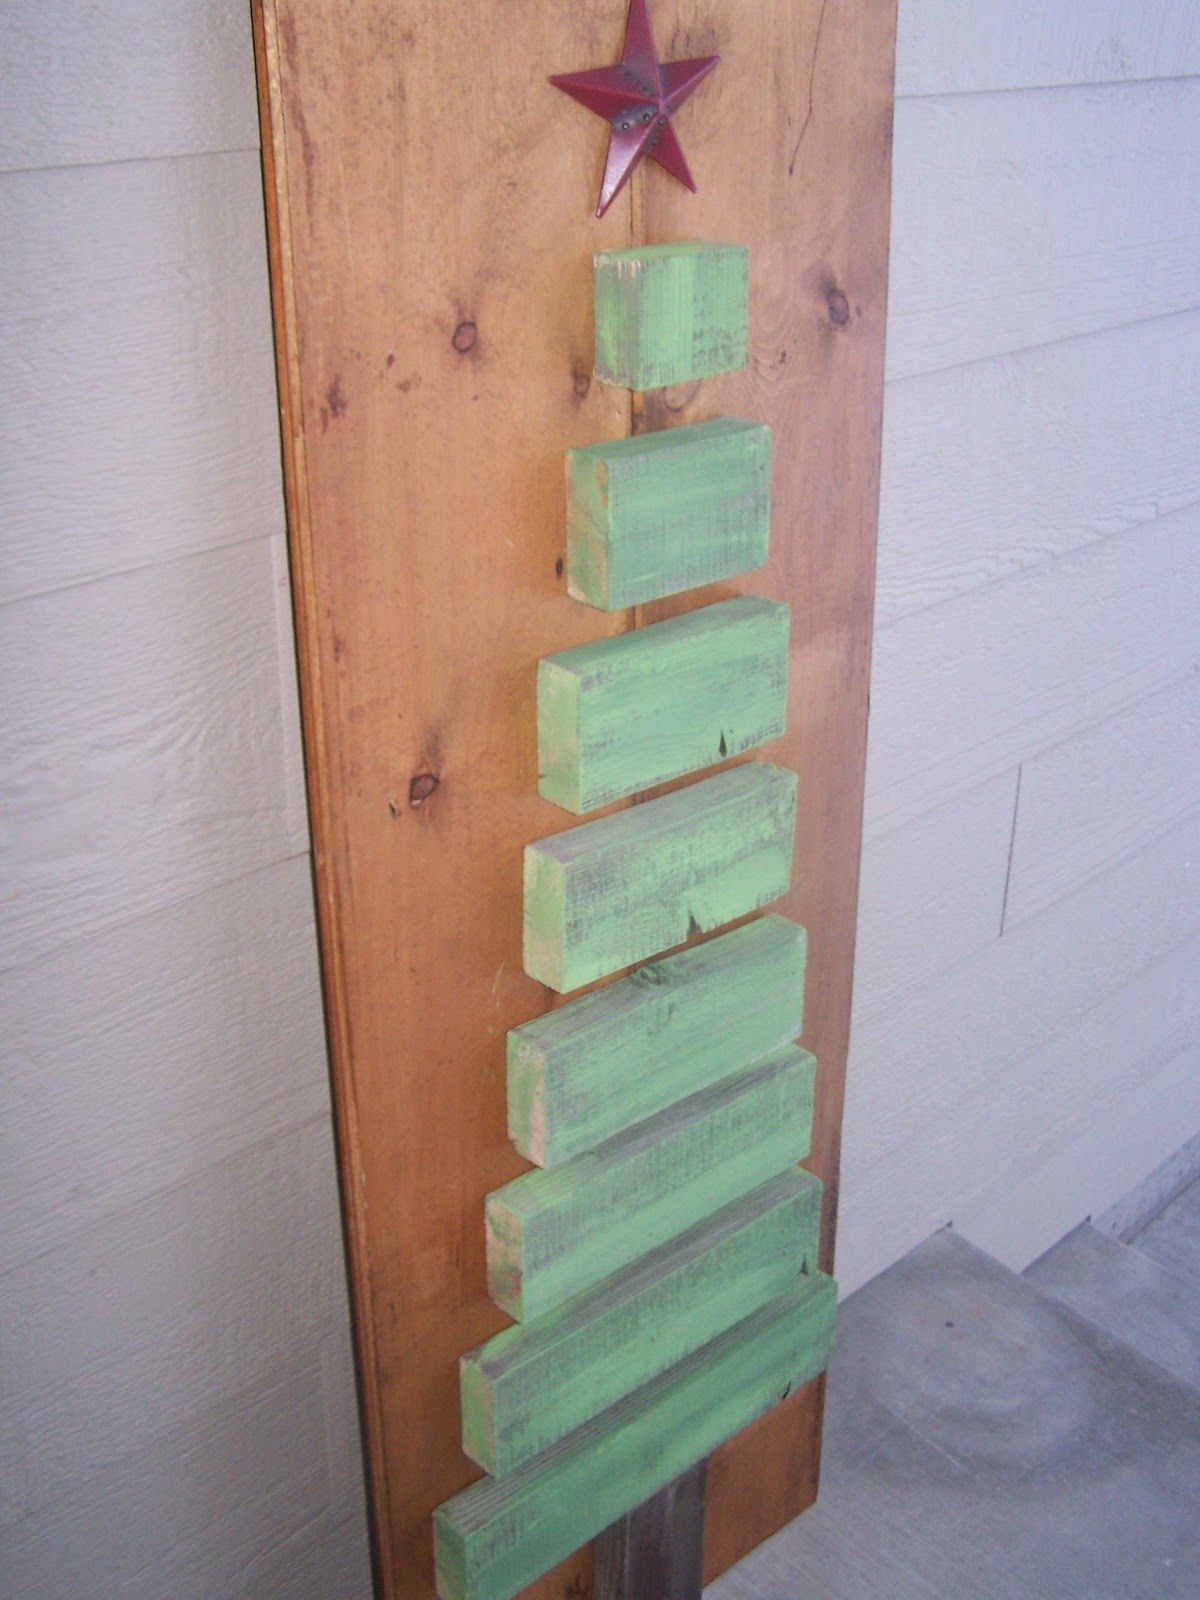
One afternoon plus drying time, about $18 in materials.
Take away the red star and you’re looking at a stack of green boards nailed to a plank. That little metal topper is the entire tree signal — it tells your brain what the shape means before you’ve processed anything else. It’s also the only warm red in the composition, which quietly ties the green blocks back to that brown backing board. Buy the star first, cut the wood second.
3. Spiral-Stacked Blocks Around a Center Dowel
The formula here runs about 70% bare light wood, 25% white negative space, and 5% shadow. Because there’s no color to speak of, everything depends on proportion and rotation. Swap the pine for walnut and the white wall for warm cream and the recipe still holds — same spiral, same visual weight. If you add a single painted block, make it the smallest one at the top so the eye still climbs.
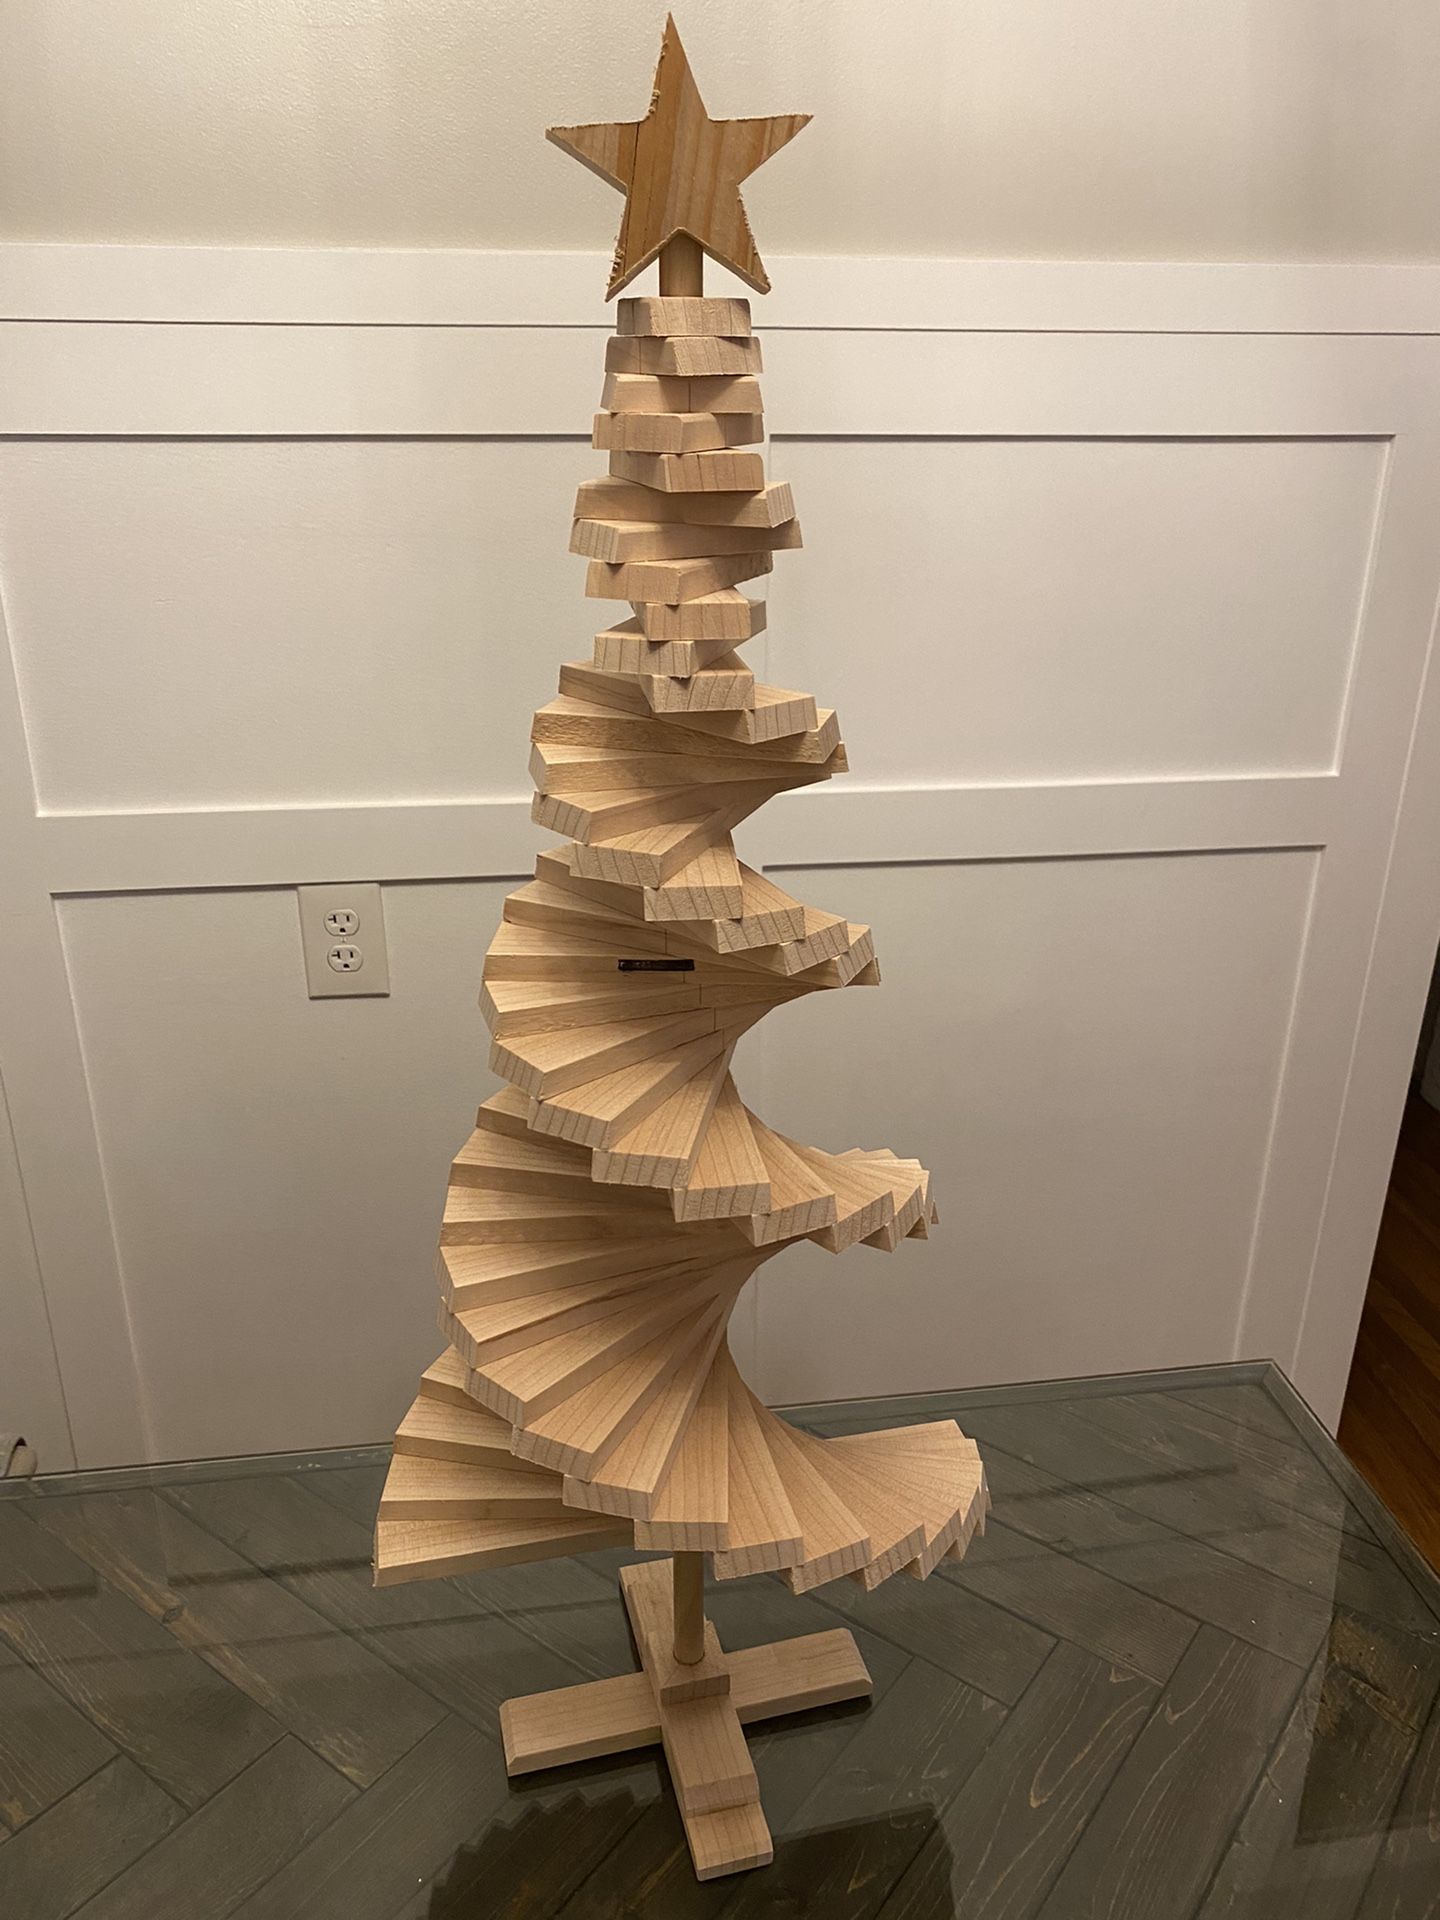
Drill the center hole with a 3/4-inch Forstner bit before you cut anything else, then slide all the blocks onto the dowel dry. Once you glue, you can’t adjust the spiral. Use a scrap of 1/4-inch plywood as a spacer so the gaps stay consistent, and rotate each block about 15 degrees off the one below it — that offset is what turns a stack into a spiral.
4. Triangular Wood Tree Wrapped in Warm Fairy Lights
The dark green inner faces sit just behind natural-grain outer edges, so every angled cut catches a thin line of light wood against shadow. That contrast is the whole trick — paint the entire piece green and it goes flat in about four seconds. The fairy lights work because they’re warm gold, not white: they pick up the wood tone and read as candlelight against the green rather than as a gadget wrapped in wire.
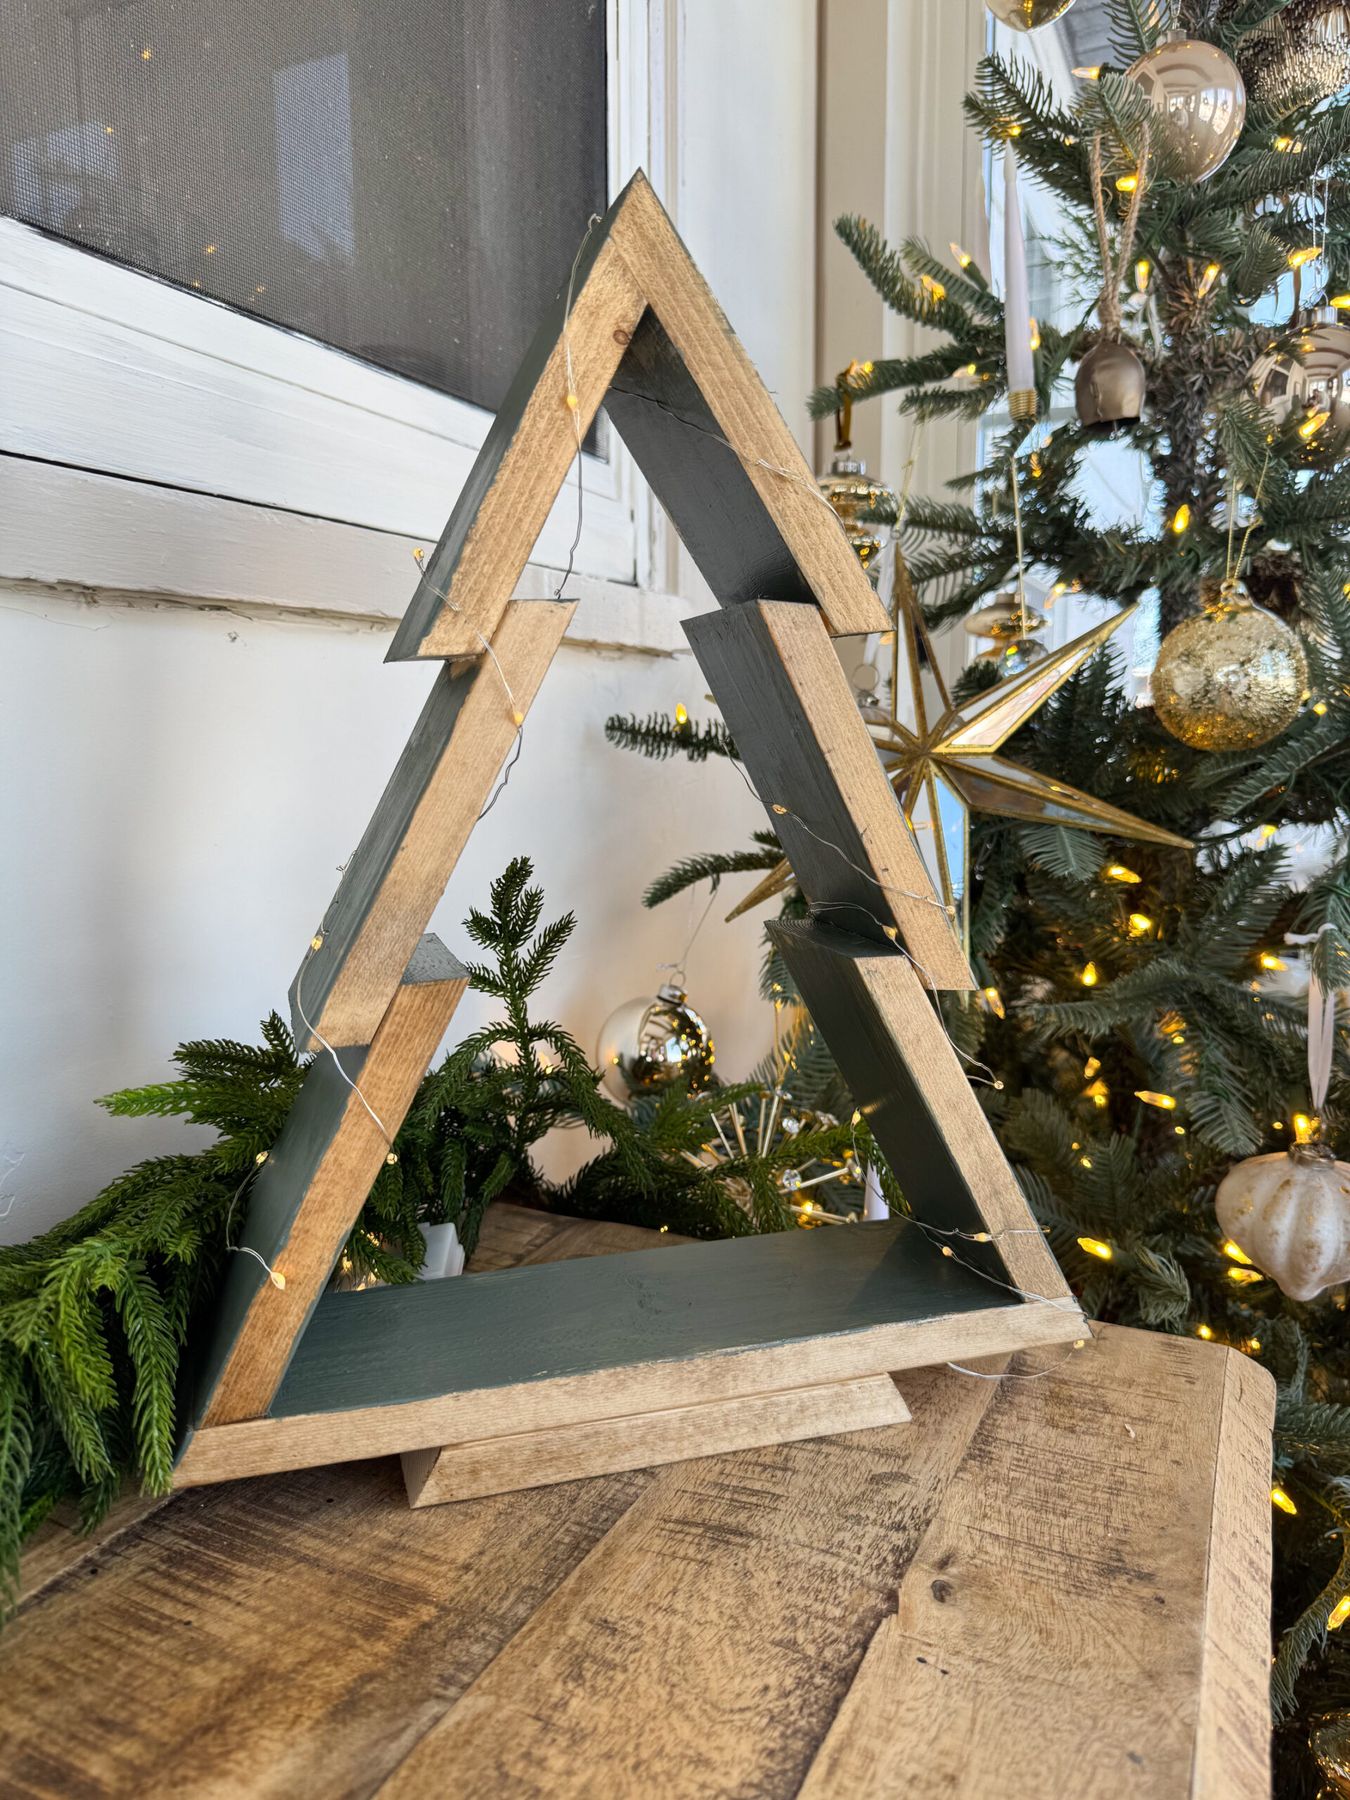
Fresh evergreen boughs look incredible for about ten days, then they start dropping needles on whatever’s underneath. Set real greens on a tray or a scrap of felt and plan to swap them around week two. Check your fairy lights too — cheap battery sets run hot, so don’t bury them under dried branches, and keep the whole arrangement off the surface your cat has already claimed.
5. Spray Painting a Geometric Tree Out in the Yard
- Spray between 60°F and 80°F, with wind under 10 mph and humidity below 60%.
- Cover the lawn or driveway with a drop cloth — overspray travels further than you think.
- Shake the can for a full minute and test on scrap before your first pass.
- Plan three thin coats 20-30 minutes apart rather than one heavy one.
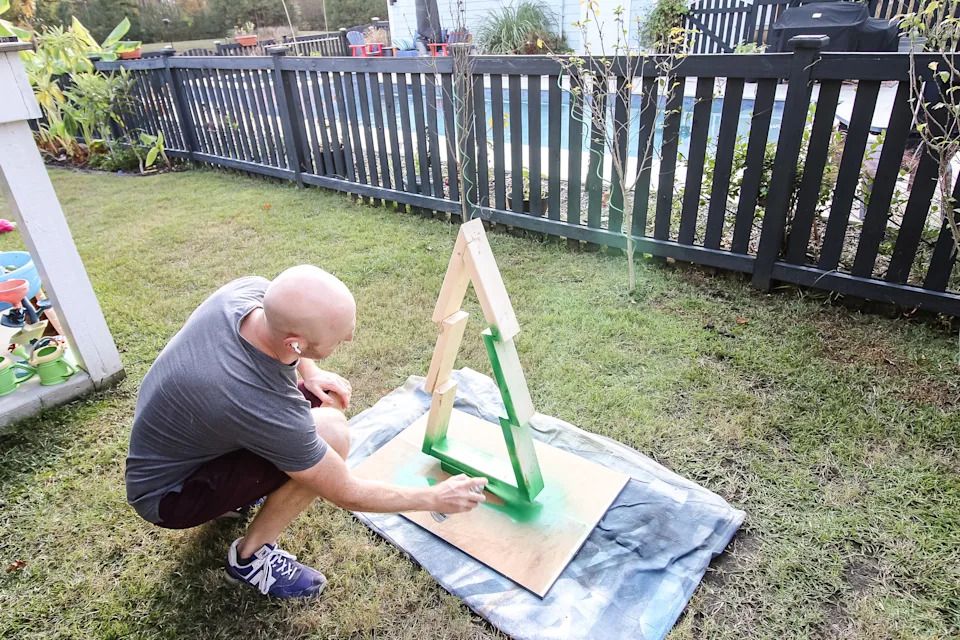
Budget about an hour of actual work plus a full day of curing before you bring it inside.
Saturated single-color wood is the finish trend of the moment, and spray paint is why. Brushes leave texture that shows on flat-cut 2×4 faces; a rattle can lays down a smooth coat that makes a $12 tree look store-bought. It’s also why so many of these projects show up in bold color instead of stain — you get graphic punch in an afternoon instead of a multi-day finishing schedule.
6. Green Tree Frame Holding a Single Poinsettia
The poinsettia is the point. The frame alone is a nice silhouette; drop a living plant inside the opening and the piece stops being decor and starts being a planter. That metallic red foil pot matters more than it should — it bounces the frame’s green back as a warm reflection, which is why the salmon-pink siding behind it feels intentional rather than accidental. Skip the plant live and you’ll feel the difference immediately.
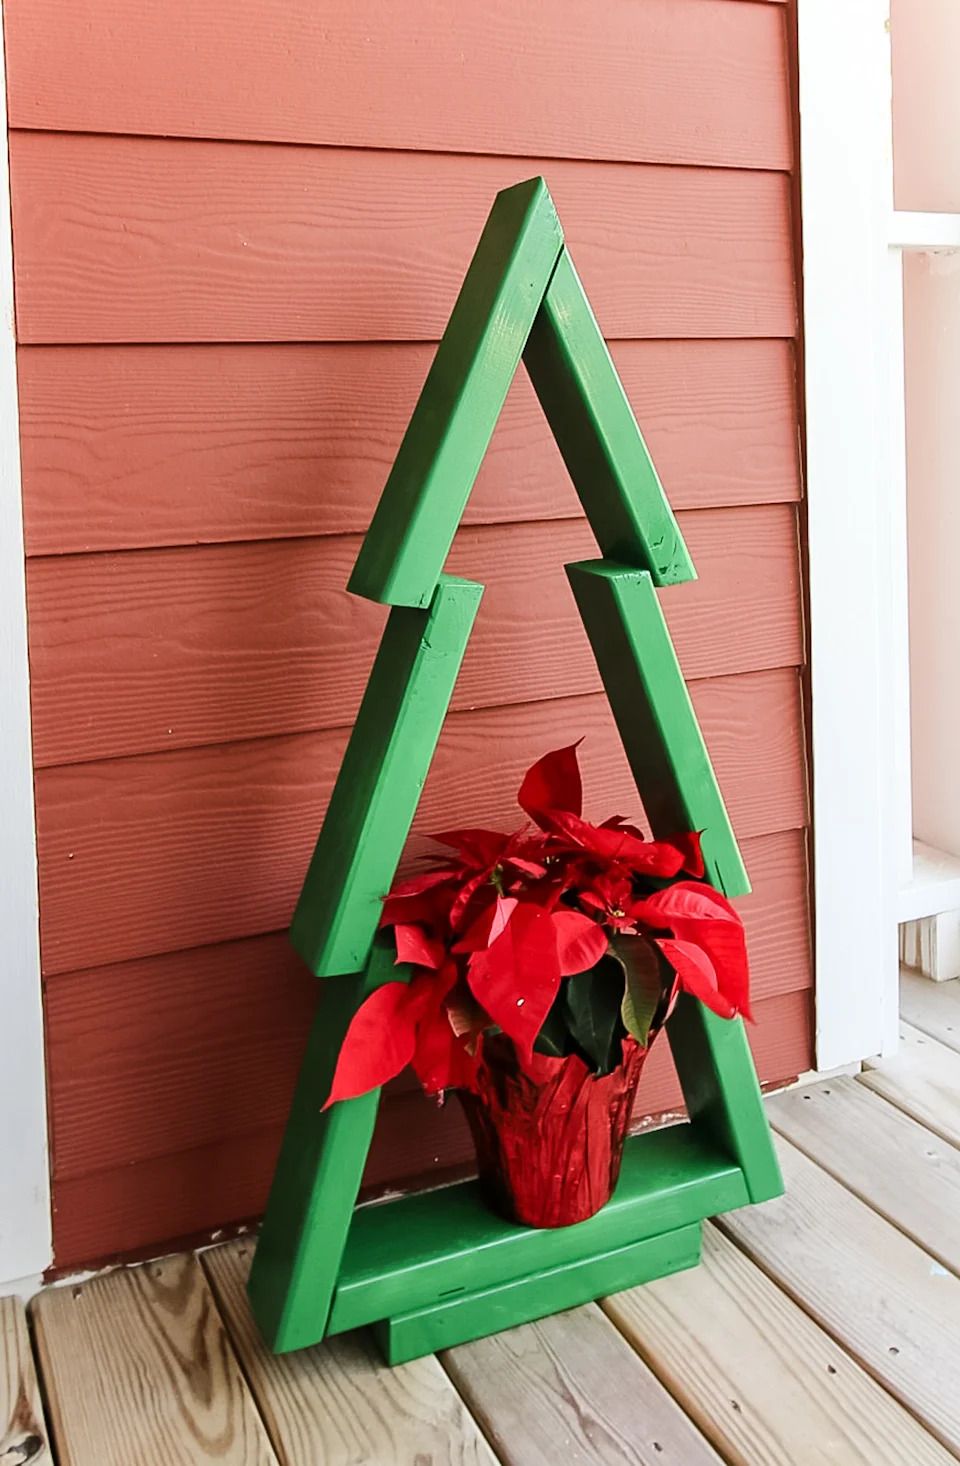
A $6 grocery-store poinsettia in a $2 foil pot gets you 90% of the look. Build the frame from lumberyard cutoffs, which most yards sell by the bundle for around $5, and paint it with a $6 can of green spray instead of a quart. If you want the taller version against a brick wall, Idea #30 does the same trick with slats. Total: under $25.
7. Two Triangle Frames, One Pine-and-Eucalyptus Wreath
Two frames, two finishes, one wreath — and it works because the wreath is doing something the frames can’t. A frosted pine, eucalyptus, and pinecone wreath brings soft, irregular texture against a hard geometric outline. If both frames had wreaths they’d compete; if neither did they’d read as furniture. The medium brown stain in front against that muted sage behind is a smart pairing too — same shape, different temperature. Every good vignette has one element that misbehaves a little.
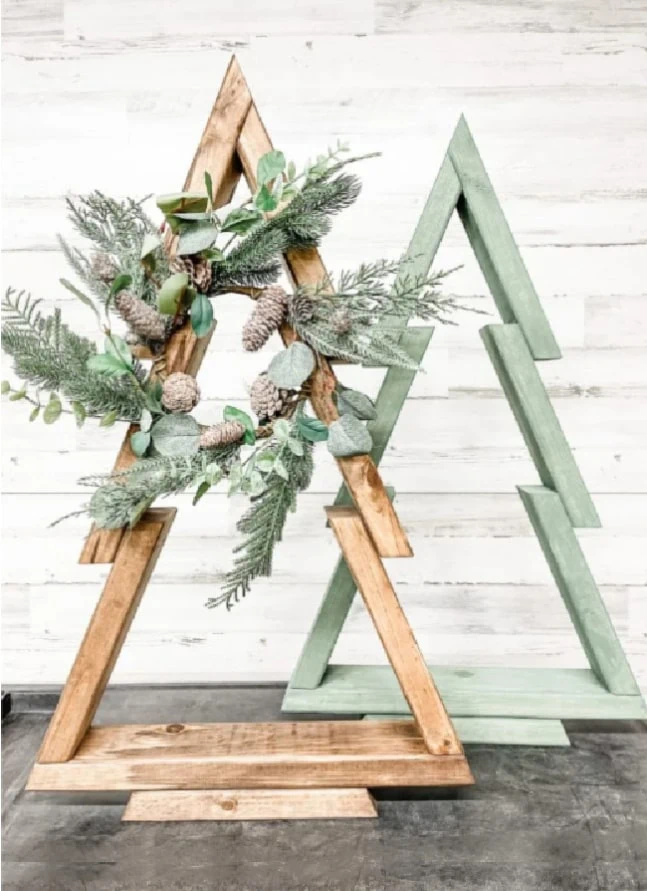
Two frames of 28 to 36 inches want at least a 5-foot-wide wall and 8-foot ceilings to breathe. Lean them rather than hang them so you can angle the pair — one slightly behind the other adds depth in a tight corner. Short on wall space? The single small frame in Idea #12 gives you the same silhouette at half the footprint.
8. Tiered Wood Sculpture With a Suspended Star
Hang the star so its lowest point falls about a third of the way down into the top step, not above the peak. Measure your chain from the top crossbar, add 2 inches, and use a small screw eye rather than a nail — the ornament is heavier than it looks and a nail will pull straight out of soft pine. On a 3-foot sculpture, a 10-inch chain is the sweet spot.
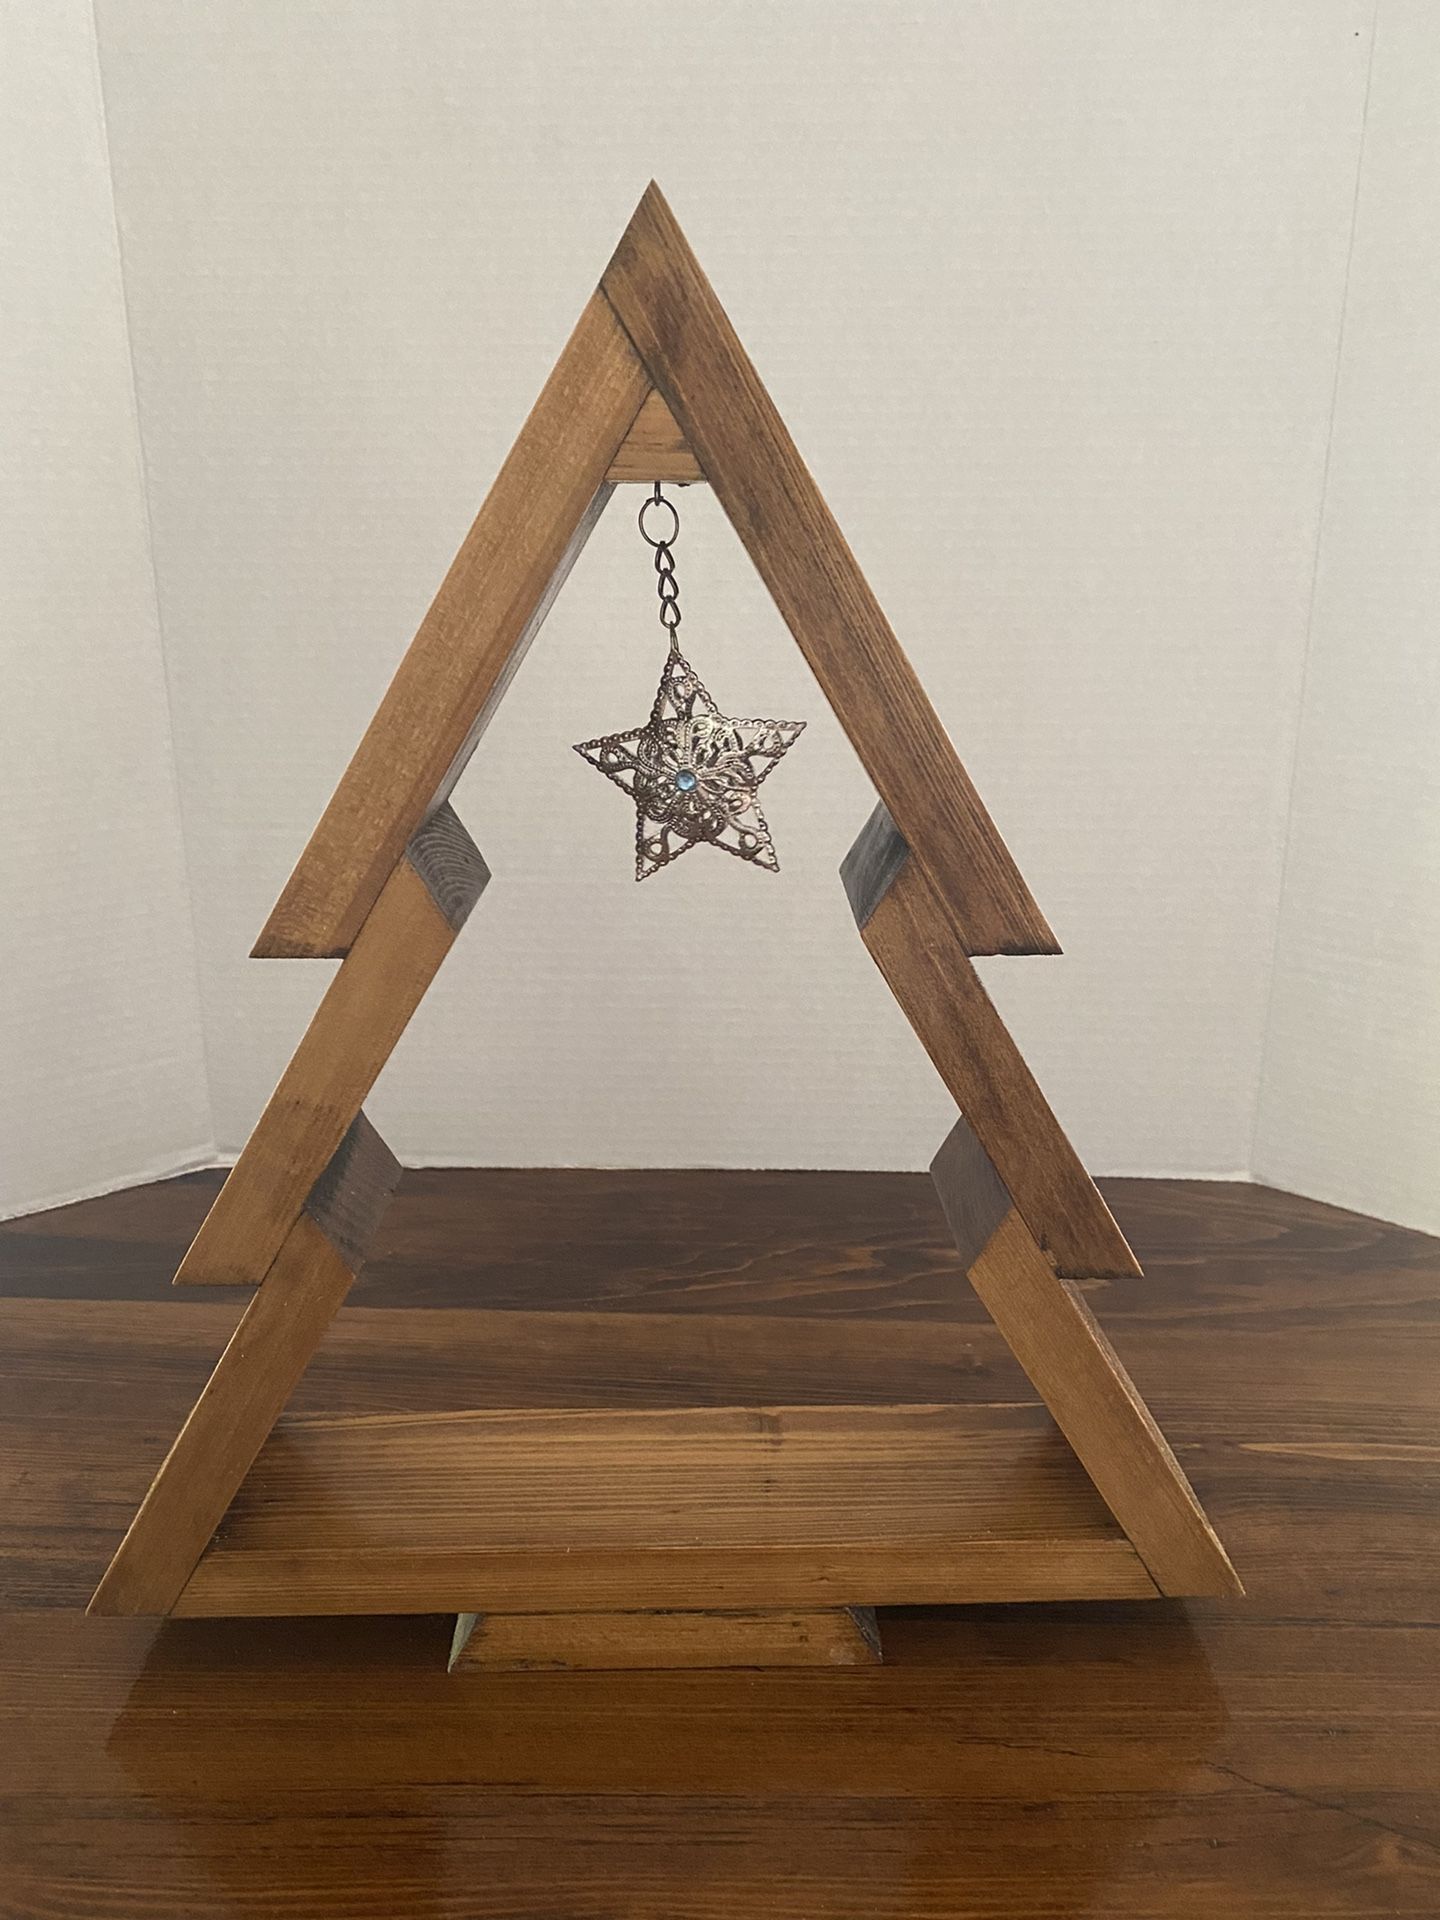
Roughly 80% stained wood, 15% dark negative space, 5% metallic. The dark comes from the wall and the shadow behind the base; the silver is only the star. Swap the wood for weathered gray and the star for brass and you’ve got the same composition with a completely different mood. What you can’t change is the ratio — add a second metallic element and the star stops being the reward.
9. Torched Wood and Red Stain, Standing Side by Side
- Two 8-foot 2x4s: $8-$16
- Propane torch and small tank: $25-$45 (one-time)
- Red wood stain, small can: $9-$14
- Saw cuts: $0 if you own a circular or miter saw
- Sanding and finishing supplies: $10-$15
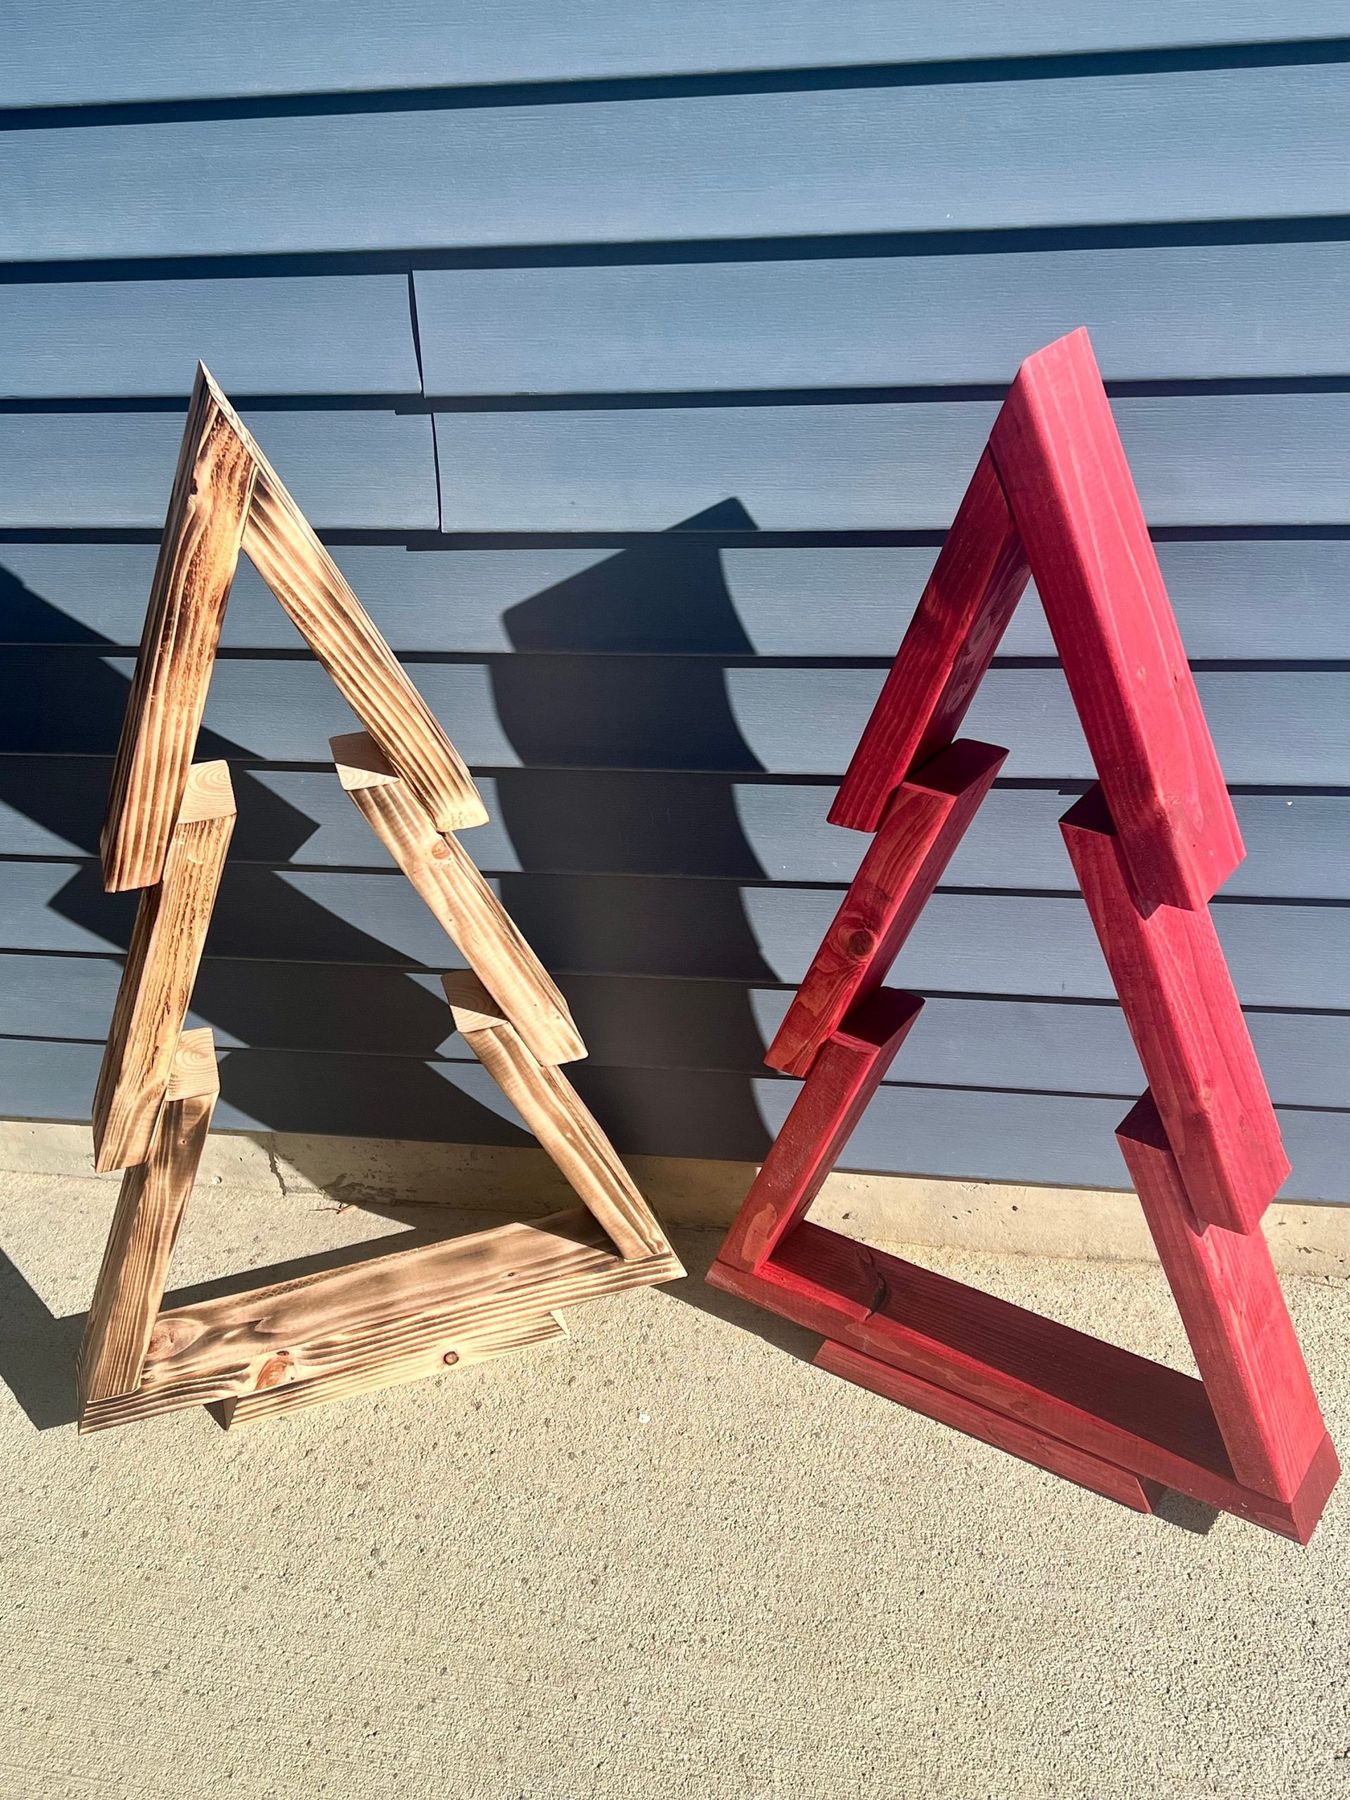
Total: $52-$90 for the pair, less if you already own a torch. Budget alternative: skip the torch and use a $7 can of dark walnut gel stain for similar depth at half the cost.
Torching wood is permanent — burn too deep and you’ve got a charred spot you can’t sand out, and soft pine scorches faster than cedar or oak. Work in short passes, keep the flame moving, and have a spray bottle within reach. The upside: torched wood needs no topcoat outdoors, while a red-stained piece will want fresh exterior polyurethane every year or two.
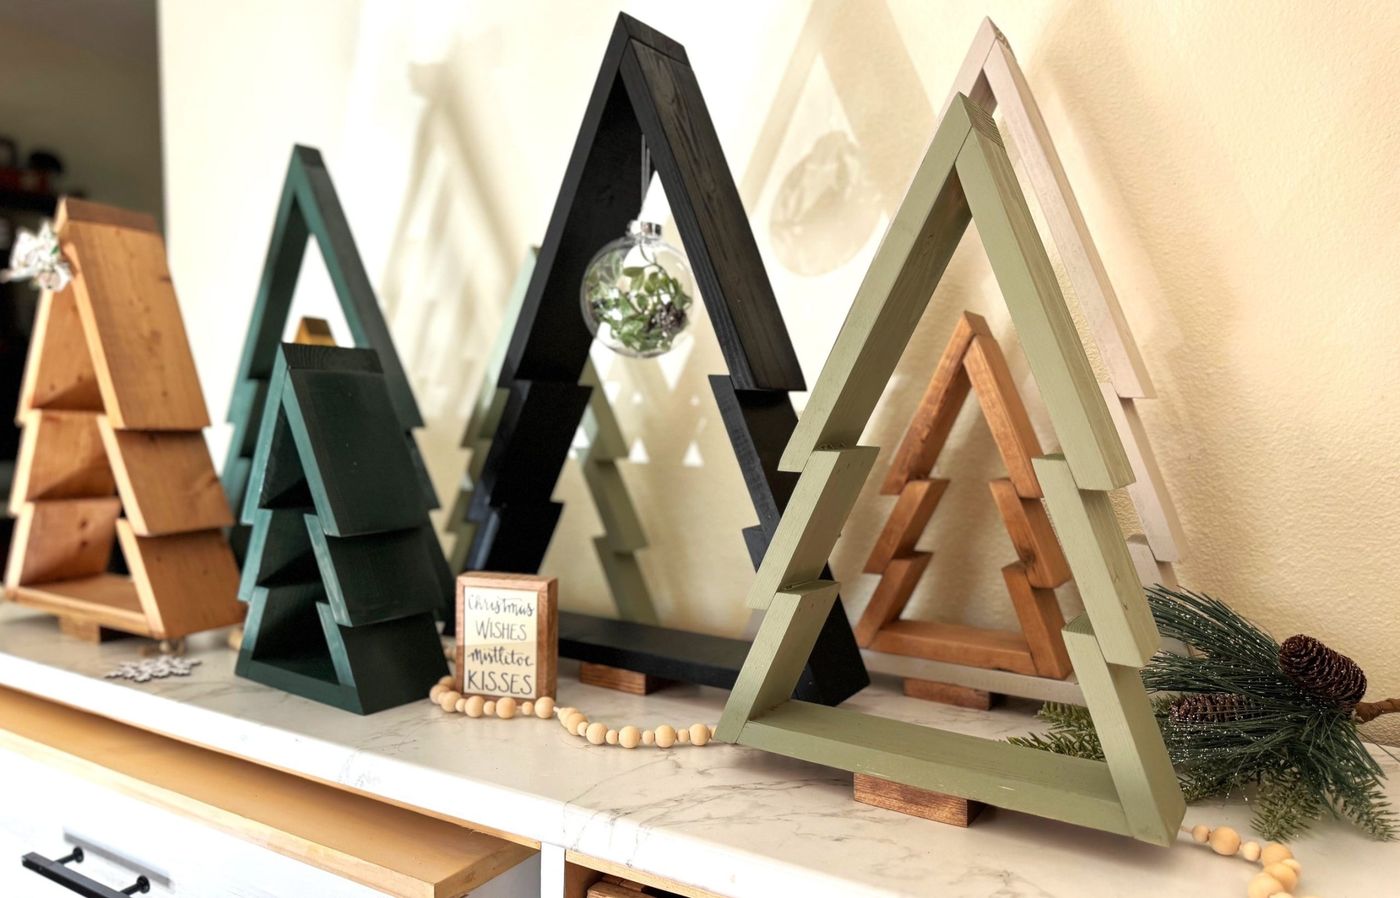
10. A Row of Triangle Trees in Five Different Finishes
These read best at 6 to 18 inches tall, arranged in a group of three to five with at least 2 inches between each. A standard 60-inch mantel or a 5-foot console handles five comfortably; a narrow windowsill handles two. Vary the heights by about 3 inches each so the group forms its own descending shape. For a floor-standing version of the same silhouette, see Idea #4.
- Remove the cap from a clear glass bauble and set it aside.
- Snip three or four 3-inch sprigs of faux greenery plus one small pinecone.
- Curl the sprigs inside the ornament with a pencil, add the pinecone, and shake gently to settle it.
- Thread a loop of twine through the cap and screw it back on.
- Hang it from the crossbar so the bauble sits just below the wood line.
Ten minutes and about $4 per ornament.
11. Black A-Frame Tree With Wooden Drop Ornaments
Space the horizontal bars 4 to 6 inches apart and keep the lowest one at least 3 inches off the base — ornaments need room to hang without touching the surface. Drill pilot holes smaller than your screws or the pine will split right at the joint. And hang the ornaments slightly off-center on alternating sides; perfectly centered ornaments on perfectly centered bars look manufactured.
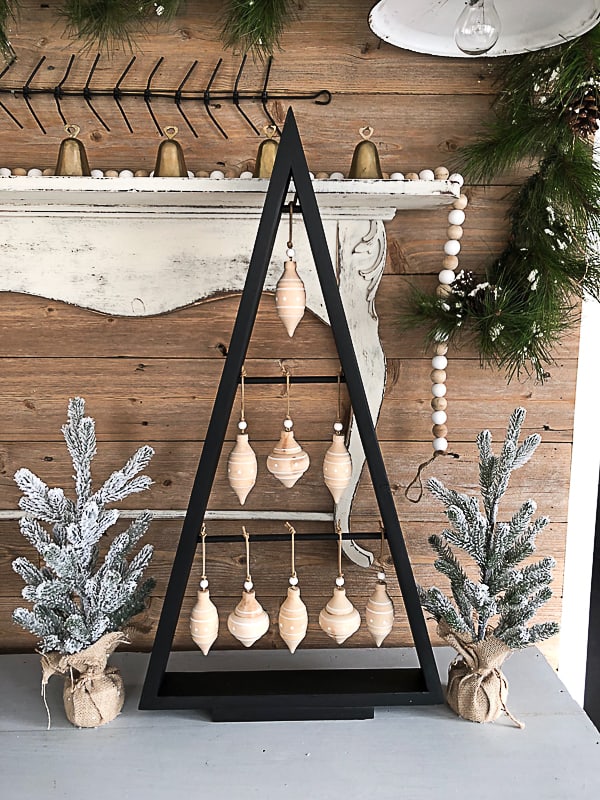
Black is unforgiving. It shows every fingerprint and every bit of dust, and in a small dark room it can read as a silhouette you keep bumping into. The burlap-wrapped bases also shed, so put a felt pad underneath or you’ll find fibers everywhere. If you love the shape but not the drama, the same A-frame painted soft white disappears into a light room instead of dominating it.
12. Three Hollow Triangle Frames, Three Wood Stains
The slats inside each frame are angled like branches, so the hollow interior has depth instead of being an empty hole. That’s the difference between a wood outline and a tree. The three finishes — green, dark red, brownish-green — sit close enough on the color wheel to read as one collection rather than three separate purchases, and because each frame is hollow, the group stays visually light even in a dark corner.
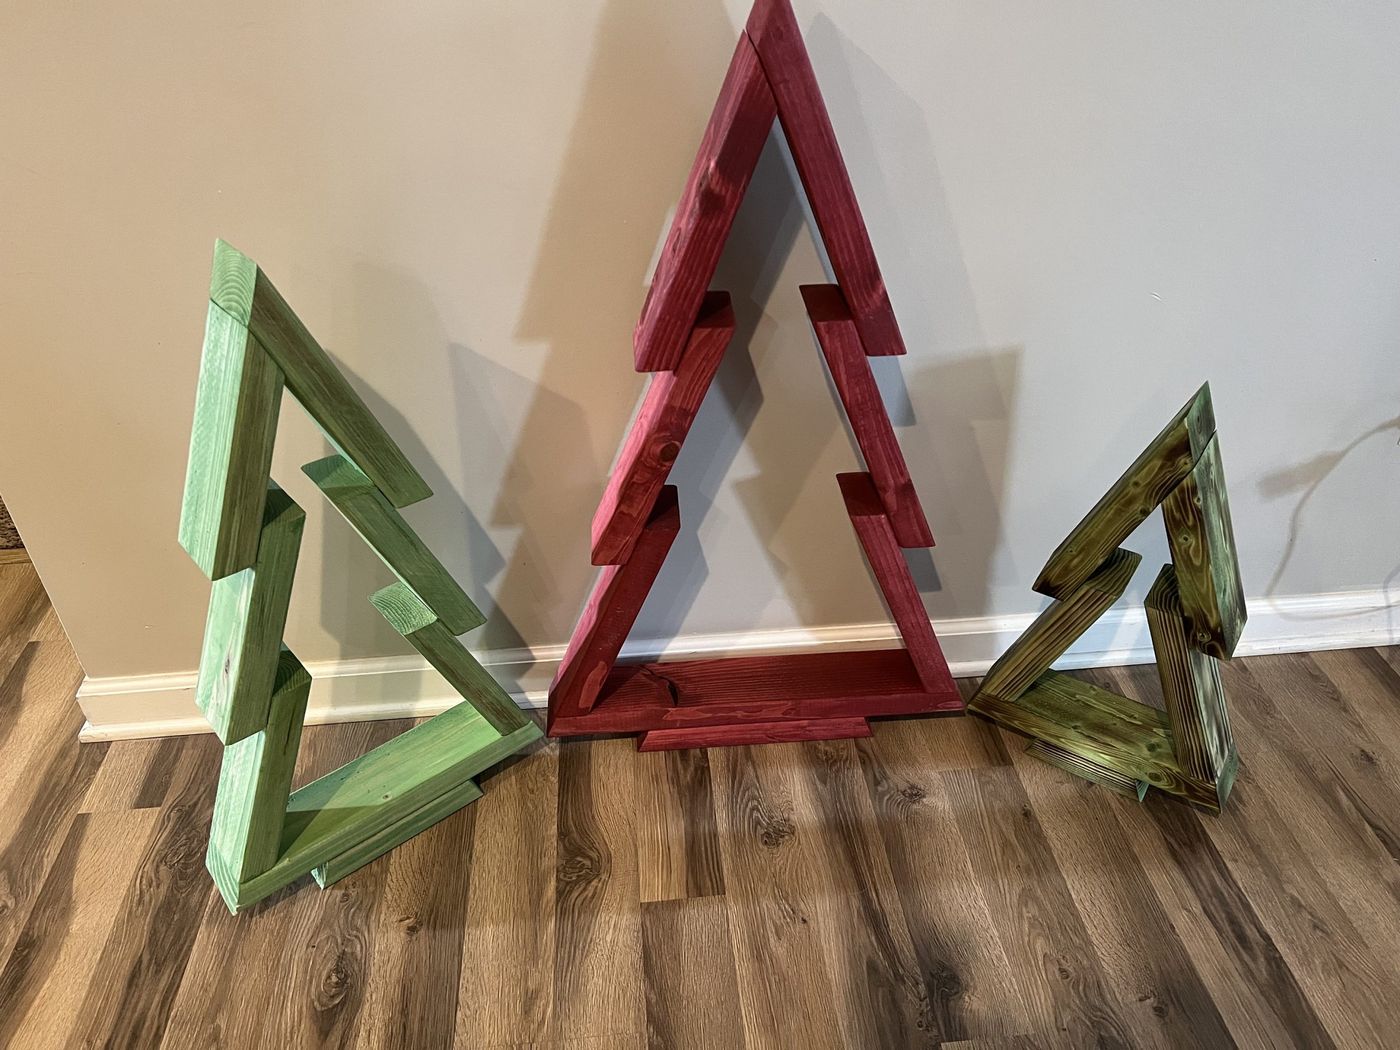
Stained wood is low-effort: dust with a dry microfiber cloth every couple of weeks and skip the spray polish, which builds up and dulls the finish. If a frame lives near a doorway, expect the bottom 6 inches to take the abuse — a quick rub with fine steel wool and a fresh wipe of stain every year or two handles it. Keep the stain can; something will chip.
13. Sage Green Block Tree With a Gold Star
The mix runs about 50% sage green, 30% white, 10% gold, 10% bright red. Two neutrals, two accents, and the accents are tiny — that’s why it feels calm instead of candy-colored. Want it warmer? Trade sage for olive and the white base for cream. Want it sharper? Make the berries a deeper crimson. The proportions stay the same either way.
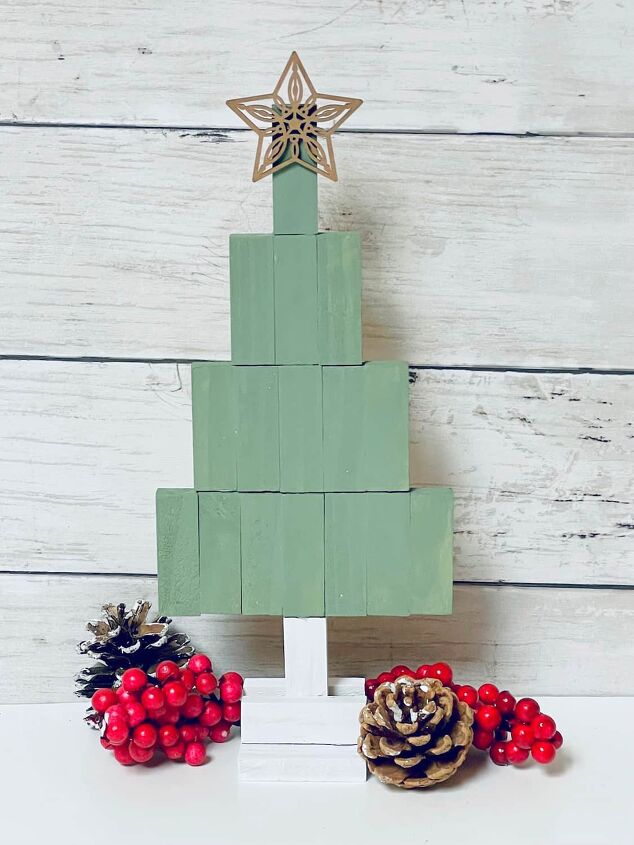
This one is genuinely cheap to fake: $1 wood blocks from a craft store, a $3 sample pot of sage paint, and a white base cut from a scrap of 1×4. Berries from the dollar store and pinecones from the yard finish it. The star is the one place to spend — a $5 wood star cutout beats a cheap plastic one every time. Under $20 total.
14. Whitewashed Blocks Wrapped Like Little Presents
- Sand the blocks to 150 grit and wipe off the dust.
- Brush on watered-down white paint, then wipe most of it back with a rag while it’s still wet.
- Cut two ribbon lengths per block: one sheer burgundy, one narrow gold.
- Wrap each block like a gift, crossing the ribbons on the front and finishing with a small knot.
- Thread a rusty jingle bell onto the knot and trim the ribbon ends at an angle.
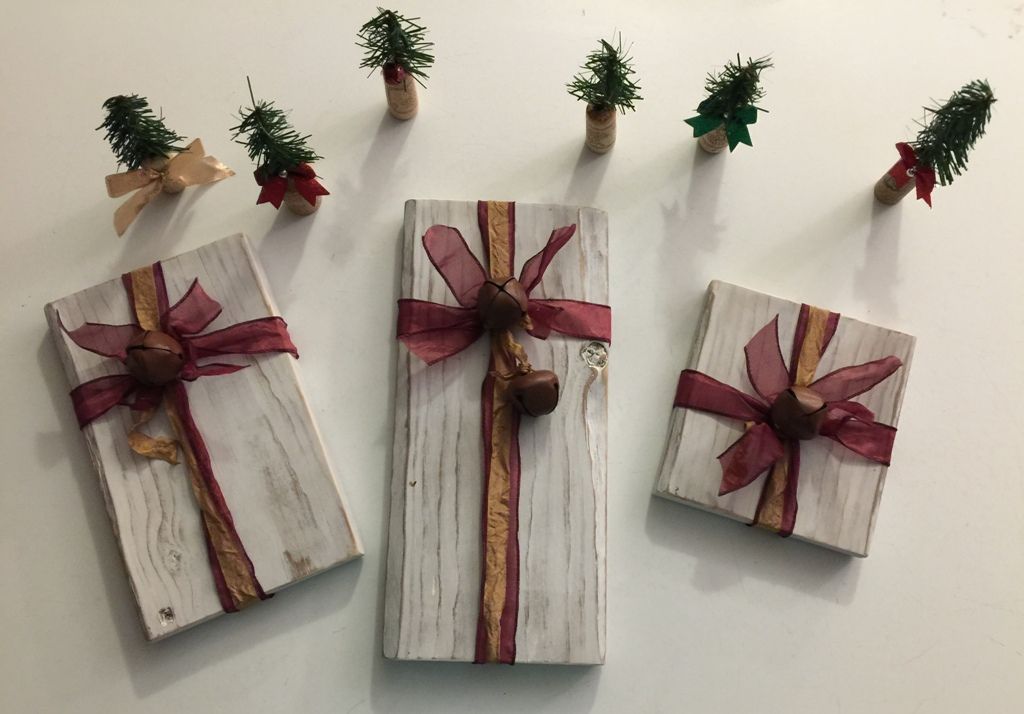
About 45 minutes for three blocks, roughly $12 in supplies.
Bottle brush trees, rusty bells, and whitewashed wood are all riding the same wave: a reaction against the glossy, coordinated holiday aisle. People want pieces that look collected over years rather than bought in one cart, and small handmade objects photographed on a neutral surface are exactly what gets saved on Pinterest right now. This look has staying power because it isn’t tied to one palette.
15. Wood Block Trees Crowding a Fireplace Mantel
Mantels are typically 5 to 6 feet wide with 6 to 8 inches of depth, which fits five or six block trees between 6 and 14 inches tall without a traffic jam. Keep the tallest near one end rather than dead center — off-center groupings photograph better and leave room for candles. Nine-foot ceilings can take a bigger cluster; a 7-foot ceiling in a small living room wants three, max. For a smaller surface, use the mini set in Idea #13.
Real pine garland, not faux. The block trees are simple and a little stiff, and a strand of real greens drapes with a limp that no wire-core garland can fake. It also smells like Christmas, which sounds like a cliché until you walk past it. Everything else here — candles, wood, greenery — stays quiet on purpose so the fresh branches remain the loudest thing in the room.
16. Green Slat Trees Screwed Onto a Center Post
- Three 8-foot 2x4s for slats and posts: $12-$24
- 1½-inch deck screws: $8-$12
- Exterior green stain, one quart: $18-$28
- Sandpaper and brushes: $10-$15
- Wood glue and a driver bit: $8
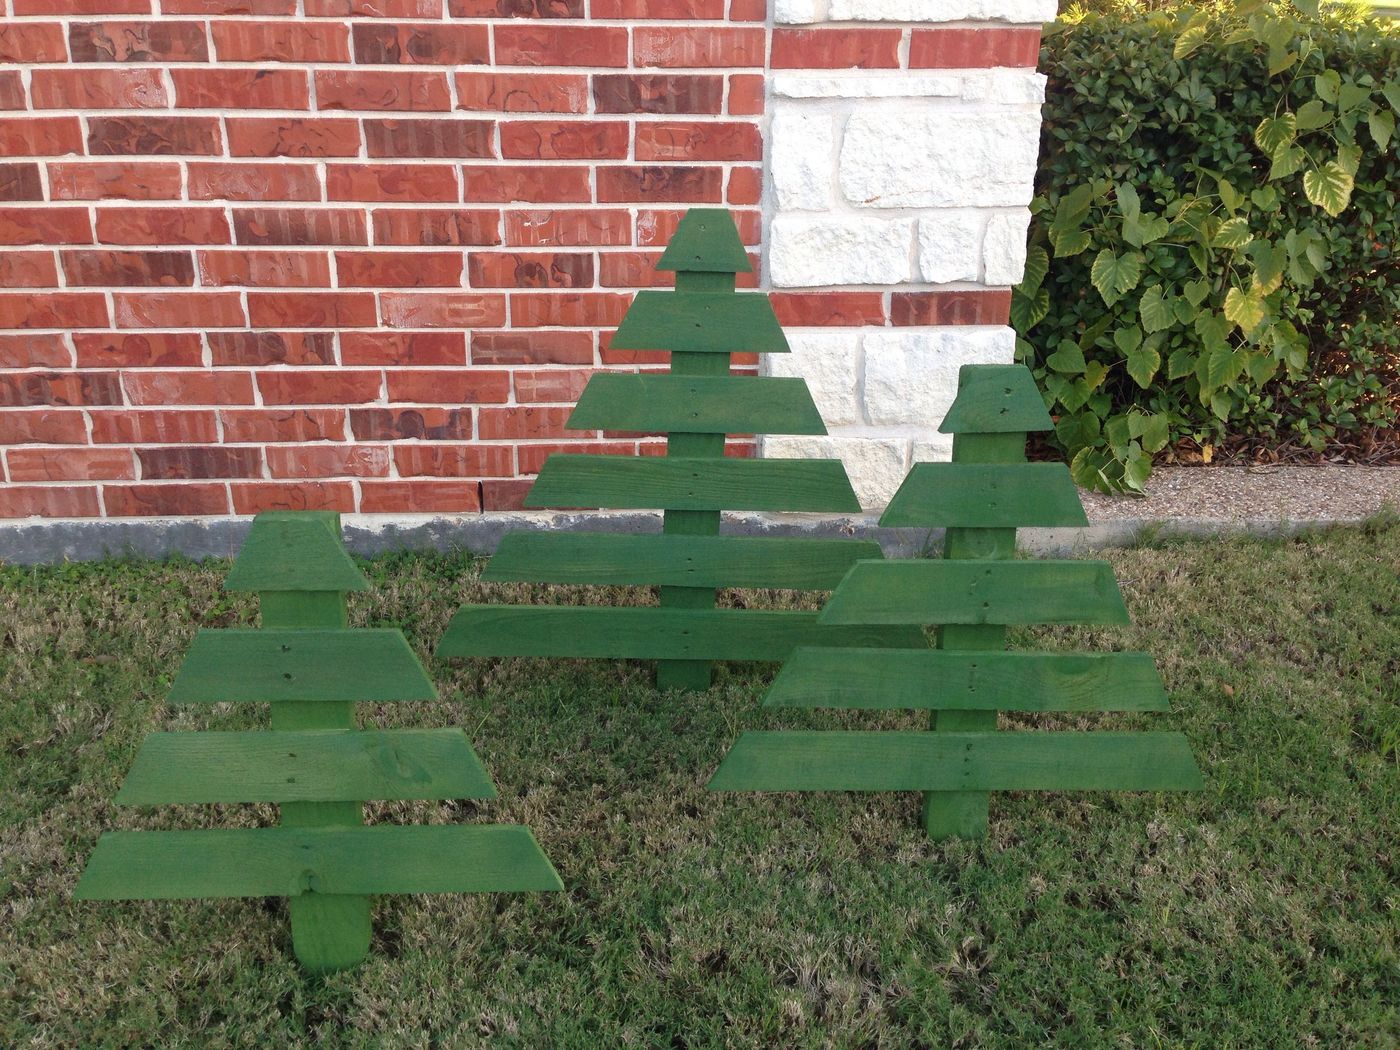
Total: $56-$87 for all three trees. Budget alternative: skip the stain and use a $10 can of exterior spray paint — thinner coverage, but it dries in an hour and costs a third as much.
If these live outside, use exterior-rated stain and expect the green to soften within two seasons — sunlight is brutal on dyed wood. Untreated pine also soaks up water at the end grain, so stand the bases on bricks or rubber feet rather than directly on soil. Store them somewhere dry over summer or you’ll be rebuilding next winter.
17. Painted 2×4 Scraps Finished With Twine Bows
A 2×4 measures 3½ inches across its face, which is exactly why it works here: big enough to read from across the room, small enough to stack without looking like lumber. Cut every piece from one board so the grain and tone match, then sand the cut ends — factory edges are rounded, fresh cuts aren’t, and that difference shows the second you paint. Keep bows under 2 inches wide or they swallow the block.
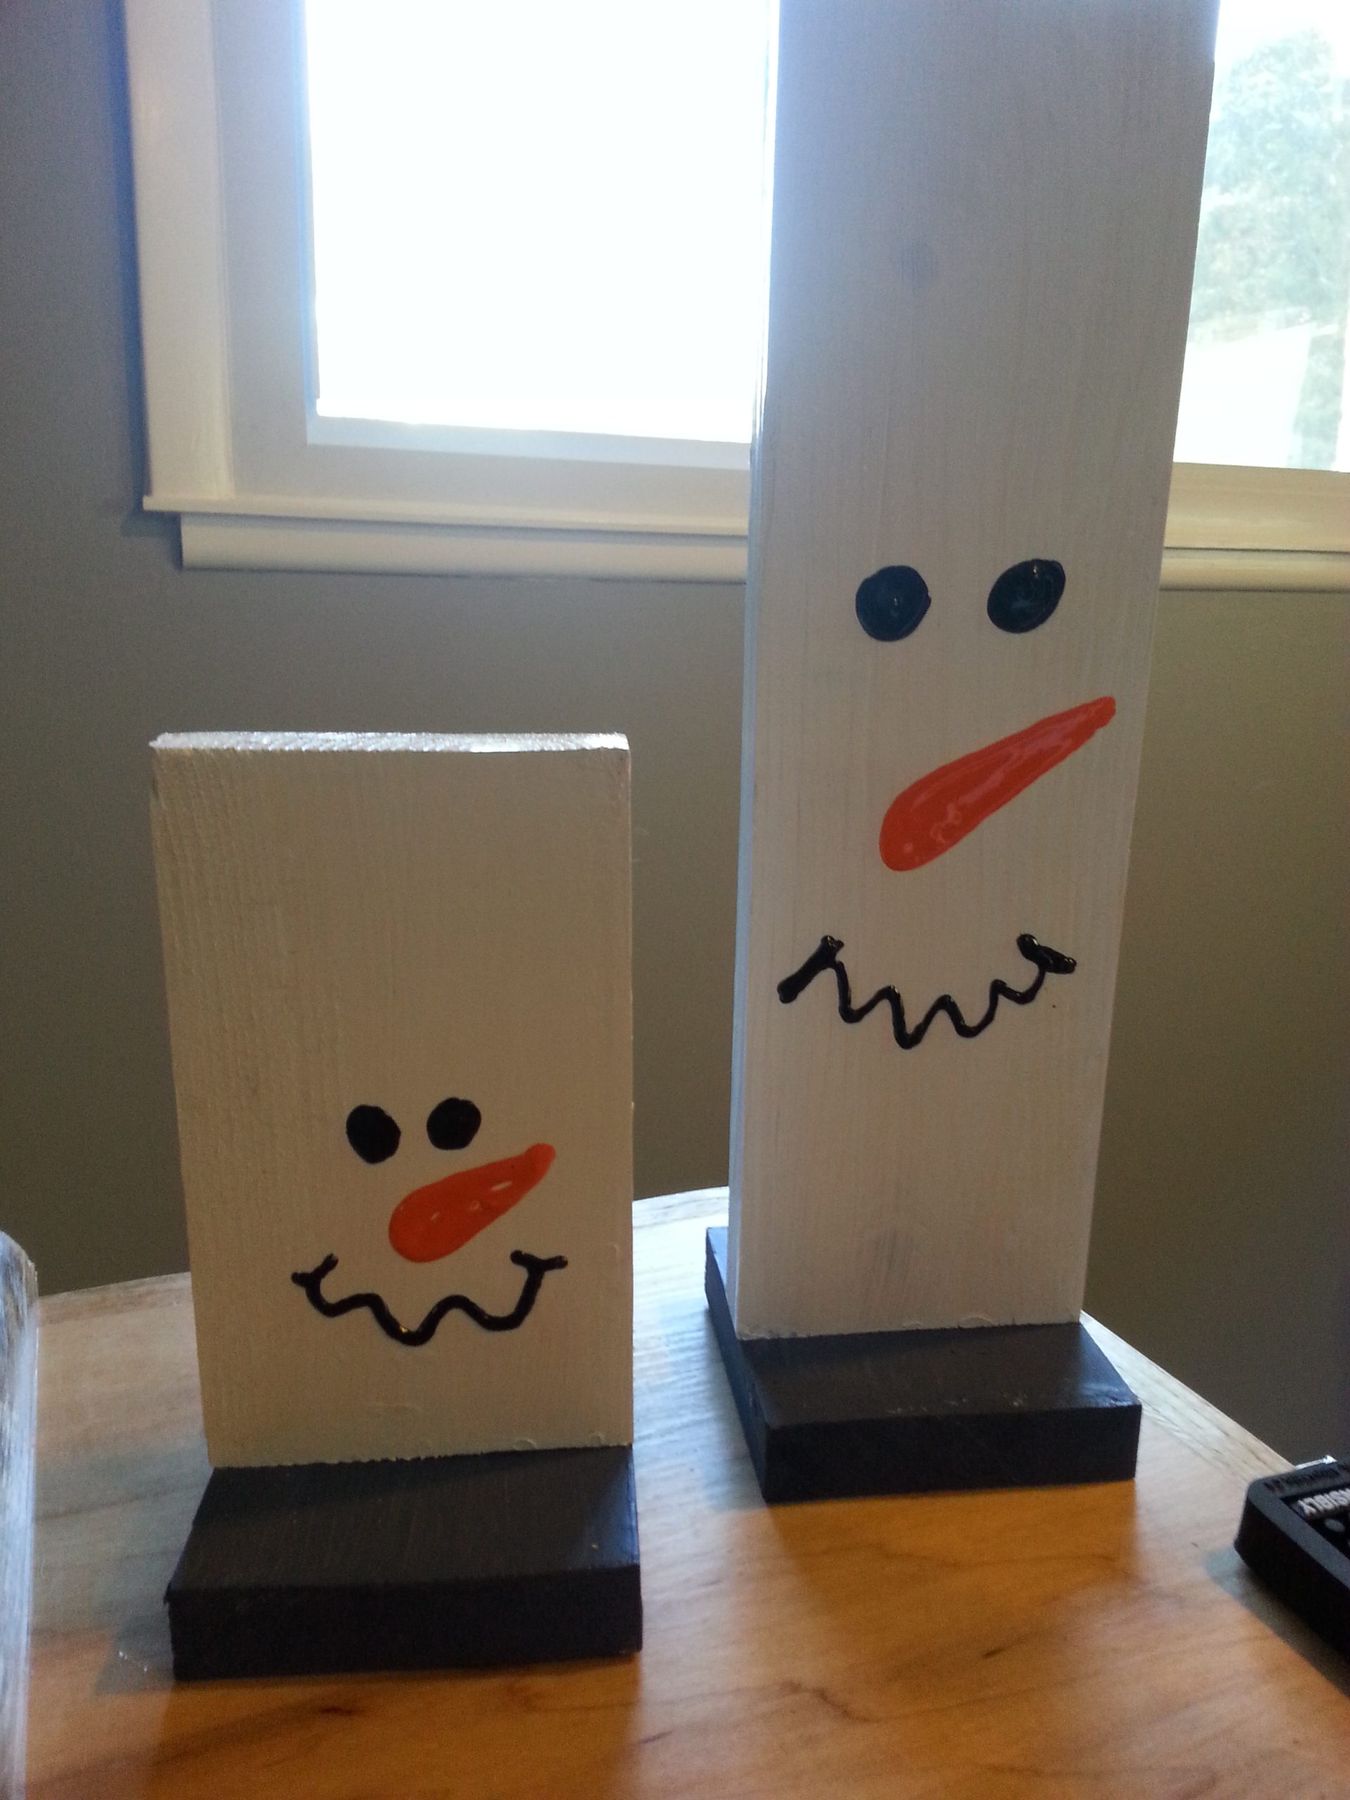
Ask the lumber desk for cutoffs and cull lumber — most yards sell damaged boards at 50-70% off, and a twisted 2×4 still yields plenty of 6-inch pieces. Hobby Lobby’s wood aisle and the dollar-store craft section cover the stars and twine for a couple of bucks. This whole set can come in under $15 if you’re willing to dig through a scrap bin.
18. Distressed White and Green Stacked Block Trees
Roughly 45% distressed white, 35% sage green, 15% exposed raw wood, 5% jute twine. The raw wood shows on the cut edges, and that’s not a flaw — it’s the third color that keeps white and green from looking like a nursery scheme. Swap sage for charcoal and the whole thing turns modern; swap it for brick red and it goes farmhouse. The grain stays either way.

Distressed finishes chip differently than solid paint — a scratch may reveal wood, which honestly just adds character. The bigger issue is dust settling into the sanded-back texture, so use a soft brush rather than a wet cloth. If the white starts looking grimy after a few seasons, a light rub with fine sandpaper and a thin coat of wax brings it back without repainting.
19. Draw the Tree Plan Before You Make a Single Cut
Do the math before the saw comes out. A single 8-foot 2×4 gives you about six usable pieces once you account for blade kerf and squared ends — figure roughly ⅛ inch lost per cut. Sketch your tree at full scale on kraft paper, label each piece with its length and angle, and you’ll cut once instead of driving back for another board. For a classic stepped tree, keep every angle identical; 30 degrees repeats easily on a miter saw.

- Measure the surface it will sit on, not just the wall behind it.
- Check ceiling height and any art you’d need to move.
- Confirm your board count — most designs need two 8-foot 2x4s.
- Decide leaning or hanging, because that changes your hardware list.
- Budget for sandpaper and stain, which people always forget.
20. White Slat Tree Topped With Buffalo Plaid
Plain 2x4s, a $5 can of flat white spray paint, and a bow made from a $4 quarter-yard of buffalo plaid fabric. Glue on pinecones you already have and run a $6 strand of battery lights instead of plugging in. That’s about $35 for a tree that reads like a $140 boutique piece. The brick wall behind it costs nothing and is doing at least a third of the work.
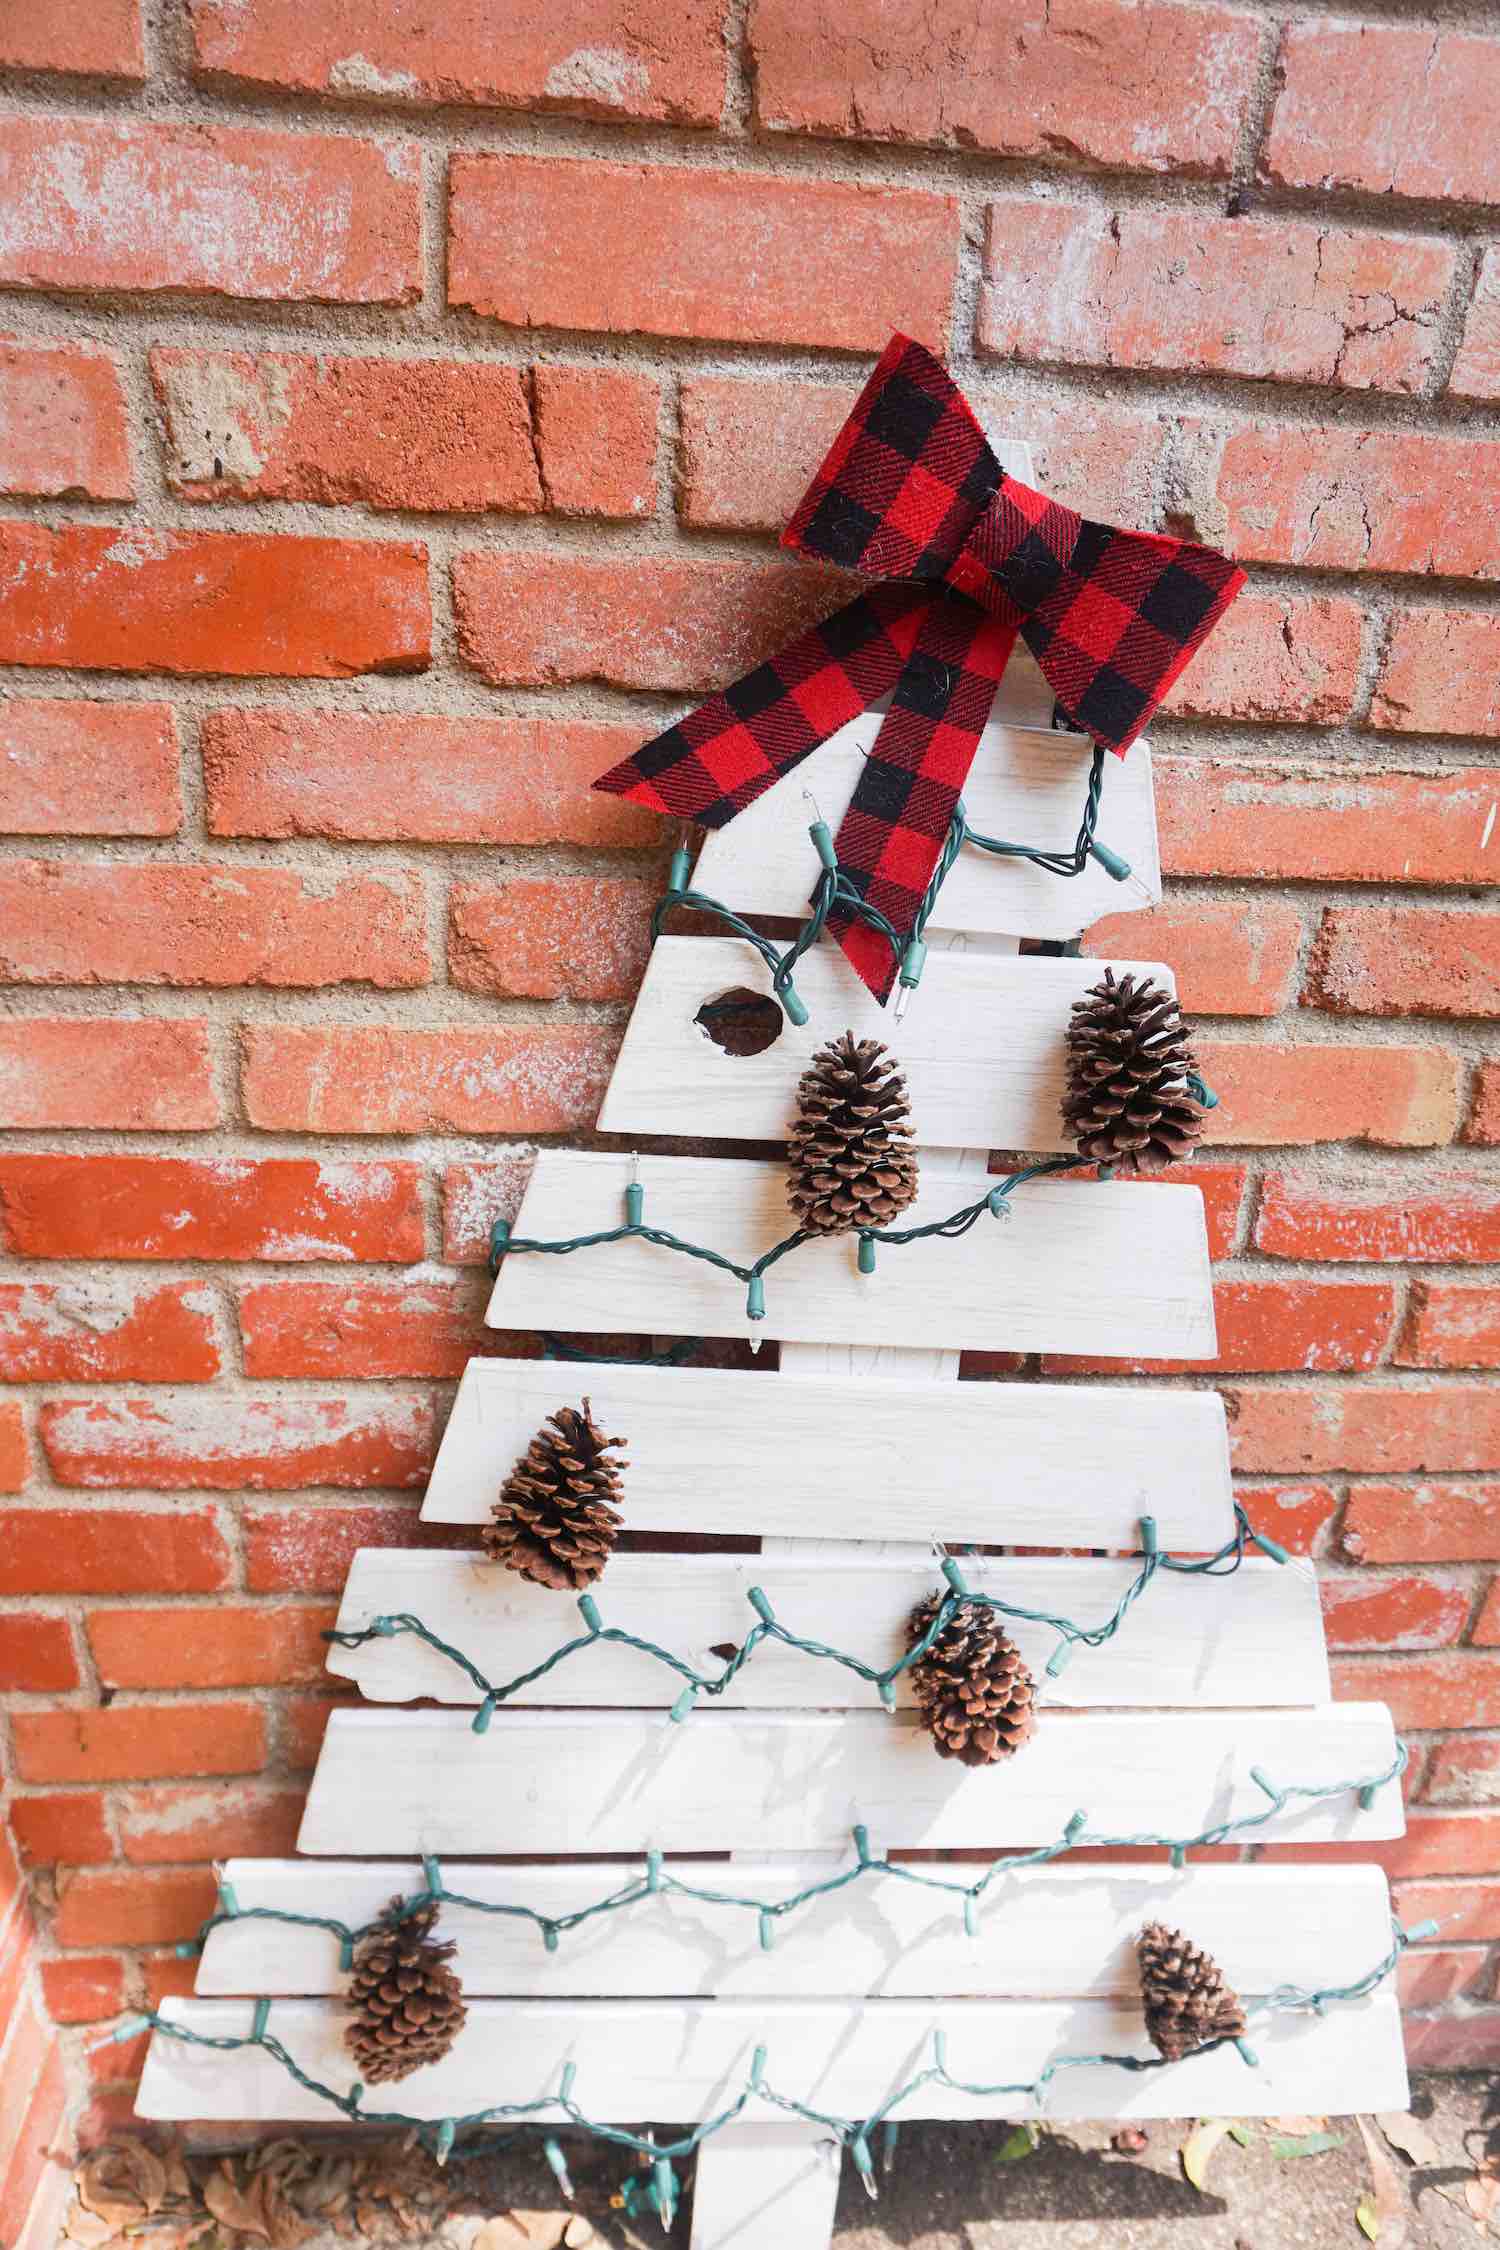
Buffalo plaid is a commitment. It anchors everything to a rustic, cabin-adjacent look, so a glossy modern room will fight it. White paint on exterior wood is also high-maintenance — one rainy season and you’re touching up the bottom tier. On the fence? Keep the tree white and use a simple red velvet ribbon; add plaid next year.
Painted slats want a wipe-down twice a season with a damp cloth, since brick dust and pollen settle into the grooves. Battery packs corrode if they sit outside through a wet month, so bring them in or use a sealed outdoor set. Expect to refresh the white every other year if it gets direct sun.
21. A Wooden Turkey With Feathers and an Organza Bow
Wood crafts that stretch across two holidays are quietly becoming the thing. A light gray block with painted eyes and a bow works from late October straight through to the day the tree goes up, which is exactly what people in small homes with limited storage are looking for. Folk-art detail — visible brushstrokes, a hand-drawn beak, real feathers — is what makes it feel collected instead of printed.
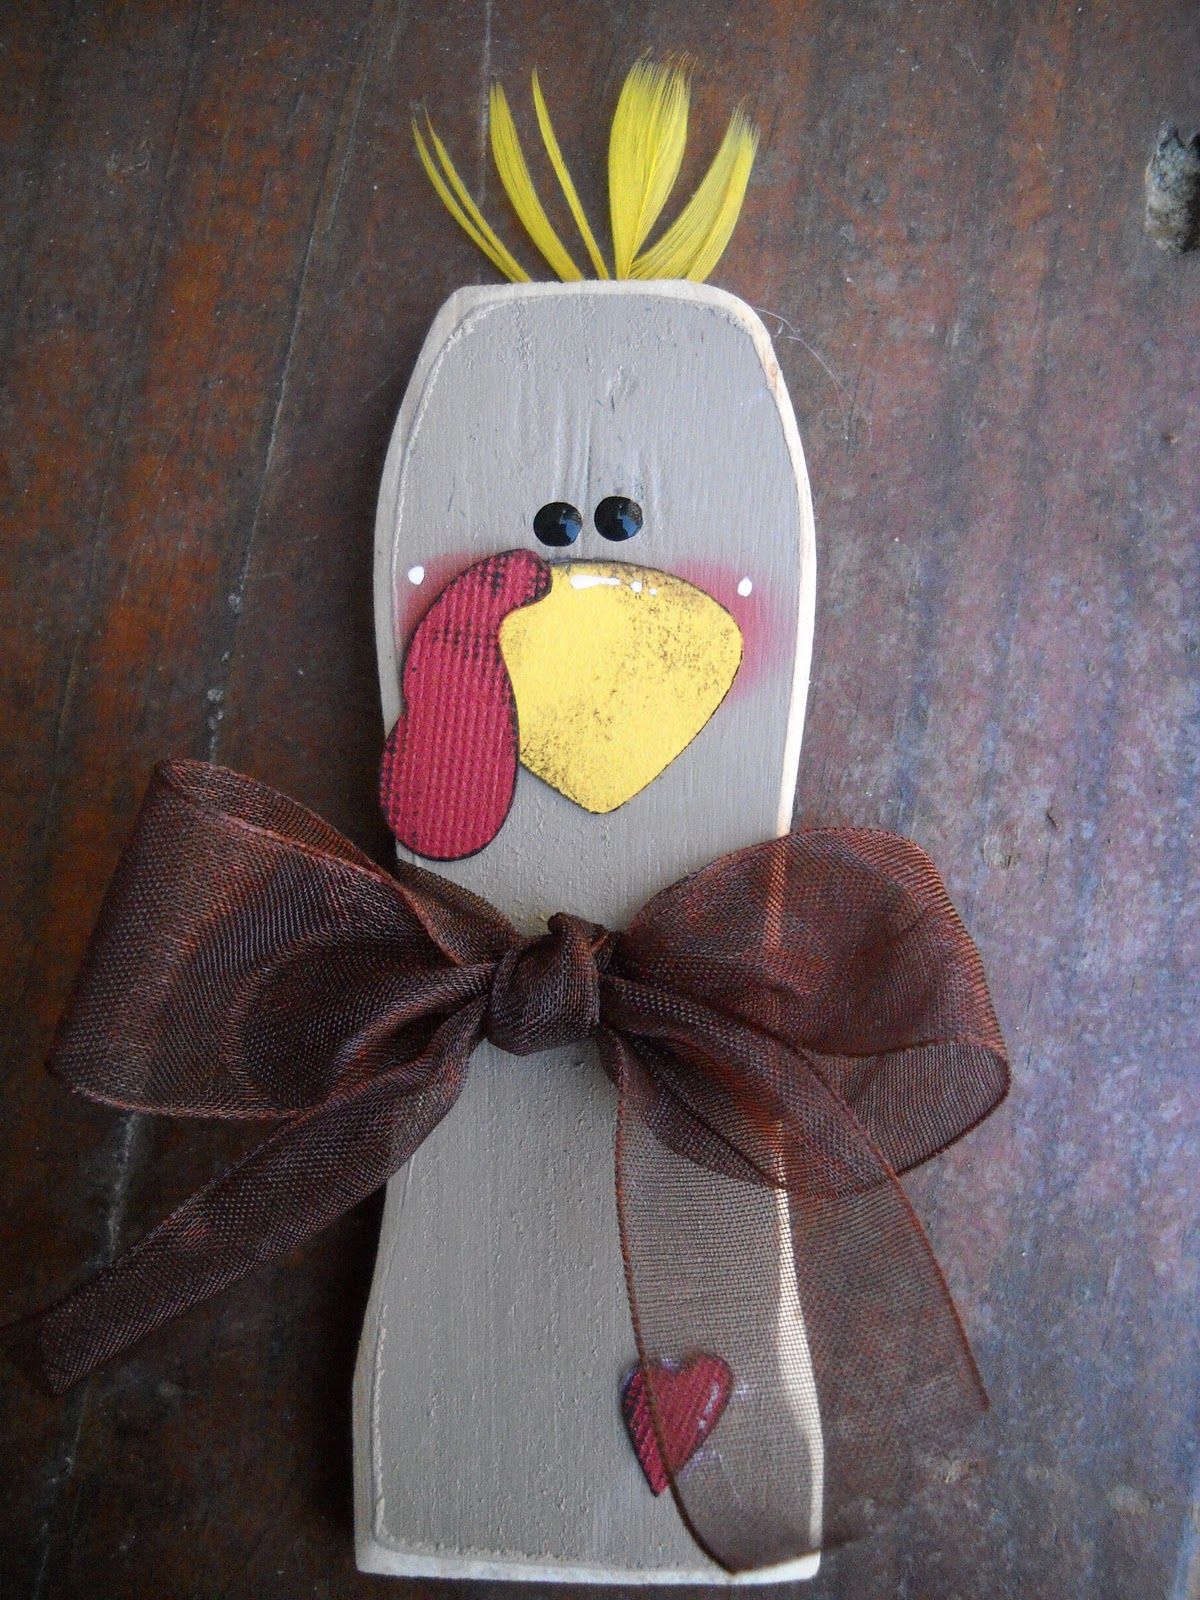
- Cut a 5×7 block of 1x stock and sand the corners round.
- Base coat in light gray; two thin coats dry faster than one thick one.
- Sketch the face in pencil first — eyes, beak, cheeks — then fill with acrylic.
- Paint the wattle in a small repeating pattern so it reads as fabric, not a blob.
- Glue a fan of three feathers to the top and tie a sheer ribbon bow at the neck.
About two hours plus dry time, under $12 in materials.
22. Carved Chevron Trees in a Whitewashed Finish
The chevron carving. Without it you’d have two plain wooden cones with white paint — perfectly fine, completely forgettable. Carving gives the surface something to do with light: every groove catches a shadow and creates a dark texture line no paint finish can replicate. It’s also the reason the whitewash doesn’t read as shabby-chic; the pattern feels intentional rather than worn.
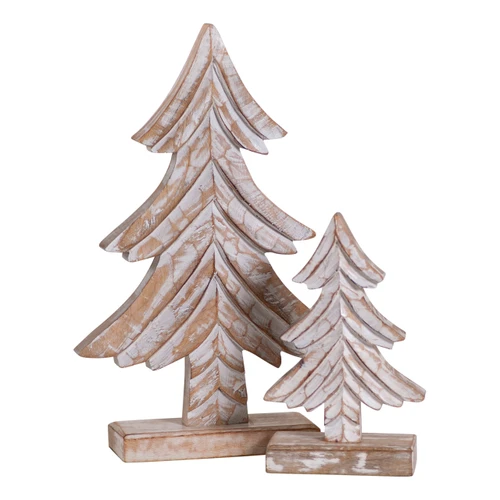
Two pieces, two heights, same texture — that’s the entire composition, and it works because the shapes repeat while the scale changes. The taller tree anchors the pair while the shorter one keeps it from feeling like a matched set from a catalog. Because the whitewash sits over natural wood, you get cool white on the surface and warm brown in the recesses, which is why it holds up against an all-white wall instead of disappearing into it.
23. Clamping Raw Boards Together Without a Jig
- Lay the boards on a flat workbench and align the faces you want flush.
- Place clamps 2 inches in from each end, then one in the middle if the span runs past 18 inches.
- Tighten each clamp a quarter turn at a time, alternating ends, so the boards don’t shift.
- Check for gaps at the joint by eye before you add glue — clamping pressure hides nothing.
- Let the assembly sit 24 hours before you cut or sand it.
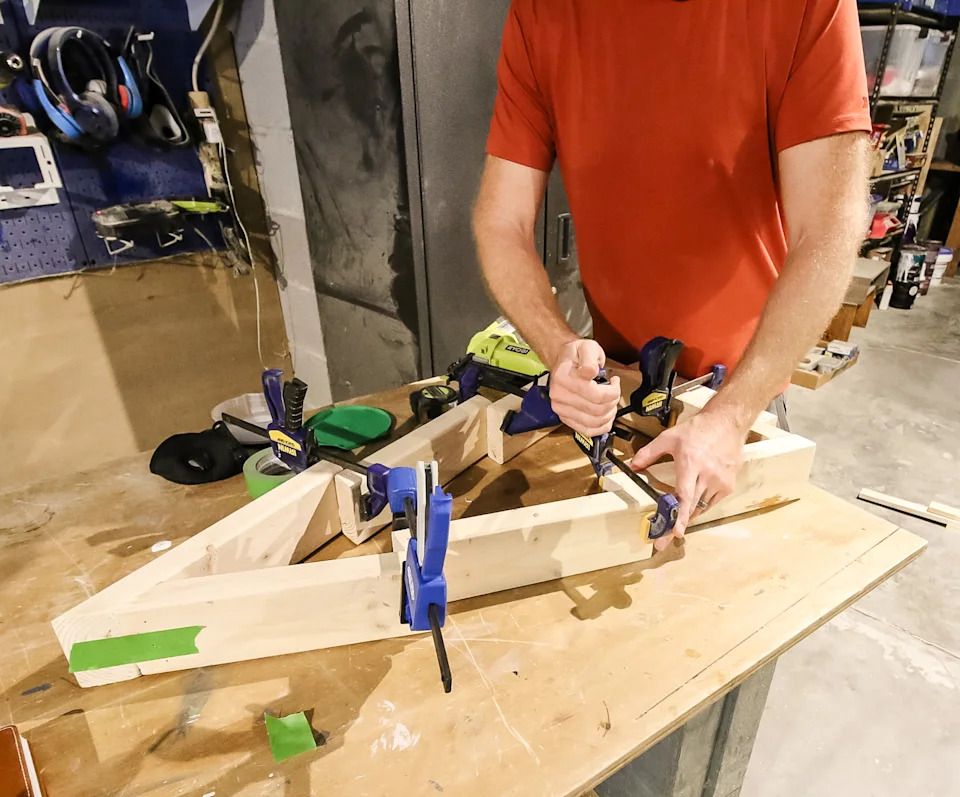
15 minutes to set up, a full day to cure.
- Confirm your clamps open wide enough for the full stack.
- Put cardboard under the work — glue drips are permanent on concrete.
- Check that the boards are dry; wet lumber moves after clamping.
- Count your clamps before you start gluing, because you can’t stop midway.
24. Dry-Fitting Lumber Into a Tree Outline First
Lay the whole thing out on the ground at full size before a single screw goes in. Cut one long base, two equal mid-pieces, and one short top, then shift them around until the silhouette reads right — 15 minutes of arranging saves a rebuild. Number every piece on the underside with a pencil and photograph the layout with your phone. When you stand it up later, you won’t have to guess which piece goes where.
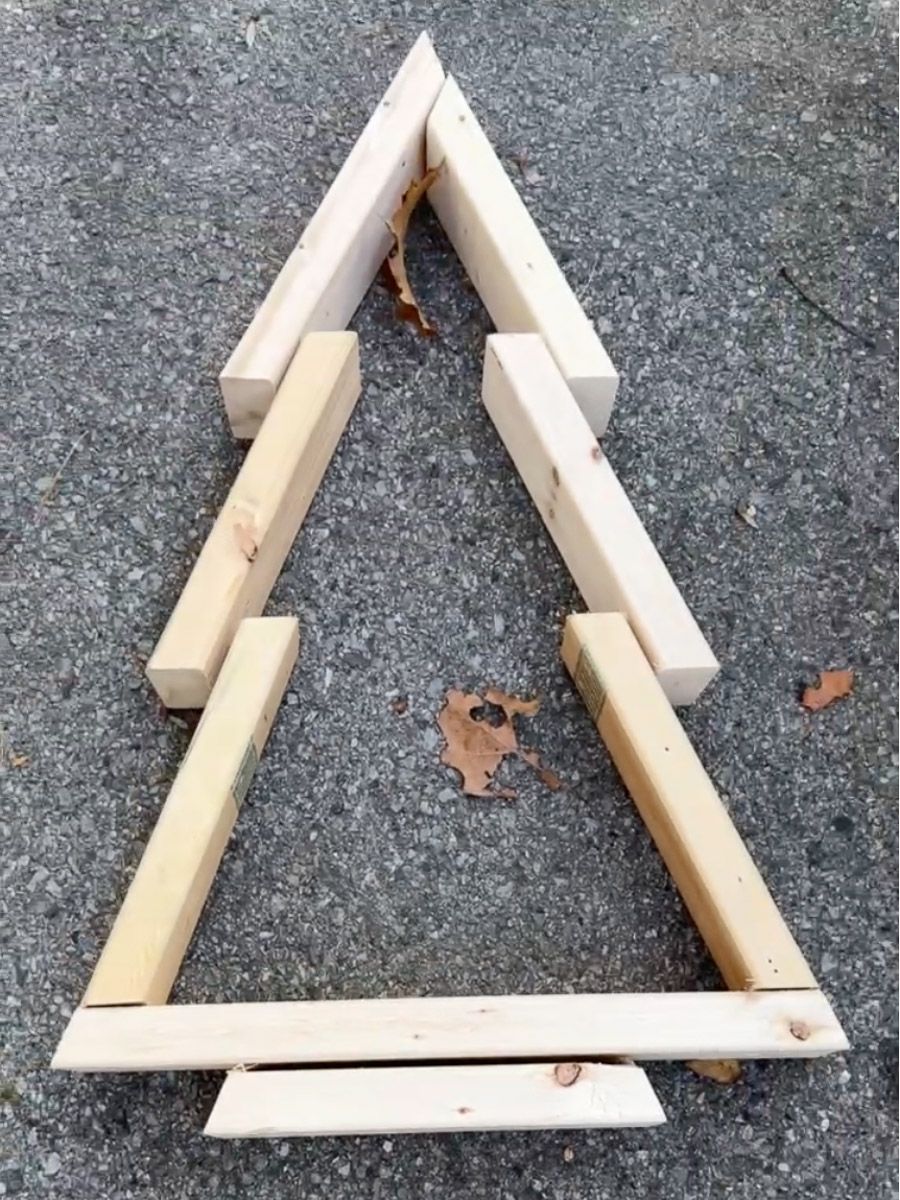
A 36- to 48-inch-tall outline works on just about any wall with 8-foot ceilings and looks especially good in a front entry or beside a fireplace. Anything under 30 inches reads as a tabletop object and wants a shelf or console instead. If you’d rather have a solid, three-dimensional version than an outline, the stepped build in Idea #1 uses the same silhouette with far more visual weight.
25. A Cross-Base Tree Stand Built From Scrap 2x4s
- 2×4 scraps for the cross base and center post: $0-$8
- 3-inch lag screws and washers: $6-$9
- Small artificial tree, 3-4 feet: $25-$60
- Warm white string lights: $10-$18
- Ornaments and gold ribbon: $15-$30
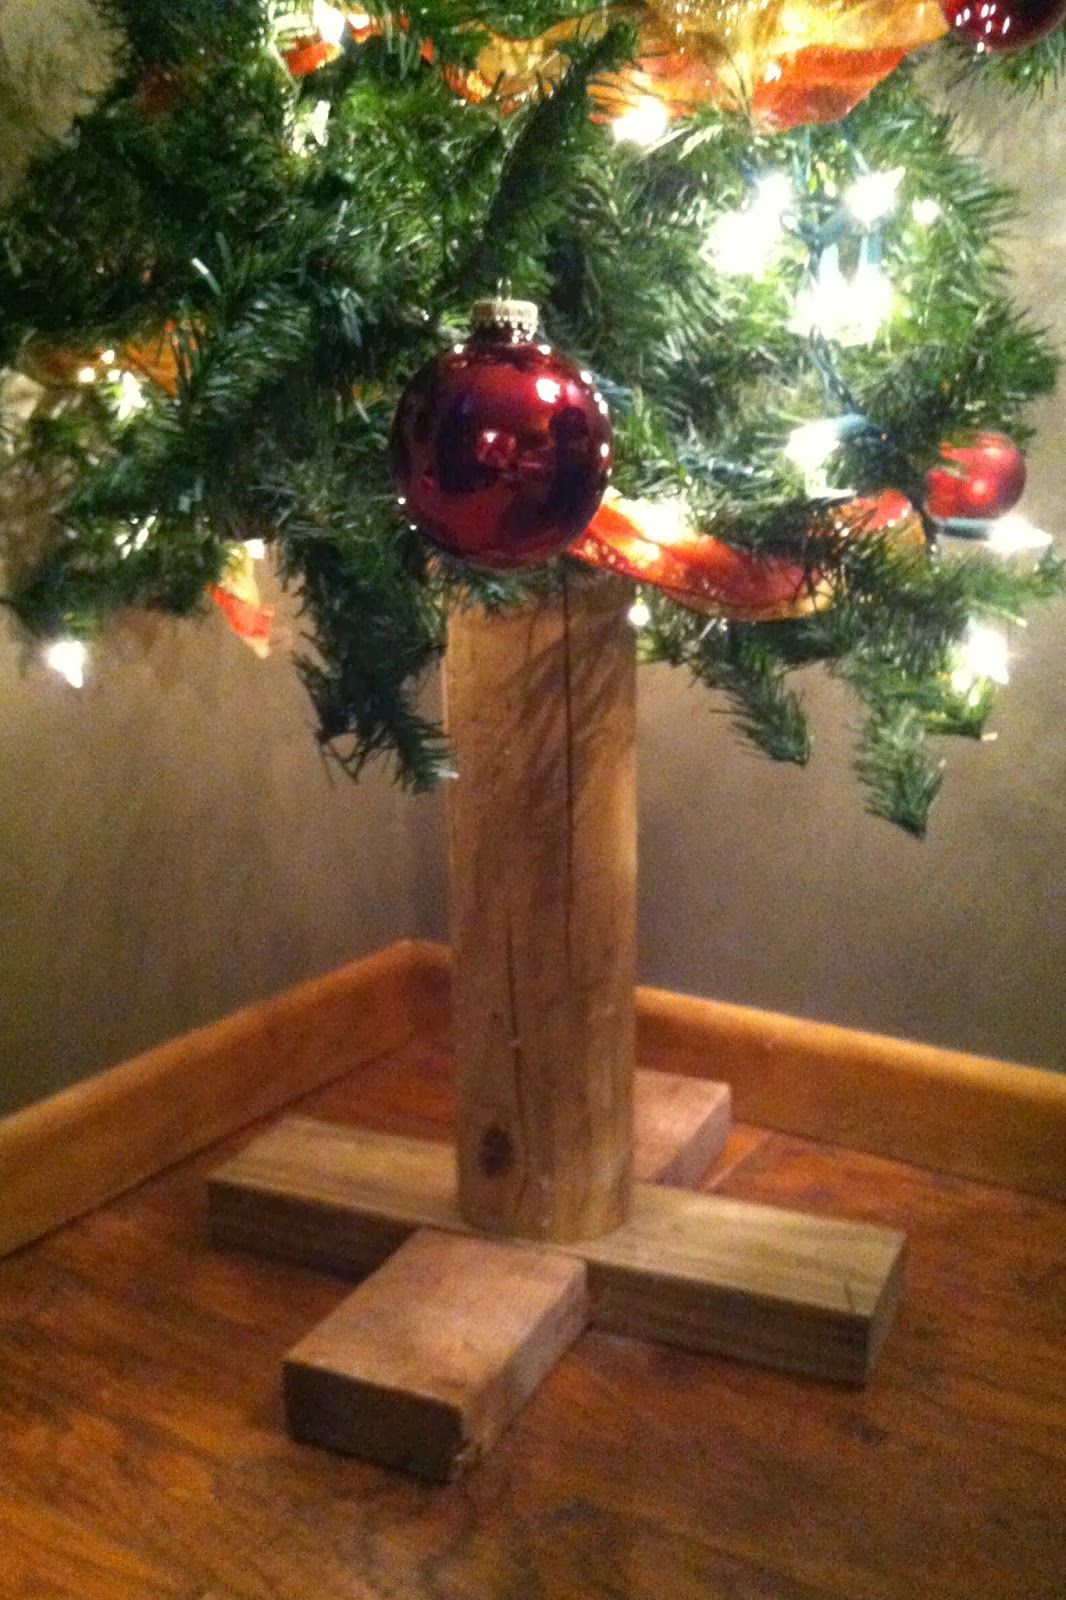
Total: $56-$125, or under $30 if you already own the tree and ornaments. Budget alternative: ask a lumberyard for cutoffs — the base only needs about 30 inches of board total.
The base is the point. It’s the least decorative part of the whole project and the only reason the rest exists — a small tree in a flimsy stand tips the second someone bumps it. Cross-joined 2x4s with a vertical post give you a footprint wide enough to stay stable and low enough to vanish under the branches. Spend your care here and you can decorate as casually as you like.
26. Green-and-White Blocks Draped in Silver Tinsel
Roughly 40% green, 30% white, 20% silver, 10% assorted color. Three of those four are quiet; the last one is a party. It works because the multicolor ornaments are small and the tinsel ties them together with a single reflective material. Trade silver for gold and the whole thing warms up instantly. Trade it for nothing and you’re back to a tasteful but sleepy green-and-white tree.
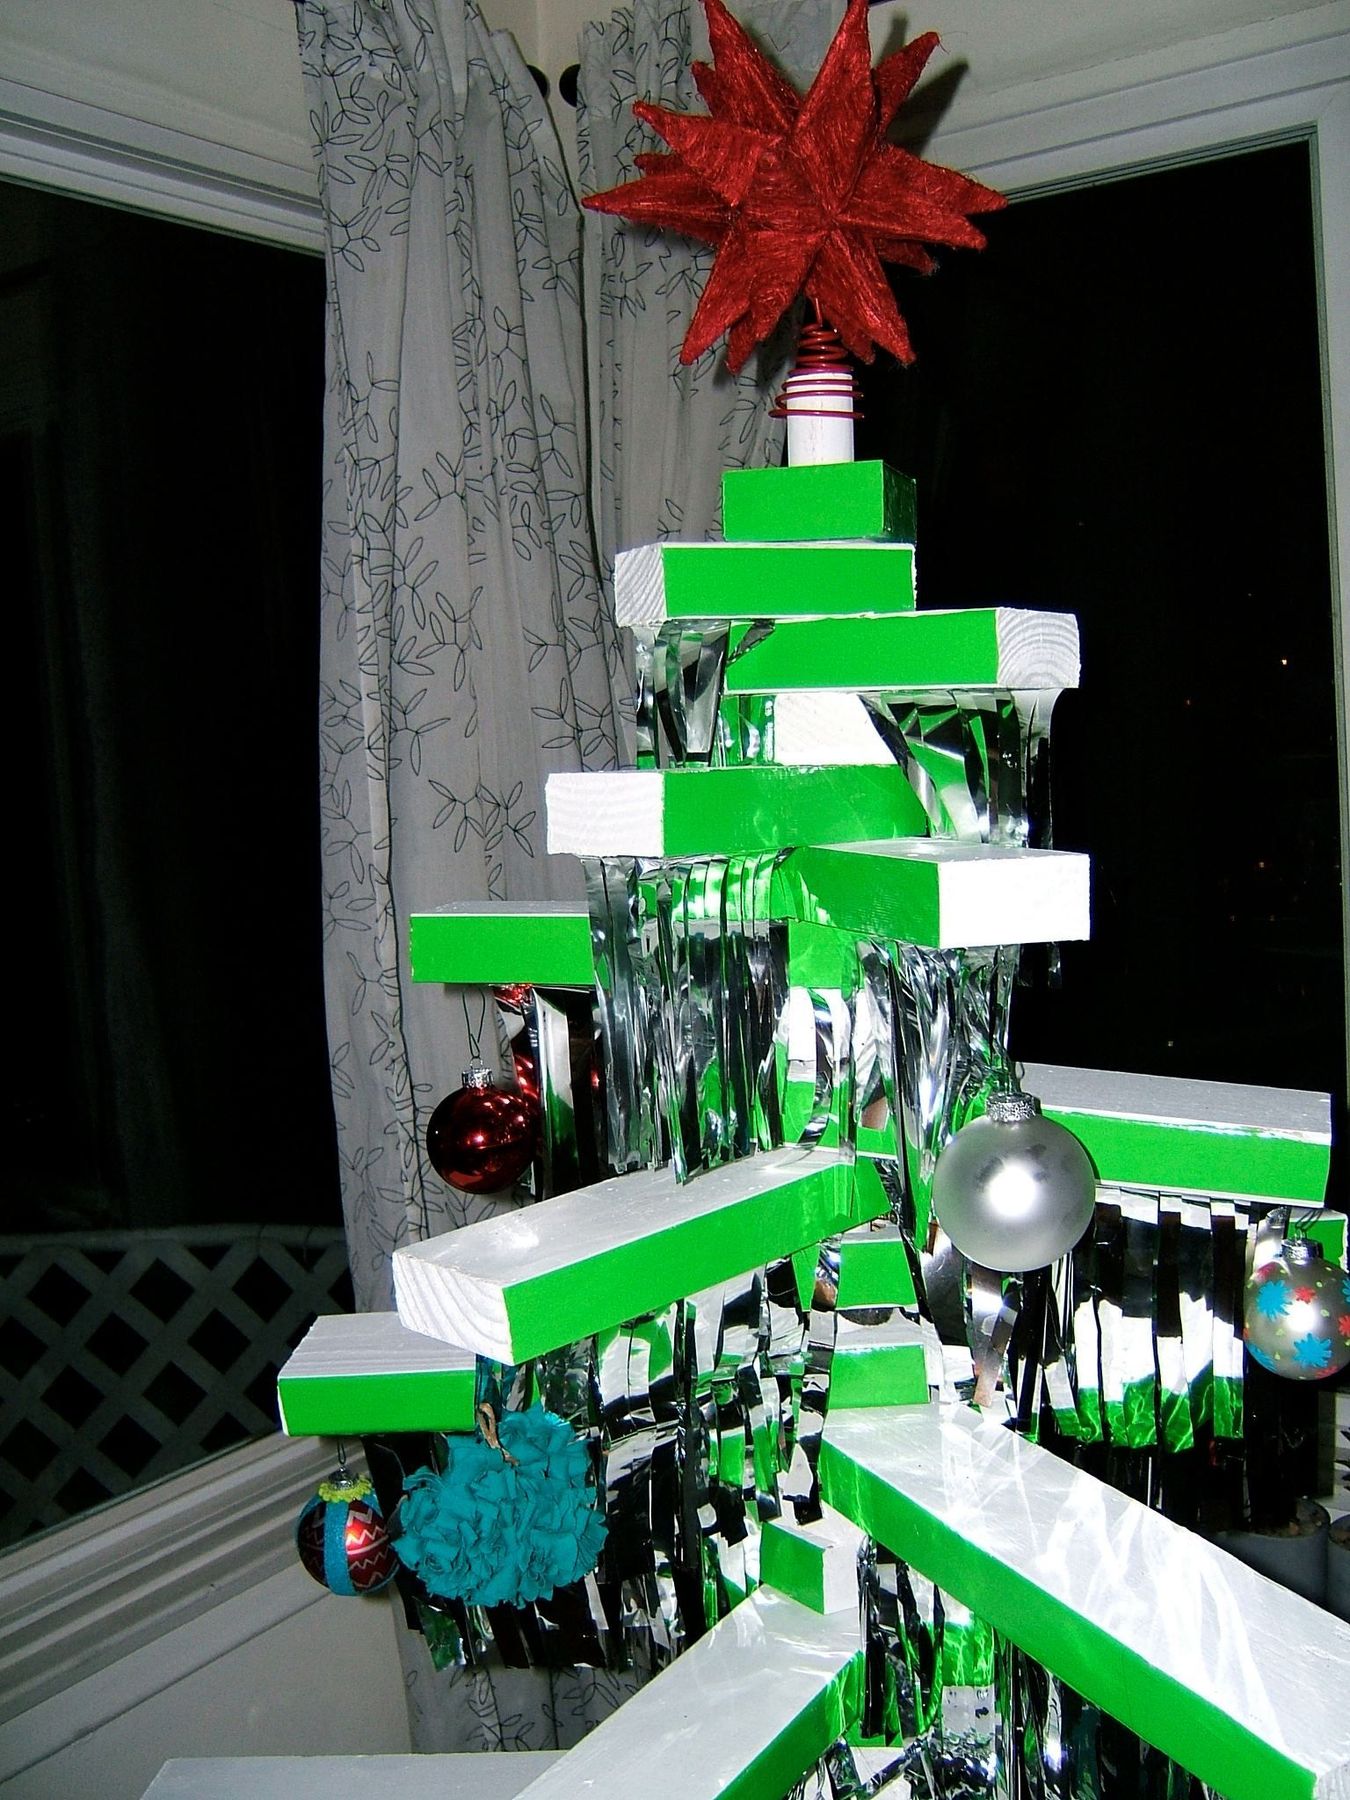
Tinsel sheds. It will shed the day you hang it, the day you dust it, and the day you pack it away. It also tangles the moment two strands touch, so cut your strips to length before you start and resist the urge to fluff. If you have toddlers or a cat, keep ornaments above the 3-foot mark — glass balls at floor level are just a countdown.
27. Alternating 2×4 Lengths, Left Completely Raw
Cut lengths in a descending pattern of long, medium, short, medium — strict symmetry makes a stack look mechanical. One 8-foot 2×4 yields about six usable pieces after kerf and trimming. Cap the top with a small square block rather than a pointed star; that blunt top is what keeps the piece feeling modern instead of traditional, and it’s one less cut to get wrong.
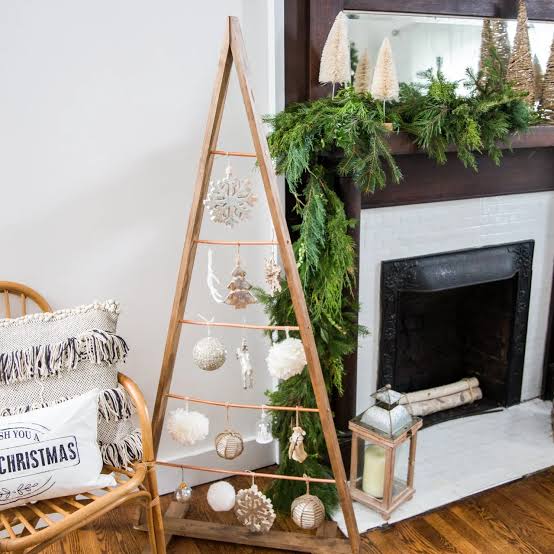
Raw, unfinished pine slowly shifts toward honey as it ages, and it absorbs cooking grease and fingerprints in a kitchen setting. A thin coat of clear paste wax — 20 minutes and one cloth — keeps the tone even and makes dusting easy without adding shine. Skip polyurethane if you like the matte look; it turns the wood noticeably yellow within a year.
28. A Plank Pumpkin in Five Distressed Colors
This is the project that eats leftover paint. Use sample pots and craft acrylics you already own — five colors doesn’t require five quarts. Cut the planks from a single fence picket or 1×4, stack them face-down on two backer strips, and add a burlap bow made from a $2 ribbon remnant. Thrift stores sell wood rounds and burlap by the bag for pocket change. Total: under $15.
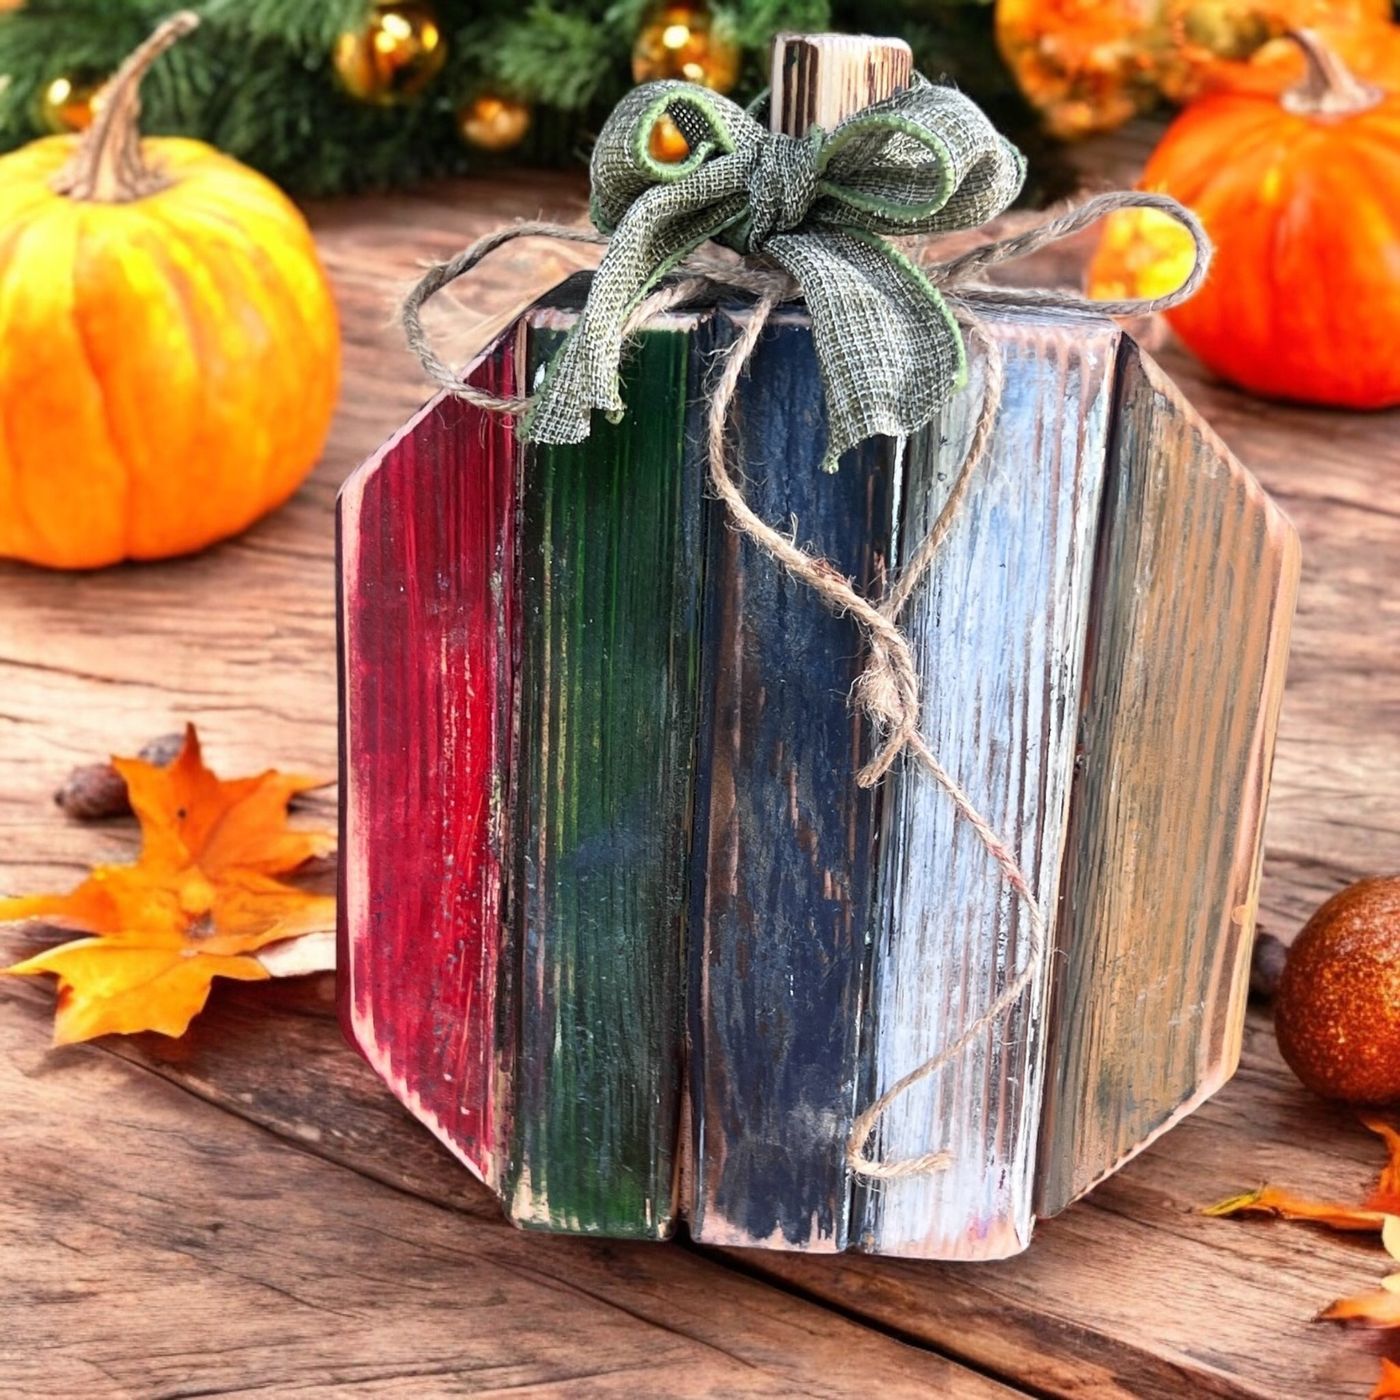
Wood crafts that don’t commit to one holiday are having a real moment. A distressed plank pumpkin in red, green, and navy reads as autumn in October and as handmade-cozy in December — same object, restyled. With storage space at a premium and craft supply prices still climbing, pieces that work twice a year are the ones people actually build.
29. White Block Snowman With a Pencil-Sketched Face
- Cut a 4×6 block and sand every edge until it feels rounded, not sharp.
- Paint it white with two thin coats and let it cure a full day before drawing on it.
- Sketch the eyes, carrot nose, and smile in pencil — you can erase graphite, not acrylic.
- Fill the eyes with solid black and outline the nose in orange, leaving the center white.
- Seal with one light coat of matte clear spray so the pencil lines don’t smudge.
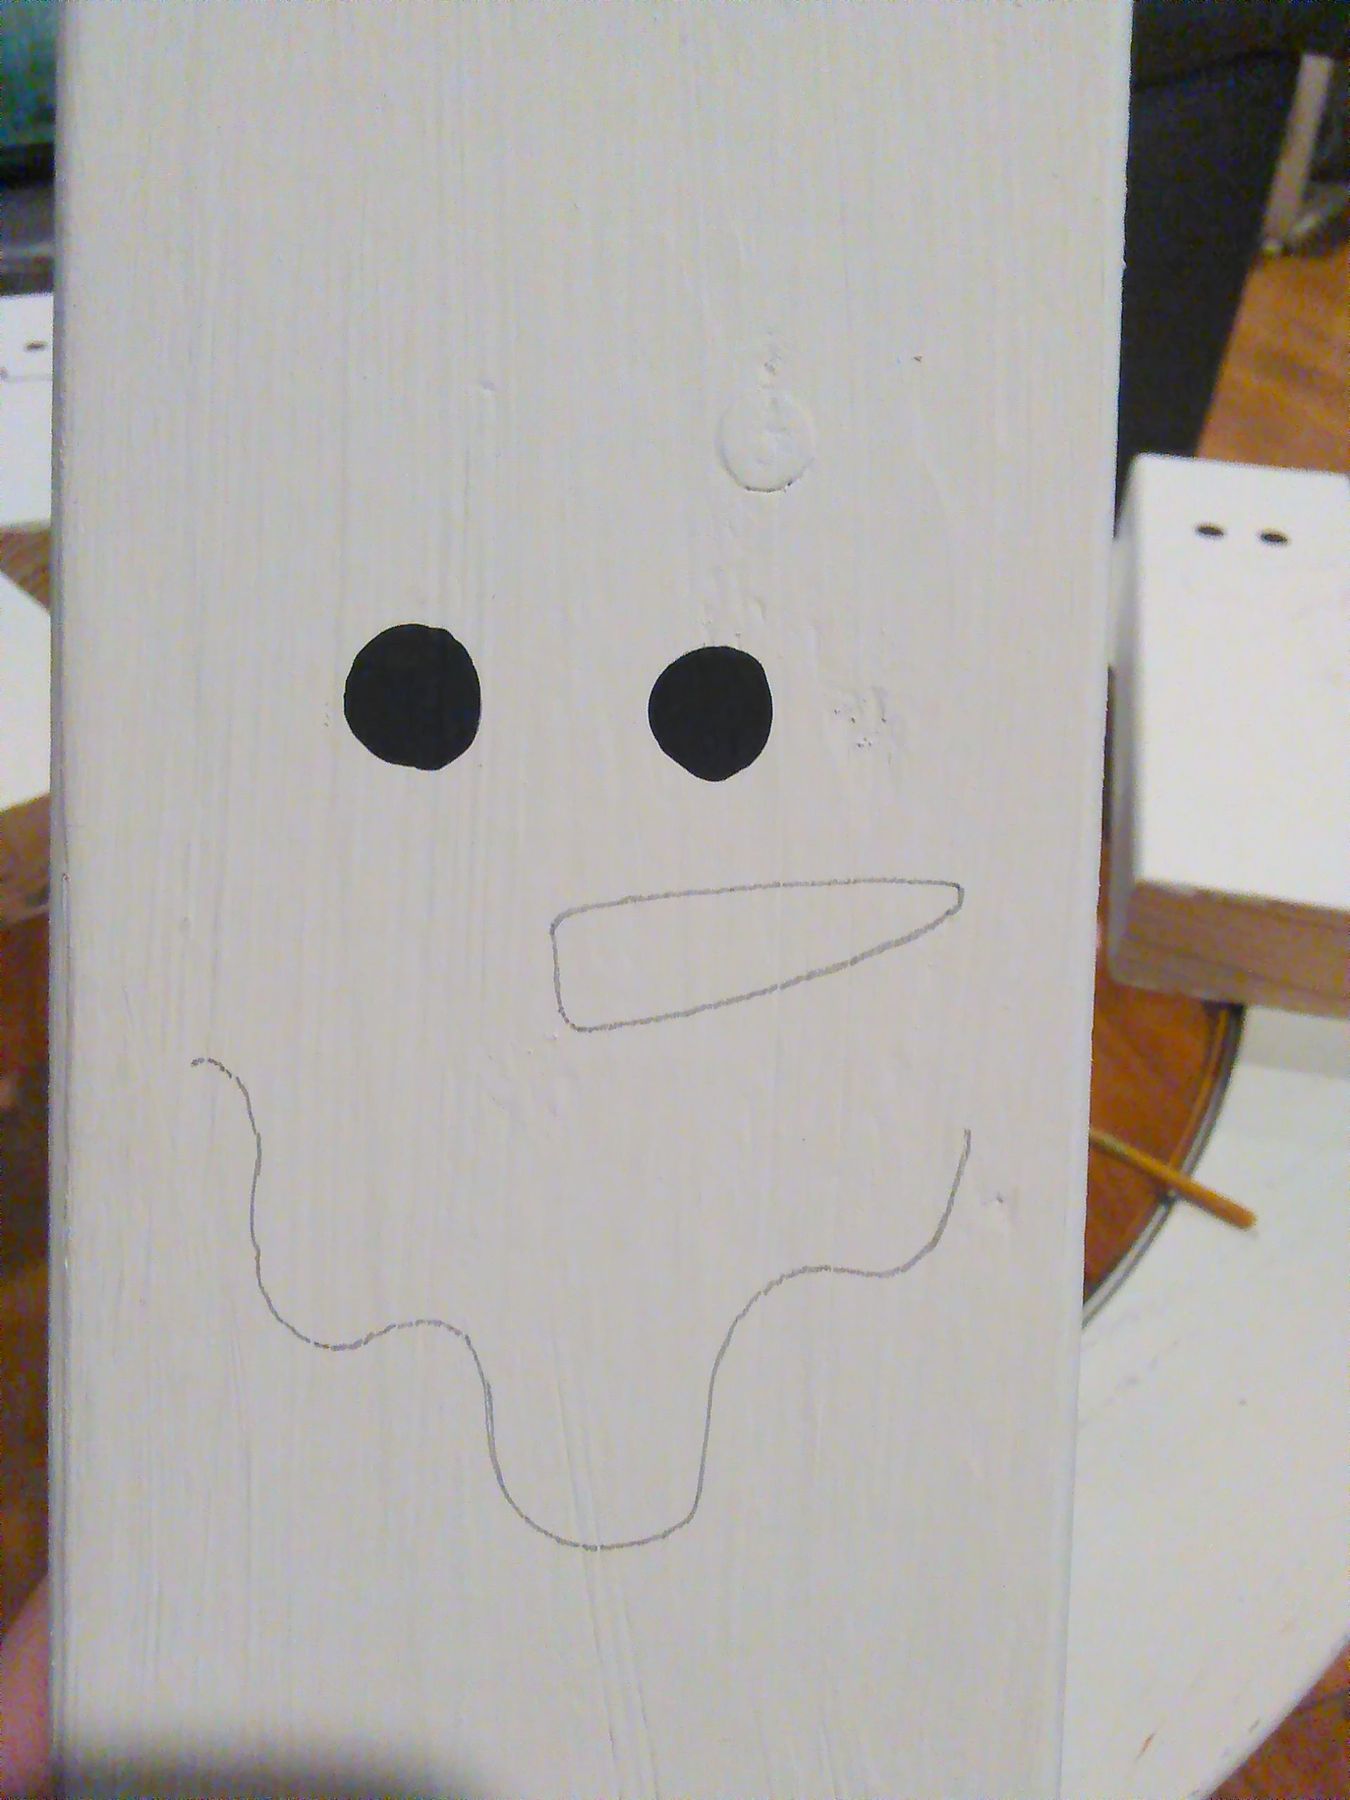
Roughly 90 minutes plus dry time, maybe less if you’re not fussy about the smile.
- 2×4 or 1×6 cut block: $2-$4
- White acrylic or spray paint: $5-$8
- Black and orange craft paint: $4-$6
- Sandpaper and a brush: $5
- Matte clear sealer: $6
Total: $22-$29, with paint left over for the snowman’s friends.
30. White and Seafoam Slat Trees Against Red Brick
Same silhouette, two finishes, two heights — the repetition makes them read as a pair rather than two random projects. The hanging Noel script on the white tree and the carved snowflake on the green one are doing opposite jobs: one adds sparkle low, the other adds craftsmanship high. Put both ornaments on the same tree and you’d lose the quiet. Split them and each tree gets one moment. Repetition without variation is a matched set; repetition with variation is a collection.
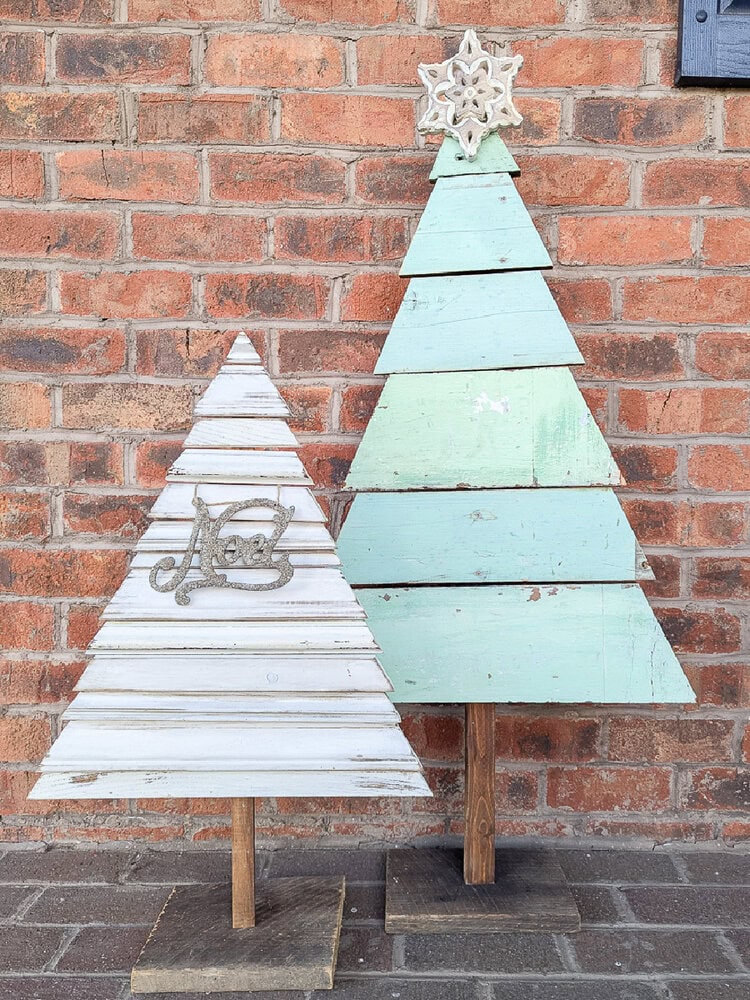
The seafoam green. Red and white is the safe holiday combination; seafoam looks a little odd in the paint aisle and completely right against red brick. It’s the color that makes people stop and ask where you bought it — and the answer is a $9 can. If you already built the buffalo plaid tree in Idea #20, this is the same structure with a totally different personality.
Your Sawdust Season Starts Now
Half of these builds cost less than a single store-bought centerpiece, and the ones that don’t are worth the extra board. Start with the simplest stack, live with it for a week, then build the second one — that’s how a collection actually happens. 📌 If you build one, save this to Pinterest so you can find the plan again next December.