
There’s a specific kind of letdown that arrives on January 2nd, when you’re packing away ornaments you grabbed on December 20th and realize none of them actually felt like yours. Handmade Christmas decor fixes that — which is exactly why handcrafted ornaments and DIY holiday projects are among the fastest-rising categories on Pinterest heading into 2026.
We spent serious time browsing Etsy, Target, Michaels, Amazon, and a few very good thrift-store aisles to bring you only what’s worth your attention this year — 30 ideas spanning everything from $4 to $180. Inside you’ll find rustic handmade, traditional cozy, natural woodland, vintage-inspired, and playful maximalist styles, with budget and luxury versions compared side by side and every idea shoppable with direct product links.
Why now? After several years of cool, minimalist beige holidays, 2026 has swung hard toward texture you can actually touch — wool, clay, wood slices, pleated paper, dried citrus. And stay until the end — we break down the most common mistakes that can ruin these looks.
📌 Save this to Pinterest for later — you’ll want to revisit these ideas.
1. Evergreen Mantel with Knitted Stockings and Brass Glow
Look at this mantel as a ratio, not a pile of decorations. Roughly 60% of what you see is evergreen — the wreath, the garland, the potted trees. About 25% is soft cream textile: those four knitted stockings. Ten percent is brass and gold, and the last five percent is pinecone brown. That’s the entire formula.
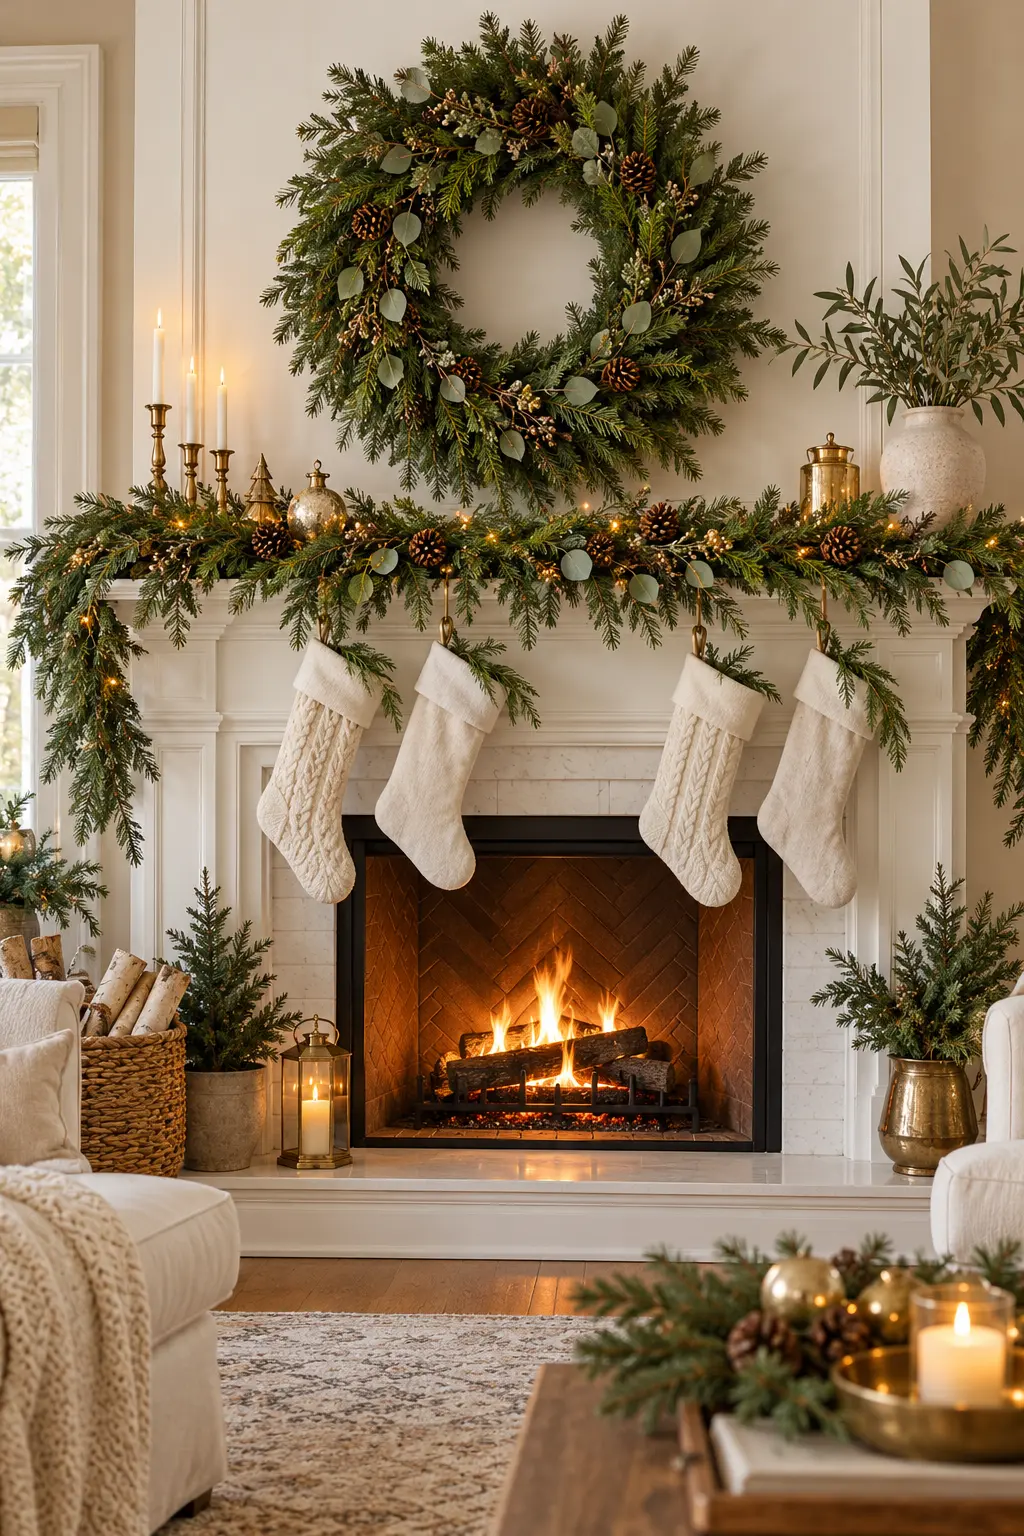
Swap the cream stockings for charcoal wool and the brass for matte black iron, and you get a modern cabin version of the exact same proportions. The math travels; the materials don’t have to.
Buy garland at 1.5 times your mantel length — a six-foot mantel needs nine feet of greenery. Anything shorter gets stretched flat and reads as a green stripe instead of a draped swag. Attach it with cup hooks under the shelf so the swags hang below the mantel edge, then thread lights up through the greenery rather than wrapping around it. One strand per foot of garland is the sweet spot: enough glow to look lit from within, not so much that it turns into a landing strip.
2. A Natural Tree Wrapped in Kraft Paper and Wicker
Two things make this tree work, and neither is an ornament. First, it sits in a woven wicker collar instead of a fabric skirt — which grounds the whole thing in the same warm brown family as the wooden beads and the kraft paper. Second, the gift wrap repeats the palette: kraft paper, green ribbon, nothing shiny anywhere.
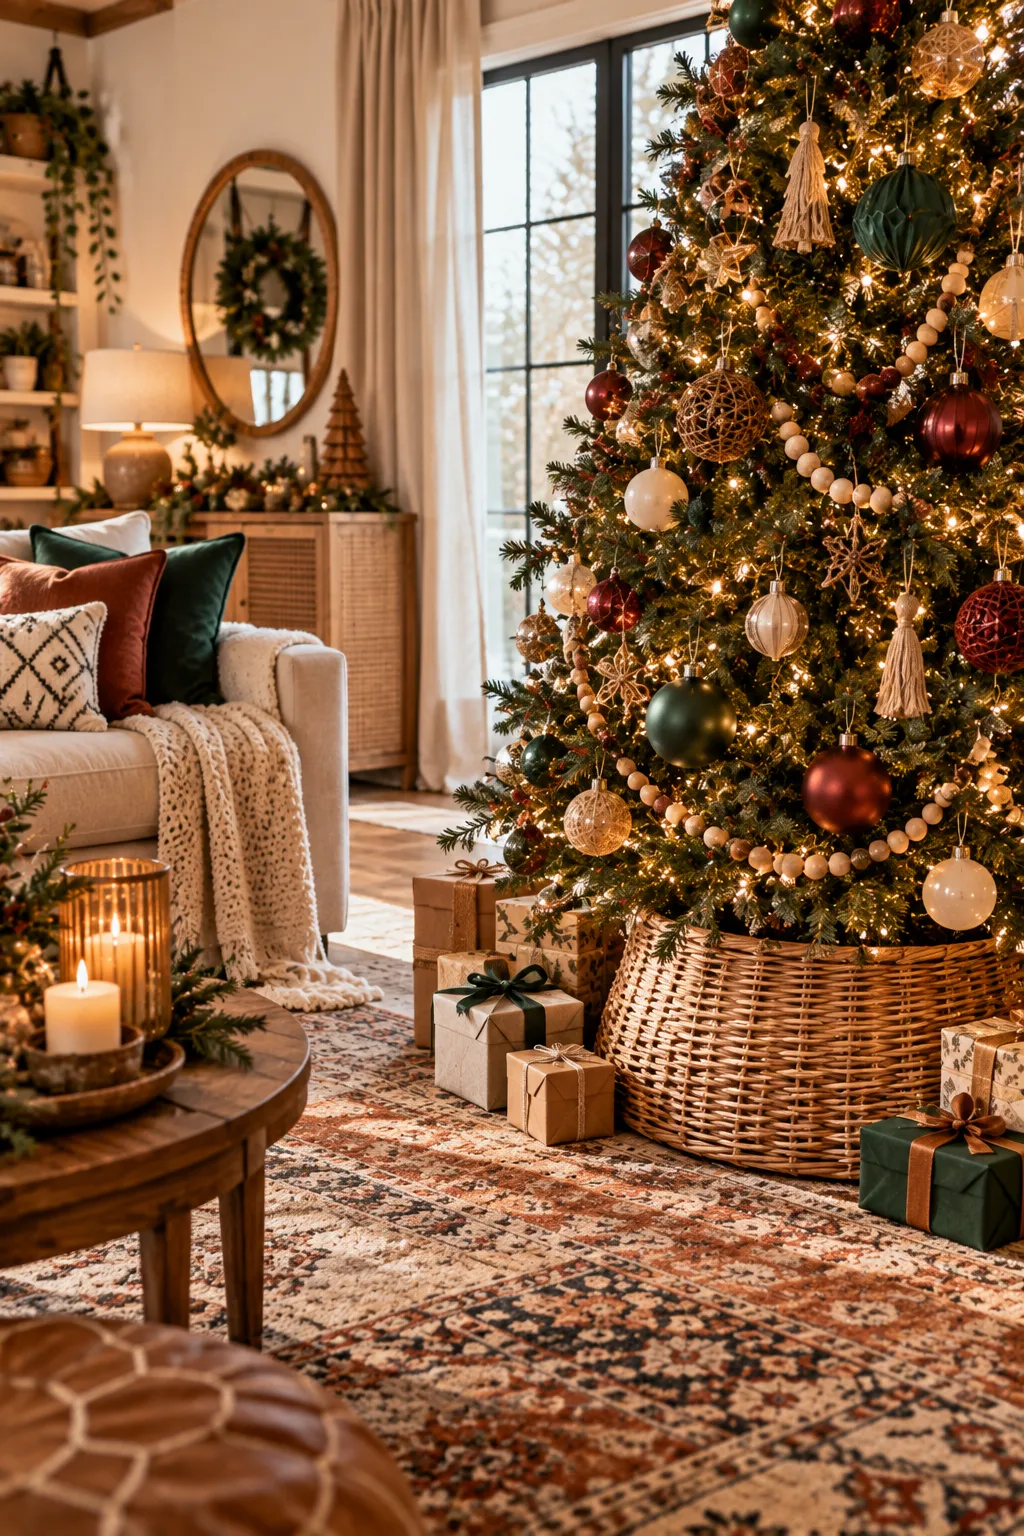
That repetition is the trick. When the wrapping matches the tree, the eye reads one warm composition instead of a tree with a bunch of unrelated stuff around it. This is the softer, more natural cousin of Idea #1 — same reds and greens, half the formality.
- Tree and wicker collar: $120–$260
- Mixed ornaments, 40–60 pieces: $60–$140
- Kraft paper, ribbon, and tags: $18–$35
- Candles and wooden table accents: $25–$60
- Green and terracotta pillows: $40–$90
Total: roughly $265–$585. Budget alternative: a Facebook Marketplace tree plus a thrifted wicker basket cut down into a collar lands you at $120–$200.
3. Fabric Snowflake Ornaments and Knitted Mini Stockings
The little knitted mini stockings take an evening, and they’re the piece everyone picks up first.
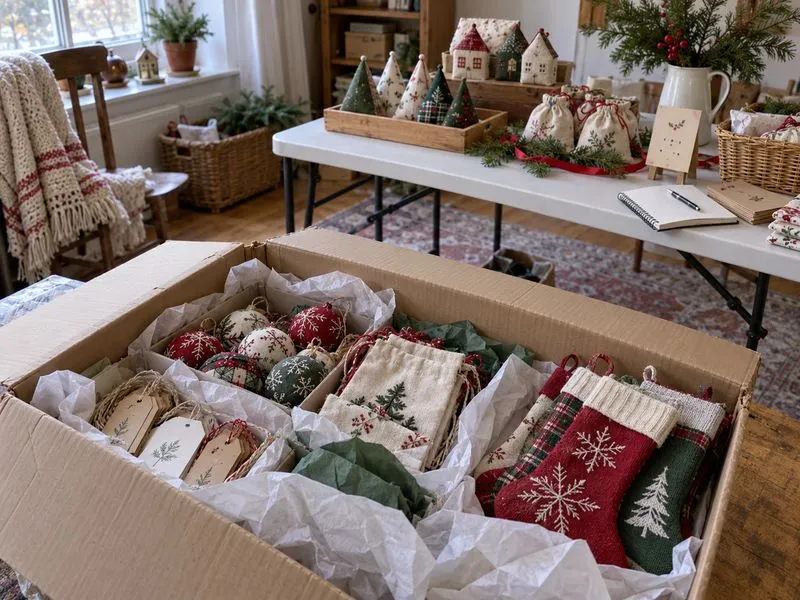
- Fold a 4 x 8 inch piece of felt or heavy knit into a stocking shape, right sides together.
- Clip the toe curve every half inch so it turns cleanly.
- Turn right side out and press the seams flat with a warm iron.
- Blanket-stitch or hot-glue a contrasting cuff, then add a twine loop at the top corner.
- Finish with a small wooden tag tied on with jute.
About 90 minutes for six, and roughly $12 in materials if you already own a needle.
This is the look craft-store endcaps were built for. Buy plain felt stockings in packs of six at a dollar store, add a cuff cut from leftover plaid flannel, and tie on tags sliced from a brown paper grocery bag — about $9 total. For the fabric cone trees, skip the sewing machine completely: a stiffened felt cone and a glue gun gets you there in twenty minutes. Compare with Idea #23 for the same concept in much brighter colors.
4. A Miniature Lit Gift Shop Diorama Under Fake Snow
that makes this diorama work isn’t the tiny sleigh or the snowman — it’s the interior lighting. Warm bulbs inside a small wooden structure, shining out through the windows, is what sells the illusion of a real shop on a real snowy street.
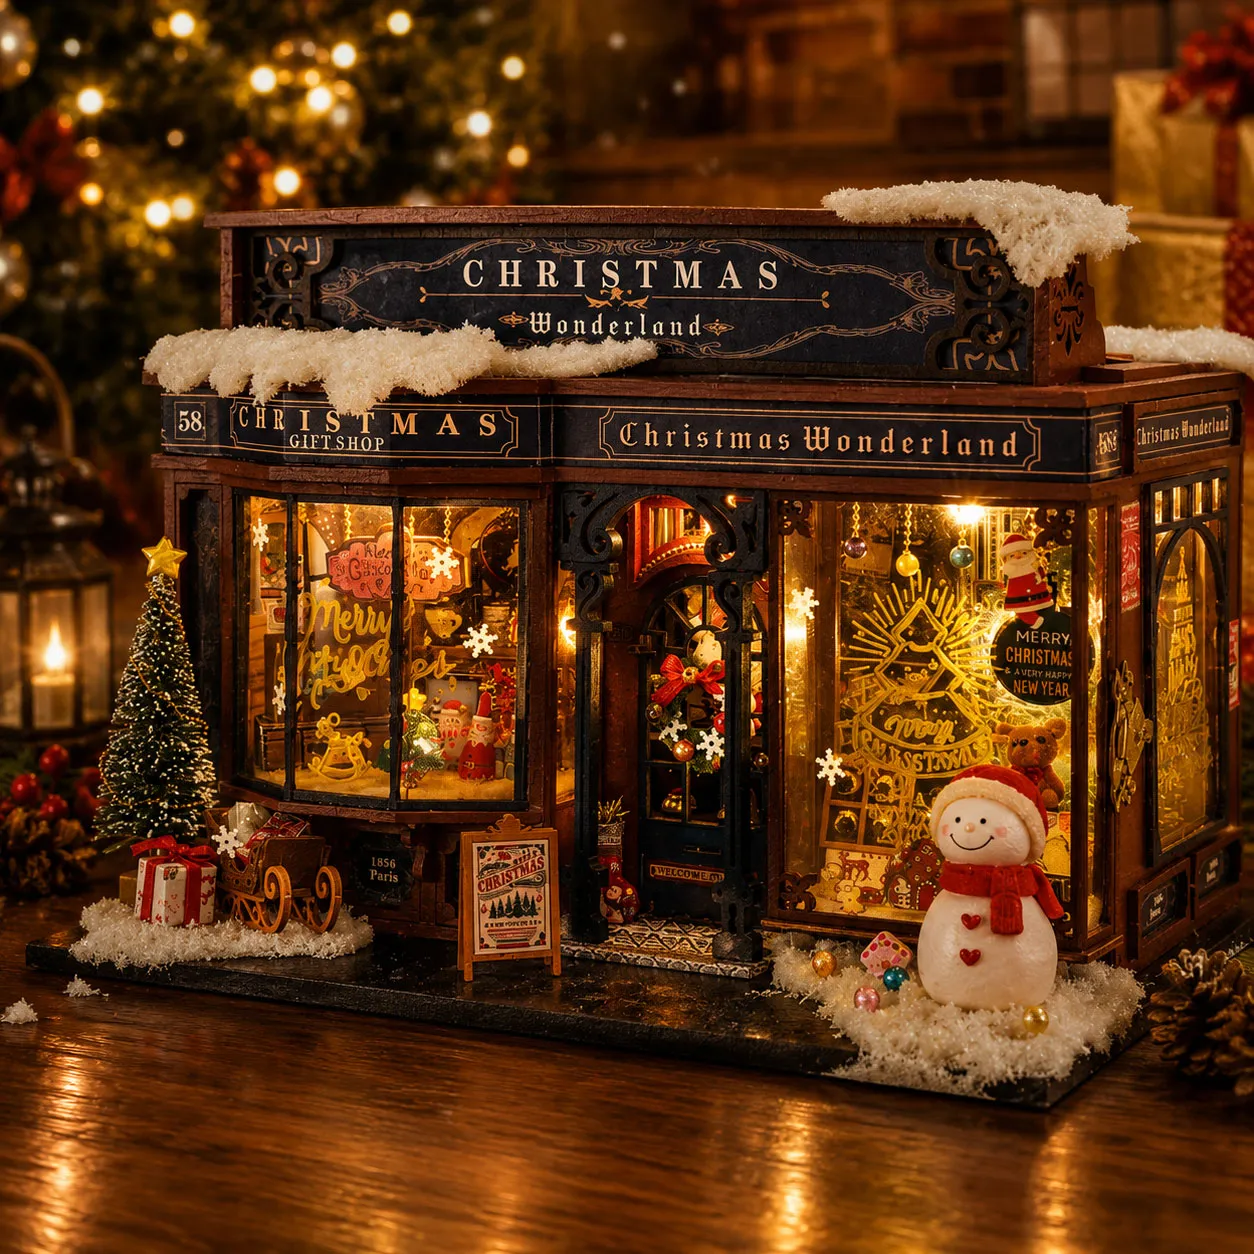
Take the light away and you have a small brown box with objects arranged around it. Keep the light and the whole thing becomes a scene. Wire the light first and build around it.
A few realities before you glue anything down.
- Artificial snow yellows in direct sun — keep it off a south-facing windowsill.
- Battery fairy lights run hot; use LED only and never leave them on unattended.
- Pets treat loose snow batting as a toy. A glass cloche solves that instantly.
Scale is unforgiving, too. A snowman taller than the shop door kills the whole effect, so measure your figures against the doorway before you commit.
5. Wood Slice Ornament Ringed with Gold Jingle Bells
This is a genuinely good beginner project — no paint skills required beyond a simple triangle.
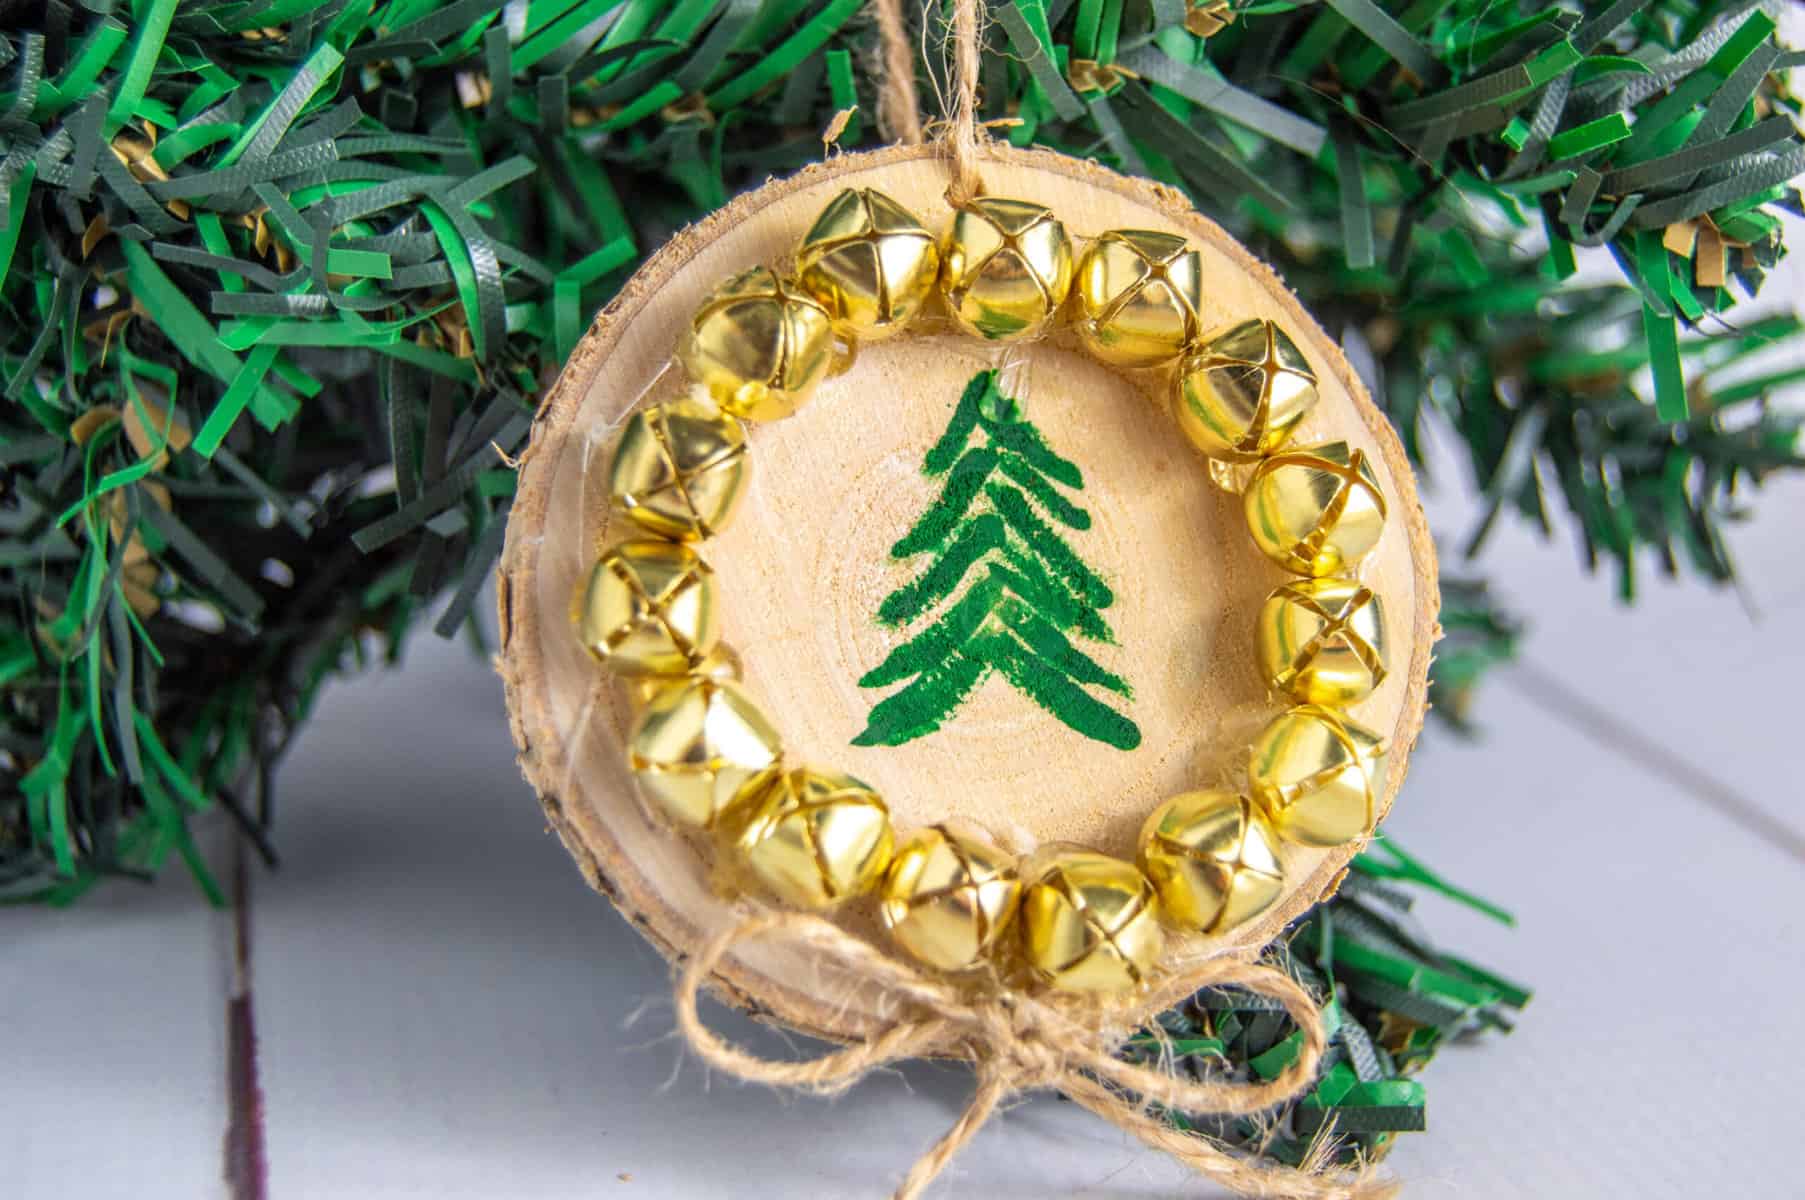
- Drill a 1/8 inch hole near the top edge of a 2.5–3 inch wood slice.
- Sketch a tree in pencil, then fill it with two coats of forest green acrylic.
- Hot-glue eight to ten small gold bells in a ring around the tree.
- Thread twine through the hole, knot it, then tie a tiny bow at the base.
- Seal with matte spray polyurethane so the bells stay put.
Around 25 minutes each and roughly $1.50 in supplies.
Choose bells by weight, not just size. Light craft bells slide around and the ornament always hangs crooked — look for bells with a closed loop at the top so the glue has something to grab. One more thing: your wood slice needs to be fully dry. A green or fresh-cut slice will crack and shed the bells within a month. Kiln-dried slices from a craft store cost a dollar more and save the entire project.
6. Knitted Ball Ornaments, Twig Wreaths, and Dried Orange
This is a tabletop arrangement, so it lives or dies by the surface under it. It needs at least 36 inches of width and 18 inches of depth to avoid looking cramped — a console, a sideboard, or a dining table runner all work. On a narrow windowsill it collapses into clutter.
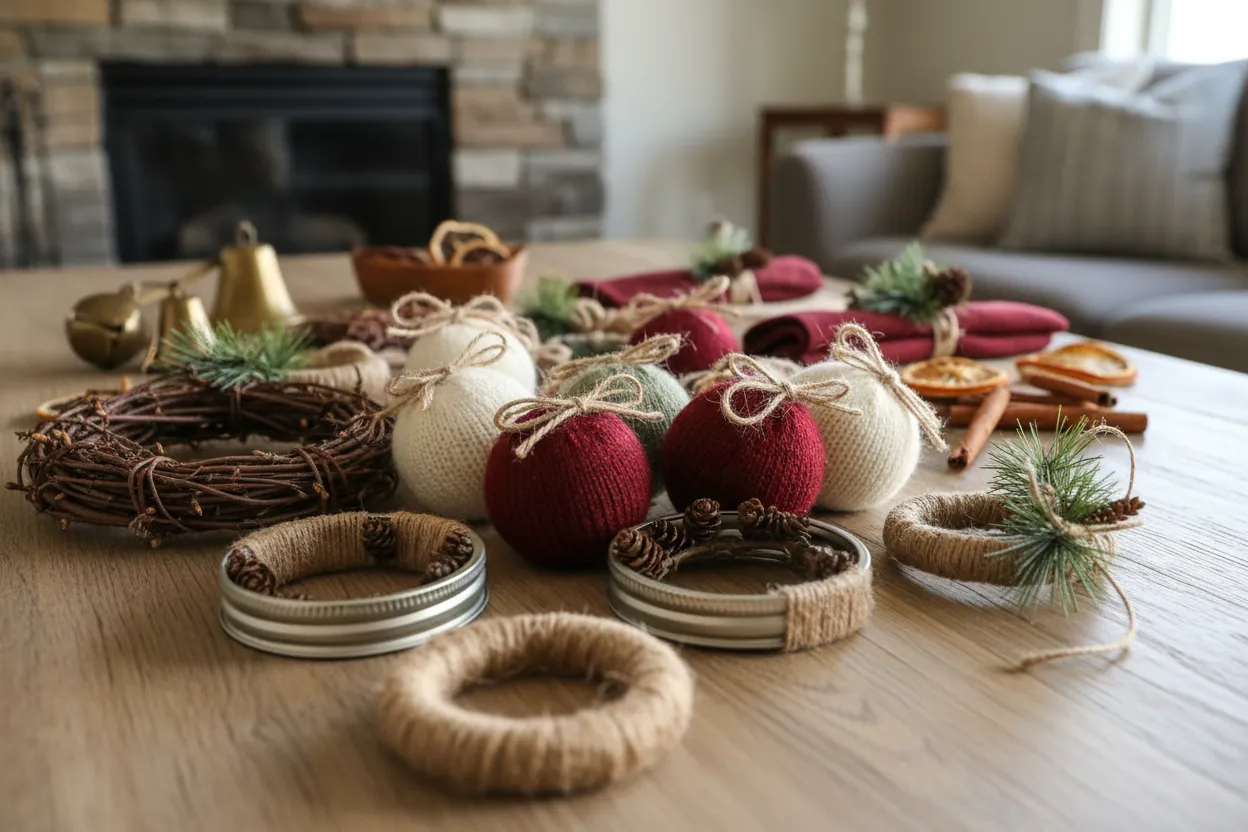
Ceiling height matters less than overhead light here. Dried orange slices and brass bells need side light to read as gold rather than brown, so set the table perpendicular to a window instead of facing it.
Every element has a cheap twin. Knitted ball ornaments: buy foam balls and wrap them in thrifted sweaters, about $6 for eight. Twig wreaths: forage them on a walk, or buy grapevine rings for $2 each. Dried orange slices: slice and oven-dry your own for pennies instead of $12 a bag. The cinnamon sticks and mini pinecones come from a discount spice aisle and the bottom of a craft bin. Total for the whole arrangement: under $25.
7. Polymer Clay Snowman with Candy Canes on a Scalloped Base
The scalloped base is the whole reason this ornament looks finished instead of homemade-in-a-rushed-way. It’s a simple flat disc with a decorative edge, but it gives the snowman a floor to stand on — a stage, essentially.
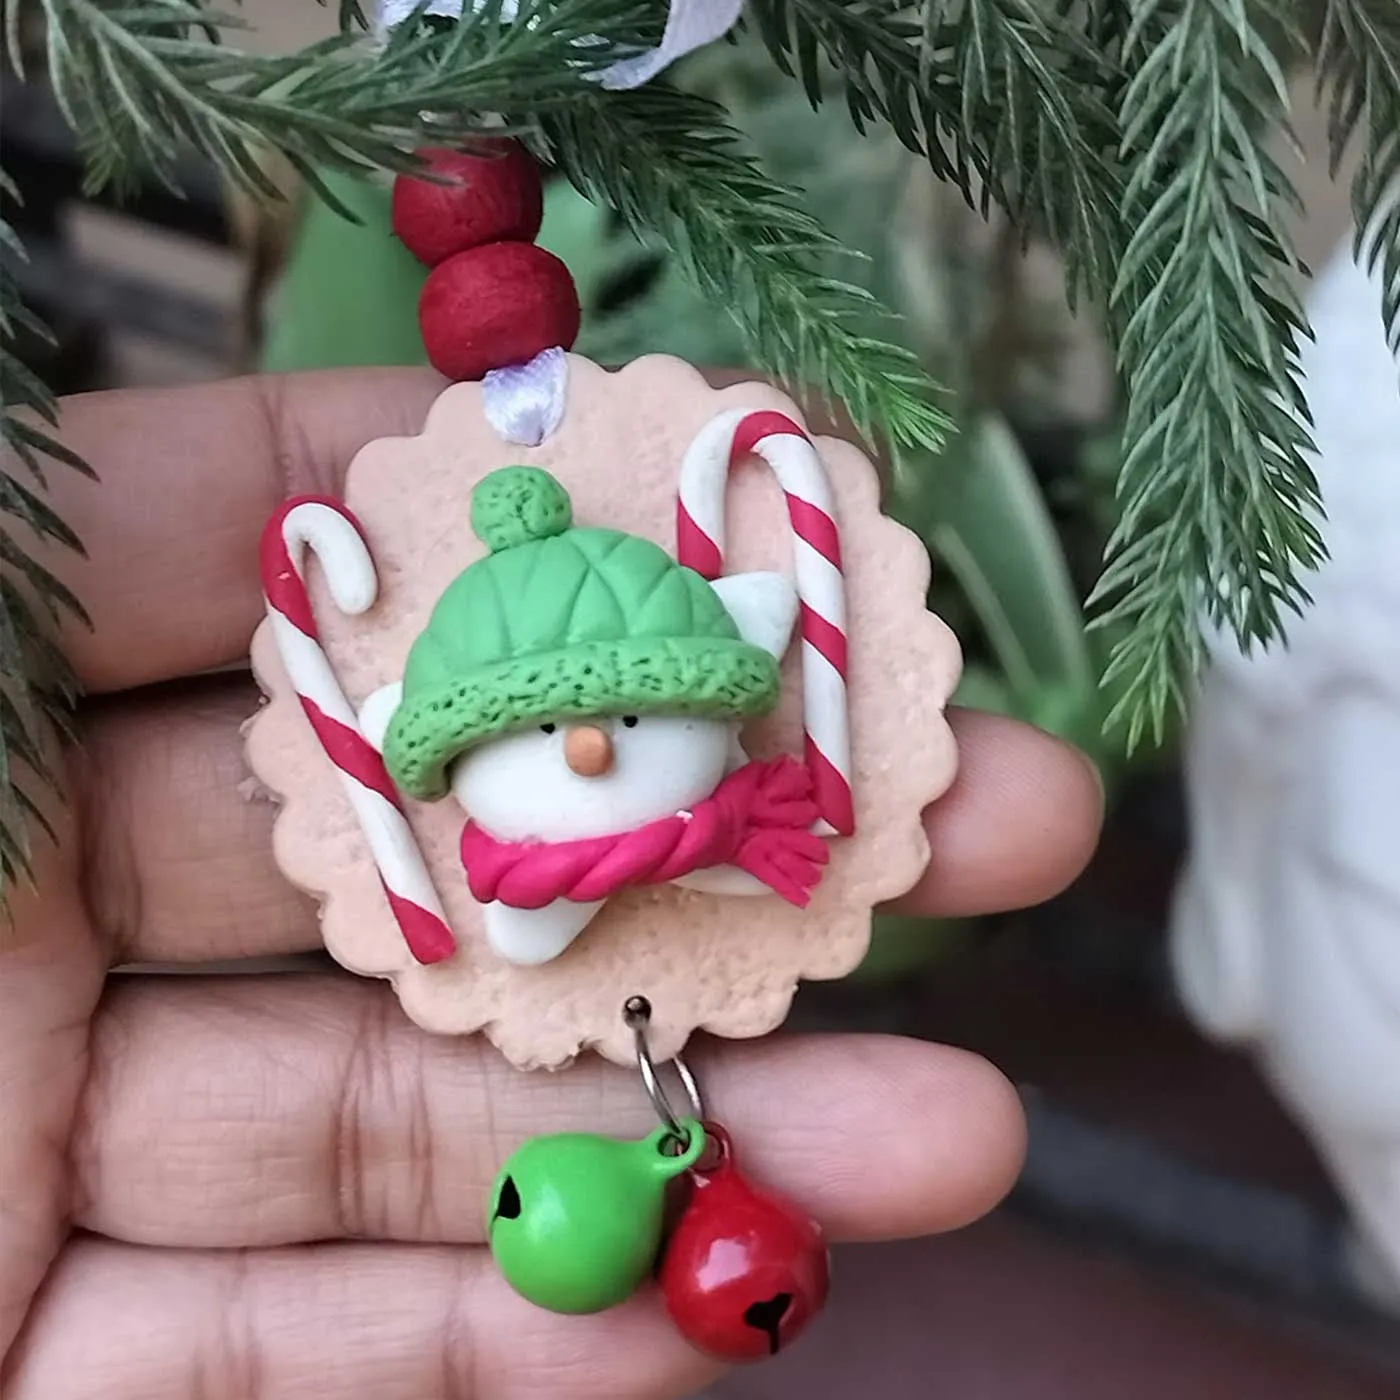
Without it he’d be three stacked balls glued to a branch. With it, he reads as a tiny illustration. That extra five minutes of clay work is worth more than any detail on the figure itself.
Three principles are quietly doing the work. Contrast: bright white against deep green and a red-and-white candy stripe. Scale: the candy canes are deliberately shorter than the snowman so he stays the hero. And repetition: the two canes mirror each other, which makes the whole composition feel intentional.
Note the pink scarf, too. One unexpected color in an otherwise red-green scheme keeps it from looking like a catalog page.
8. Evergreen Wreath with Mixed Metallics and Matte White
The formula: 70% evergreen, 20% mixed metallic ornaments, 10% matte white. That’s it. The metallics here are deliberately mixed — gold, silver, and a few dark green glass balls — because a single metallic reads flat at wreath scale.

Want a different mood? Keep the 70/20/10 split and swap the metallics for all matte black and brass. The wreath changes personality completely; the proportions stay put.
Wire your ornaments on, don’t hook them. A 22-gauge floral wire looped through the cap and twisted around a branch holds a heavy glass ball through wind and door slams. Hooks drop. And place ornaments in odd-numbered clusters of three — one large, one medium, one small — spaced roughly 8 inches apart around the ring. Even spacing at even sizes is what makes a wreath look store-bought in the bad way.
9. Clay Stars and Trees Drying on Kraft Paper
The trick to clean-edged clay ornaments is rolling and cutting at the right thickness.

- Roll air-dry clay to a consistent 1/4 inch between two wooden craft sticks.
- Cut stars and trees with cookie cutters, then smooth the edges with a damp fingertip.
- Poke a hanger hole with a straw, not a toothpick — it won’t close up as it dries.
- Dry flat on kraft paper for 24–48 hours, flipping once at the halfway point.
- Sand the edges with fine paper, then seal both sides with matte medium.
Under $15 for a dozen ornaments.
- Air-dry clay, 2 lb block: $10–$18
- Star and tree cookie cutters: $6–$14
- Kraft paper roll: $5–$9
- Matte sealant: $8–$12
- Ribbon and twine: $6–$12
Total: about $35–$65 for roughly 24 ornaments. Skip the cutters and hand-shape the stars to land near $20 instead.
10. A Glittered Red Monogram Ornament with Tiny Snowmen
Personalized ornaments have been climbing every holiday wishlist for a few years now, and 2026 is the year they went fully handmade. Initials, pet names, house numbers — the appeal is that a tree covered in them tells a story no retail set can.

It’s also the most giftable category on this list. A monogram ornament costs a few dollars to make and outperforms almost anything you could buy for the same money.
The three tiny snowmen are what make this ornament memorable. A red initial with glitter snowflakes would be perfectly nice and instantly forgettable. Adding three sculpted figures with their own hats and scarves turns it into a scene — and scenes get saved to Pinterest. If you’re making a set for a family, vary the snowmen count per initial and suddenly each ornament has its own personality.
11. A Pleated Paper Angel with a Gold Bell Head
Paper pleating is the entire skill here, and it takes about ten minutes to learn.
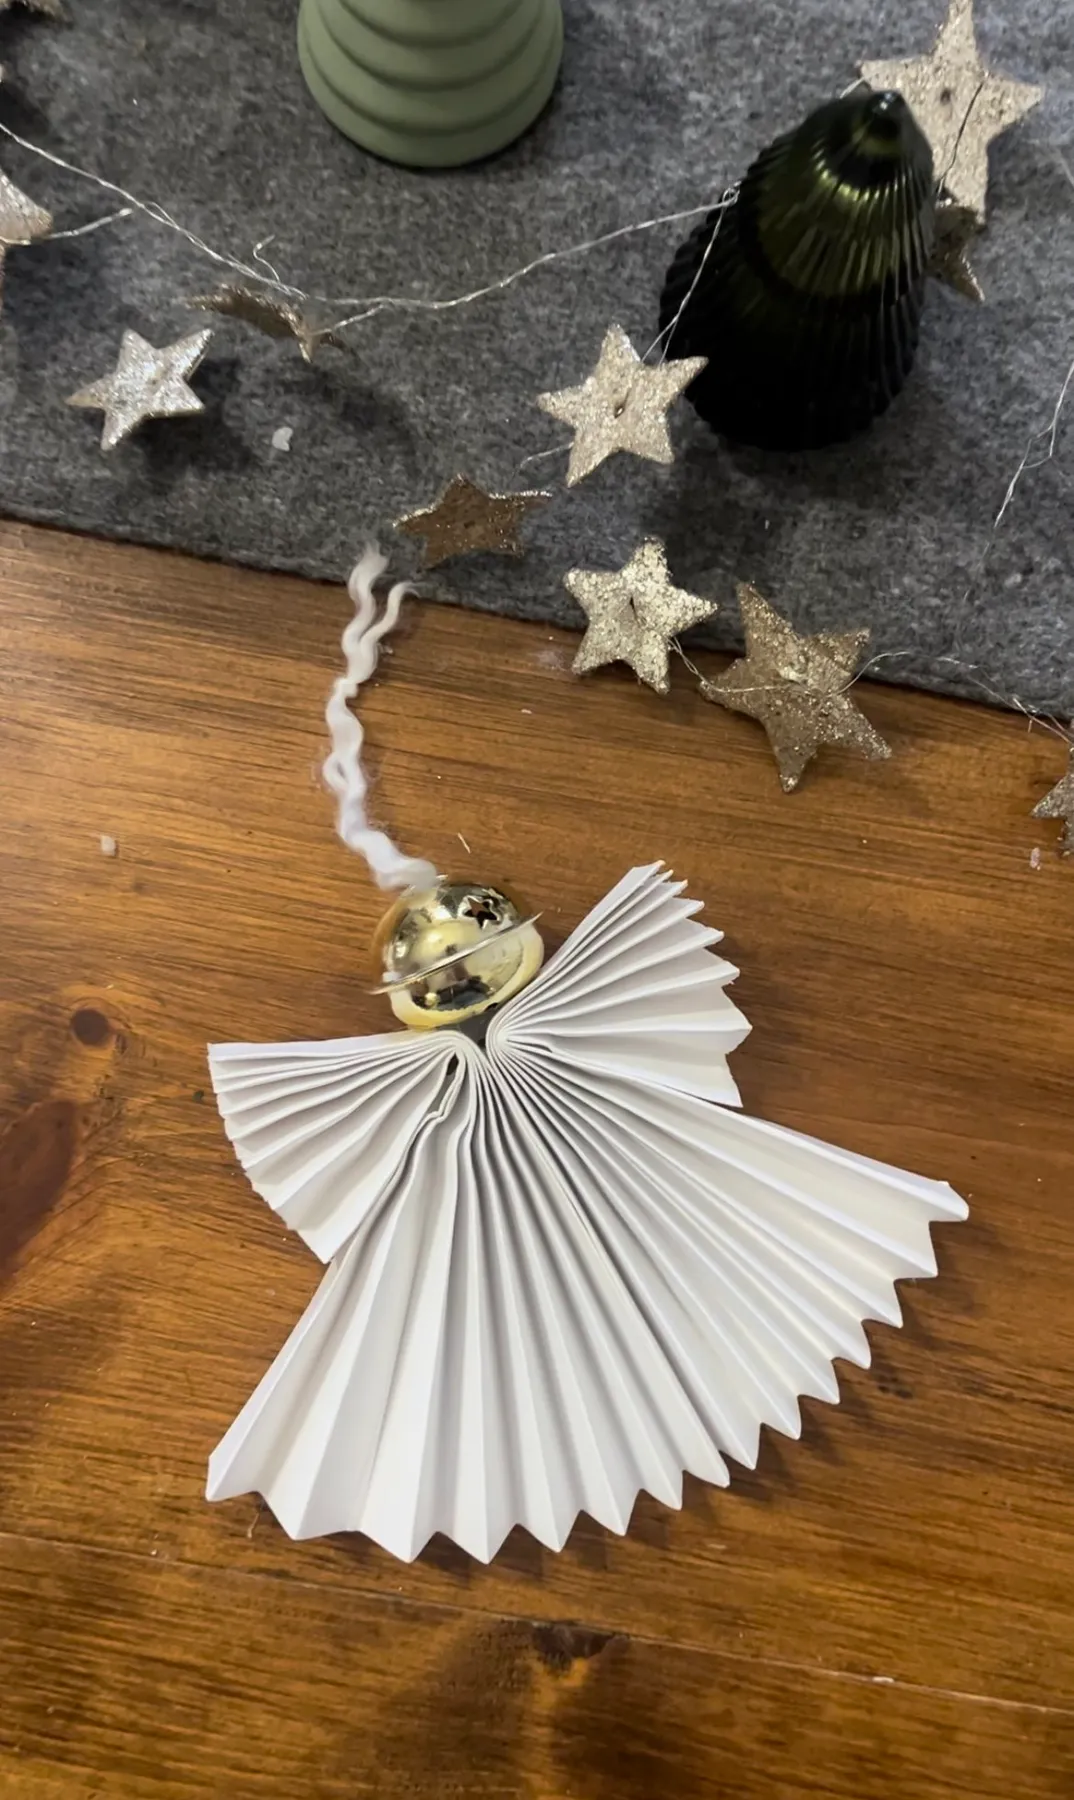
- Cut a 4 x 8 inch strip of paper and accordion-fold it in 1/2 inch pleats.
- Pinch the center, fan the pleats into a circle, then staple the pinch.
- Repeat with a smaller strip for the wings and glue them behind the body.
- Thread a small gold bell onto floral wire for the head and twist it through the center.
- Fluff the pleats and hang from a gold thread loop.
Roughly 15 minutes and $2 per angel.
Use text-weight paper or thin cardstock, never tissue. Tissue collapses under its own pleats within a week, especially near a warm fireplace, while 65 lb cardstock holds the fan shape indefinitely. And score every fold line with a bone folder or the back of a butter knife before you pleat — un-scored folds go crooked by the fifth pleat and there’s no fixing it afterward.
12. A Penny Wreath Ornament with a Plaid Bow
This is one of the cheapest ornaments on the list and possibly the most charming. Eleven or twelve pennies, a wooden ring, a scrap of plaid ribbon. Under $5 if you raid the coin jar.
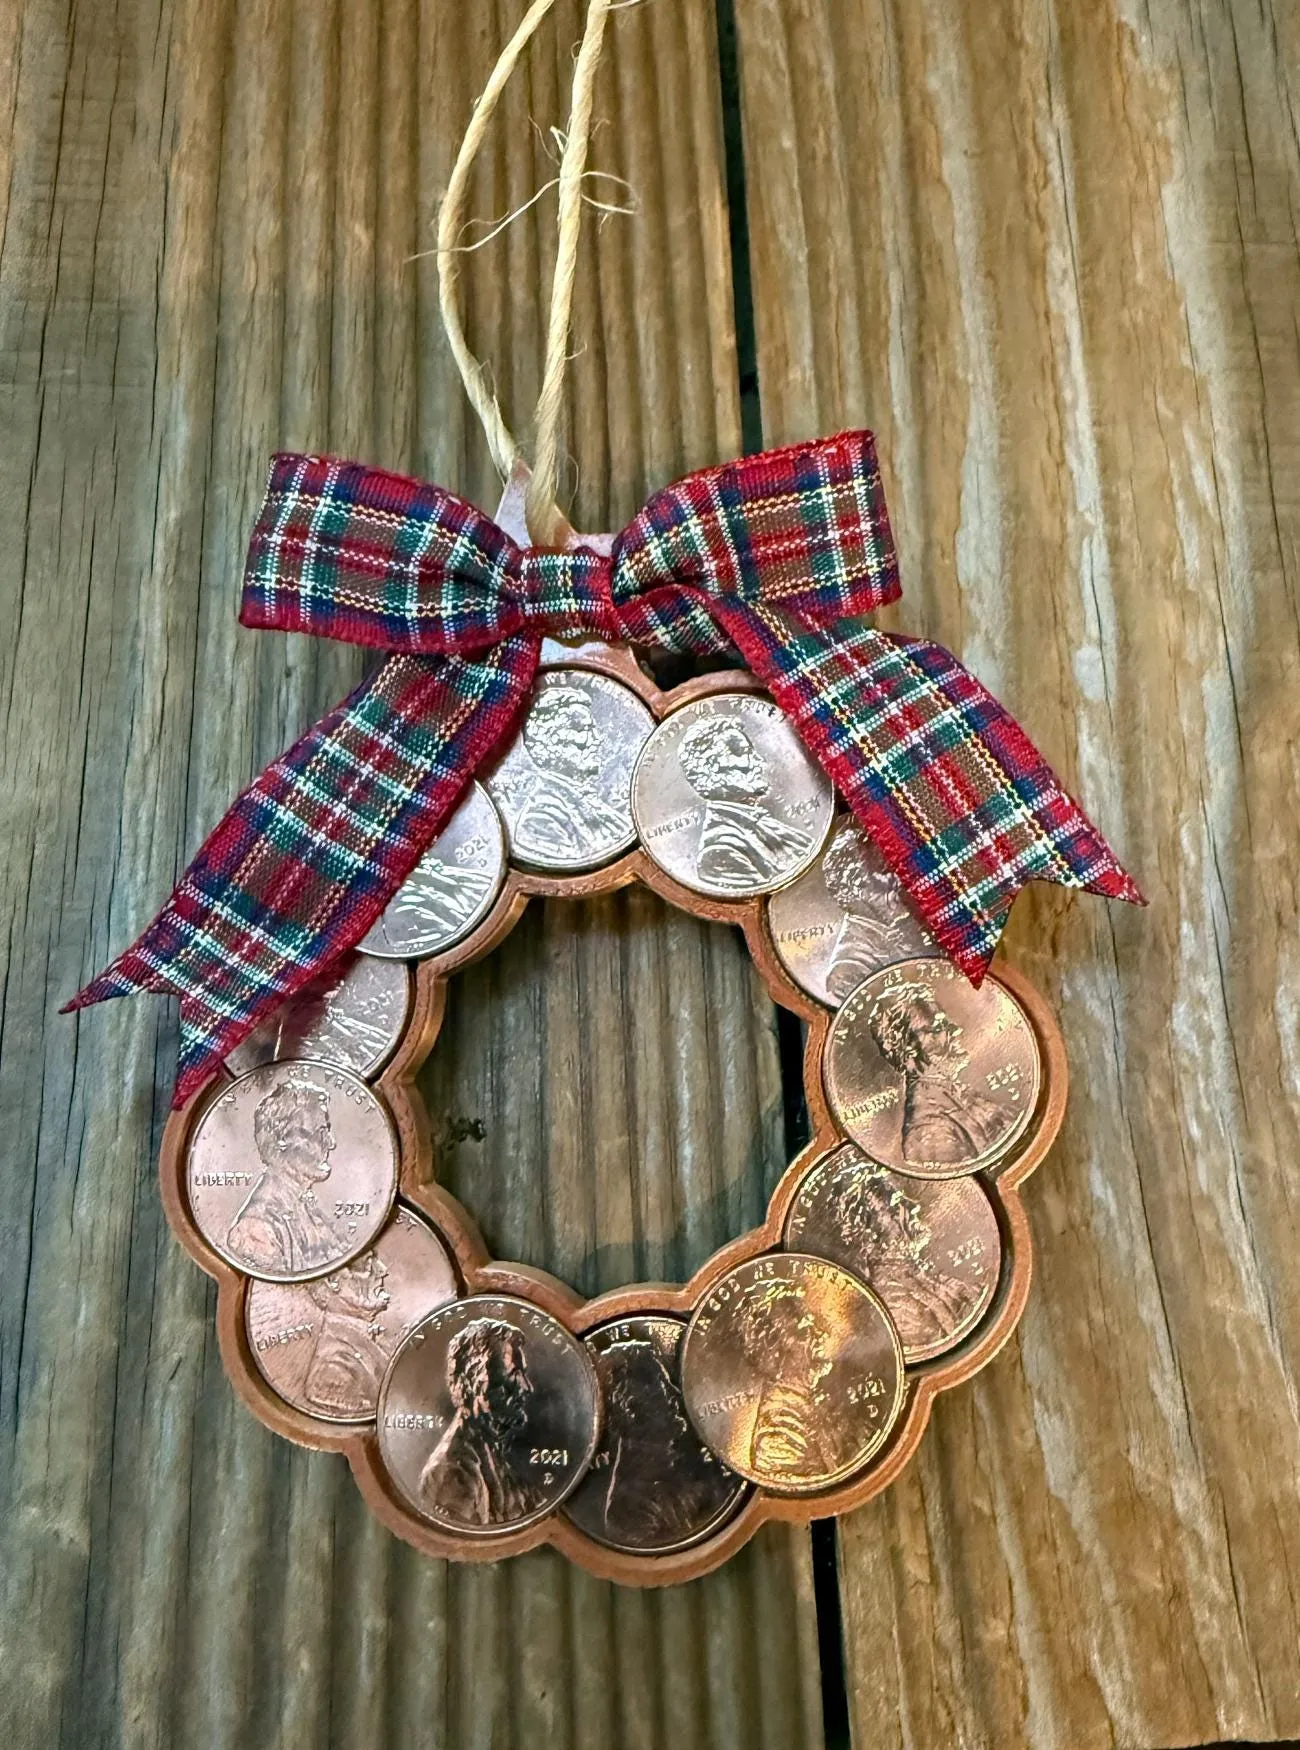
No pennies? Washers, buttons, bottle caps, or small wooden discs all work, and thrift stores sell buttons by the bag for a dollar. The look shifts slightly — brighter, more graphic — but the handmade warmth stays intact.
Before you glue:
- Check state rules on defacing coin currency if you plan to sell these.
- Use a ring at least 2.5 inches across, or the pennies crowd the center.
- Test the bow size against the ring — an oversized bow hides the coins entirely.
- Use E6000 or hot glue, not craft glue; metal needs a flexible bond.
Ten minutes per ornament once the supplies are out on the table.
13. Gingerbread House Garland Over a Rustic Credenza
The garland works because it’s hung as art, not as trim. It sits above two framed pieces at roughly the same visual weight, so the wall reads as a gallery row rather than a decoration shoved up high.
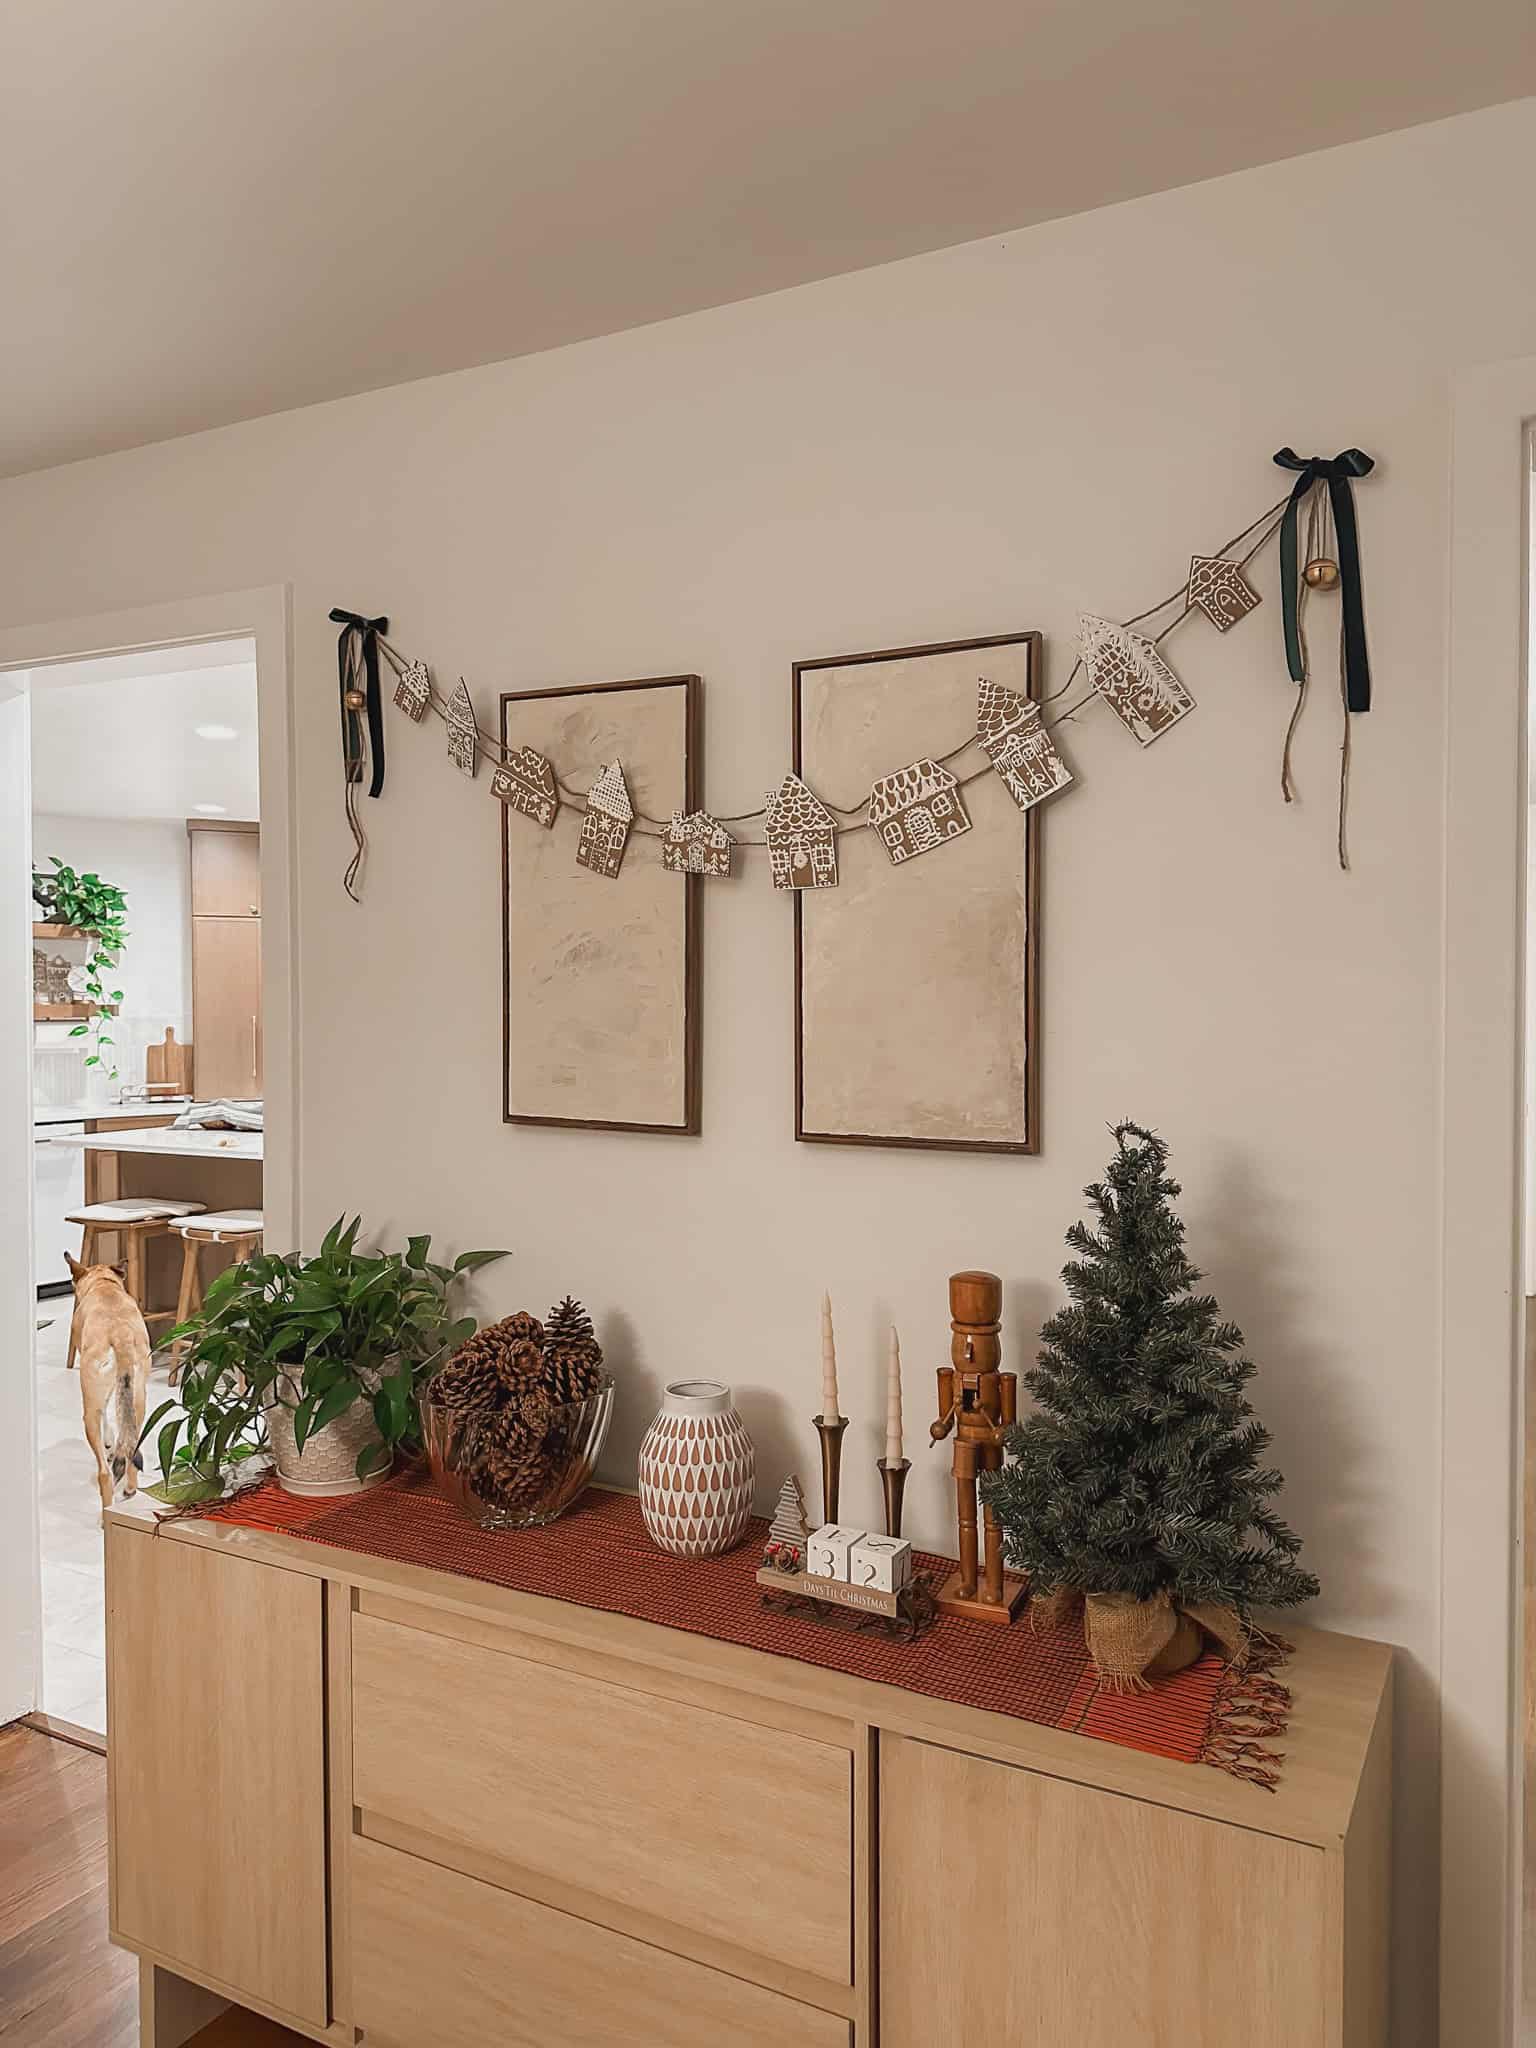
The other smart move: dark green velvet bows at regular intervals break up the white gingerbread cutouts. Without them the garland would be a pale blur against a pale wall.
- Gingerbread house cutouts, wood or cardstock: $15–$40
- Velvet ribbon, 3 yards: $12–$28
- Small artificial tree: $30–$70
- Wooden nutcracker: $12–$35
- Candles, pinecones, glass bowl: $20–$50
Total: about $90–$225. Cut it to $35 by cutting the gingerbread shapes from cardboard, painting them, and using fabric scraps for the bows.
14. Crocheted Ornaments Tucked in a Wicker Basket
Crochet is durable but not indestructible. Cotton pieces can be hand-washed in cool water and laid flat to dry, roughly once a season if they’re out in the open. Acrylic is easier to clean but pills where it rubs against branches.
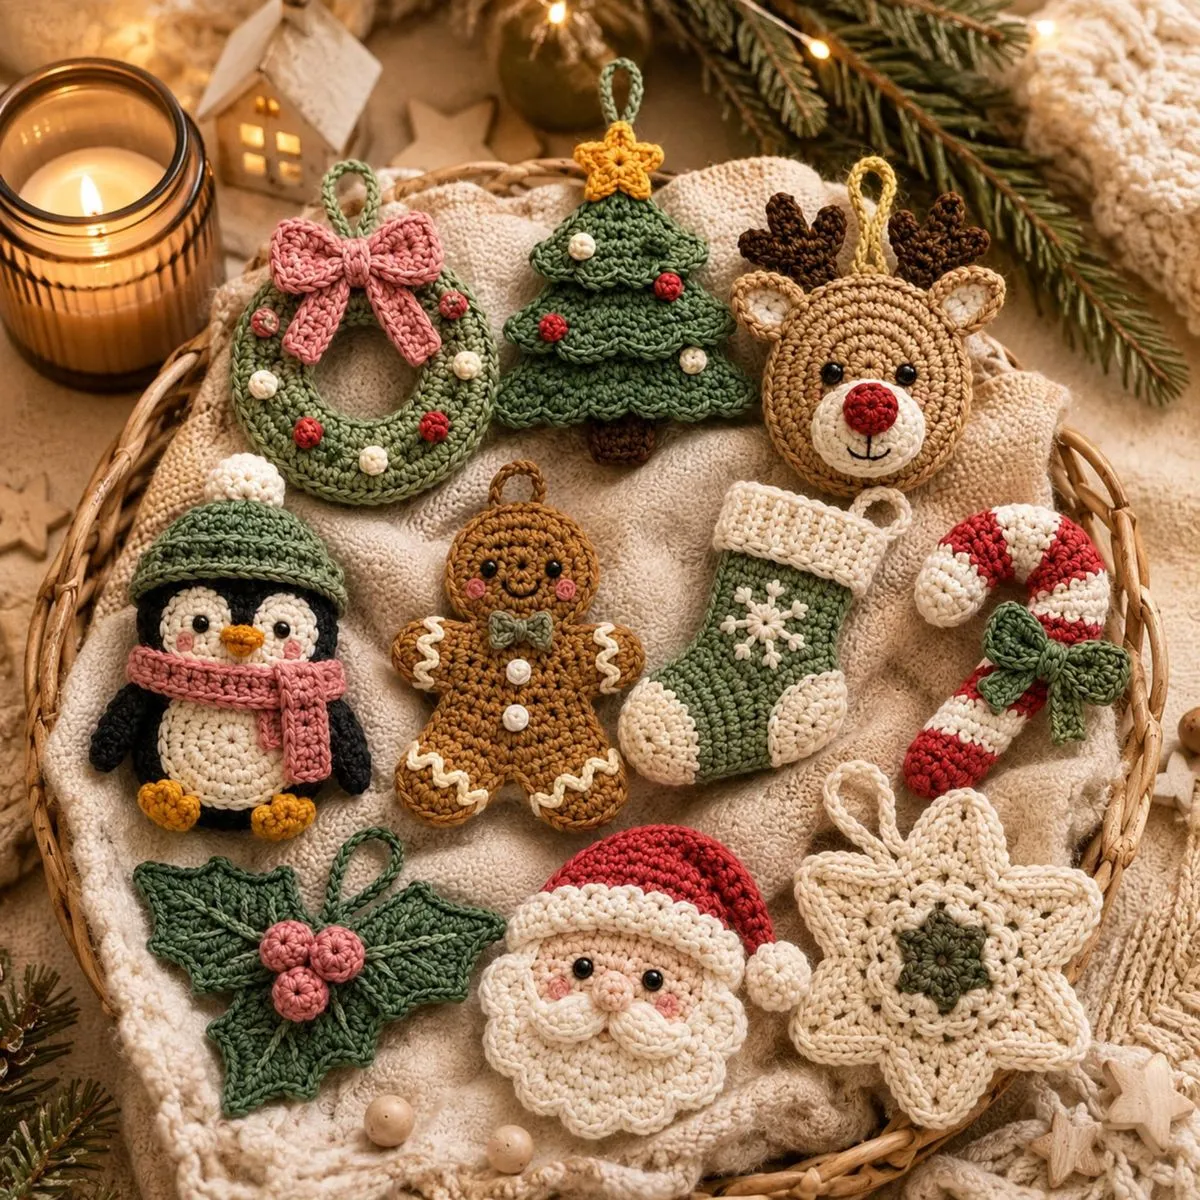
Watch for two things: sun fade on reds and pinks, which bleaches noticeably within two seasons in a bright window, and moths if you store everything in a closet for eleven months. A cedar block in the basket handles that for about $6.
What makes this display work isn’t the crochet — it’s the basket and the cream knit blanket inside it. The ornaments are nestled into something soft, which makes a collection read as a curated moment rather than merchandise. Container choice is doing 60% of the styling here.
15. A Vintage Doily Ornament on a Frosted Tree
Printing on paper doilies is easier than it looks, but the paper matters. Standard 20 lb printer paper curls. Use 65 lb cardstock doilies, or pre-spray a paper doily with matte fixative and let it dry completely before it goes anywhere near a printer.
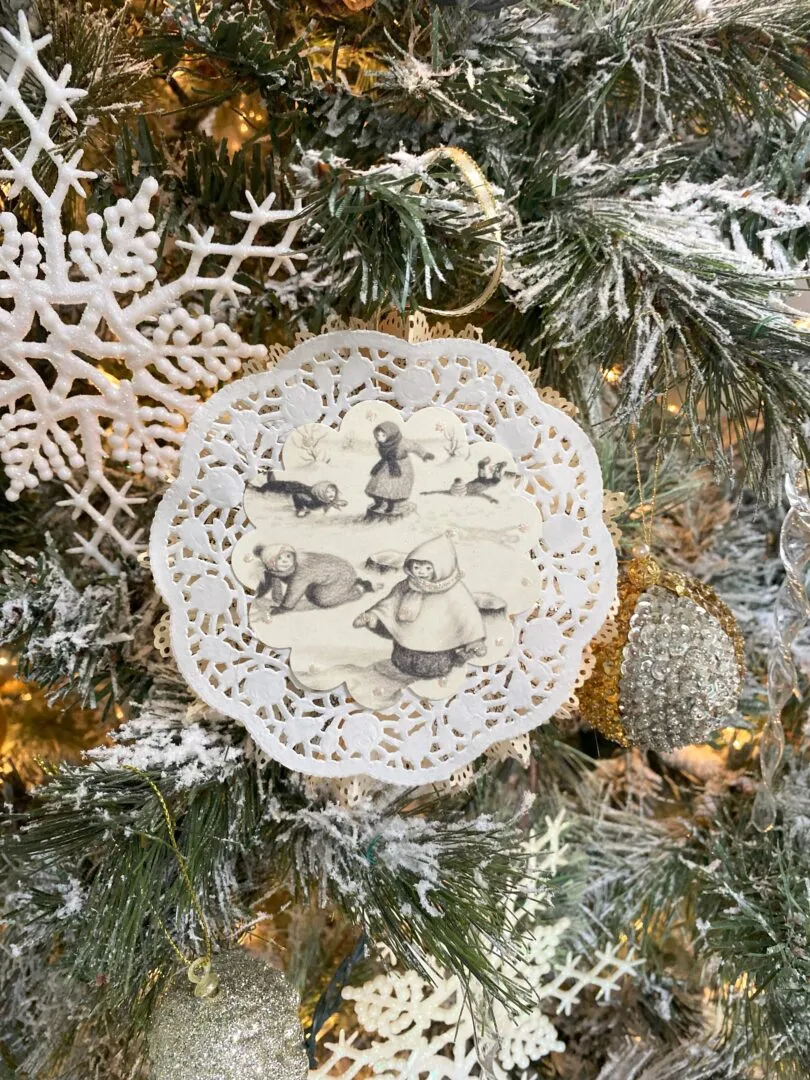
Print your vintage image at 60–70% opacity rather than full strength — the paper texture showing through is what sells the antique look.
Vintage Christmas cards from estate sales and thrift shops are the cheapest source for images like this: a whole box for $3, and you can scan or photocopy the ones you love and reuse the originals forever. Public domain archives online hold thousands of early-1900s holiday illustrations for free. Print at home, mount on a doily, add a twine loop — about $0.40 per ornament. Compare the mood with Idea #10 — same nostalgic instinct, much louder execution.
16. A Royal Blue Felt Dala Horse with Embroidered Details
The color story here is a deliberate clash: royal blue against dark green, with white, yellow, and orange embroidery adding tiny sparks. It’s roughly 80% green tree, 15% blue ornament, 5% warm accent — a proportion that keeps the blue feeling like a jewel rather than a mistake.

Swap royal blue for deep plum or mustard and the formula holds. What you can’t swap is the dark green backdrop; against a flocked white tree this horse would vanish.
Felt ornaments are forgiving, but a few things will bite you.
- Wool felt holds embroidery; craft felt stretches and puckers around stitches.
- Backstitch the outline — a running stitch pulls through felt over time.
- Filling should be sparse; an overstuffed felt ornament bulges at the seams.
And don’t skip the interfacing. A thin fusible backing keeps the horse flat and readable on a busy tree.
17. Yarn Angels, Macrame Trees, and Burlap on One Tree
The yarn-wrapped tree is the most repeatable piece in this collection.
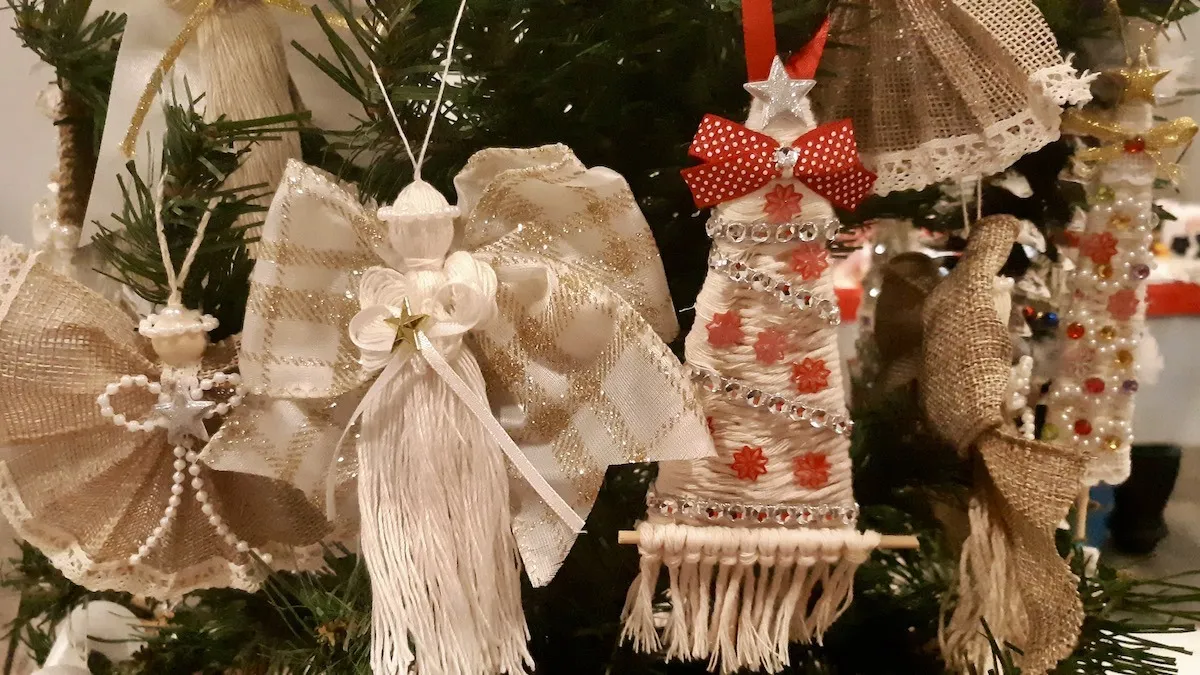
- Cut a 10 inch triangle from cardboard and wrap it entirely in cream yarn, snug and overlapping.
- Wrap the trunk area in contrasting twine for about an inch.
- Glue small red felt stars across the body in a loose diagonal.
- String tiny silver beads on thread and drape them in a single loop.
- Add a twine hanger at the top and a small bow at the base.
About 30 minutes each and under $3 in materials.
These ornaments want a tree with room to breathe. A 7 to 7.5 foot tree gives enough vertical space to spread thirty-plus handmade pieces without crowding — anything under 6 feet forces them into a knot. They also read best against greenery that isn’t too dense. If your tree is very full, use fewer, larger pieces and let the burlap and lace ones carry the front.
18. A Beaded Teardrop Ornament on an Antique Gold Stand
Single-ornament stands are quietly having a moment. As people collect fewer, better ornaments, displaying one on a small metal stand has replaced the forty-baubles-on-a-tree approach — the same instinct that turned vinyl records and perfume bottles into decor.
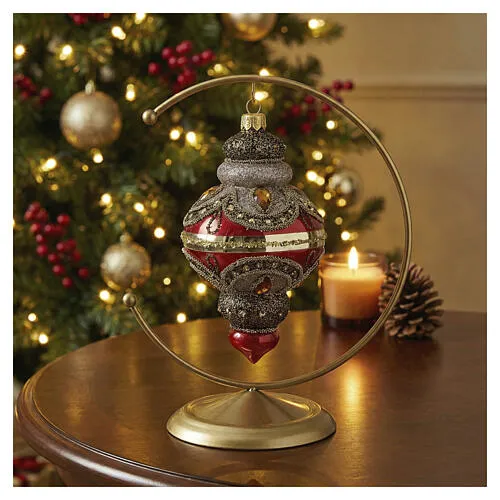
This style leans heavily on traditional red and gold, which never really leaves. It just gets quieter or louder depending on the decade.
If you display a single ornament, light it from the side at a low angle rather than from above. Beading and amber gems need raking light to cast the tiny shadows that make them look dimensional — overhead light flattens them into a silhouette. A single warm LED tealight or a small picture light placed 8–10 inches to the side does the whole job.
19. A Flocked Tree Dressed in Pink Satin and Gingham
The formula is 50% white flocked tree, 30% bright pink and red, 15% gold, 5% green gingham. That green is the pressure release valve — without it the whole tree reads as a Valentine’s display.

To keep the same energy with a different palette, hold the ratios and swap pink for cobalt, red for tangerine. Or drop the gold to 5% and push the gingham up for a calmer, more cottage-feeling tree.
Flocked trees are expensive; flocking spray is not. A $40 artificial tree plus two cans of spray flock at $12 each gets you 80% of the effect — just work outside and build in light coats, because heavy coats flake. The pink satin is a yard of fabric-store lining, about $8. The paper stars are printed and cut at home, the silver disco ornaments come from a dollar store, and the whole tree lands under $90 if you start from a Marketplace find.
20. A Classic Red and Gold Living Room with Lit Garland
- Sofa and upholstery, or slipcovers: $600–$1,800
- 7–8 ft tree with red and gold ornaments: $180–$450
- Mantel garland with berries and pinecones: $60–$150
- Candles, mirror, and table decor: $80–$220
- Plaid pillows, red throw, patterned rug: $120–$350

Total: about $1,040–$2,970. Slipcovers over existing sofas, a Marketplace tree, and thrifted brass bring a similar room in around $420–$650.
Hang your stockings at three different heights — roughly 4, 8, and 12 inches below the mantel edge — and the fireplace instantly looks styled rather than lined up. Identical heights is the single most common mantel mistake. Keep the garland asymmetrical, too: heavier swag on one side, lighter on the other. Symmetry belongs in architecture, not holiday greenery. This room is the warm traditional counterpoint to Idea #2, with far more volume.
21. White Clay Botanical Ornaments with Gold and Velvet
The restraint is the point. White clay, one gold botanical impression, a brown velvet ribbon. That’s three elements, and each one gets to be seen.
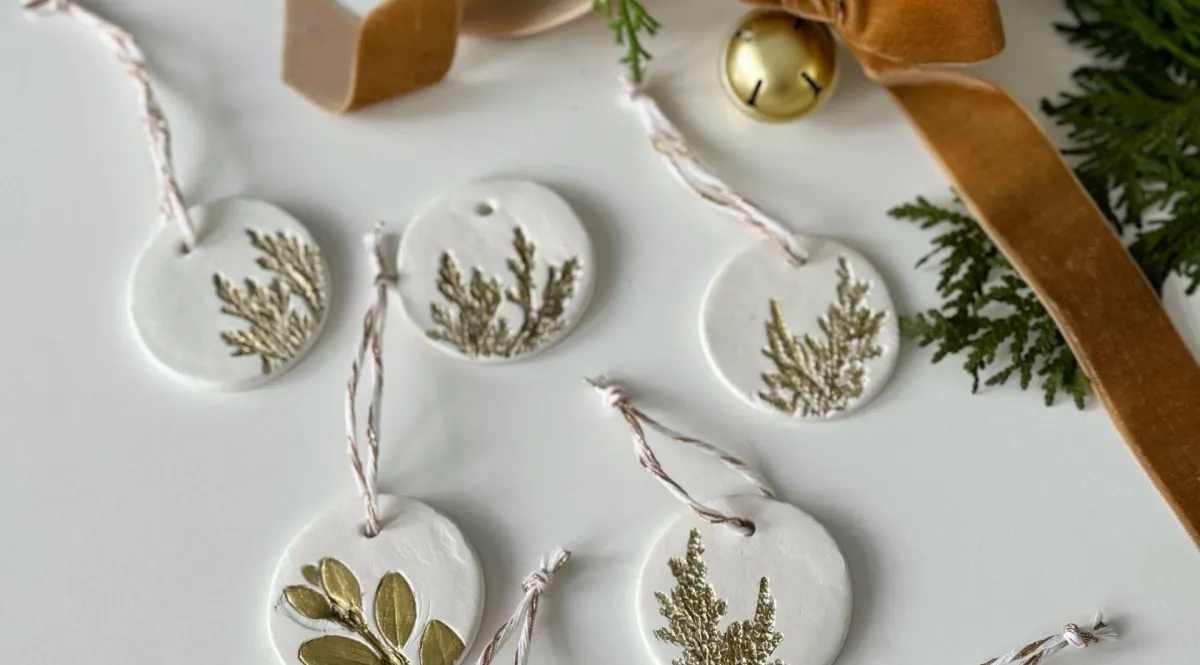
Compare that to a typical handmade ornament loaded with glitter, beads, paint, and a bow — everything competes and nothing lands. Limiting the palette to white, gold, and brown also means these will still look good in five years, which is more than most holiday crafts can claim.
Check these before you start stamping:
- Is your clay 1/4 inch thick? Thinner cracks, thicker looks like a coaster.
- Do you have a release agent? Dust the stamp with cornstarch or it will stick.
- Is your ribbon pre-washed? Velvet off the bolt can bleed onto white clay.
- Do you have a drying rack? These need 48 hours flat and undisturbed.
Fifteen minutes of prep saves a whole batch.
22. A Living-Green Tree with Wooden Animals and Paper Shapes
Mixed-material trees are forgiving in photos and fussy in person. Wooden animals, paper geometry, and knit bells all have different weights, so heavy pieces drift downward and light ones migrate up. Plan to rebalance once, about a week after decorating.

Also: paper ornaments near warm string lights are a genuine fire risk. Use LED only on this tree, and keep paper pieces on the outer branches rather than pressed against the bulbs.
This is a tree for rooms with 8 to 9 foot ceilings — a 7.5 foot tree leaves comfortable headroom and shows off the top ornaments. In a room under 8 feet, drop to 6.5 feet and cut your ornament count by a third. The brighter, lighter counterpart to this approach is Idea #19: same mixed-ornament philosophy, completely different color temperature.
23. Puffy Fabric Trees and Stars in Vivid Colors
Stuffed fabric ornaments are the gateway craft — no pattern, no precision. Trace a tree or star onto two scraps, sew or glue around the edge, turn, stuff, done. A bag of polyfill costs $5 and lasts through years of projects.
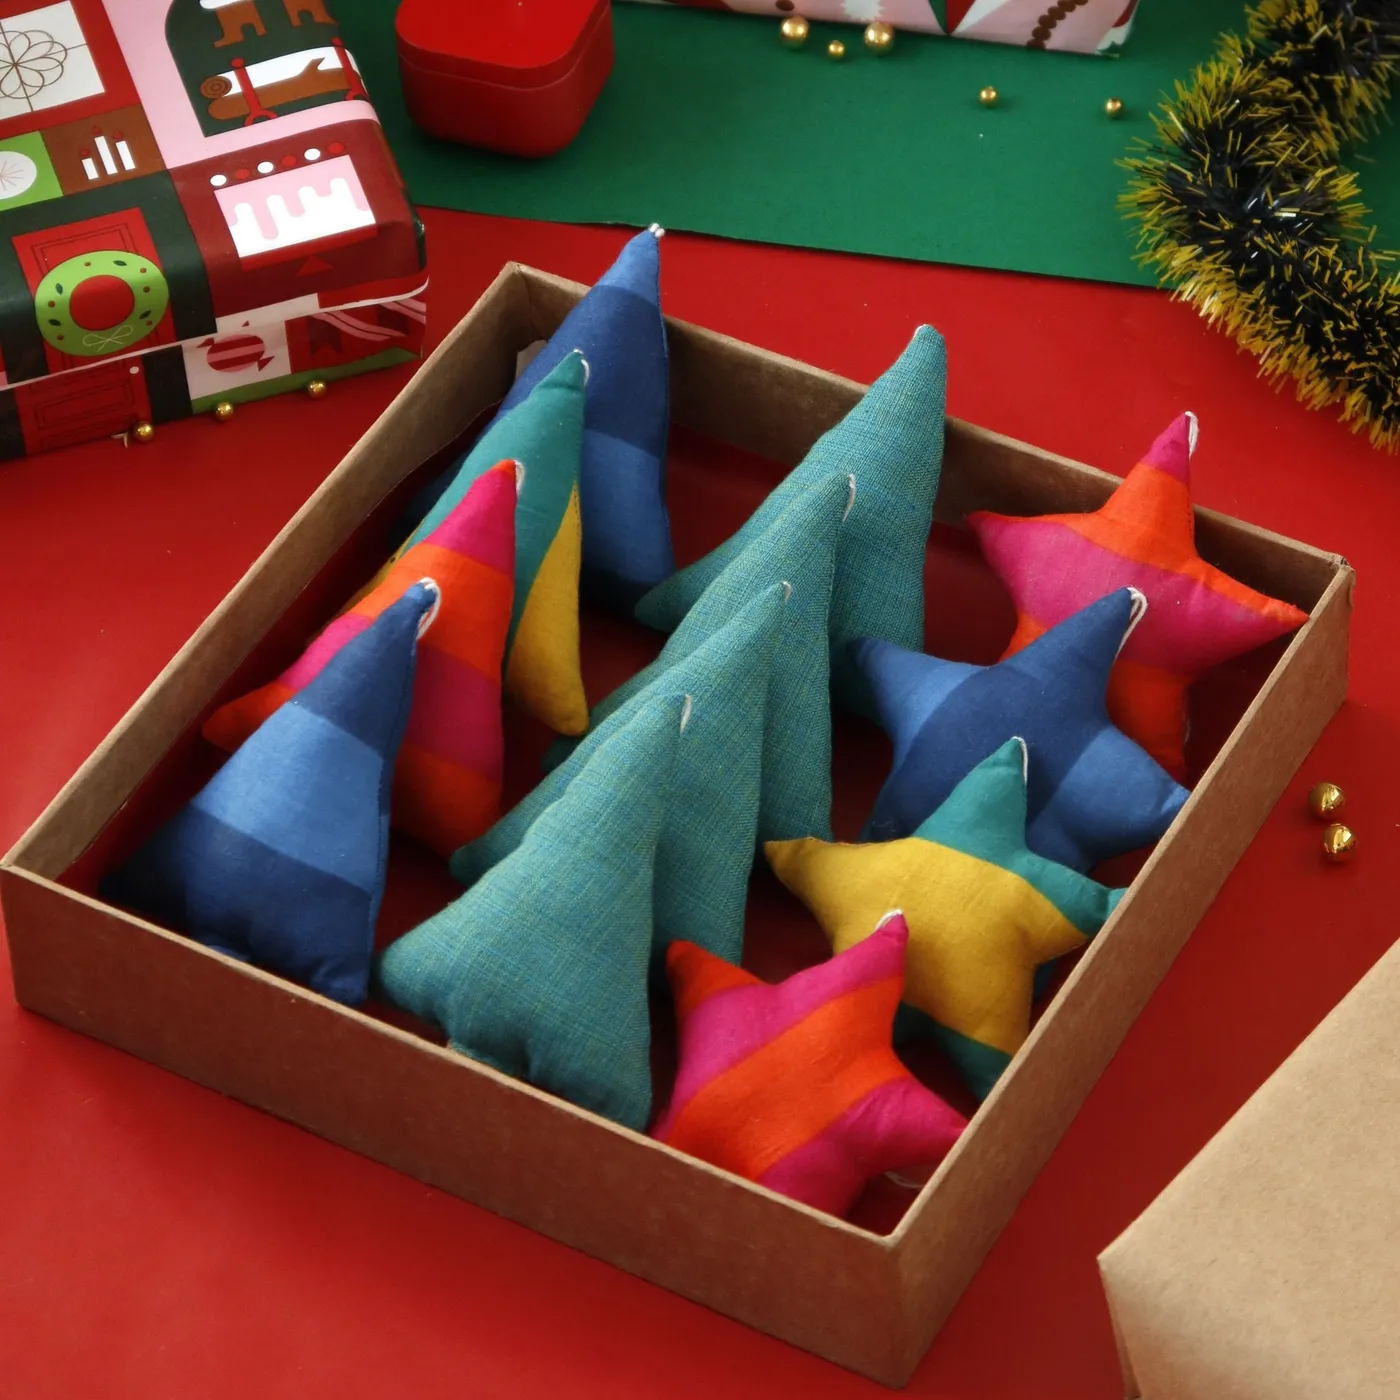
Source your fabric from the thrift store men’s shirt rack: $2 per shirt gets you a yard and a half in patterns you’d never find at a craft store. Add gold beads from a dollar-store necklace and you’re at roughly $8 for a dozen ornaments.
- Fabric scraps or thrifted shirts: $10–$25
- Polyfill, 12 oz bag: $5–$9
- Gold beads or craft pearls: $4–$10
- Thread and needles: $5–$8
- Patterned gift boxes for display: $6–$15
Total: roughly $30–$67 for 24 ornaments. Buy one patterned sheet set at a discount store instead of individual fabrics and you’ll land near $18.
24. Painted Wood Slice Deer Faces in the Greenery
Paint the lightest layers first and let them fully cure — white felt ears, then cream muzzle, then dark eyes, then the black nose last. Acrylic on raw wood wicks, so seal the slice with a thin coat of matte medium before any paint goes down. That one step stops the bleeding edges that make hand-painted faces look muddy. Eyes should sit roughly one eye-width apart; almost everyone spreads them too far.
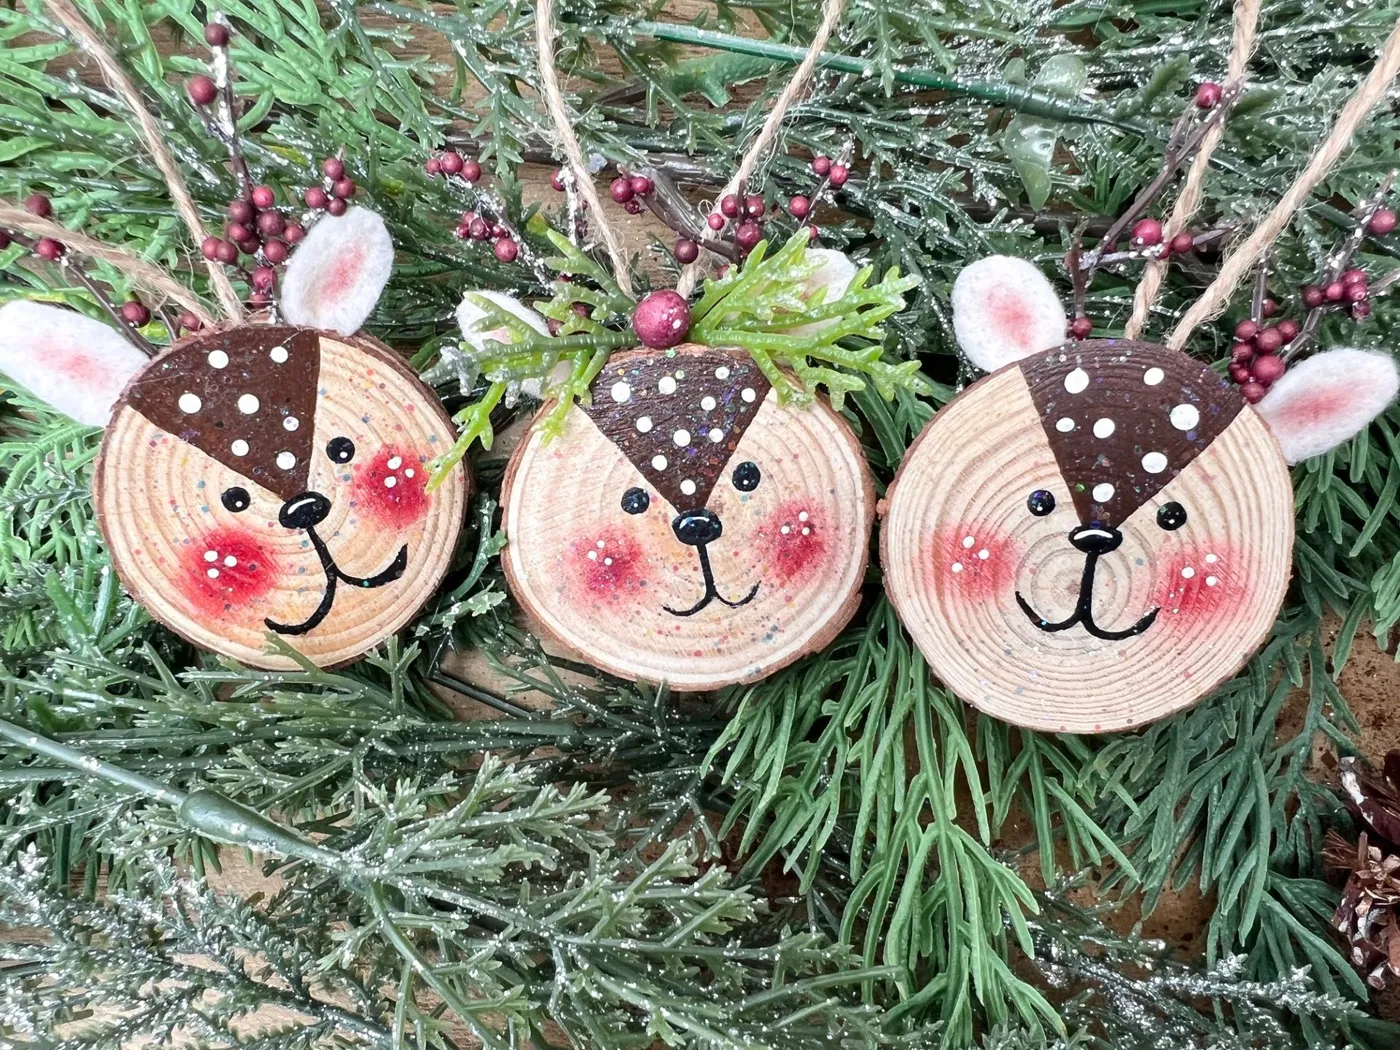
The white felt ears are what turn a painted circle into a reindeer. Flat painted shapes on a wood slice read as abstract; giving the ears physical dimension and a little fuzz flips the brain straight into animal. If you only have time for one upgrade, make it the ears.
25. Wooden Bead Wreaths and Twine Angels on Frosted Branches
Wooden bead ornaments are the lowest-maintenance thing on this list. No fading, no shedding, no yellowing. Wipe them with a dry cloth once a year and they’ll outlast your tree.
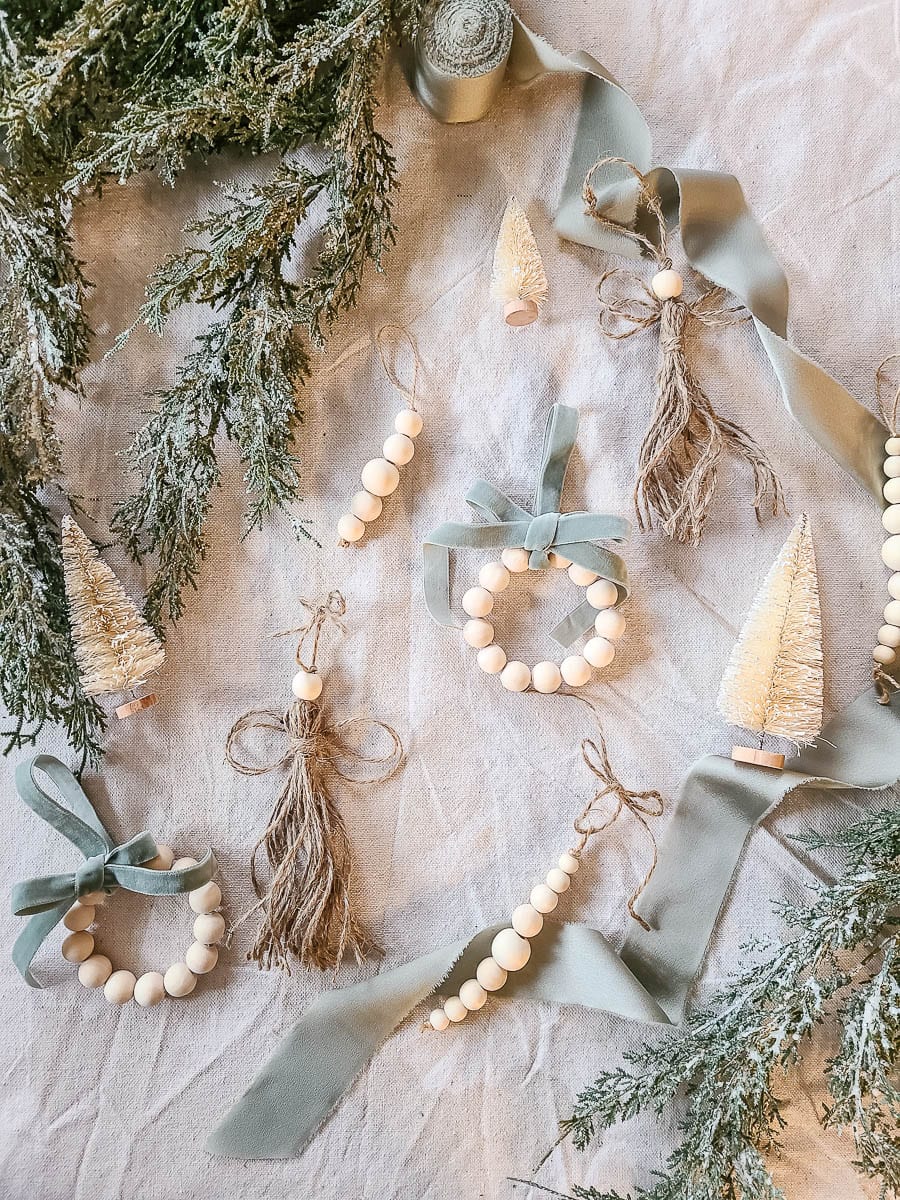
The frosted greenery is the opposite — the faux snow sheds every time you move a branch, and it collects dust visibly. Expect to replace frosted stems every two or three seasons. Plain greenery plus a can of spray snow costs less over time and lets you refresh the frost each year.
The palette here is unusually tight: light natural wood, sage green, jute, frost, cream. Roughly 40% wood, 30% sage, 20% cream, 10% frost. That narrowness is exactly why a whole collection of small pieces feels calm instead of busy. Introduce one warmer brown and it softens further; add a single bright red and it becomes a completely different, more traditional arrangement.
26. A Wooden Tree Figurine on a Natural Mantel
This arrangement needs a shelf at least 5 feet long and 8 inches deep. The lantern, the figurine, the garland, and the bottle brush trees together occupy about 36 inches of width, so anything narrower than 60 inches gets crowded fast.
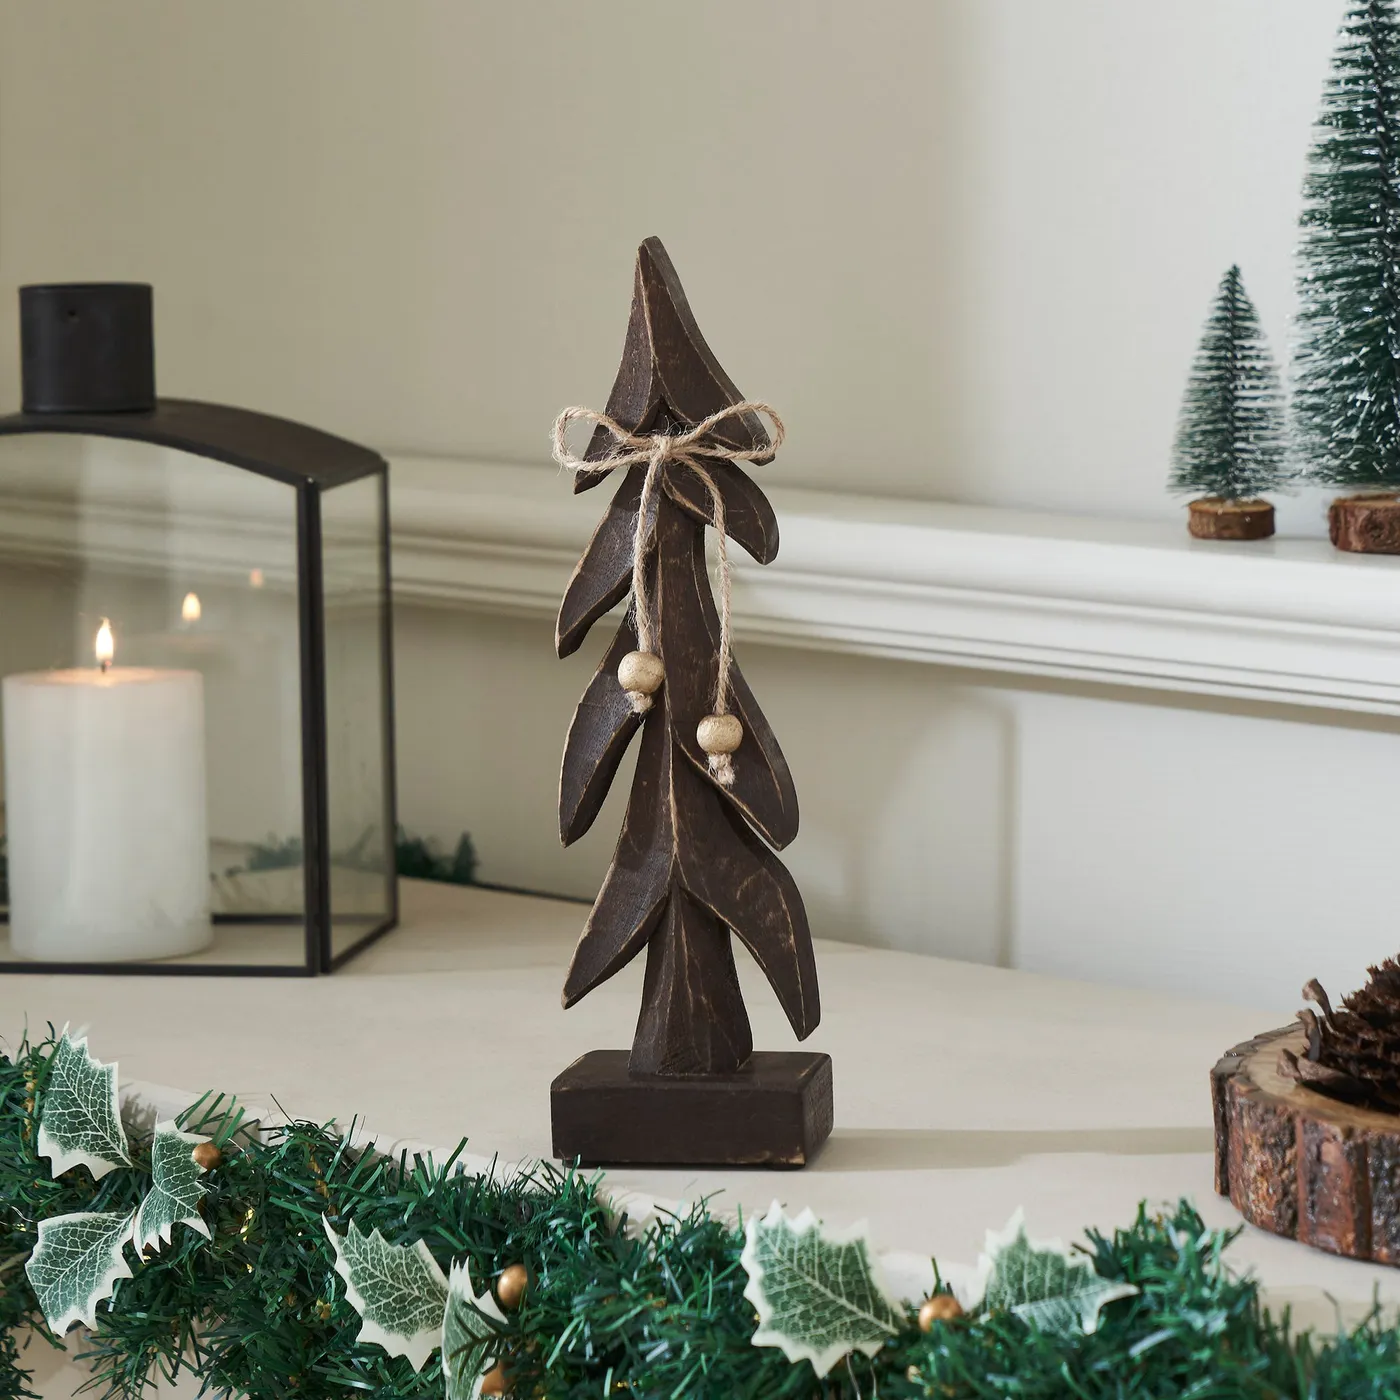
It’s also a low-ceiling-friendly option. Because everything stays under 14 inches tall, it works on a mantel with a shelf only 20 inches above it, where a tall garland would fight the wall.
Verify before you place anything:
- Is the mantel shelf level? Old houses sag, and a lantern will slide.
- Is the lantern rated for a real candle, or do you need LED?
- Does the garland overlap the artwork above it?
- Do the bottle brush trees have a stable base, or will a draft tip them?
Five minutes of checking prevents a December 23rd rescue mission.
27. Chocolate-Dipped Pretzel Rods in a Mini Red Stocking
These take twenty minutes and look like a bakery made them.
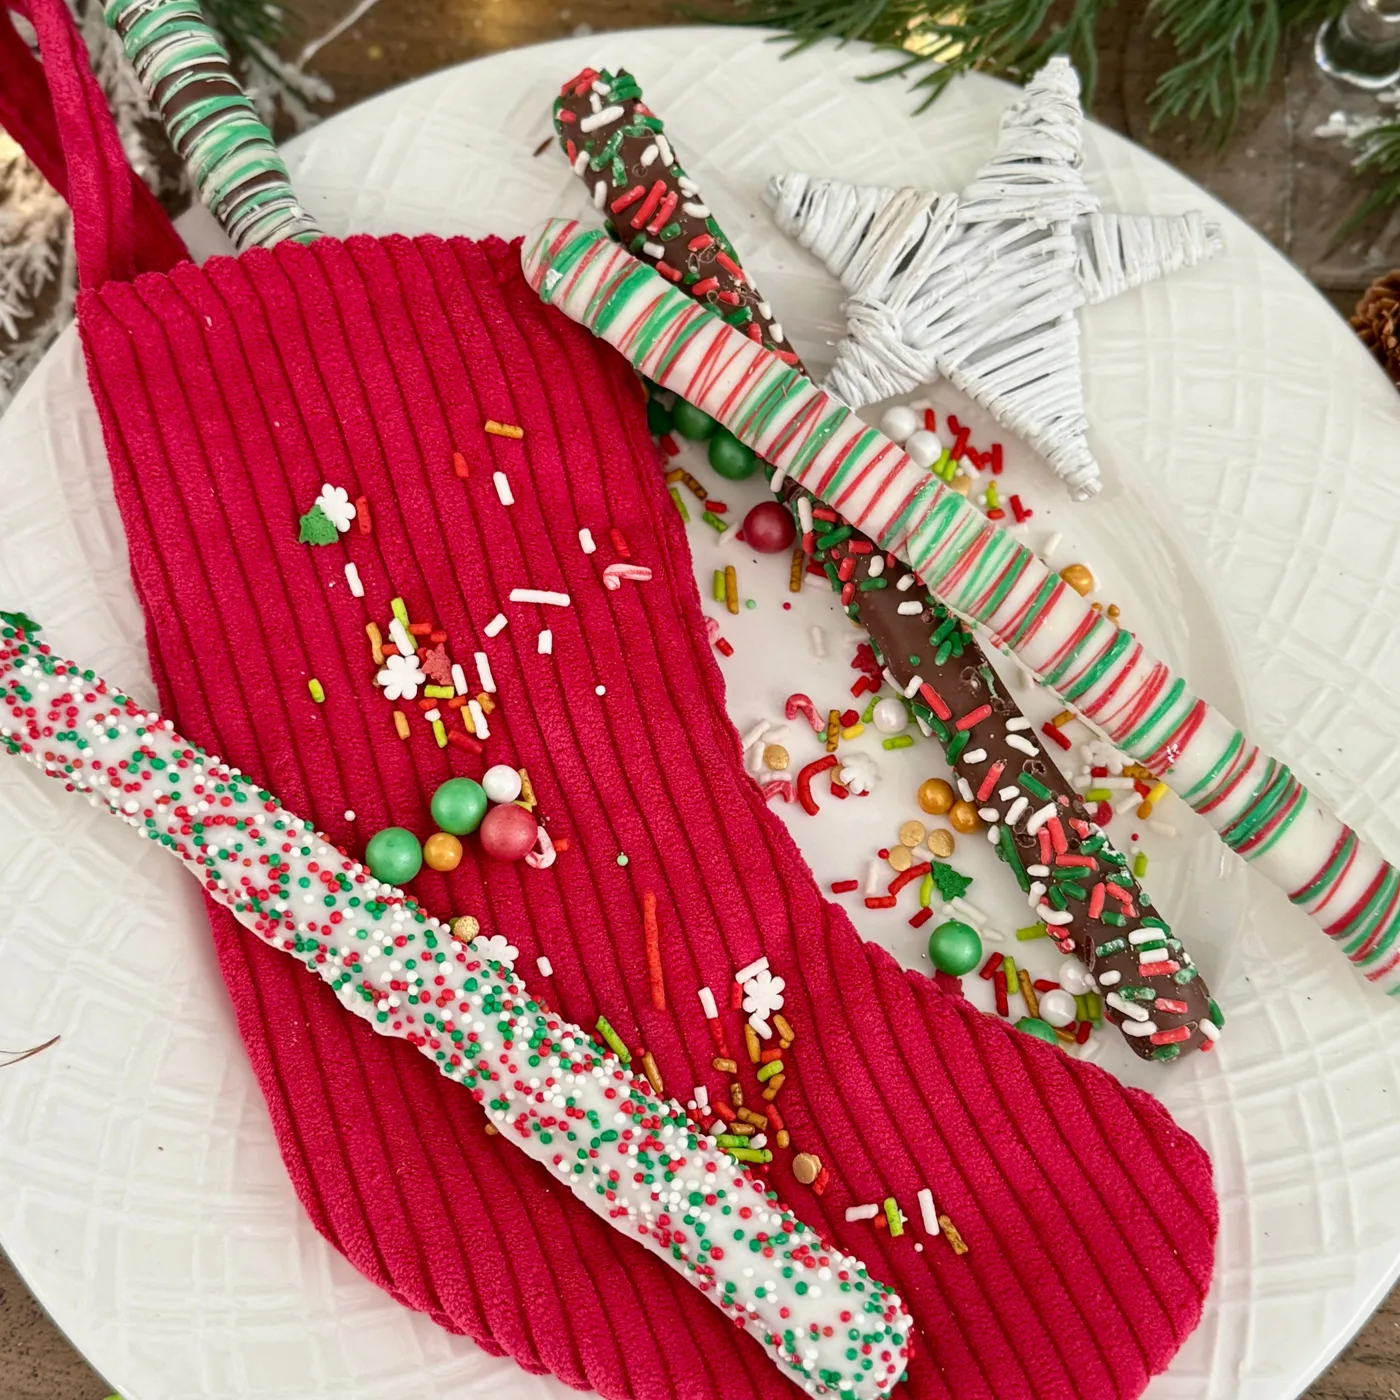
- Melt dark chocolate in 20-second microwave bursts, stirring between each.
- Dip two-thirds of each pretzel rod and let the excess drip back into the bowl.
- Stand the rods upright in a tall glass to set for 10 minutes at room temperature.
- Roll the dipped ends in sprinkles while the chocolate is still tacky.
- Set fully in the fridge for 5 minutes — no longer, or the chocolate blooms.
About $12 for a batch of twelve.
Two things nobody tells you. First, chocolate seizes if a single drop of water gets in — dry your hands and your bowl before you start. Second, humidity ruins the finish; a rainy day gives you streaky, dull chocolate no matter what you do. And if these are gifts, pack them the morning you deliver. Pretzels go stale in about 48 hours once the bag is open, and no amount of pretty sprinkles fixes a soft pretzel.
28. A Patchwork Fabric Ornament from a Kit
- Precut fabric squares or a layer cake bundle: $12–$28
- Gold pins and beads: $6–$14
- Styrofoam or felt core ball: $5–$10
- Plaid ribbon and threads: $8–$16
- Craft tool or chopstick for tucking: $3–$8
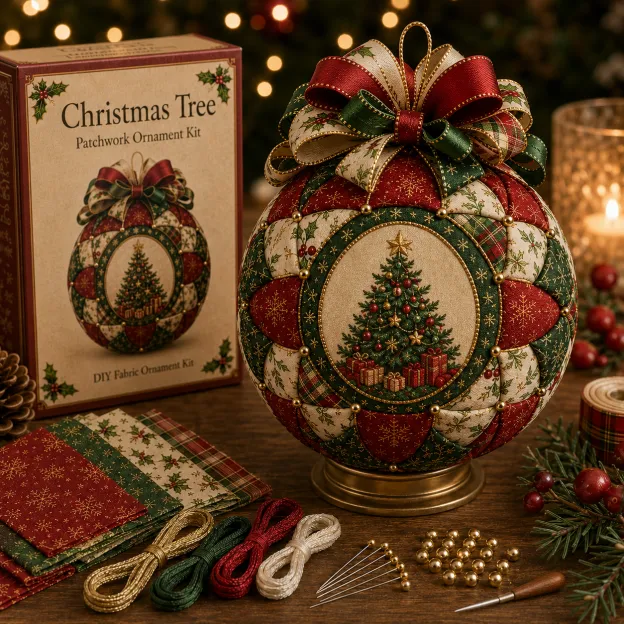
Total: about $34–$76 for supplies to make six. A ready-made kit runs $20–$35 for one ornament. Buy a thrifted plaid shirt instead of precut squares and you’ll land near $15.
The difference between a crisp patchwork ball and a lumpy one is tucking depth. Push each square about 3/4 inch into the core — deep enough that the raw edges disappear, shallow enough that the fabric doesn’t bunch. Work in rings rather than randomly, and rotate the ball a quarter turn after every ring so you can spot gaps before they multiply. A chopstick beats a specialty tool here: same result, zero dollars.
29. Building a Wreath from Evergreen, Citrus, and Ribbon
Wreath-making is mostly about the order of operations.
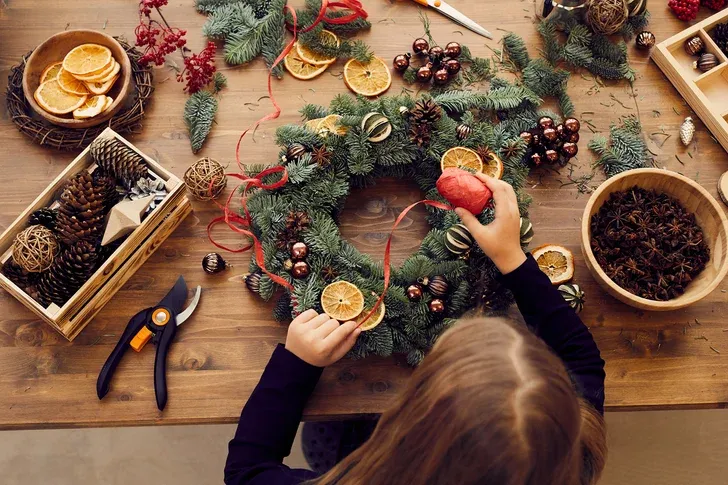
- Soak or condition your evergreen sprigs overnight so they don’t drop needles while you work.
- Wire the base ring with the largest branches first, working clockwise and overlapping by half.
- Add a second, lighter layer of smaller sprigs facing the opposite direction.
- Tuck dried citrus and pinecones into the gaps, wiring each one so it can’t shift.
- Finish with a single ribbon bow at the 4 or 8 o’clock position, never dead center top.
About two hours and $25–$40 in materials.
Foraged and dried materials have moved from crafty to design-forward over the past two years. The reason is partly economic — fresh wreaths from florists now run $60 to $120 — and partly aesthetic, since dried citrus and pinecone work fits the broader 2026 shift toward warmer, more tactile interiors. Expect this one to age well. It’s less a trend than a return to how wreaths were made a hundred years ago.
30. Paper Trees Suspended from Painted White Branches
The white branches are doing something clever: they’re a display system disguised as decor. Hanging ornaments from a bare branch instead of a tree turns a craft project into a centerpiece, and you can see every piece at eye level.
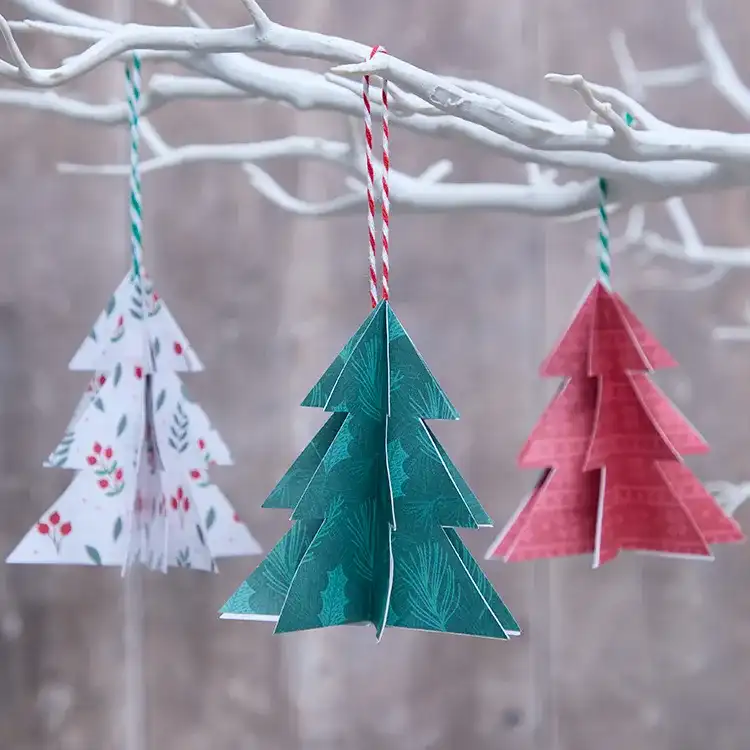
The patterned paper tells a story, too — white with berries, teal with evergreen, red with tiny motifs. Three patterns sharing a color family read as a collection rather than a random assortment.
Paper ornaments are the most fragile thing on this list, and the failure mode is always the same: they crease at the hanger hole. Reinforce both sides of that hole with a small circle of cardstock before you string anything through. Store them flat in a shoebox with tissue between layers, never in a bin with heavier ornaments, and expect two or three seasons before the paper softens and yellows. For the same shapes with more longevity, Idea #19 uses paper stars on a tree — identical construction, and cheap enough to remake.
Your December, Made by Hand
None of these projects require talent — they require an evening, a glue gun, and the willingness to make something slightly crooked the first time. Start with one ornament or one garland, and by next season you’ll have a box of decorations that actually feel like yours.
📌 Pin your favorites now so they’re waiting for you in November.