
Your Pinterest board is probably already full of quilted Christmas tree skirts — and you still can’t decide which one actually belongs under your tree. We get it. So we spent serious time browsing Etsy, Amazon, and Target, plus a few late-night rabbit holes through independent quilt shops, and pulled out 31 ideas that genuinely deliver in 2026, from $18 ribbon-tied patchwork finds to $340 hand-quilted heirlooms. You’ll find traditional patchwork, rustic farmhouse plaid, heirloom needlepoint, and loud modern geometrics — and plenty of entries put a budget version right next to the splurge. And stay until the end — we break down the most common mistakes that can ruin these looks. (Heads up: this post contains affiliate links, which means we may earn a small commission if you buy through them, at no extra cost to you.) 📌 Save this to Pinterest for later — you’ll want to revisit these ideas.
1. Red Ticking Stripe With a Ruffled Linen Edge
Ticking stripe is a mattress-ticking pattern: narrow, evenly spaced, quietly utilitarian. That’s exactly why it works under a tree. The vertical lines draw your eye downward and give the round shape a direction, instead of letting it sit there as a flat red disc. The light beige ruffle is the counterweight — it softens the stripe’s hard geometry just enough that the whole thing reads heirloom country rather than craft-fair. Red, silver, and gold ornaments above give that red something to answer to.
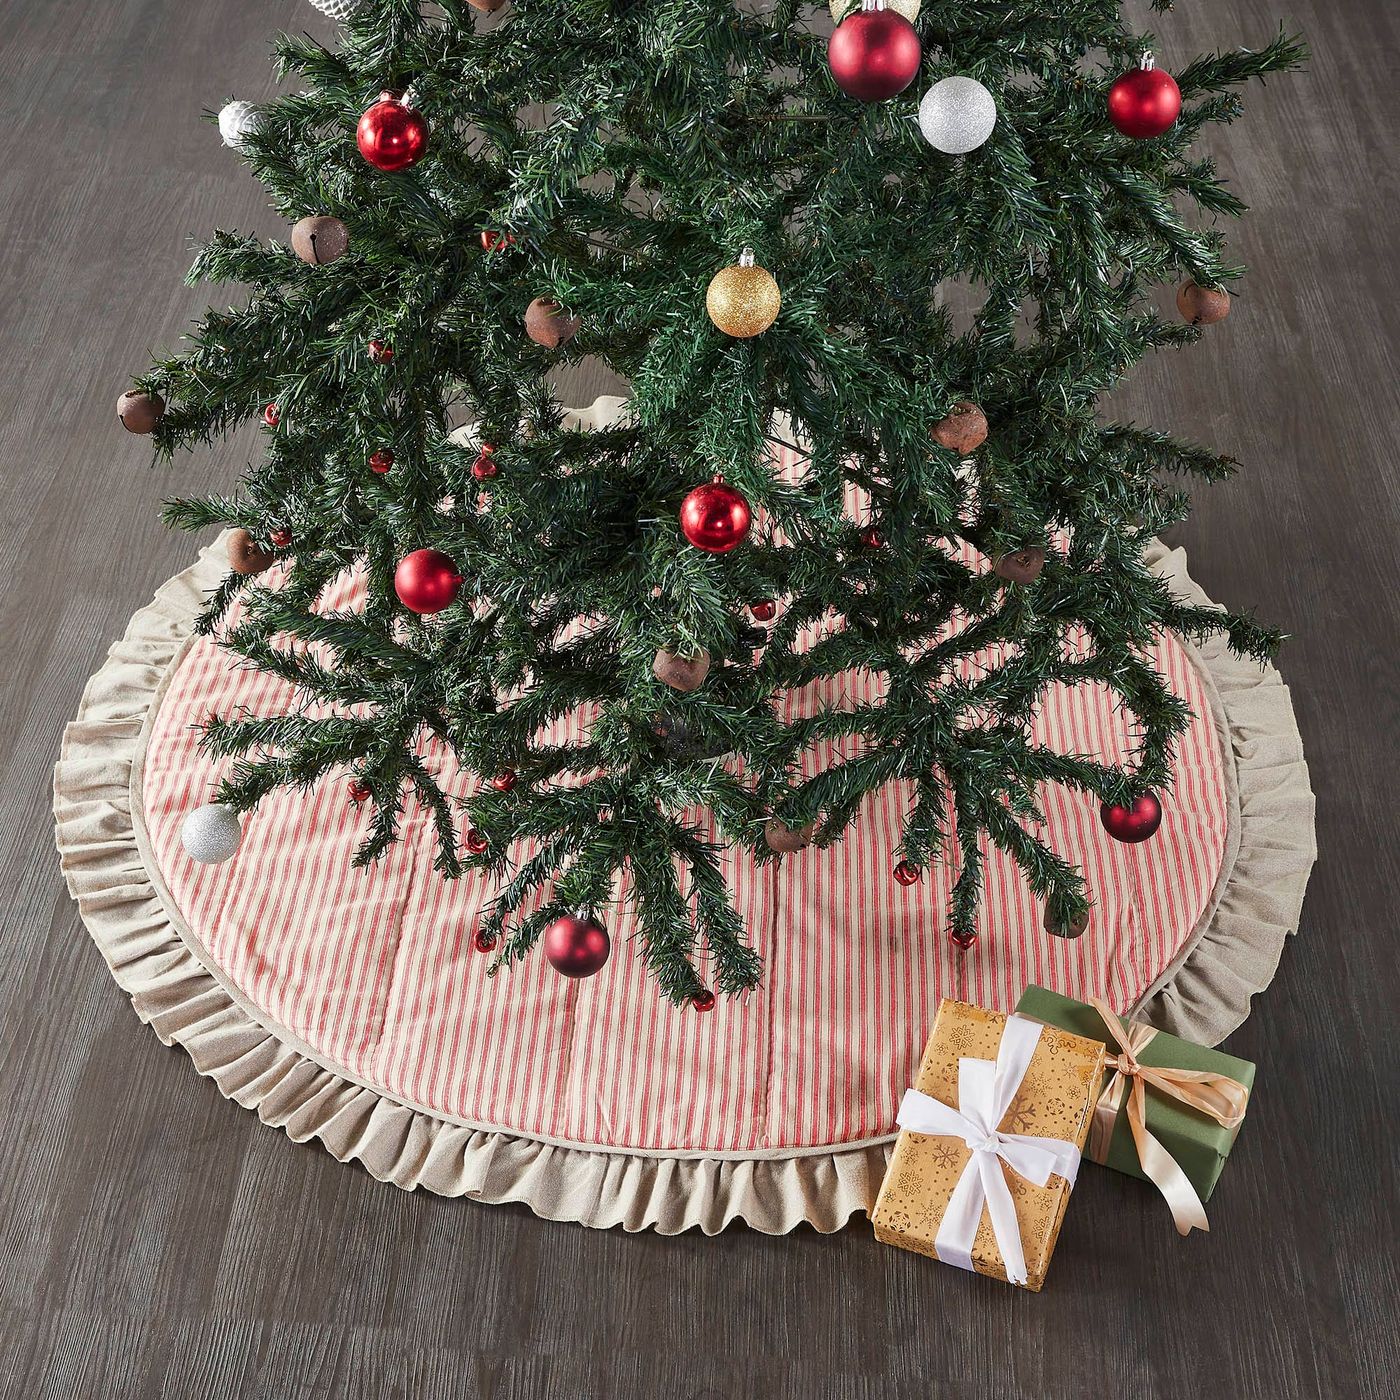
Quilted and pieced tree skirts are having a moment precisely because the rest of the room went quiet. As living rooms lean warmer and more neutral — oatmeal sofas, oak, linen — the tree base has become the place people spend their color budget. Ticking stripe rides that quiet-country wave: nostalgic without being fussy, and it photographs beautifully on dark wood. This one has staying power past 2026; ticking has been moving in and out of American homes since the 1800s.
2. Hunter Green Chevron Quilting Tied With a Fabric Bow
Ask about stitch spacing before you buy or quilt. Chevron and diagonal quilting lines should sit about 1.5 to 2 inches apart — that’s the sweet spot where the pattern still registers from standing height. Closer than an inch and the lines blur into texture mush; wider than 3 inches and the batting shifts and lumps after a season in storage. Also, match the closure bow to the skirt fabric itself rather than to a satin ribbon. Fabric ties drape, they stay knotted, and they look like they belong.
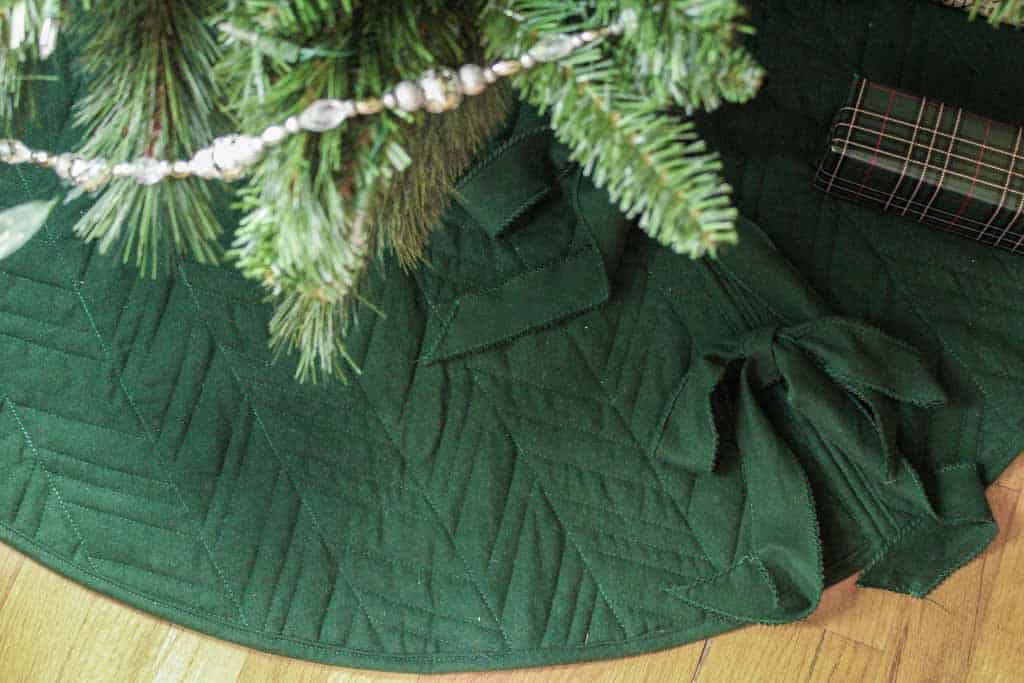
The bow. Without it, this is a green disc under a tree. With it, the skirt has a front, a closure, and a small ceremony — someone tied that. A matching fabric bow also solves a practical problem: it hides the slit and keeps the opening from gaping once gifts start pushing things around. If you’re making one, cut the ties 4 inches wide by 30 inches long and press them into a soft fold before knotting.
3. Diamond Patchwork in Cream, Crimson, and Black
- Quilting cotton, 3 to 4 yards at $10 to $14 per yard: $40 to $70
- Low-loft batting: $12 to $20
- Backing fabric (a thrifted flat sheet works fine): $15 to $25
- Thread, rotary blades, spray basting: $15 to $25
- Total for a DIY diamond patchwork skirt: $85 to $140
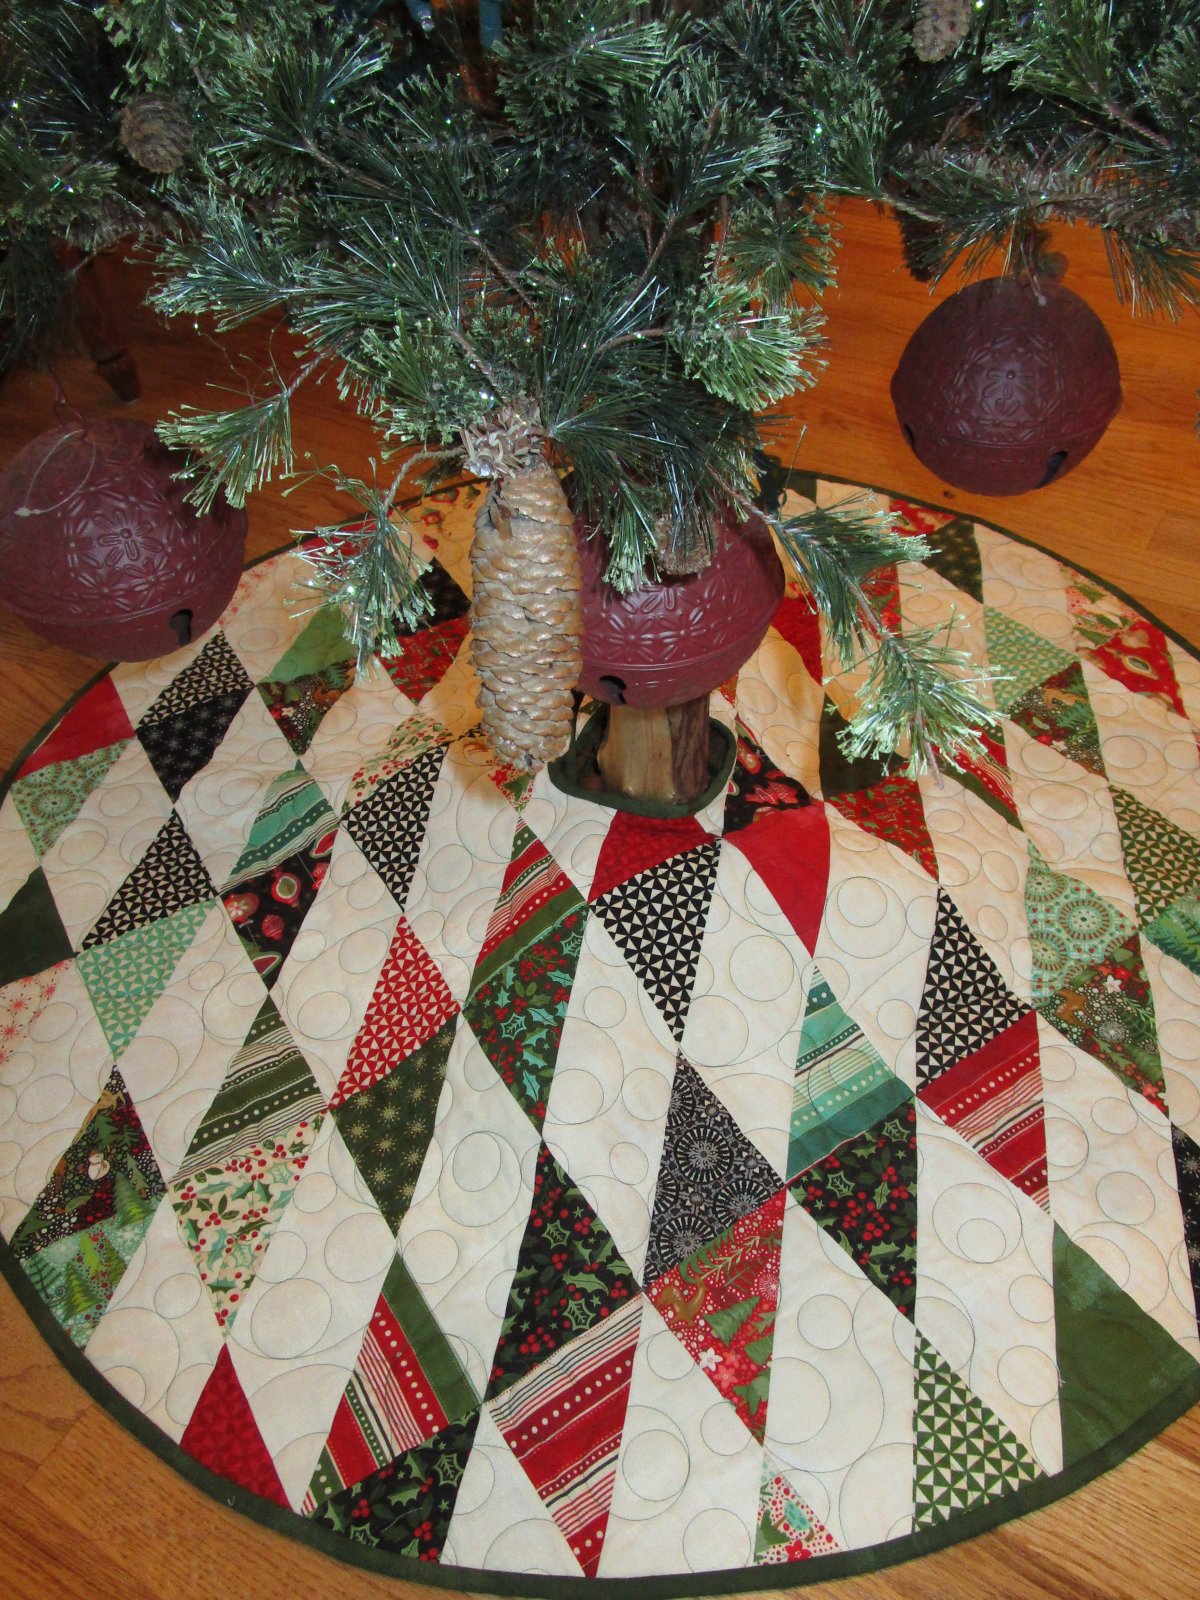
Budget alternative: start from three pre-cut charm packs at $12 to $15 each and piece the diamonds as half-square triangles. Same look for roughly $55 to $75, and about four fewer hours of cutting.
Patchwork lives or dies on whether the eye has somewhere to rest. The cream sections here are that rest stop — the only quiet fabric in a mix of red, green, and black, and also where the circular quilting reads most clearly. Black is the sneaky hero: it gives red and green an edge, so the diamonds look crisp instead of muddy. The bells and that single oversized pinecone finish the vignette without stealing focus.
4. No Photo, No Problem: Choose the Fabric Palette First
Buy half a yard extra of every single fabric before you cut anything. Dye lots shift between bolts, and a tree skirt is a lot of surface area for a mismatch to show up. Same goes for binding: if you’re binding in a fabric from a second bolt, cut that strip first and compare it against your panels in daylight, not under your sewing lamp. It takes four minutes and saves an entire re-make.
Here’s the unglamorous math on going handmade. A quilted skirt with pieced panels runs 15 to 25 hours from cutting to binding — closer to 40 if it’s your first one. At a reasonable hourly rate that’s $500 or more of your own time. That’s not a reason to skip it; it’s a reason to be picky about the pattern you choose. Pick one you’ll still like in six Decembers, not the one that looked best on a screen at midnight.
5. White Quilted Base With Appliqué Trees and Green Binding
Appliquéing a tree motif onto a quilted base:
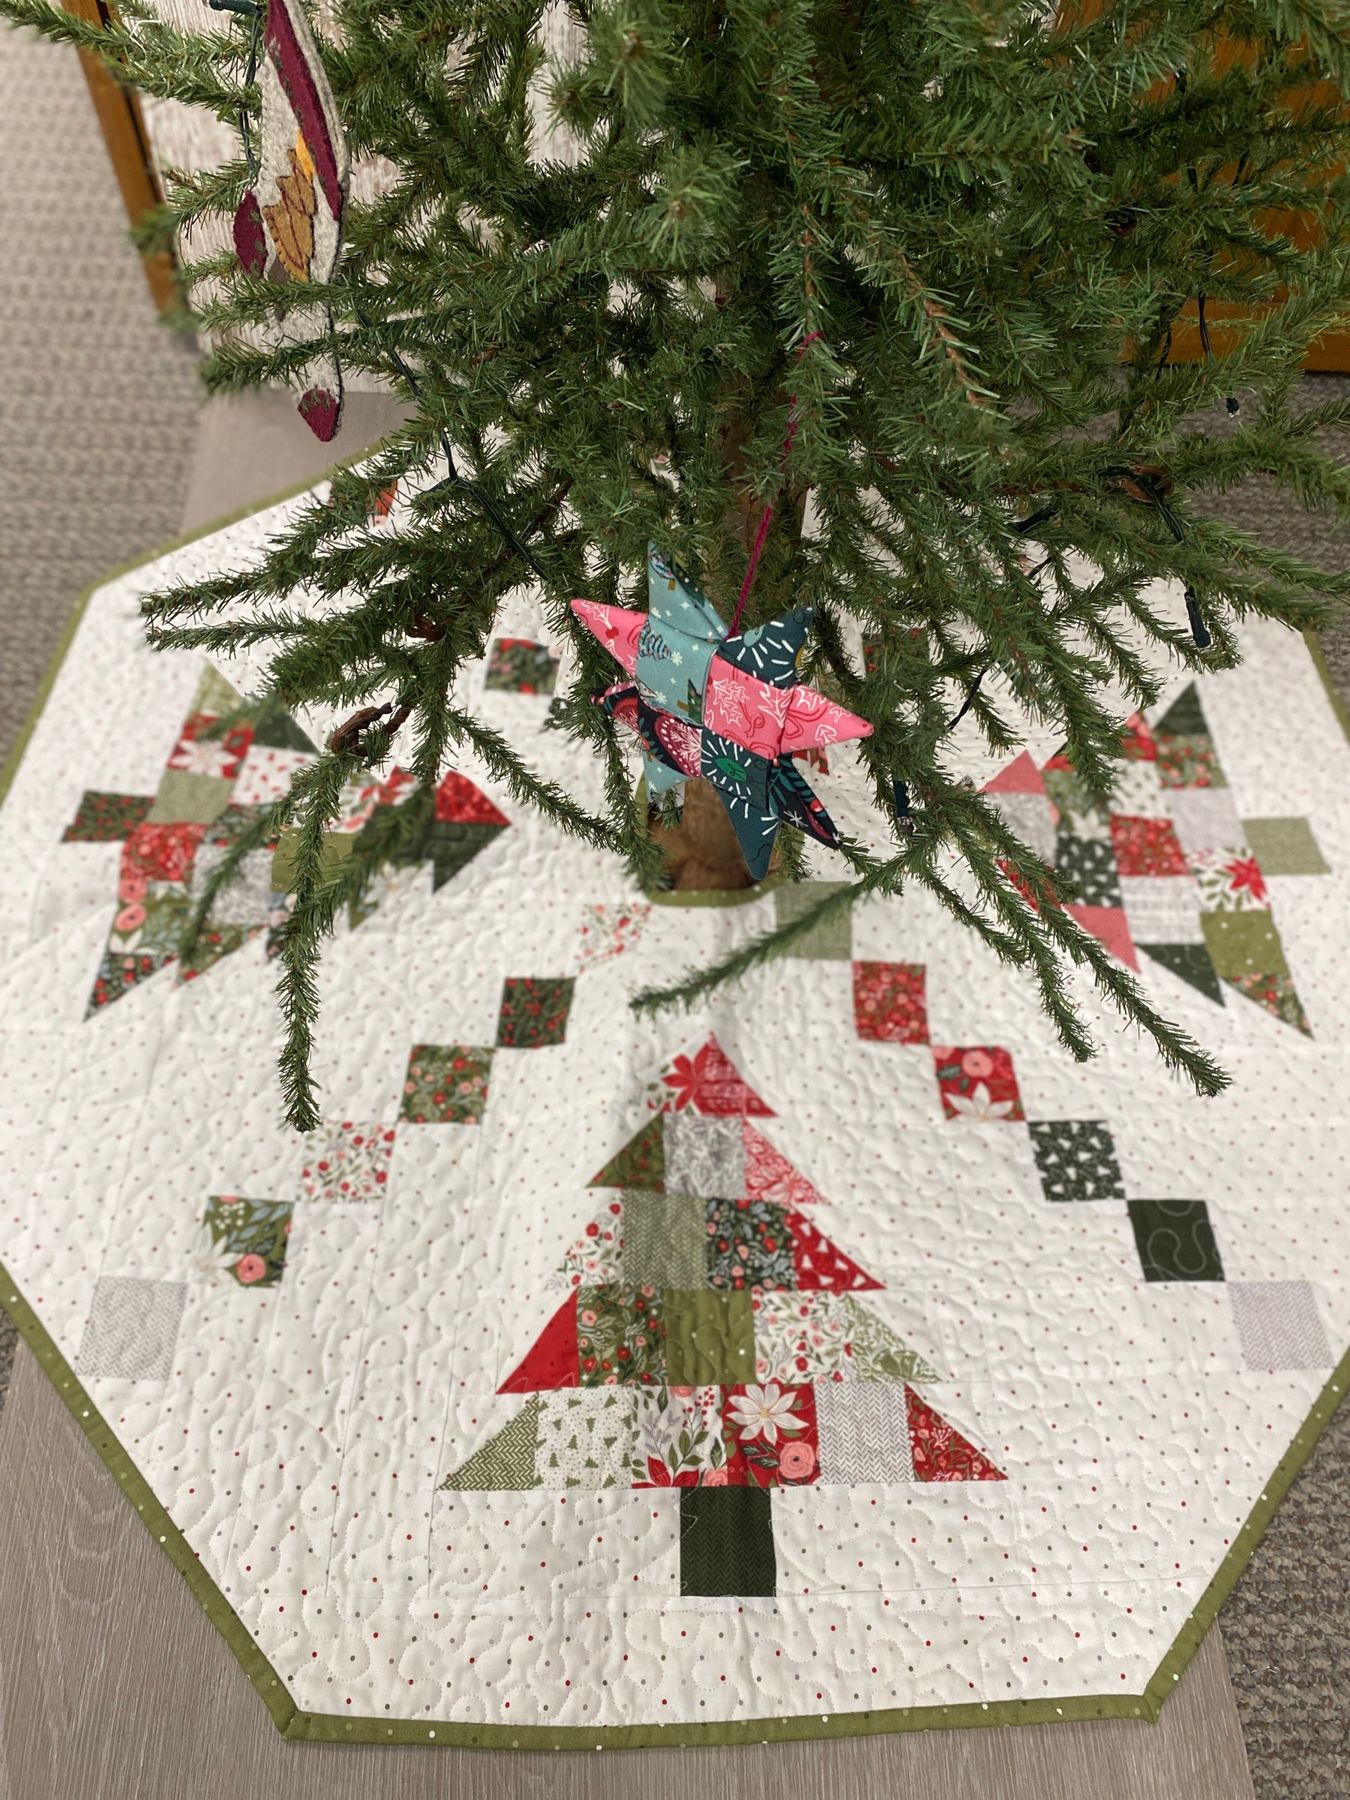
- Fuse a lightweight web to the back of your tree fabric, then cut simple triangle-stack silhouettes
- Press each tree onto the skirt panel, working from the outside in toward the center
- Machine-stitch around each shape with a narrow zig-zag or blanket stitch in matching thread
- Stipple the background — around the trees, not over them — so they sit above the quilting
- Bind the outer edge in a solid green bias strip, mitering the corners at the slit
Time: 3 to 4 hours for a 42-inch skirt. Materials: $25 to $40, not counting the base quilt.
The green bound edge is doing more work than it looks like. On a white, red-dotted quilt, a solid green binding is the only place your eye gets to stop — it frames a busy field of dots and tree motifs, and it echoes the tree itself so the skirt reads as part of the holiday rather than a random white circle. Swap it for white and the whole thing goes soft and shapeless at the perimeter.
6. Gingham, Script Print, and Holly in One Pieced Skirt
The formula is roughly 55% red-and-white gingham and buffalo check, 25% dark green holiday motifs like wreaths and holly, 15% white or cream prints with script text, and 5% warm gold. The checks do the job a solid neutral usually does — they hold the pattern together without introducing a new color. To swap it: trade the red checks for navy and the green motifs for grey, and you have a completely different skirt using the exact same math.
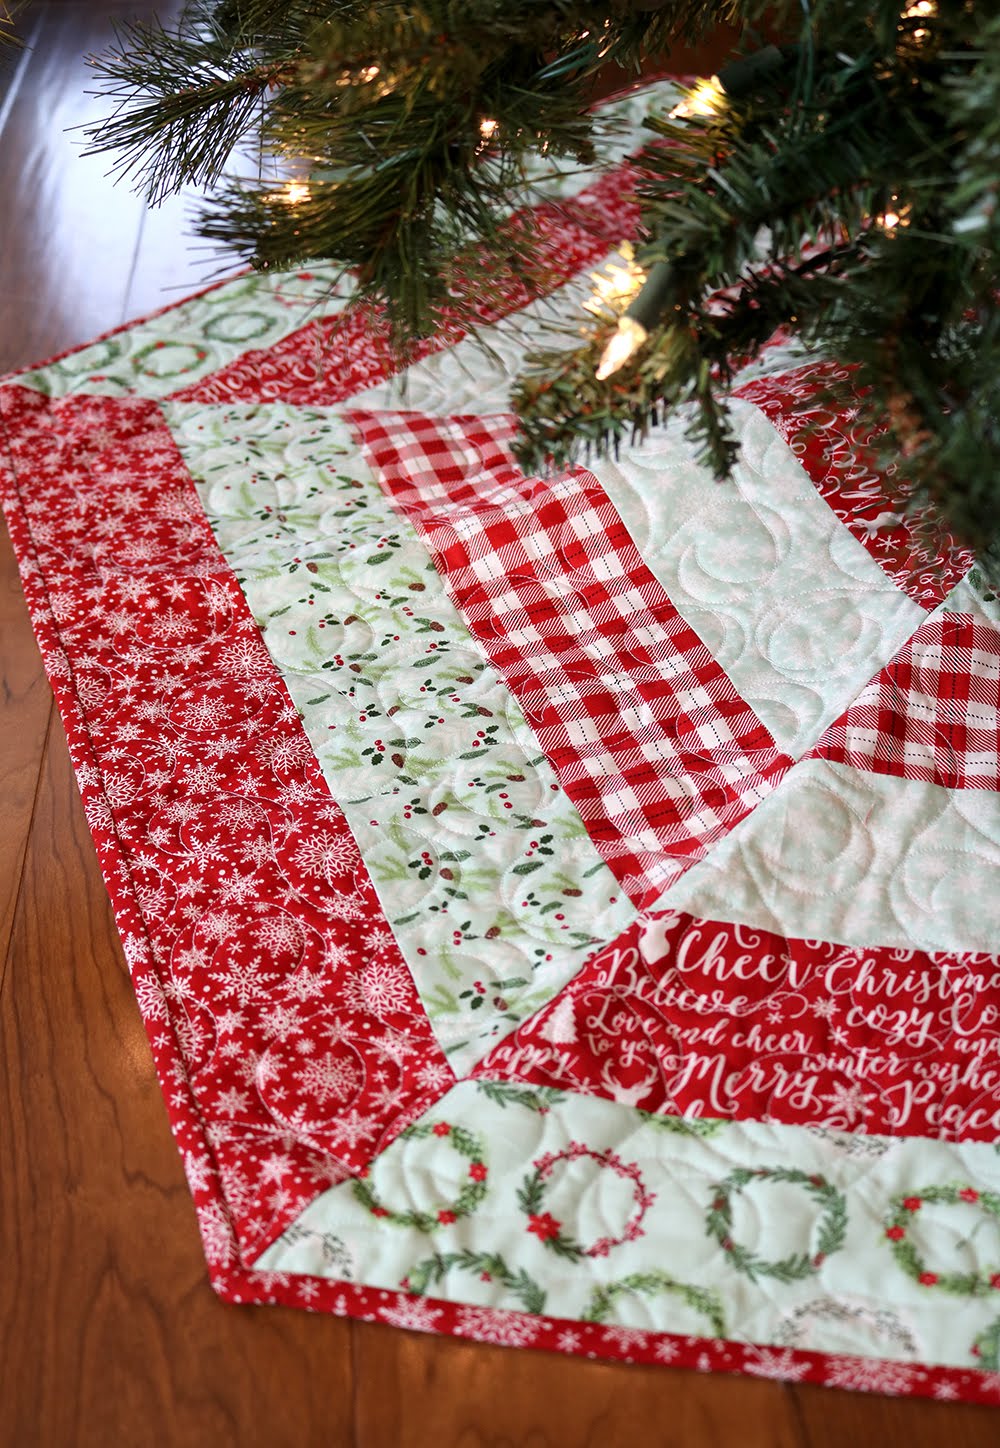
You do not need a fabric store’s entire holiday wall. Three or four charm packs — those 5-inch pre-cut squares, usually $12 to $15 each — plus a thrifted red gingham sheet for backing gets you this look for under $60. Add a $12 spool of neutral thread and a $9 package of low-loft batting and you’re done. The pieced-block structure is what reads as handmade, not the price of the fabric.
7. Red and Black Plaid With a Deep Fringed Border
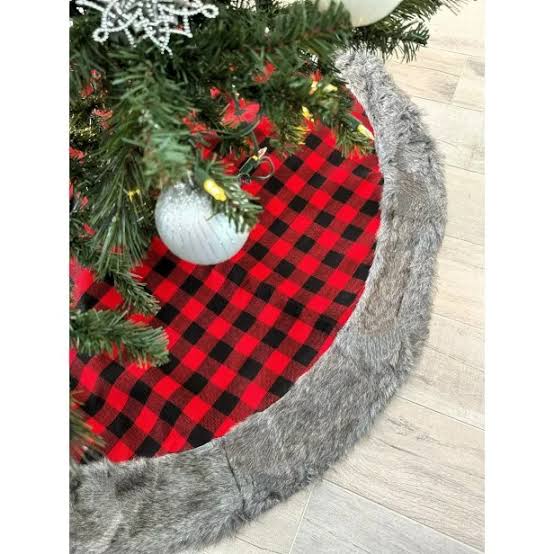
It’s the fringe. Red-and-black plaid on its own is a lumberjack shirt; the fringed border is what pushes it into lodge territory — that slightly worn, cabin-shelf feeling that makes a tree base look collected instead of coordinated. Fringe also does quiet visual work by breaking the hard circular edge, so the skirt looks softer from across the room. If you make one, cut the fringe 4 inches deep and machine-bind just above it so it doesn’t fray past a single season.
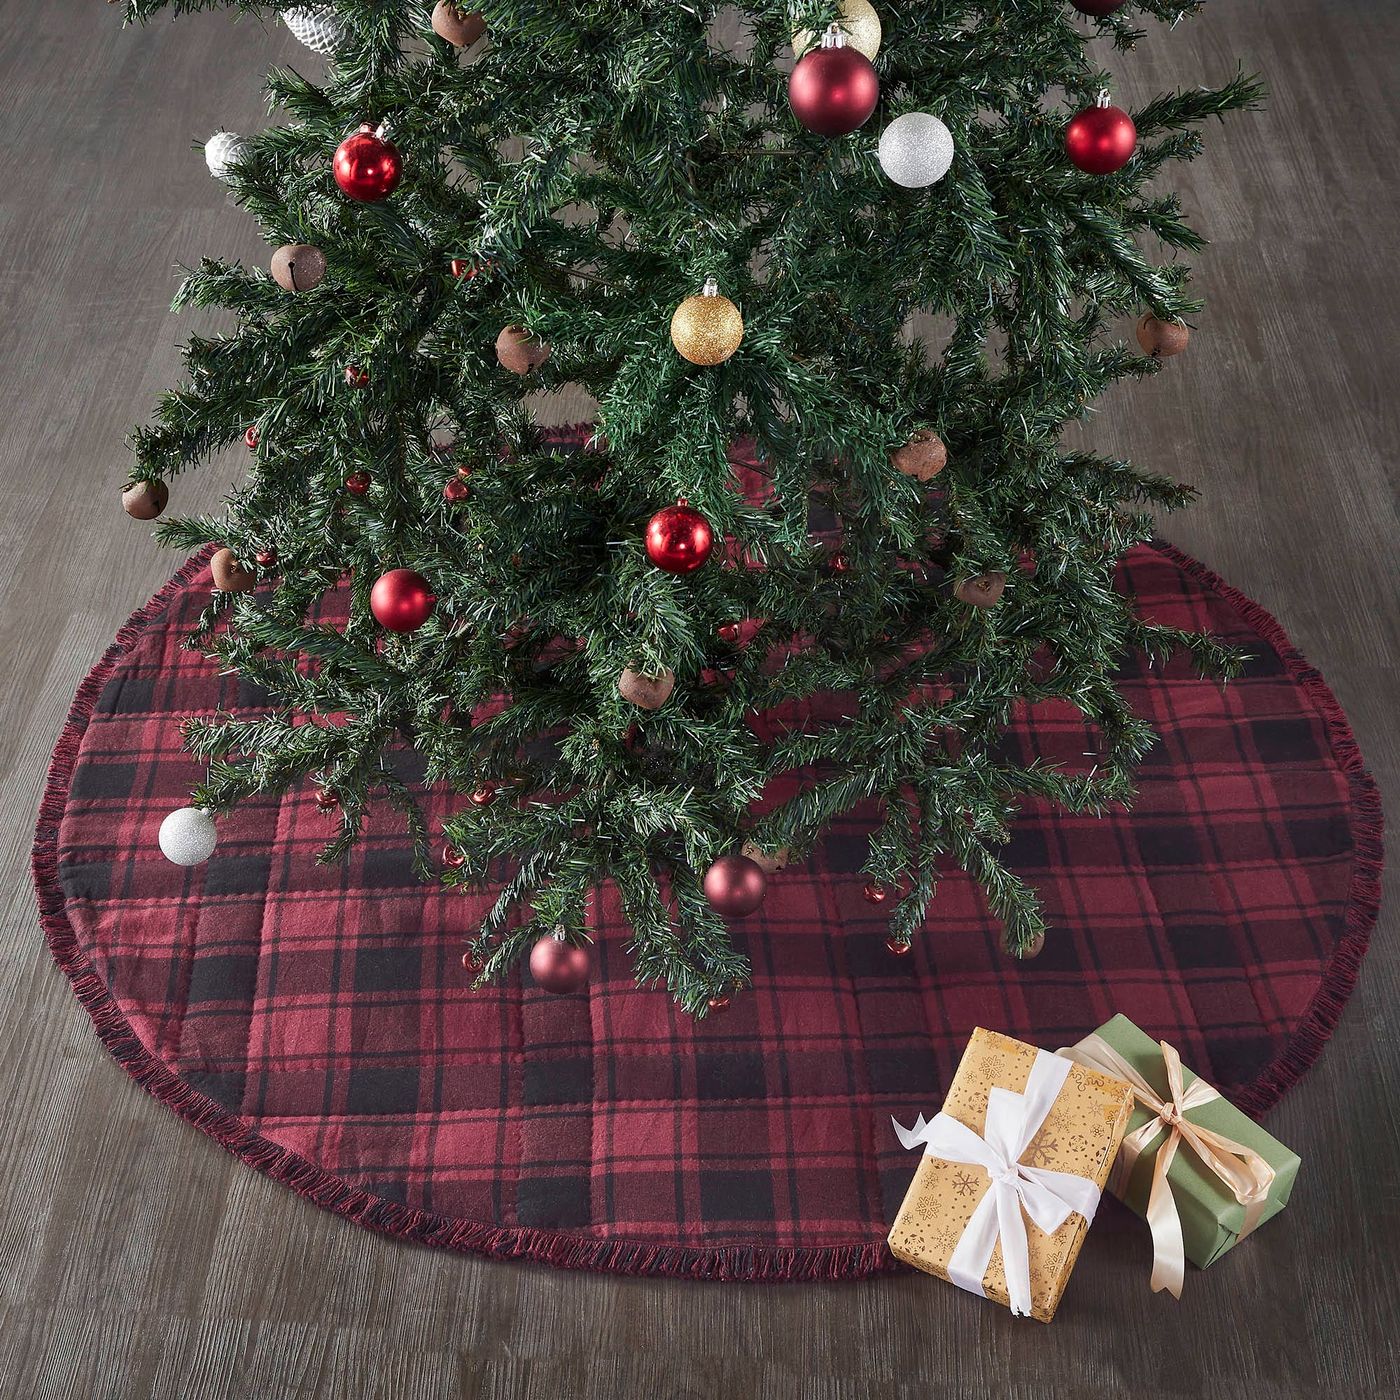
This diameter works best under trees 6 to 7.5 feet tall with a base spread of 42 to 52 inches. In rooms under about 150 square feet, skip the fringe — a fringed edge adds visual weight down at floor level and can make a small living room feel crowded. For tighter spaces, look at Idea #23, where four oversized panels keep the pattern bold without the extra bulk around the perimeter.
8. Radiating Plaid Panels and a Gathered Stripe Ruffle
When you piece plaid panels that radiate from a center point, cut each wedge on the bias if you want the lines to fan outward. Cutting on the straight grain makes every wedge’s plaid run in the same direction and the whole skirt reads flat. Bias cutting wastes more fabric, so plan on 20% extra. Press each seam open rather than to one side, or the center point puckers into a little cone.
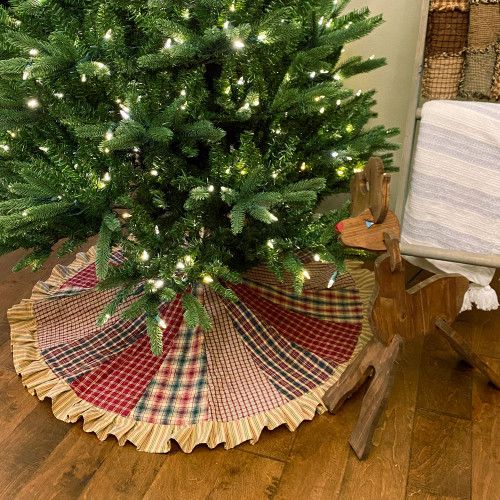
There are two competing patterns here — plaid wedges and a striped ruffle — and it works because they’re separated by scale. The plaid repeats large across an entire wedge; the stripe is fine and gathers into a narrow band at the edge. Two patterns can share a skirt as long as one of them is clearly the background noise. The wooden reindeer finishes it by adding a third material, so the whole corner doesn’t feel like a fabric display.
A gathered ruffle roughly doubles the fabric and the sewing time on the perimeter, and it collects dust like a filter. With pets in the house, expect to vacuum that ruffle twice a month with a brush attachment — never a beater bar, which will chew the gathers. If a ruffle isn’t worth it to you, a flat piped edge reads nearly as finished from standing height and takes 45 minutes instead of three hours.
9. Radiating Wedges Displayed Flat Across a Sofa
Quilts like this one stay heirlooms only if you store them like heirlooms. Fold along the quilting lines, wrap in acid-free tissue, and keep it out of plastic bins — cotton batting traps moisture and mildew moves in fast. A cotton pillowcase works in a pinch. Never stack anything heavy on top, because permanent creases in a pieced quilt are almost impossible to press out. Annual upkeep cost is essentially zero, which is the best part of owning one.
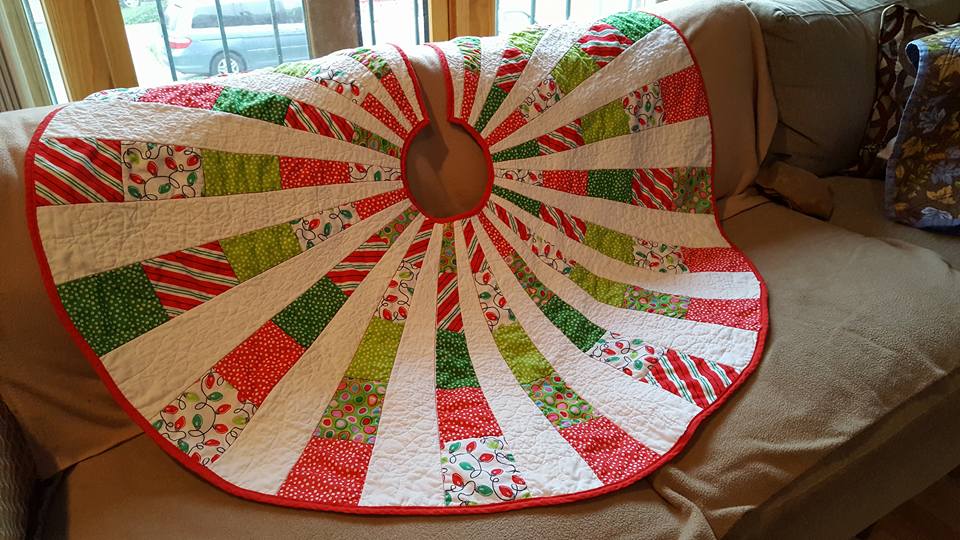
The pattern is what makes this expensive to reproduce, but the source doesn’t have to be. Browse Facebook Marketplace and estate sales for a vintage quilt in the $15 to $40 range, measure a center circle, cut the opening with a rotary cutter, then bind the raw edge. Thrift stores occasionally turn up hand-pieced quilts for $8 to $20. You’re not reproducing the radiating wedges exactly — you’re buying someone else’s twenty hours of work for the price of lunch.
10. Bright Red Polka Dots Under Warm String Lights
This one runs close to 60% solid red base, 25% white polka dot, and 15% ornament color. Keeping the dots as the accent rather than the main event is what lets a fully decorated tree sit on top without visual combat. To rework it: 60% solid forest green, 25% white dots, 15% copper and cream ornaments gives you the same cheerful energy with a completely different mood. Or trade the dots for tiny white stars if you want a quieter December.
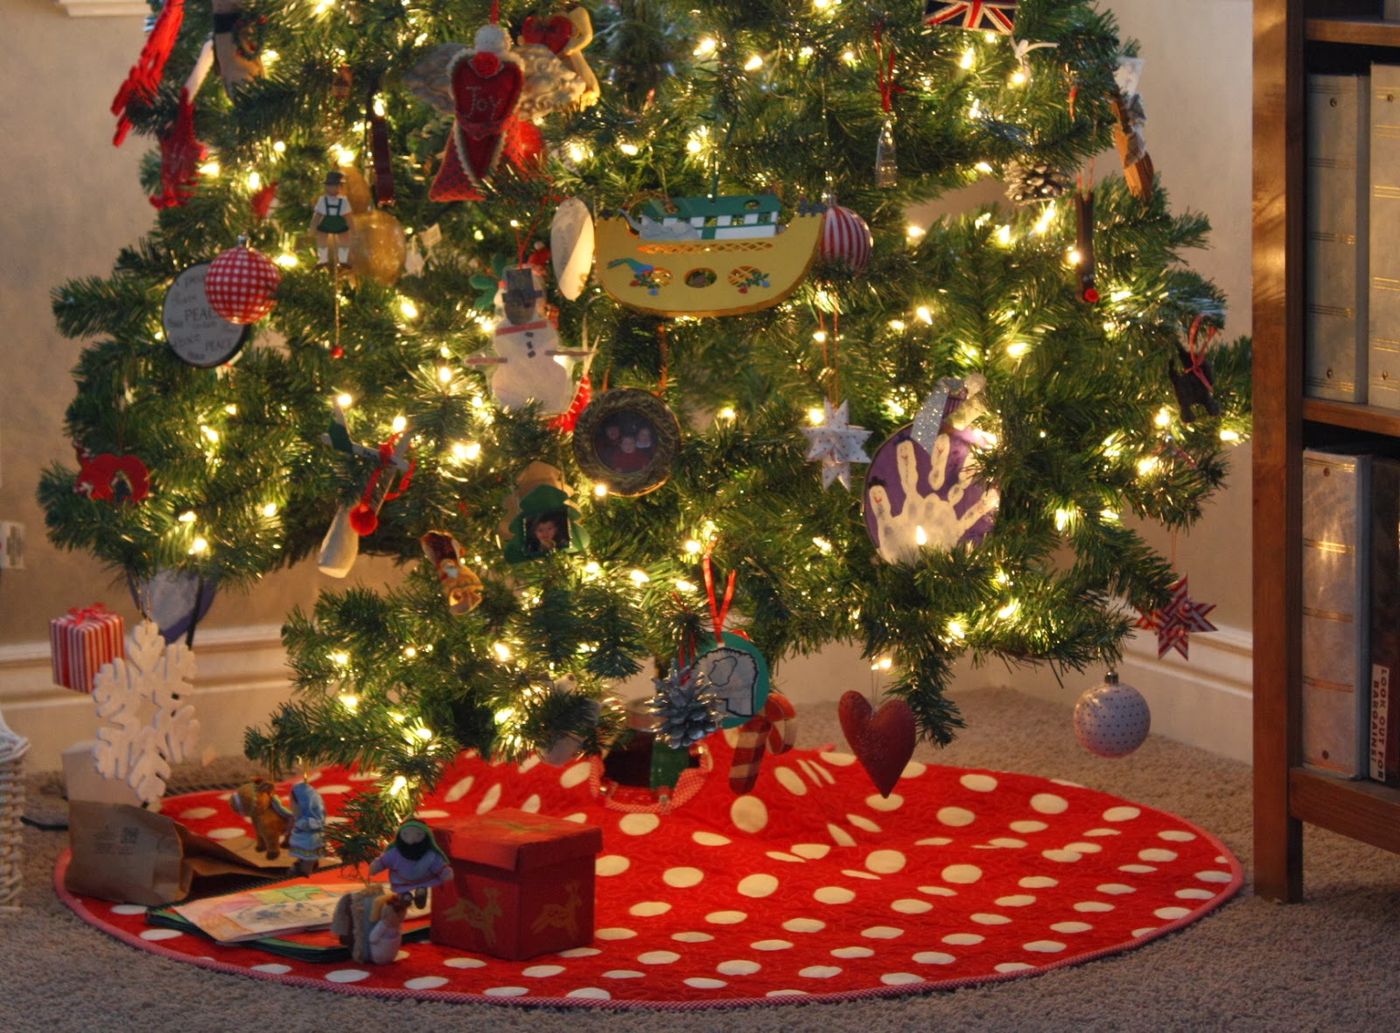
Busy prints need breathing room above them. With a polka-dot skirt, keep ornaments to roughly two per 12 inches of branch and cluster them in odd numbers — threes and fives — instead of sprinkling evenly. Even sprinkling plus a dotted skirt equals visual static. Keep the ornament palette to two color families too. Red and white ornaments on a red dot skirt is clean. Red, gold, silver, blue, and green is a skirt you’ll never see.
11. Pie Wedges, Burlap Ties, and a Reindeer Print
Making a wedged skirt with burlap ties:
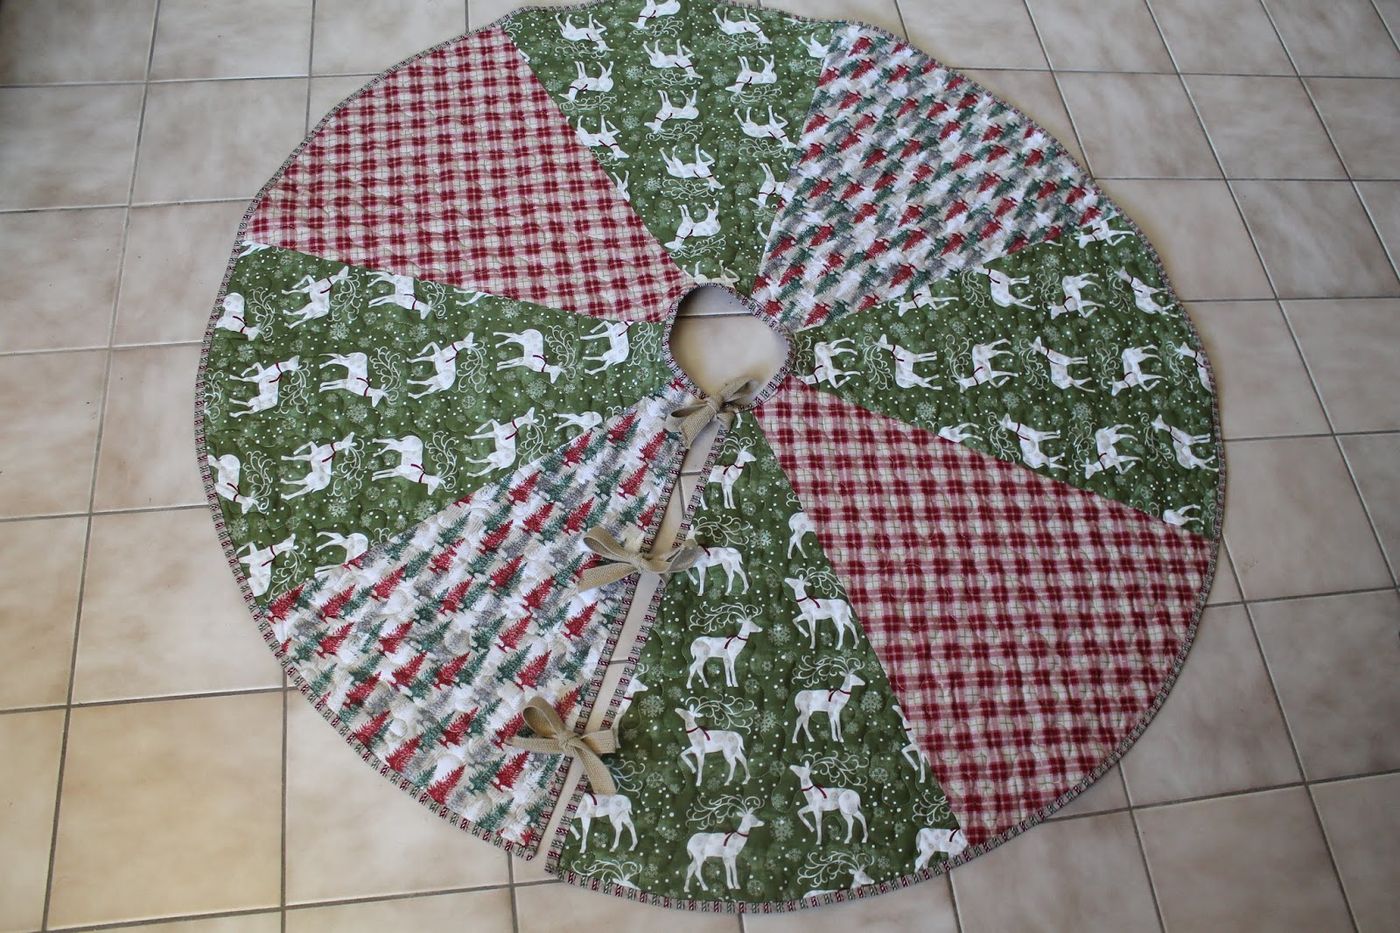
- Cut a paper wedge template — 12 wedges for a 42-inch skirt, 16 for something wider
- Cut each wedge in a different print, keeping the grain line parallel to the outer edge
- Sew wedges in pairs, then in fours, then join into a full circle and press seams open
- Cut the center opening and the slit, then bind both raw edges with bias tape
- Add 1-inch burlap ribbon ties at the slit, long enough to knot with extra to spare
Roughly 4 to 5 hours once your fabric is cut. Burlap ribbon runs $6 to $10 for 10 yards. Compare the print mix with Idea #6 — same pieced construction, much brighter fabric choices.
The burlap ties are the difference between a skirt that looks handmade and one that looks homemade. Burlap is coarser than the quilting cotton it’s tied against, so the closure gets a small, satisfying bit of texture contrast — and functionally, coarse ribbon grips itself and stays knotted. Pull the ties into a simple bow with tails hanging about 6 inches, and don’t trim them perfectly even. Slightly uneven tails look intentional; straight-cut ones look unfinished.
12. Red Plaid Against Grey Herringbone, Stitched in Red
Contrast topstitching is the most unforgiving detail in this entire roundup. Every wobble is visible, and unpicking it leaves needle holes in quilting cotton. Stitch a test strip with your exact thread, needle, and tension before you go anywhere near the real panels. Use a walking foot or a dual-feed machine, and mark your stitch path with painter’s tape. If you’d rather not gamble 20 hours, a blanket-stitched edge in matching thread instead of contrast thread gets you 80% of the look.
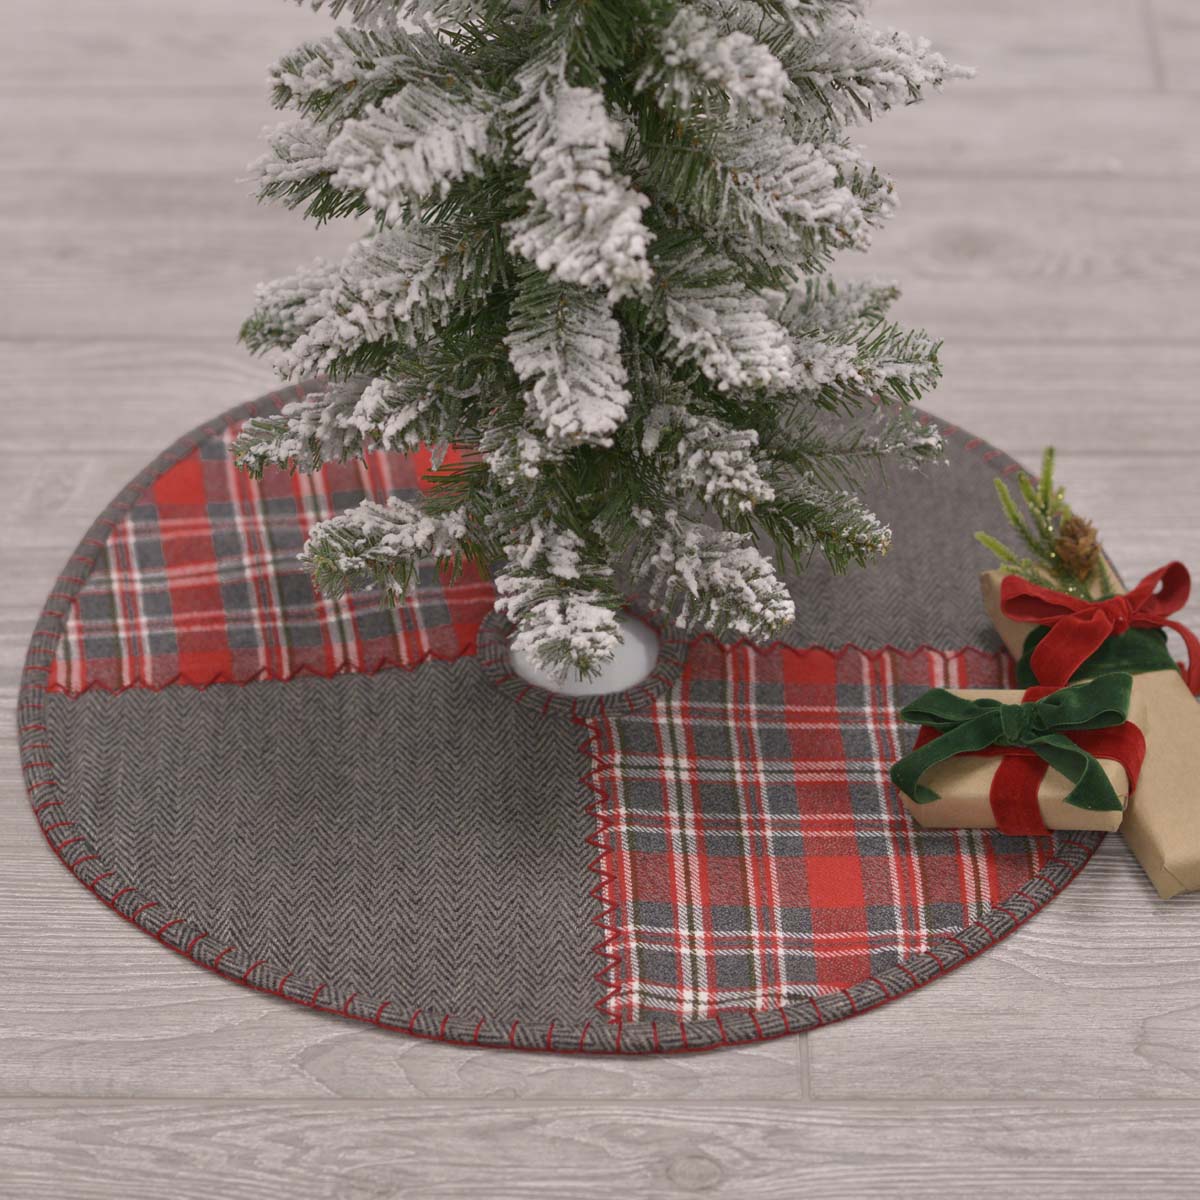
A 48-inch skirt fills the base of a 7 to 7.5 foot tree nicely; below that, the skirt starts swallowing the tree. A quick rule: skirt diameter should be roughly two-thirds of your tree’s height in inches, so a 6-foot tree wants something in the 44 to 48 inch range. Tabletop trees in the 4 to 5 foot range look best with a 30 to 36 inch skirt — see Idea #31 for a smaller-scale handmade option.
13. Half-Square Triangles in Alternating Red and Green
Half-square triangles are the friendliest beginner block there is, and you can shortcut the cutting entirely with layer cakes — 10-inch stacks of coordinating prints, usually $10 to $13 each. Two layer cakes plus a $9 package of batting gets you a full pieced skirt for around $45. Target and Walmart both carry basic batting and solid backing cotton in store, so you can skip shipping. The triangle grid, not the fabric pedigree, is what makes this read as a real quilt. For a flat-laid version of the same piecing idea, see Idea #9.
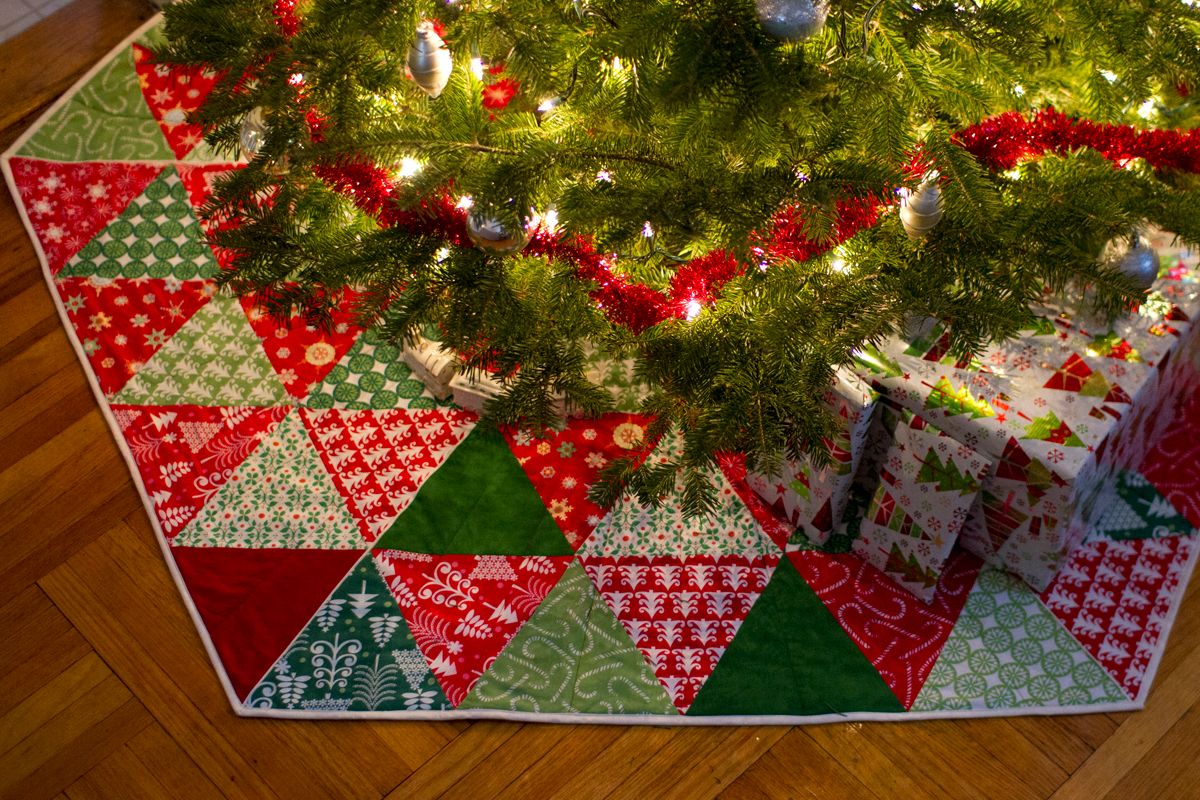
Roughly 50% red prints, 40% green prints, and 10% white or neutral to let the eye breathe. That last 10% is the one people skip, and it’s why some patchwork skirts look cluttered — without a cream patch here and there, red and green grind against each other. To change the mood without changing the formula, flip it to 50% green and 40% red, or trade red for burgundy for a warmer, more antique version.
14. The Cutting Table Flatlay: Red and Cream Floral Strips
Quilting is having the kind of revival that shows up in class enrollment, not just hashtags. Beginner workshops at independent fabric shops have been filling up, and a lot of that wave is people who started with something small — a tree skirt, a pillow, a wall hanging — because the commitment is one season deep instead of one year deep. A skirt is a forgiving first pieced project: it sits in low light, nobody inspects your seam allowances, and in January it goes in a pillowcase.
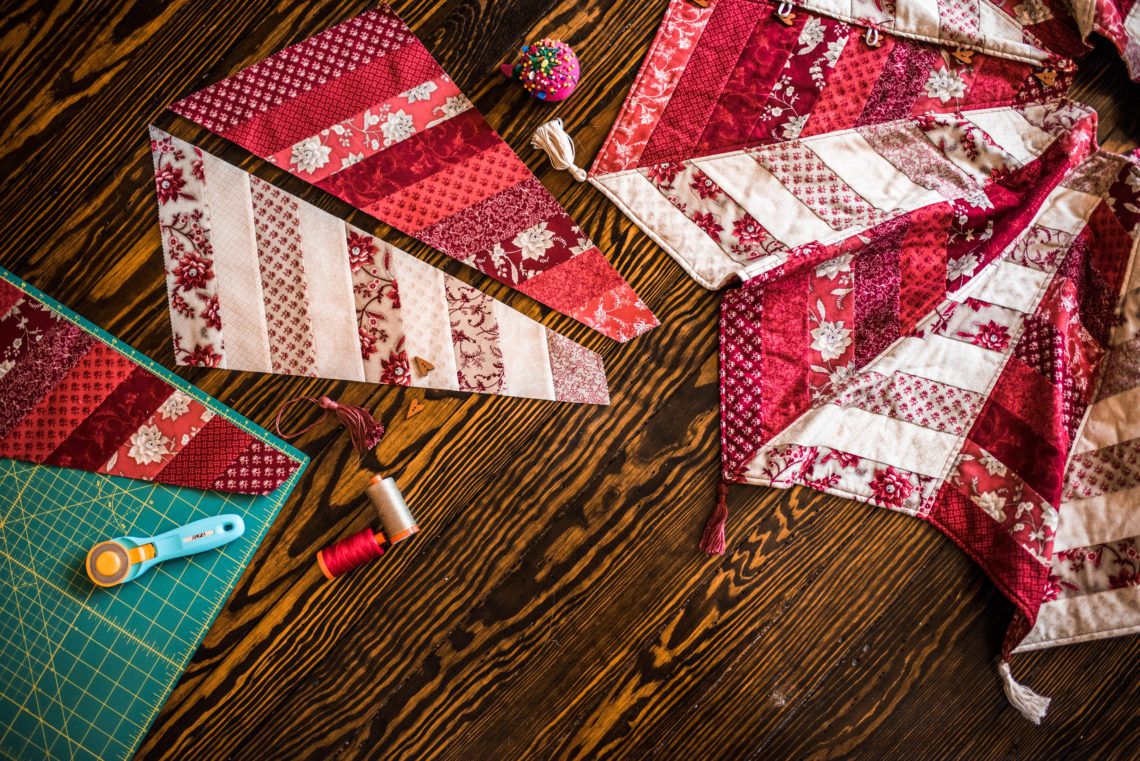
Strip-piecing this on the cutting table:
- Cut 2.5-inch strips across the full width of fabric — about 12 strips for a 42-inch skirt
- Sew strips into pairs, right sides together, then press the seams open
- Sub-cut those pairs into 2.5-inch segments with a rotary cutter and a fresh blade
- Arrange them on the mat in an alternating grid and photograph it with your phone first
- Press the whole top before basting — never quilt a wrinkled top
About 2 hours for the top. That phone photo is the trick that saves an hour of rearranging.
15. A Starburst of Turquoise, Mustard, and Magenta
When a quilt is this loud, the binding should be the quietest thing in the room. That green edge isn’t really a color choice, it’s a perimeter — it gives your eye a place to stop so turquoise, mustard, and magenta can be as chaotic as they want inside the boundary. If you’re making one, pick the binding last, after the patches are laid out, and hold three options against the finished top in daylight. Ninety percent of the time the binding you thought you wanted isn’t the one.
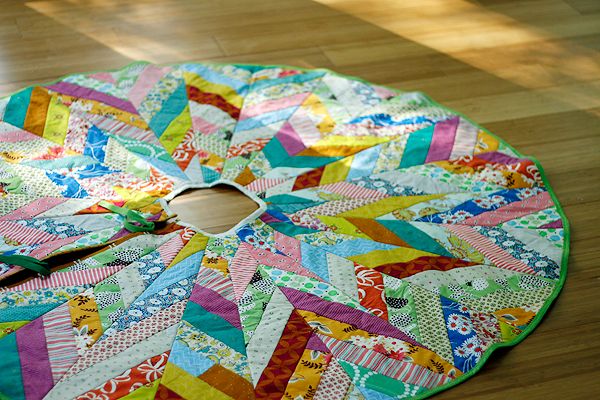
This is repetition with variation, the oldest trick in quilting. The same wedge repeats 14 or 16 times around the circle, but almost no two wedges use the same print — so your brain registers order and novelty at once, which is the feeling people describe as handmade. The center opening anchors everything; without a clear bullseye, a starburst this busy reads as chaos. The scalloped edge softens the geometry without competing with it.
16. Diagonal Striped Bands Under Warm Fairy Lights
The diagonal bands. Rather than slicing the skirt into pie wedges, this one is built from striped bands running at an angle, so the pattern travels outward in rays instead of spokes. The effect is slightly off-kilter and far more energetic. Without those diagonals you’d have a perfectly nice geometric skirt with none of the movement. Cut bands 3 inches wide, join them into long strips first, then trim the assembled panel into a circle — piecing diagonals directly into a curve is how you get puckers.
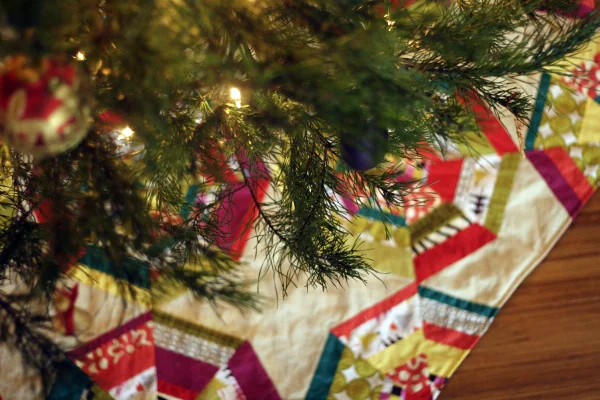
Strip-pieced skirts scale well from 36 up to 54 inches, because the diagonal bands just get longer and the pattern never breaks. Under a 7-foot tree, 48 inches is the sweet spot. For the glow on those branches, aim for warm white bulbs around 2700 to 3000K; anything cooler than 3500K will make the cream and yellow patches look grey. Compare with Idea #15 — same radiating geometry, much louder palette.
17. Pinwheel Border, Striped Top, and a Stocking Named Ruby
- Pinwheel border: 8 to 12 fat quarters at $3 to $4 each: $30 to $48
- Striped fabric for the upper section, 1 yard: $12 to $18
- Batting and backing: $25 to $40
- Matching quilted stocking, DIY or pre-made: $15 to $30
- Total for the skirt and stocking set: $82 to $136
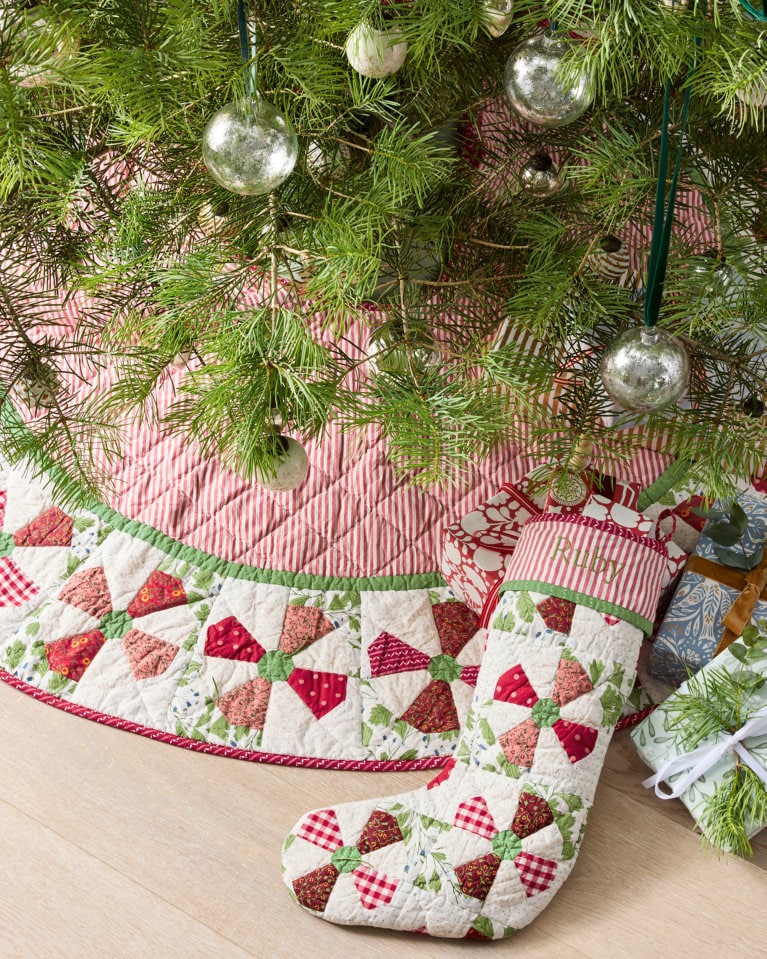
Cheaper route: buy pre-quilted fabric by the yard, about $13 a yard, and skip batting and backing entirely. You get a quilted look for $35 to $50 and about six hours back.
If you’re making the stocking too, match its cuff stripe to the skirt’s upper stripe — same fabric, same direction. That’s one extra fat quarter and it’s the difference between a set and two objects that happen to be nearby. Also, quilt the stocking before you sew it into a shape, not after. Quilting a finished tube on a home machine is genuinely miserable and the seam allowances fight you the whole way.
18. Primitive Star Blocks in Burgundy, Navy, and Mustard
Primitive palettes are a commitment, not just a skirt. Burgundy, navy, and mustard on cream is a very specific look, and it will not get along with a tree loaded with bright red and gold — you’ll end up with two different holidays in one corner. If you go this route, pull your ornaments toward the same muted end: wooden beads, matte reds, tin. The skirt isn’t the problem. The floor-up color story just has to agree with the branches-up one.
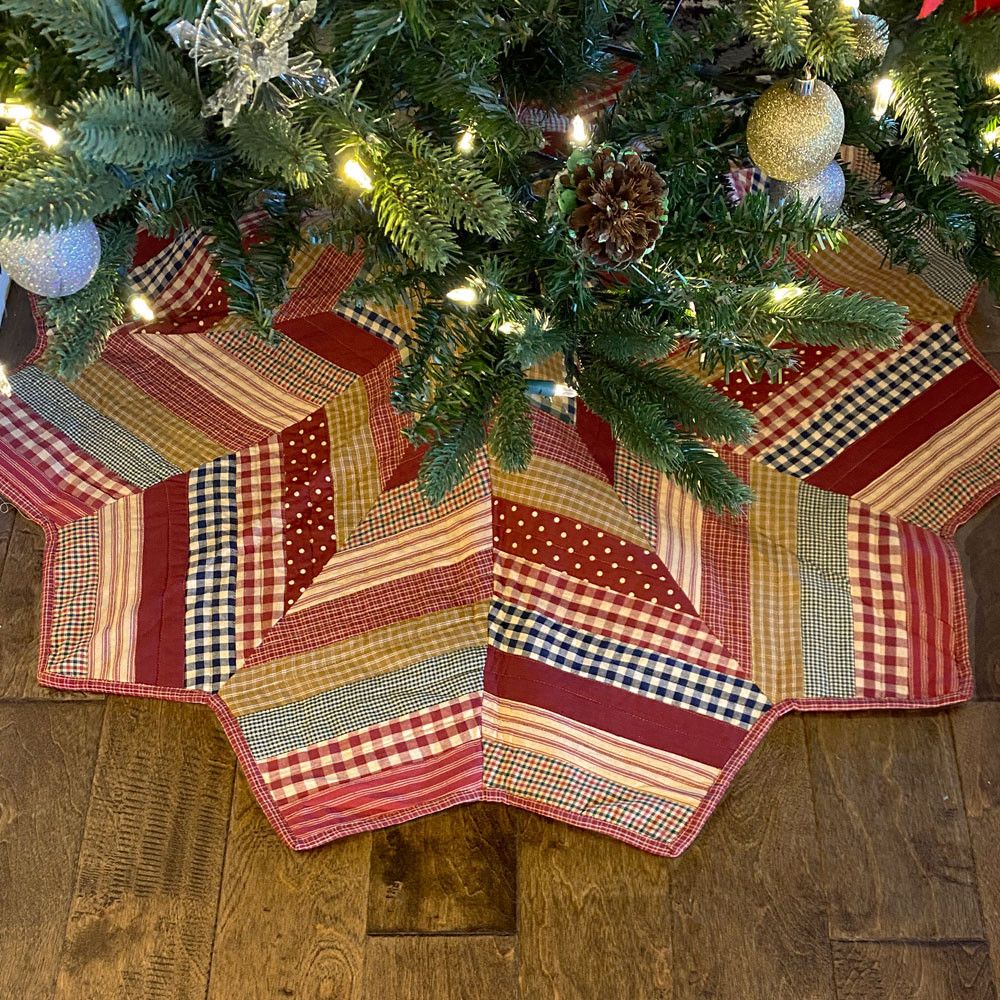
About 45% cream and off-white background patches, 30% burgundy red, 15% navy, and 10% mustard gold. The creams are what make this read as country rather than dark — skip them and the skirt turns heavy fast. To keep the formula but change the mood, swap navy for olive and mustard for rust, and you have a completely different skirt with identical proportions. Compare with Idea #27, which softens this same idea into olive and dusty red.
19. Beige Needlepoint With Santa, Reindeer, and a Red Edge
Wool needlepoint is the one skirt here you cannot toss in a machine. Dry clean only, and even then sparingly — agitation lifts the canvas and dulls the wool. Store it flat rather than folded, because creases set into wool canvas and a folded skirt will show a horizontal line across Santa’s face by year three. Cedar blocks or lavender sachets in the storage box keep moths out, and a full re-blocking at a needlework shop runs $50 to $90 if it ever needs one.
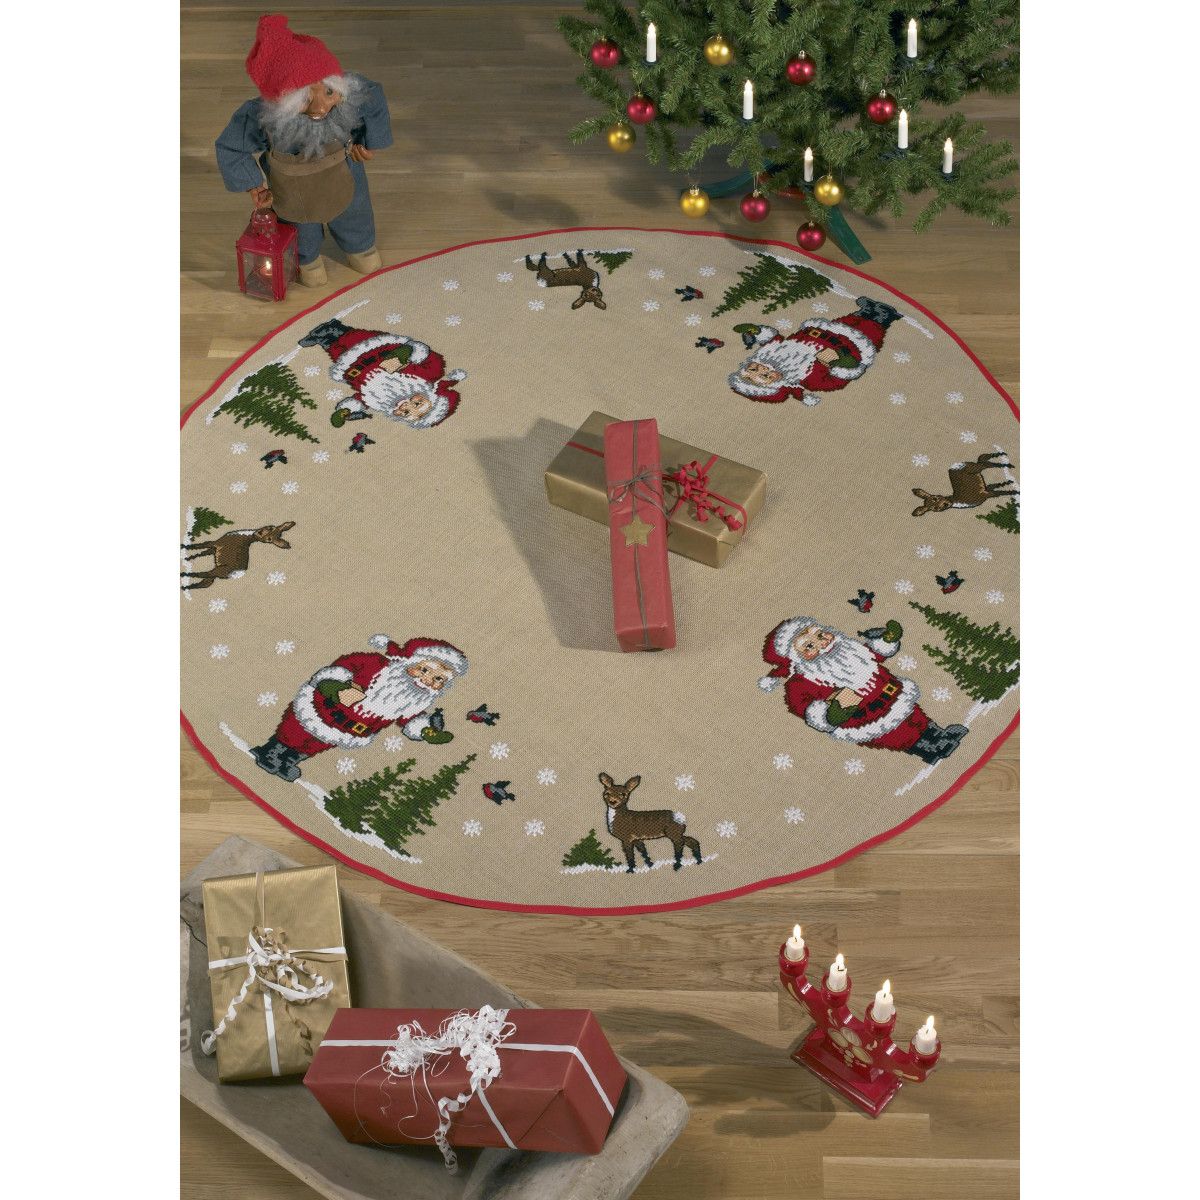
You can get this beige-with-figures look without the needlepoint price. Printed needlepoint-look canvas runs $12 to $20 a yard, and a vintage embroidered tablecloth from an estate sale — usually $10 to $35 — can be cut into a circle with a center opening and bound in a thin red strip. Enlarge a simple Santa or reindeer silhouette from a coloring book page, trace it onto fusible web, and appliqué a handful of figures onto a plain beige quilted base.
20. Gingham, Plaid, and Micro-Check Wedges With a Pleated Hem
Making a pleated hem that actually lies flat:
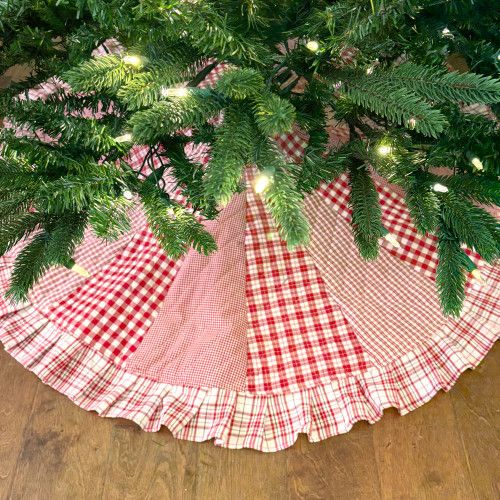
- Cut your ruffle strip 1.5 to 2 times the finished outer circumference — no less
- Sew two rows of long gathering stitches, one at 3/8 inch and one at 5/8 inch
- Pull both threads at once; two rows keep the ruffle from twisting as it gathers
- Pin the ruffle to the skirt edge every 2 inches, distributing fullness evenly
- Stitch between your two gathering rows, then finish the seam with a zig-zag
About 90 minutes. One extra yard of fabric covers a 42-inch skirt. It’s the same ruffle logic as Idea #1, just with a pleated rather than a floppy gather.
Fullness ratio matters more than pleat style. Aim for 1.5:1 for a flat, tailored ruffle and 2:1 for the gathered cottage look. Below 1.5:1 the ruffle stands up stiffly like a collar instead of falling; above 2.5:1 it gets so dense that it doubles the skirt’s visual weight and stops lying flat on the floor. Measure your outer circumference, multiply, and write the number down before you cut a single strip.
21. Paisley, Polka Dot, and Olive in Traditional Patchwork
Three pattern scales, three jobs. The large paisley is the focal print — your eye lands there first. The small polka dots act as visual white noise, filling gaps without demanding attention. The cream and olive solids are rest stops, and if you pull them out, the identical skirt becomes exhausting to look at. Nothing here is expensive. It’s arranged by size, and that’s the whole trick to mixing prints anywhere in the house, tree skirts included.
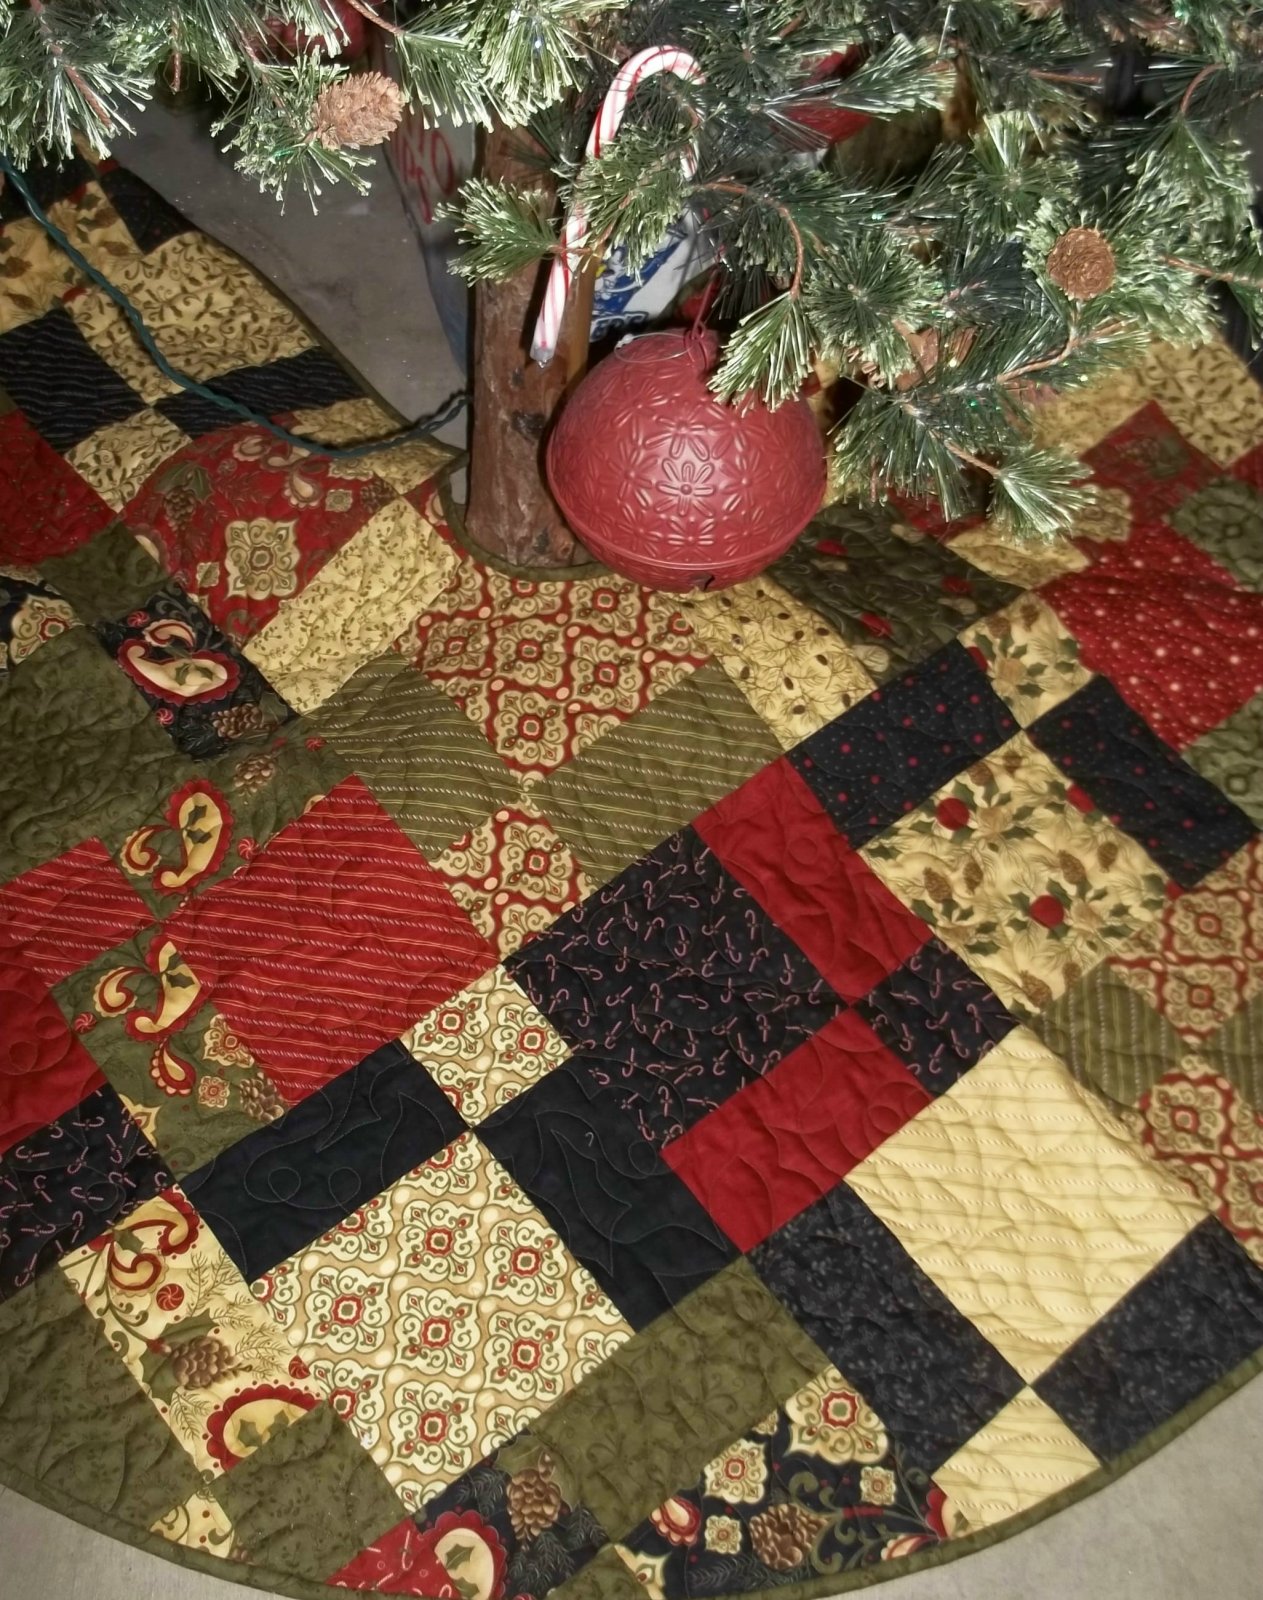
The olive green. Everything in this skirt is red, navy, or cream except a few olive patches — and those patches are what stop it from reading as everything-red. Olive is a warm neutral in disguise; it sits between candy-cane red and navy without fighting either one. If you’re building your own, swap it for sage or even a soft brown and you keep the same balance. Lose it entirely and the skirt goes flat.
22. Sheet-Music Print With a Row of Fabric Tree Appliqués
Novelty prints are charming and they date fast. A sheet-music-and-carol background is delightful in 2026 and will feel firmly retro by 2036. If you’re spending 20 hours and real money, use the novelty print as an accent band or a row of appliqué trees rather than the whole skirt, and keep everything else in quiet coordinates you’d still like in ten years. Or accept it as a five-year skirt and enjoy it fully — just don’t build family heirloom expectations around a printed trend.
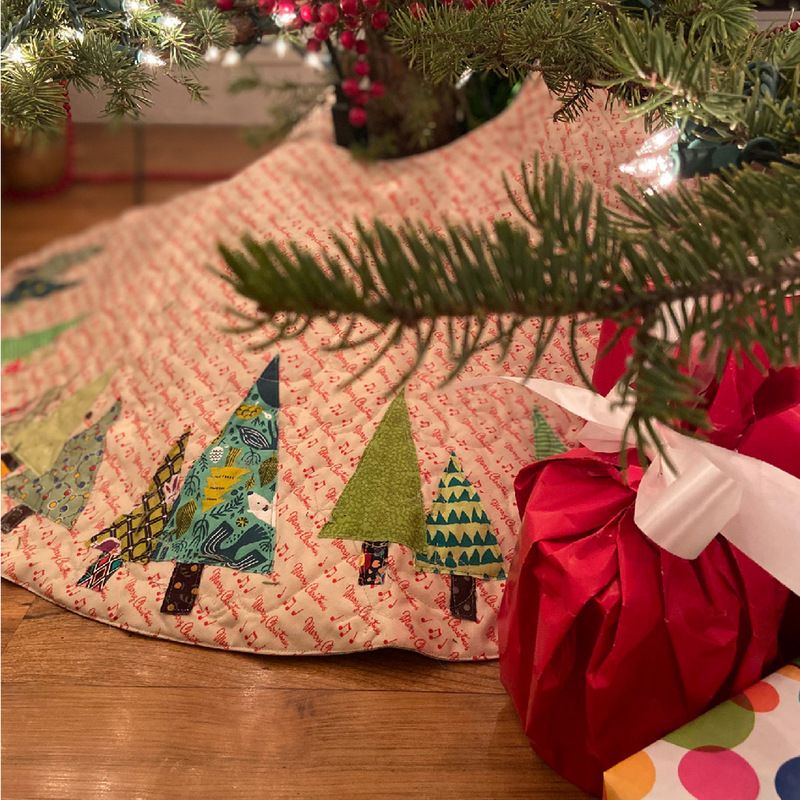
- Measure twice and add 4 inches to your outside diameter for seam and quilting take-up
- Pre-wash and shrink every fabric; cotton can lose 3 to 5% and mismatched shrinkage warps a pieced circle
- Test fusible web on a scrap of your novelty print — some inks scorch under an iron
- Buy a fresh 80/12 sharp or microtex needle; appliqué punishes a dull point
- Decide your batting loft now: low-loft for a skirt that drapes, high-loft for a wall hanging
23. Four Big Quadrants: Green Festive Print and White Calico
Two contrast fabrics is the cheapest real version of a quilted skirt there is. You need about 2.5 yards of each at $9 to $12 a yard, a $15 to $20 package of batting, and backing cut from a thrifted sheet for $3. That lands you near $60 total with zero fancy cutting and about two hours of sewing. Four panels means four seams — no wedge templates, no matching a dozen prints, no rotary cutter gymnastics on a Tuesday night.
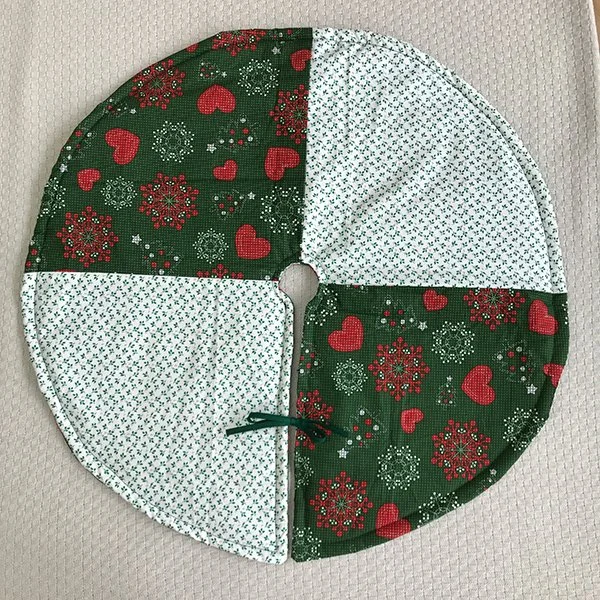
Four panels also means each fabric gets to be seen at full size. Where a 16-wedge skirt chops a print into slivers, a quadrant layout lets the green festive print and the white calico read as big shapes from six feet away, which is how anyone actually sees a tree skirt. And the green ribbon tie at the bottom is the one detail that makes a two-fabric project look considered rather than unfinished.
24. Contrasting Borders and a Zig-Zag Edge Stitch
Borders are the cheapest way to make busy prints behave. Cut your sashing strips 1.5 inches wide finished — roughly 2 inches cut — so every patterned square gets a thin quiet frame around it. Any narrower and the border disappears into the print; any wider and the patches start looking like a grid of little framed pictures. And please use a contrasting solid rather than another print. You’ve already got four patterns talking; the border’s job is to make them stop arguing.
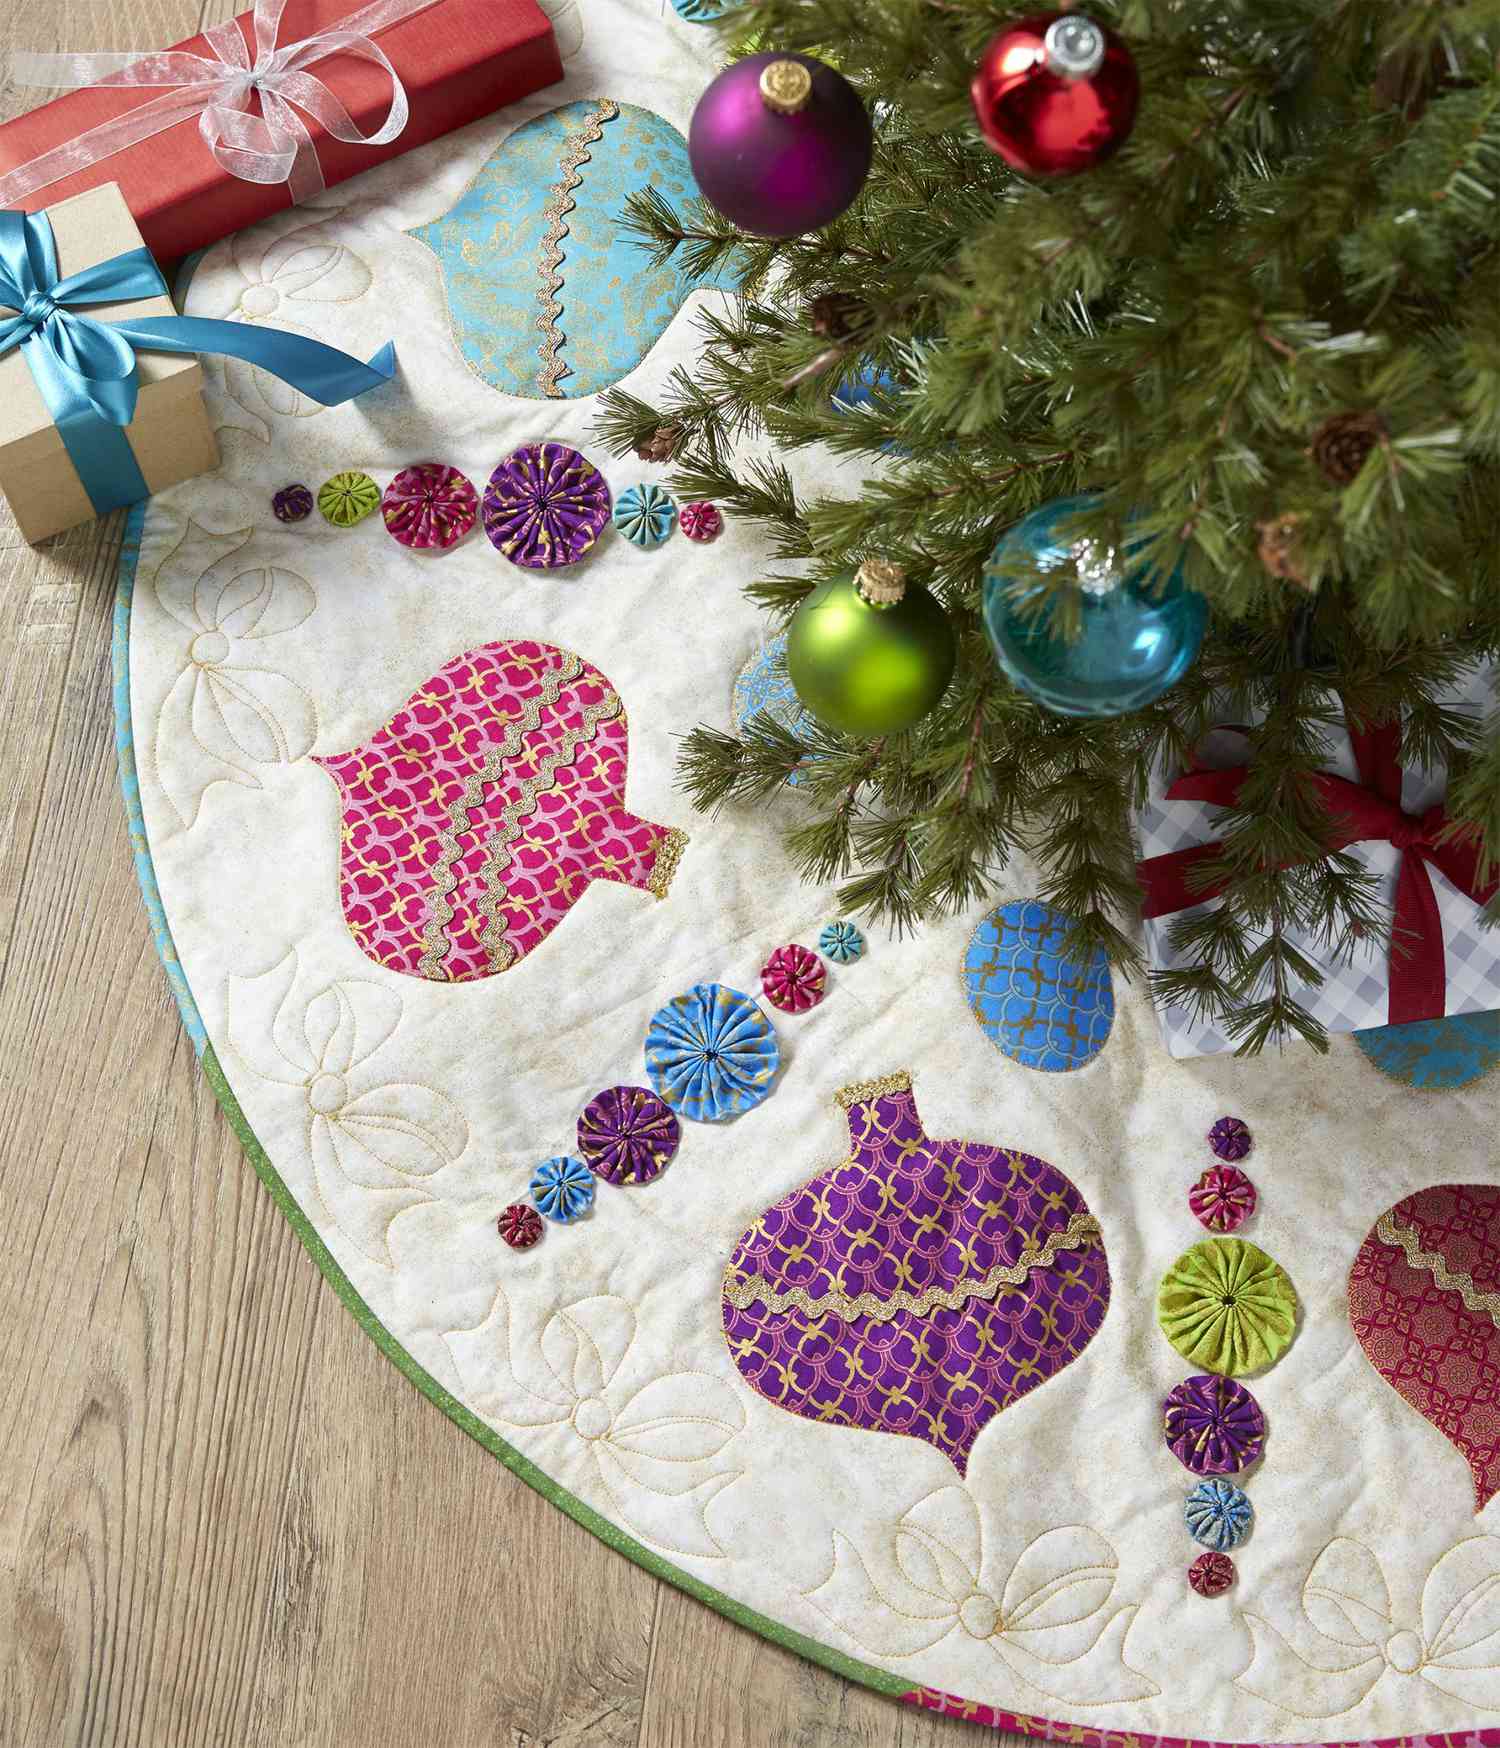
About 70% busy printed patches, 20% solid contrasting borders, and 10% cream or white breathing space. That middle 20% is where the money goes if you’re buying fabric by the yard, but it’s also what separates a skirt that looks designed from one that looks like a scrap bin. Run the zig-zag edge stitching in a slightly heavier thread than your piecing thread so the finish reads as deliberate rather than accidental.
25. Diagonal Stripe Patchwork in Red, White, and Floral
The strongest driver behind the quilted-skirt boom isn’t decor at all — it’s the made-it-myself feeling. People who spent the last few years buying everything are now spending December evenings at a sewing machine, and a skirt is the perfect size of project: big enough to be worth the setup, small enough to finish before the tree goes up. Clean, low-fuss florals paired with solid stripes are what this crowd reaches for, because a finished skirt needs to look good in a photograph.
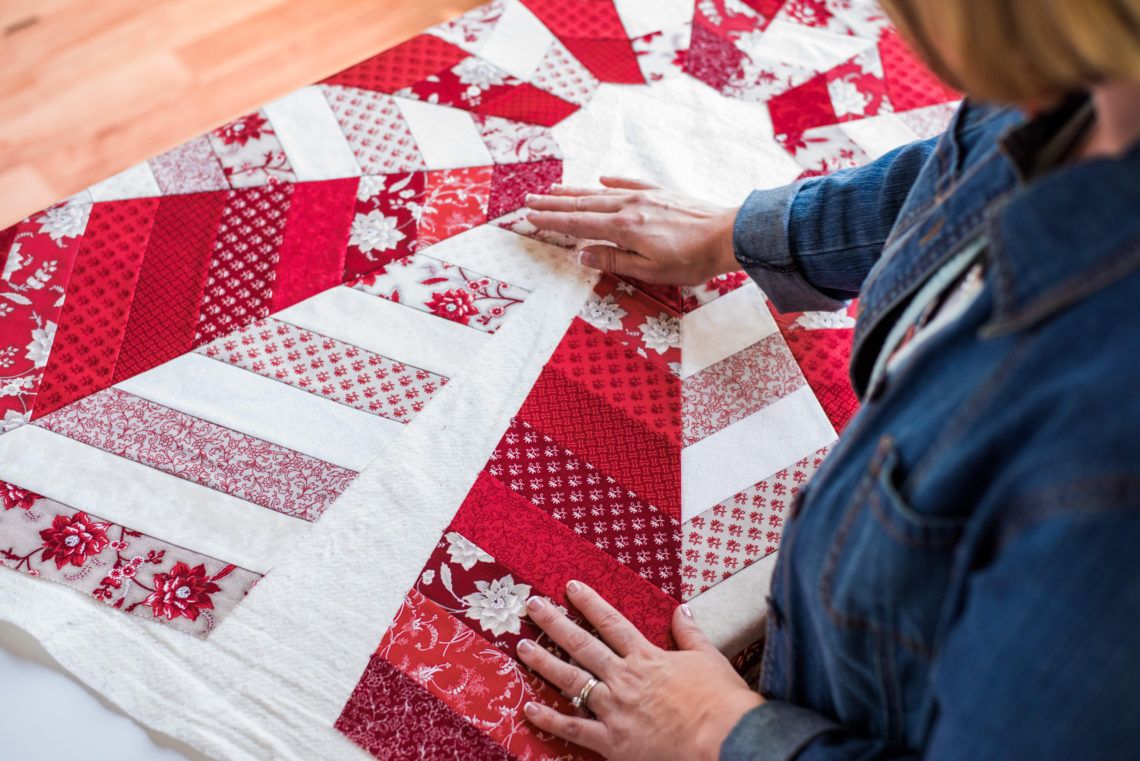
Sewing the diagonal stripe sets:
- Cut strips 2.5 inches wide, alternating a solid and a floral in each pair
- Sew pairs right sides together and press the seams open, not to one side
- Sub-cut the stitched pairs into 2.5-inch segments at the angle shown on your ruler
- Join segments into long diagonal bands, pressing after every seam
- Trim the cream border strips to length last, after the bands are assembled
Two hours of pressing included. The pressing is not optional.
26. A Quilted Skirt Grounding a Full Traditional Living Room
The one element that matters most in a fully decorated room isn’t the pattern at all — it’s the visual anchor. When a tree is lit, tinseled, and loaded with inherited ornaments, the skirt is the single object connecting all that vertical sparkle down to the floor and the rest of the furniture. Take it away and the tree looks like it’s floating on the carpet. That’s why an oversized, slightly plain skirt often beats a dainty detailed one in a formal living room.
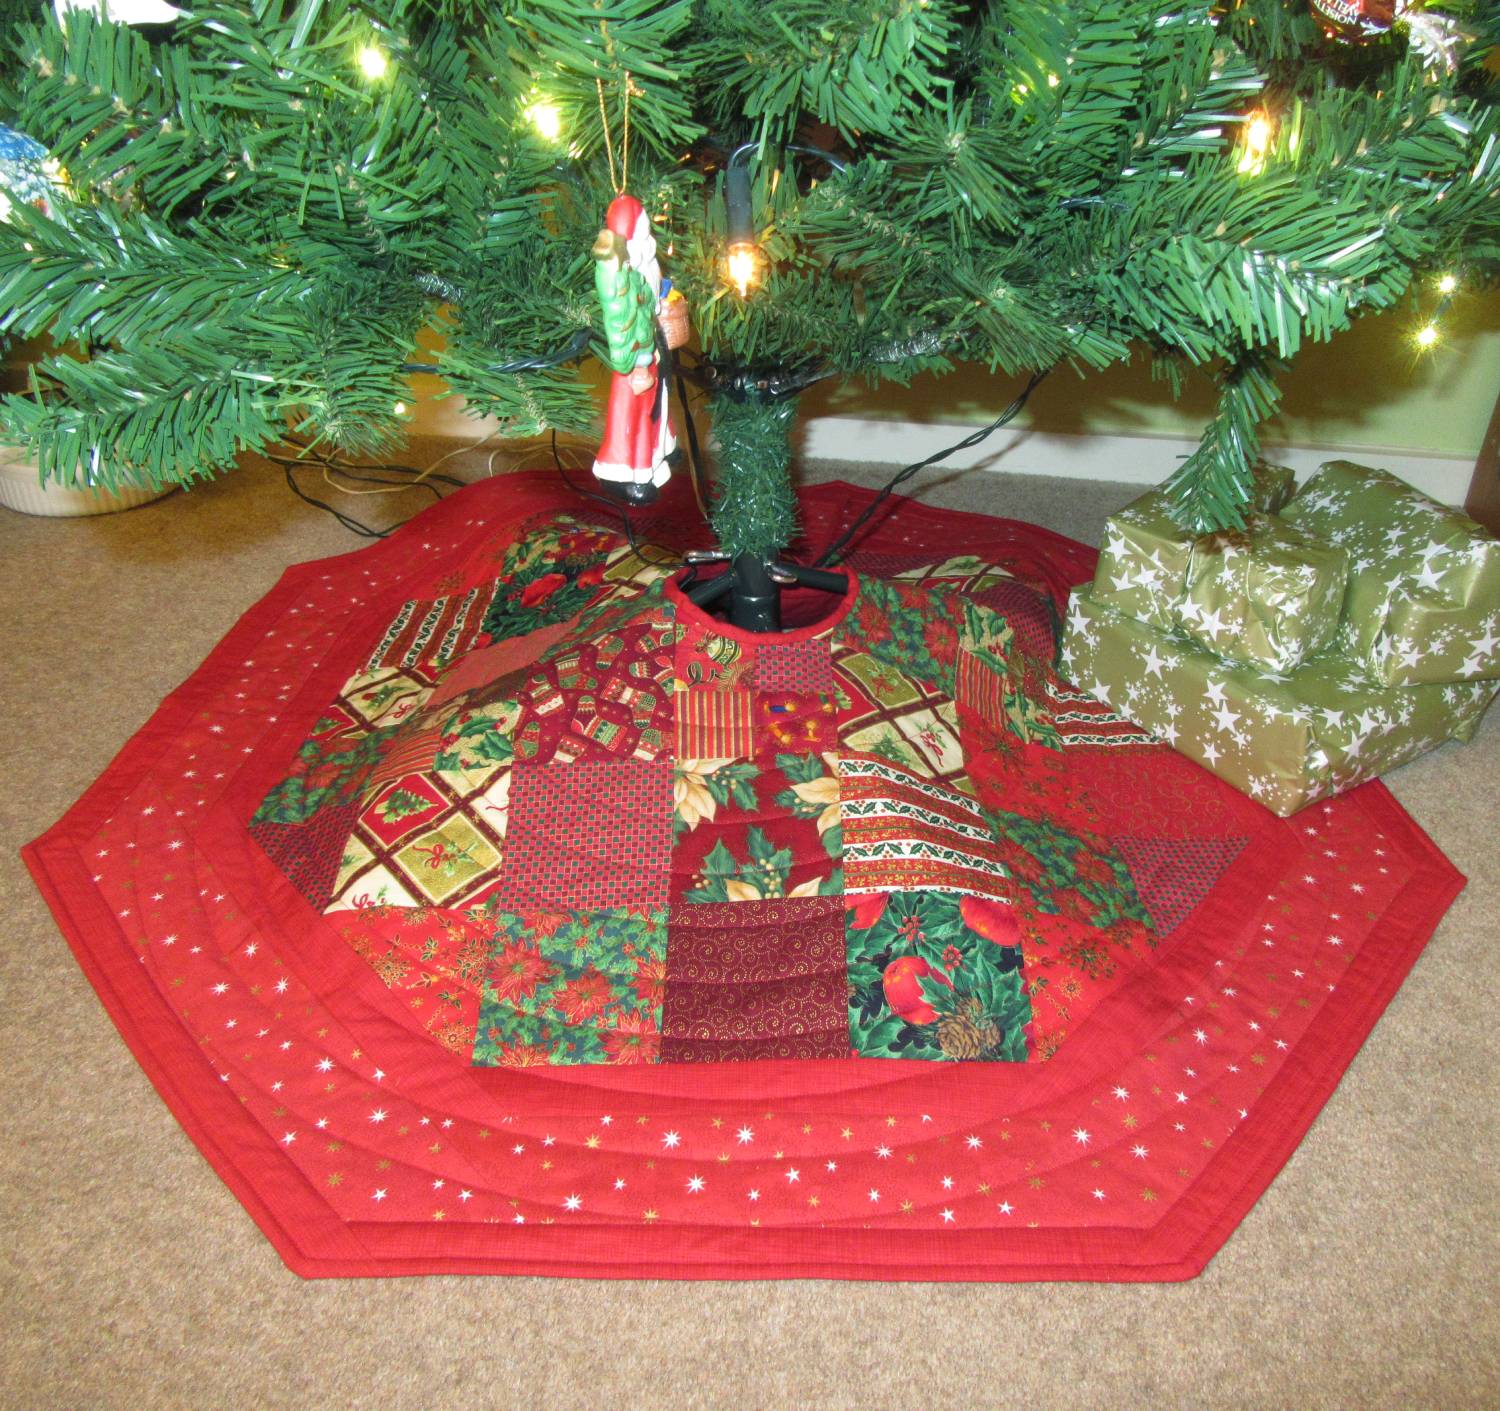
For full living rooms with 9-foot ceilings and a 7.5-foot tree, go big: 48 to 60 inches in diameter. Room width matters more than square footage here — anything narrower than about 11 feet will push the skirt’s outer edge too close to a sofa or walkway, and people will step on it. Narrow room? See Idea #12 for sizing guidance that keeps the footprint cleaner.
27. Checkerboard Pinwheel Stars in Olive and Dusty Red
Two upkeep realities with a quilted cotton skirt on dark stained floorboards. First, dark floors make every bit of lint, batting fuzz, and pet hair visible, so keep a lint roller near wherever you store the skirt. Second, if the wood was refinished recently, wait about 30 days before setting a quilt down on it — fresh finish off-gasses and has been known to tint fabric touching it. Otherwise it’s a cold gentle wash and a flat dry, once a season at most.
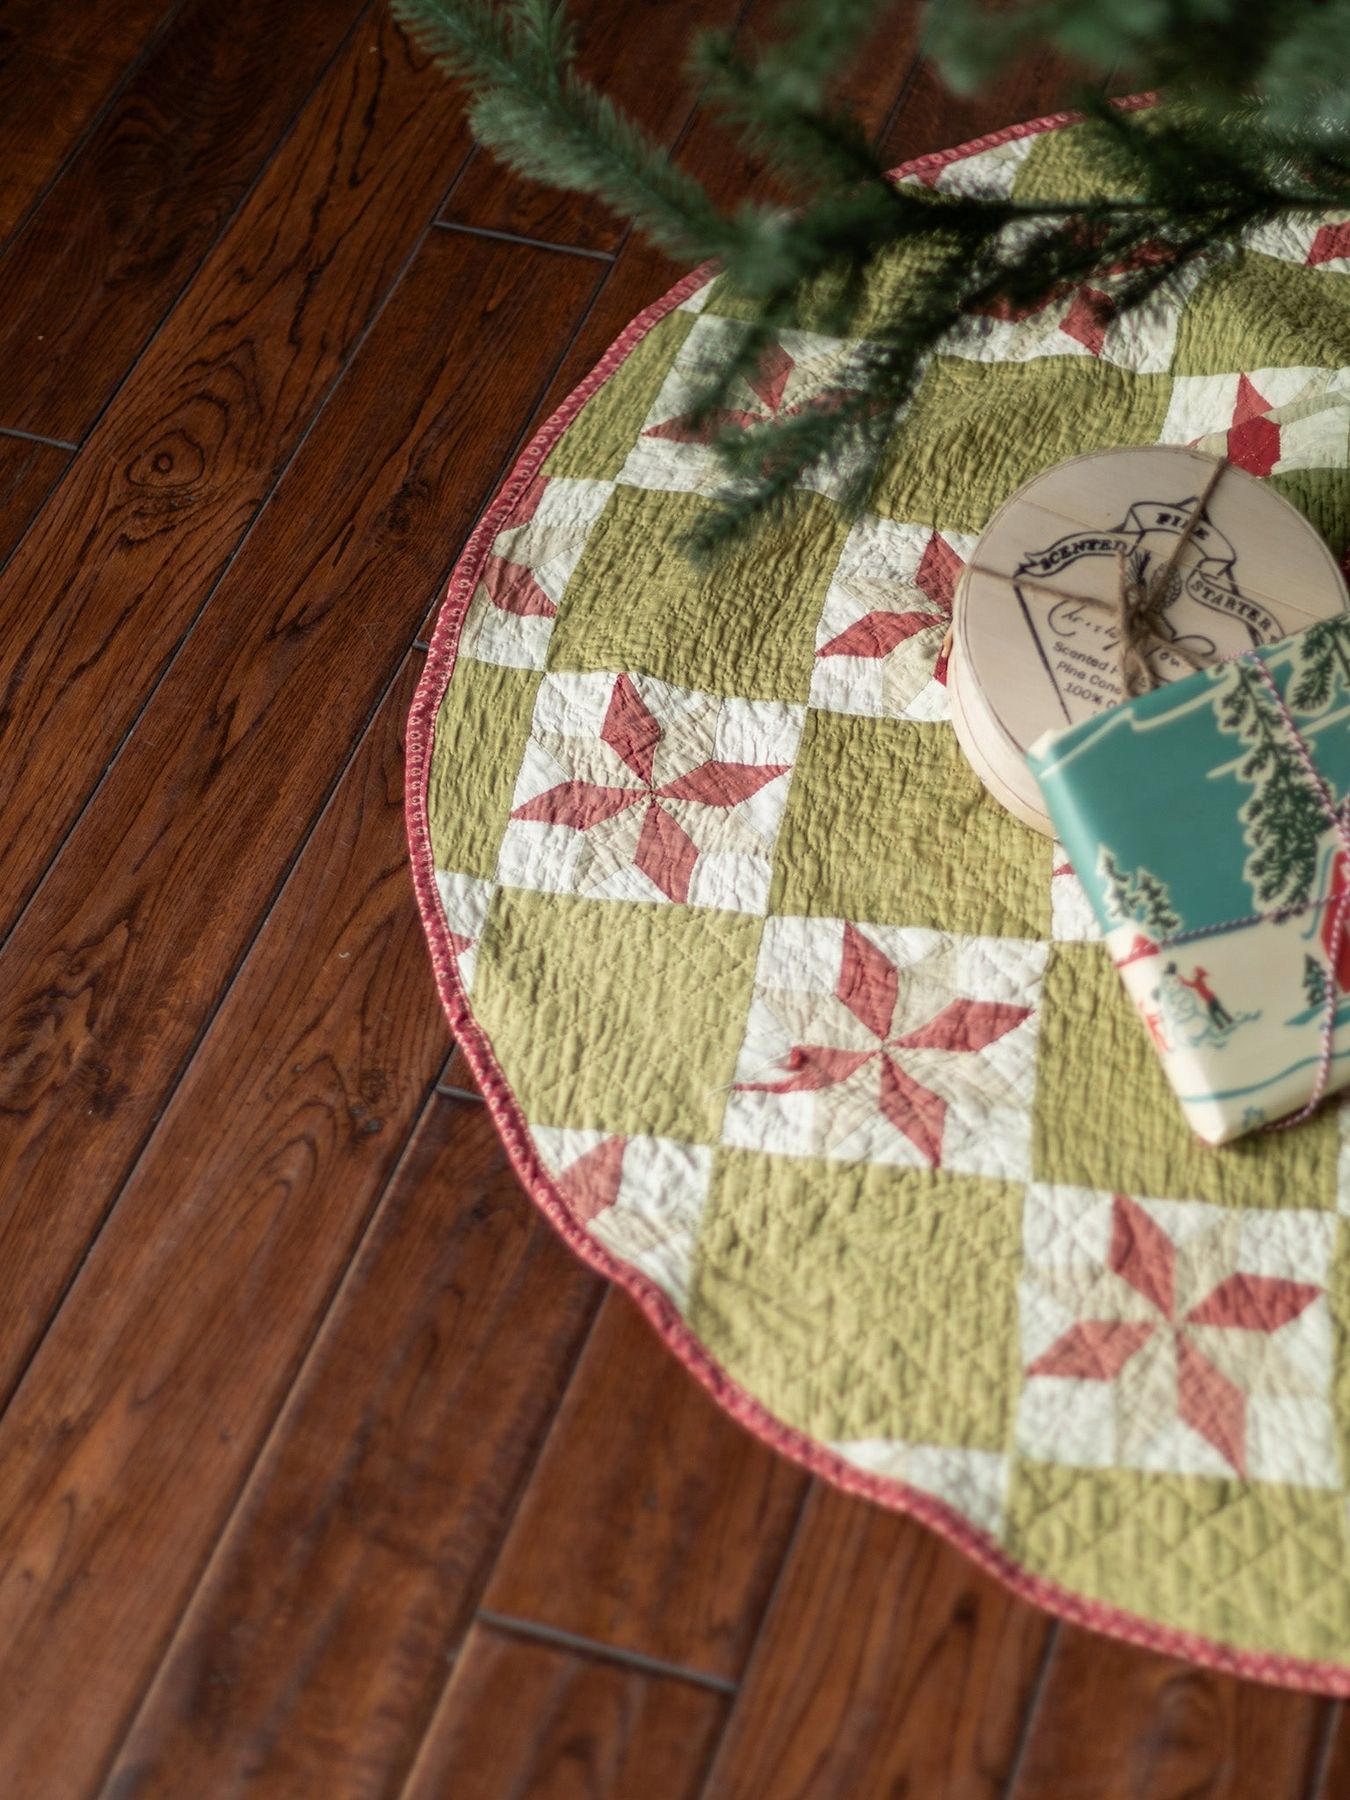
Roughly 50% olive green blocks, 30% cream star motifs, 15% dusty red accents, and 5% dark neutral for the small squares. Olive carries the whole thing — it’s the reason a red-and-green skirt can feel calm instead of loud. Shift the ratio to 60% olive and 20% dusty red and you get an even quieter version that still reads unmistakably Christmas.
28. Snowmen, Snowflakes, and Candy Canes in Triangle Segments
The reason this reads as festive rather than noisy is restraint in the print mix. Four novelty prints where every single fabric has a snowman or a candy cane creates visible static from six feet away — the motifs stop being recognizable and start being texture. The fix is a hierarchy: two star novelty prints as the main event, plus three supporting prints or solids that carry no motif at all. Same cheer, half the visual noise. Ribbon ties at the slit finish it with a soft, non-quilty edge.
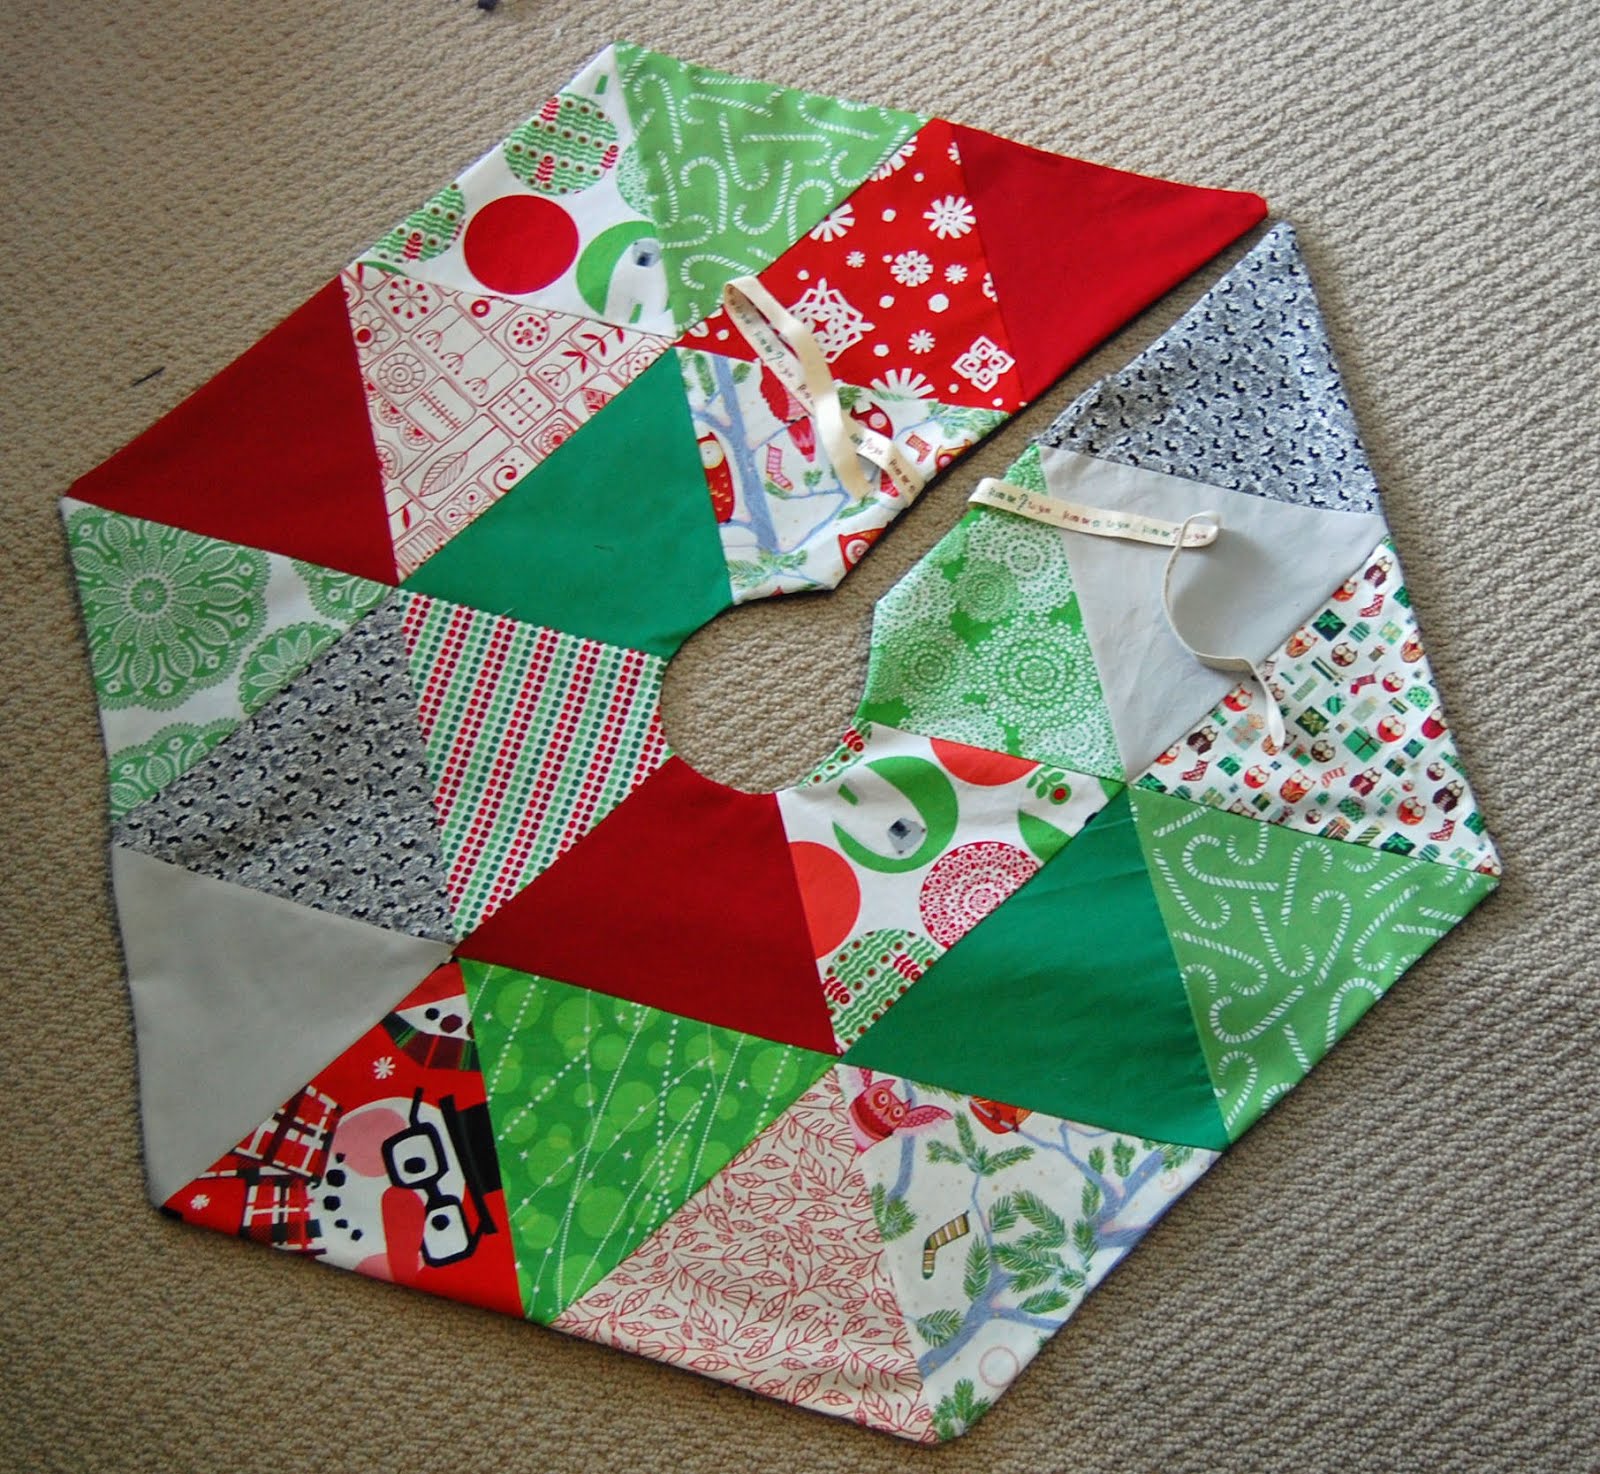
If you’re shopping for this at a lower price point, pick three novelty fat quarters at $3 to $4 each, one solid red and one solid green by the half yard, and repeat them around the circle. That’s about $25 in fabric plus $18 in batting and backing. Rotate the same six fabrics in alternating order and nobody will ever count the prints — the repetition is what makes a small fabric budget look deliberate.
29. Concentric Knitted Bands With Intarsia Reindeer
Knitting one of these from the center out:
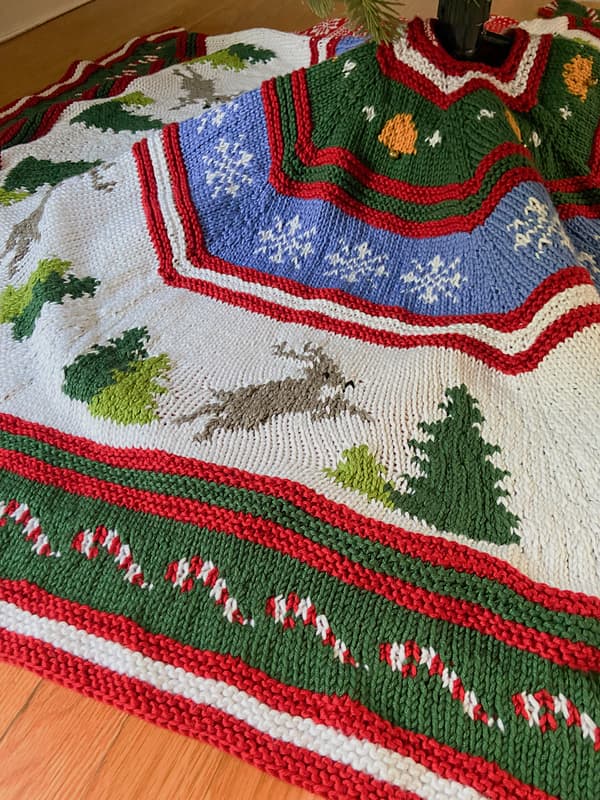
- Cast on 8 stitches and join in the round, working increases every other round
- Increase steadily until the circle reaches your tree’s base diameter, then work straight
- Chart the intarsia bands — reindeer, trees, snowflakes — and work them flat across each section
- Add the red and green border trim, then bind off loosely so the edge stays flat
- Block aggressively over a damp towel so the concentric circles actually sit round
Time: 25 to 40 hours. Yarn: $60 to $120 depending on fiber. The color bands do the designing for you.
What you’d lose without the concentric bands is the structure. Each ring is a different motif — reindeer, evergreens, snowflakes, bells — but the rings themselves give your eye an order to follow, so four separate patterns never feel like four separate decisions. It’s the same principle as striped quilting lines, just knitted and much slower. Hand wash cold with a wool wash, dry flat, and re-block every couple of seasons.
30. Poinsettias, Polka Dots, and a Striped Binding
About 40% red poinsettia print, 30% black and white, 20% light green, and 10% red-and-white stripe on the binding. Here’s the part worth stealing: the black and white is functioning as a neutral. It’s what allows a strong red and a soft green to sit next to each other without clashing, and it gives the whole patchwork a graphic, modern edge inside an otherwise traditional skirt. Swap the stripe binding for solid red and you lose the little bit of wit at the perimeter.
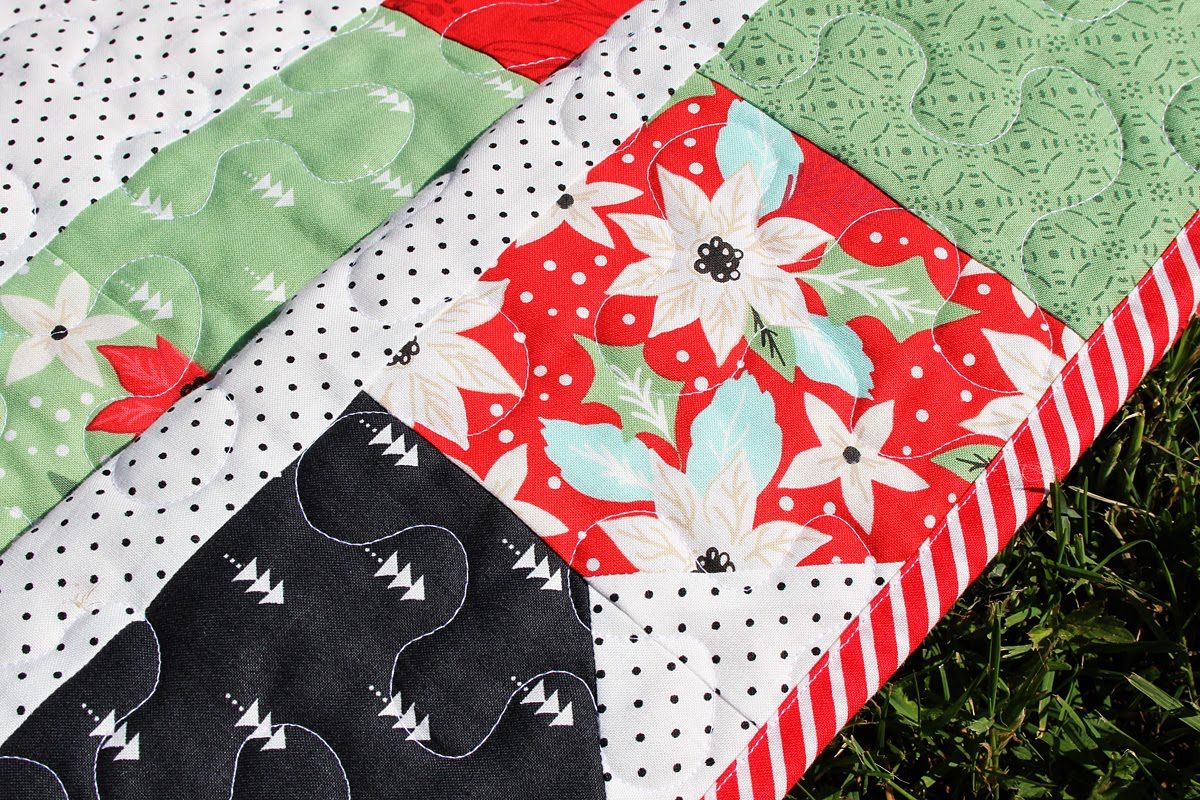
Meandering machine quilting is doing quiet corrective work across the surface. Without it, four busy prints read as flat wallpaper; with it, the fabric gains a dimensional texture that catches lamp light and makes each patch separate slightly from its neighbors. If you’re quilting at home, a medium stipple at about 3/8 inch spacing is plenty — tighter than that and you’ll stiffen the skirt so much it stops draping.
31. Red Crochet, Concentric Rows, and Wooden Buttons
Crochet stretches, and a heavy red skirt hanging off a tree trunk will droop into a puddle by New Year’s if you don’t plan for it. Two options: back it with a lightweight cotton circle once it’s finished, or starch the living daylights out of it and re-starch each season. For a skirt that holds its shape without backing, work worsted weight yarn with a size H hook — anything bulkier and the concentric rows lose definition; anything finer and a full circle takes a month of evenings.
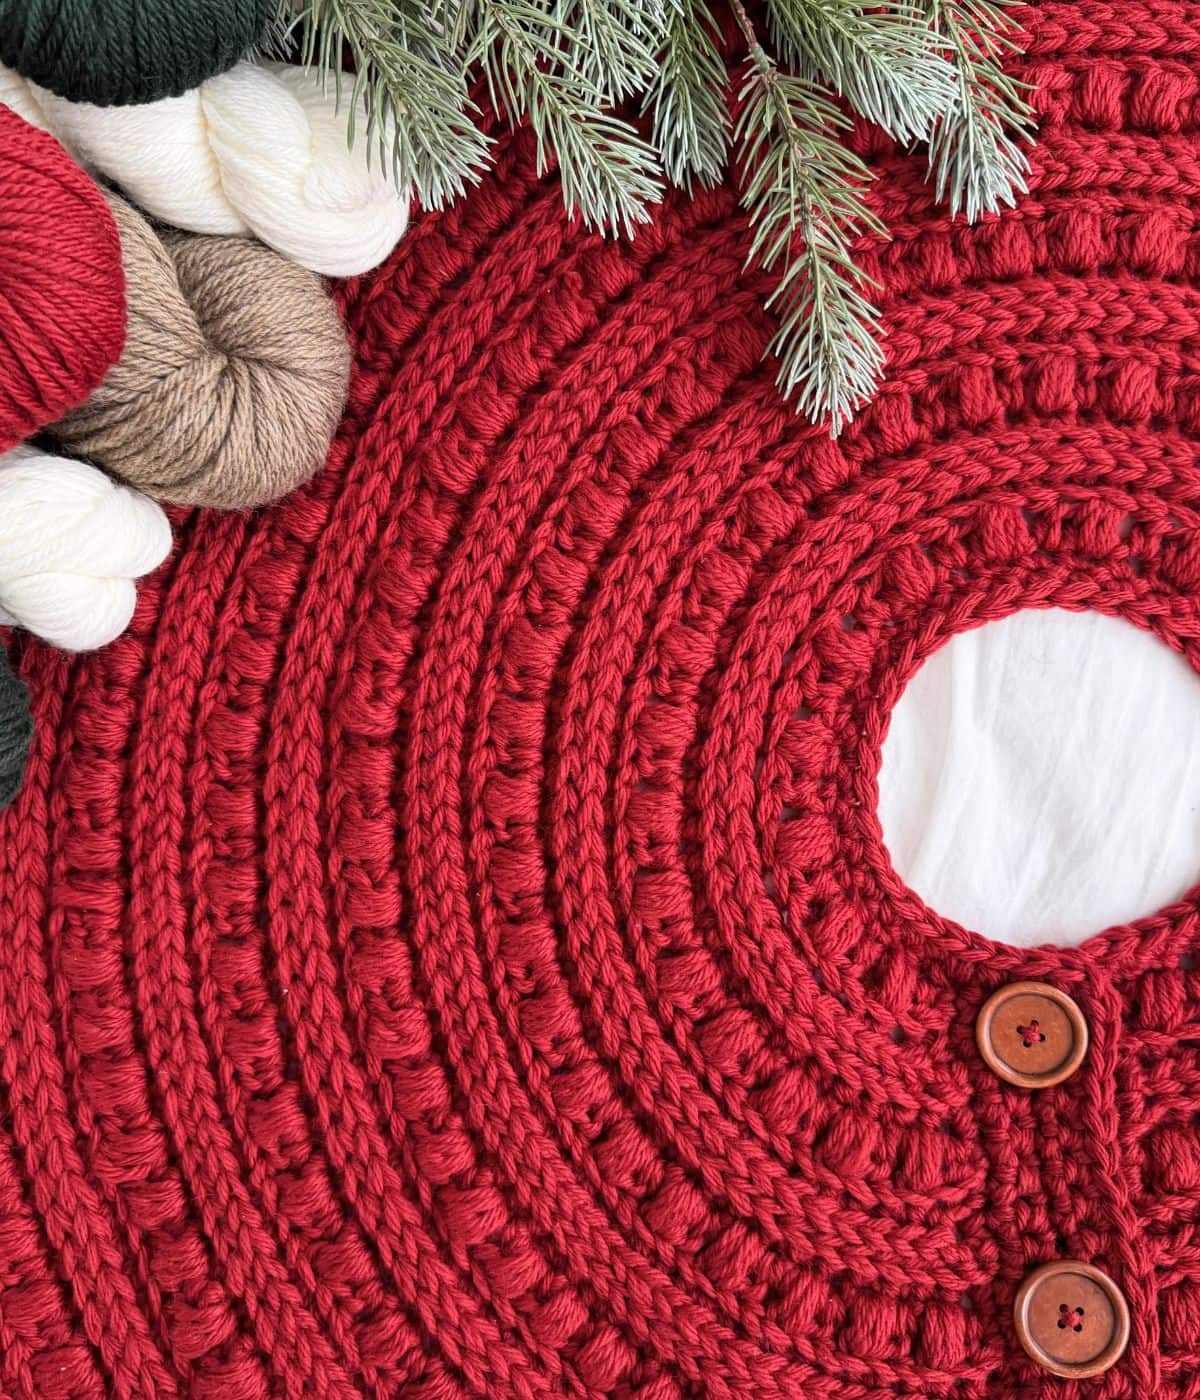
Crocheted and knitted skirts work best in the 36 to 42 inch range, which suits trees 6 to 6.5 feet tall. They don’t need to be as wide as a quilted skirt because the stitch texture reads from farther away, so a slightly smaller diameter still holds its ground visually. And those two wooden buttons at the opening are doing real work — they close the slit and add a warm, non-shiny accent to a lot of red yarn. Compare with Idea #29 for the knitted version of this same handmade logic.
Your Tree Base Deserves Better Than a Bedsheet
Whether you buy one, thrift one, or spend three December evenings piecing one, a quilted tree skirt is the rare holiday object that gets prettier as it gets older — loose threads, faded reds, and all. Start with the fabric that makes you stop scrolling, then let the measurements and the light temperature do the boring work.
📌 Pin your favorite from this list before you close the tab — come November you’ll be glad it’s waiting for you.