
29+ Stunning Pallet Christmas Tree Ideas That Will Elevate Your Holiday Decor in 2026

Still scrolling through pallet Christmas tree photos at eleven at night, saving every single one and committing to none? You are not alone — wood slat trees have quietly eaten a real chunk of the artificial tree market, and honestly, they photograph better.
We spent serious time browsing Etsy, Home Depot, Marketplace, and Lowe’s to bring you only what is genuinely worth building or buying this year, from $25 tabletop versions up to a $450 sculptural piece.
Inside you will find 29 curated ideas covering rustic farmhouse, modern minimal, cozy cottage, and distressed vintage looks — some sized for a snowy porch, some for a hallway wall, some small enough to sit on a kitchen shelf. Budget and luxury versions are compared side by side so you can see exactly where the money goes.
Pallet trees are having a moment in 2026 because they hit two trends at once: the shift toward repurposed materials and a growing appetite for one meaningful handmade piece instead of a room full of plastic. And stay until the end — we break down the most common mistakes that can ruin these looks.
📌 Save this to Pinterest for later — you’ll want to revisit these ideas.
1. Slatted Wood Tree With a Plain Cardboard Star Topper
The taper is what makes this read as a tree instead of a stack of lumber. Every slat is cut a little shorter than the one below and pinned to a single central upright, so the gaps stay parallel from base to tip. That repetition does the heavy lifting — your eye finishes the triangle on its own. The star is deliberately plain, cut from a light brown board and left unfinished, and the cross base stays visible. Nothing here is hiding the fact that a person built it, and that is the whole charm.
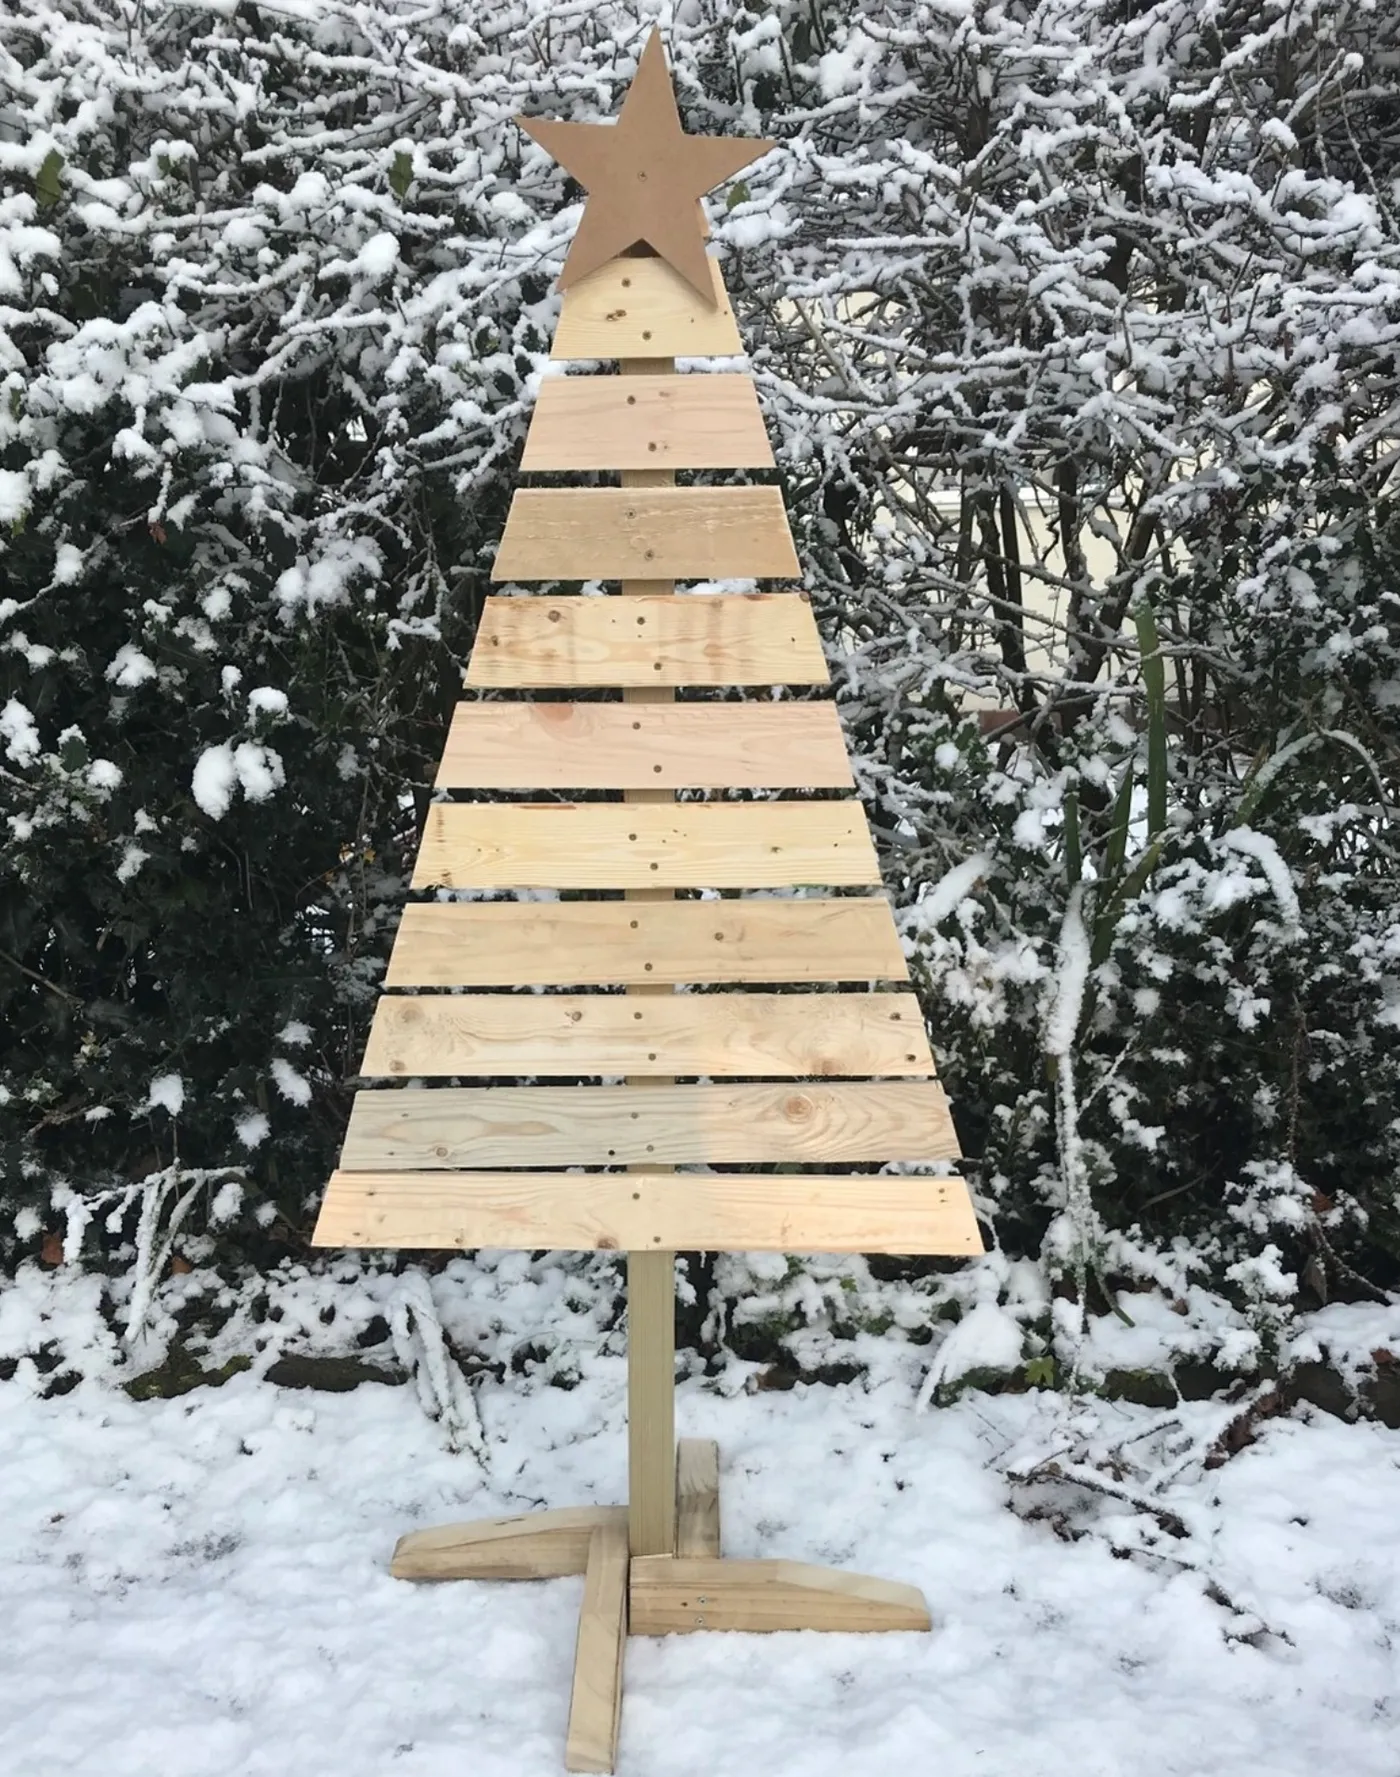
Most first pallet builds fail at step one, not step five. Run this check first.
- Measure the display spot including depth — a cross base needs 20 to 24 inches to stand safely.
- Look for an HT (heat-treated) stamp on the pallet. Never use MB, which is chemically treated.
- Confirm storage space; this silhouette does not fold flat.
- Decide whether it lives outdoors year-round. Untreated softwood greys out after one season.
2. Modern Slat Tree With Red Baubles by the Fireplace
Slat trees have no branches to hide hangers behind, so ornament count matters more than variety. Stick to twelve to sixteen baubles, none smaller than three inches across, and space them six to eight inches apart in a loose zigzag rather than straight columns. Keep roughly two-thirds of them above the midpoint. On light wood, one saturated colour beats three muted ones every time — the red is doing the work of an entire box of mixed ornaments.
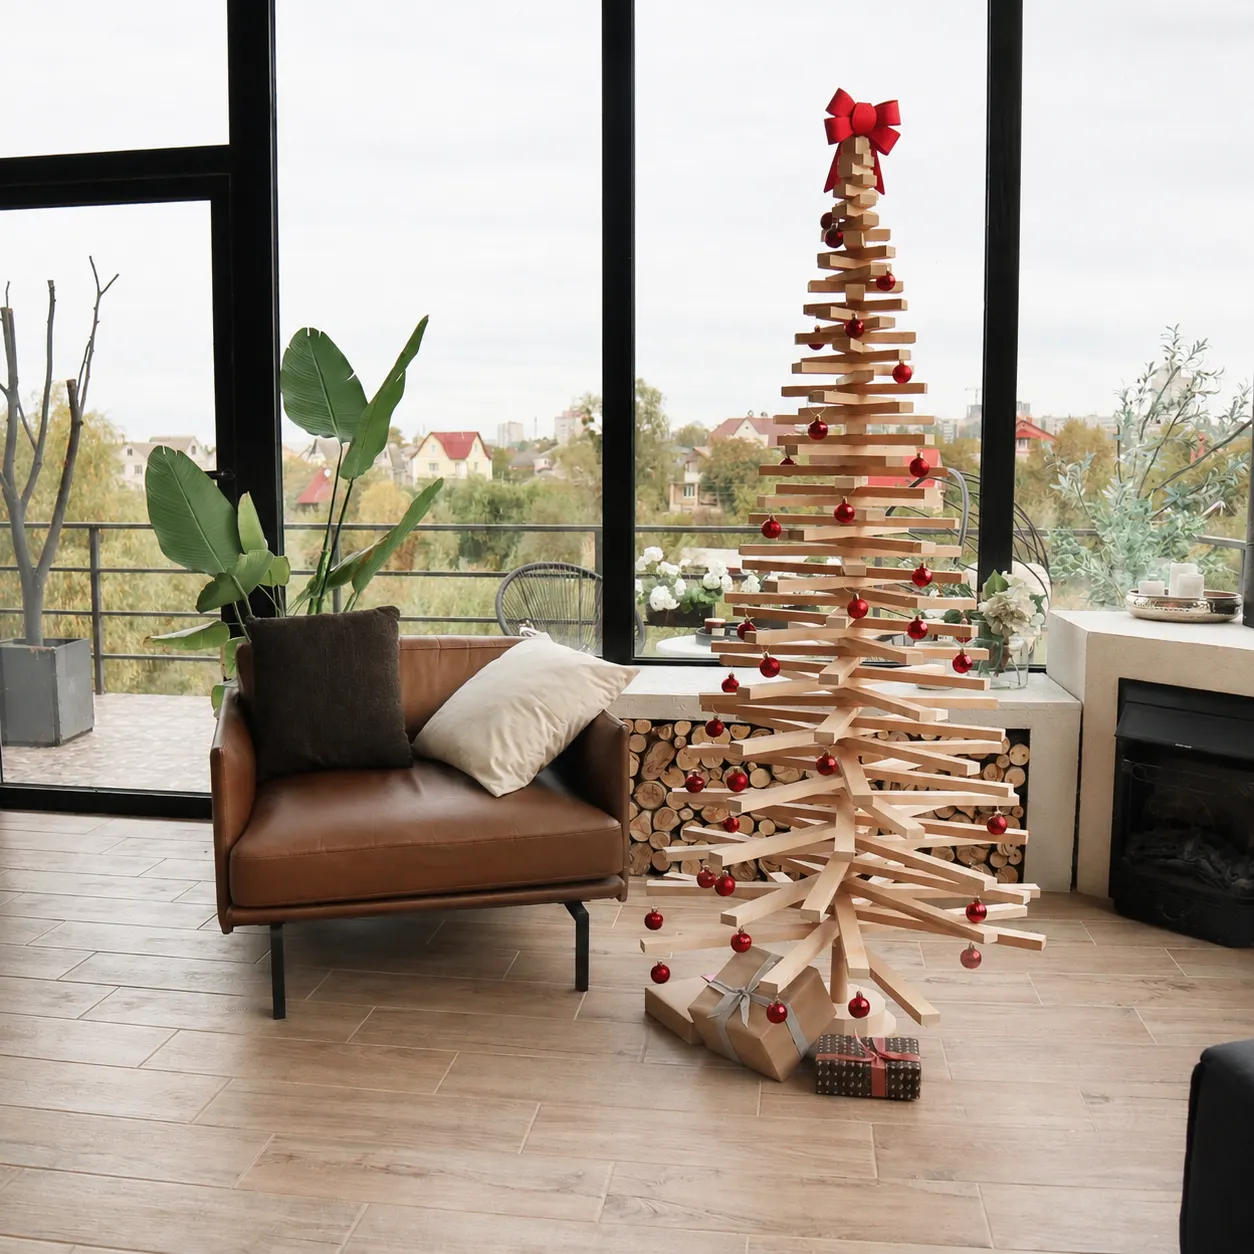
The formula is roughly 70 percent light natural wood, 20 percent saturated red, and 10 percent dark anchor tones from the leather chair and black window frames. Swap the red for deep teal and the whole thing turns coastal. Swap the wood for a walnut stain and it turns moody. Keep the percentages identical and the mood shifts without the design falling apart.
3. Weathered Plank Tree Wrapped in Sheer Ribbon and Lights
Draping the ribbon is the part people rush, and it shows.
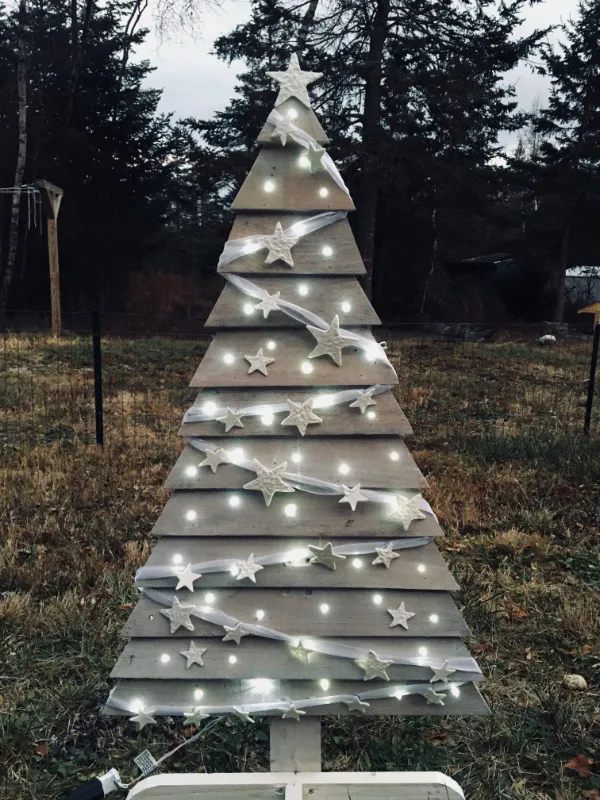
- Lay the tree flat on a table before anything else.
- Anchor the ribbon at the top slat with one staple, hidden behind the wood.
- Draw it down on a soft diagonal to the opposite corner of the base, pinning at each slat junction.
- Repeat in the reverse direction so the two runs cross twice.
- Run the string lights last, following the ribbon line so they read as one gesture.
About 40 minutes, and roughly $18 in ribbon and lights.
A plank tree on an open porch will get rained on eventually, and sheer ribbon holds water like a sponge. Take it in at night, or accept a slightly crinkled, faded version by January. For the lights, look for an IP44 rating or higher and run the cord along the back of the planks rather than the front. Skip the bargain timer plugs — they are the number one failure point in outdoor displays.
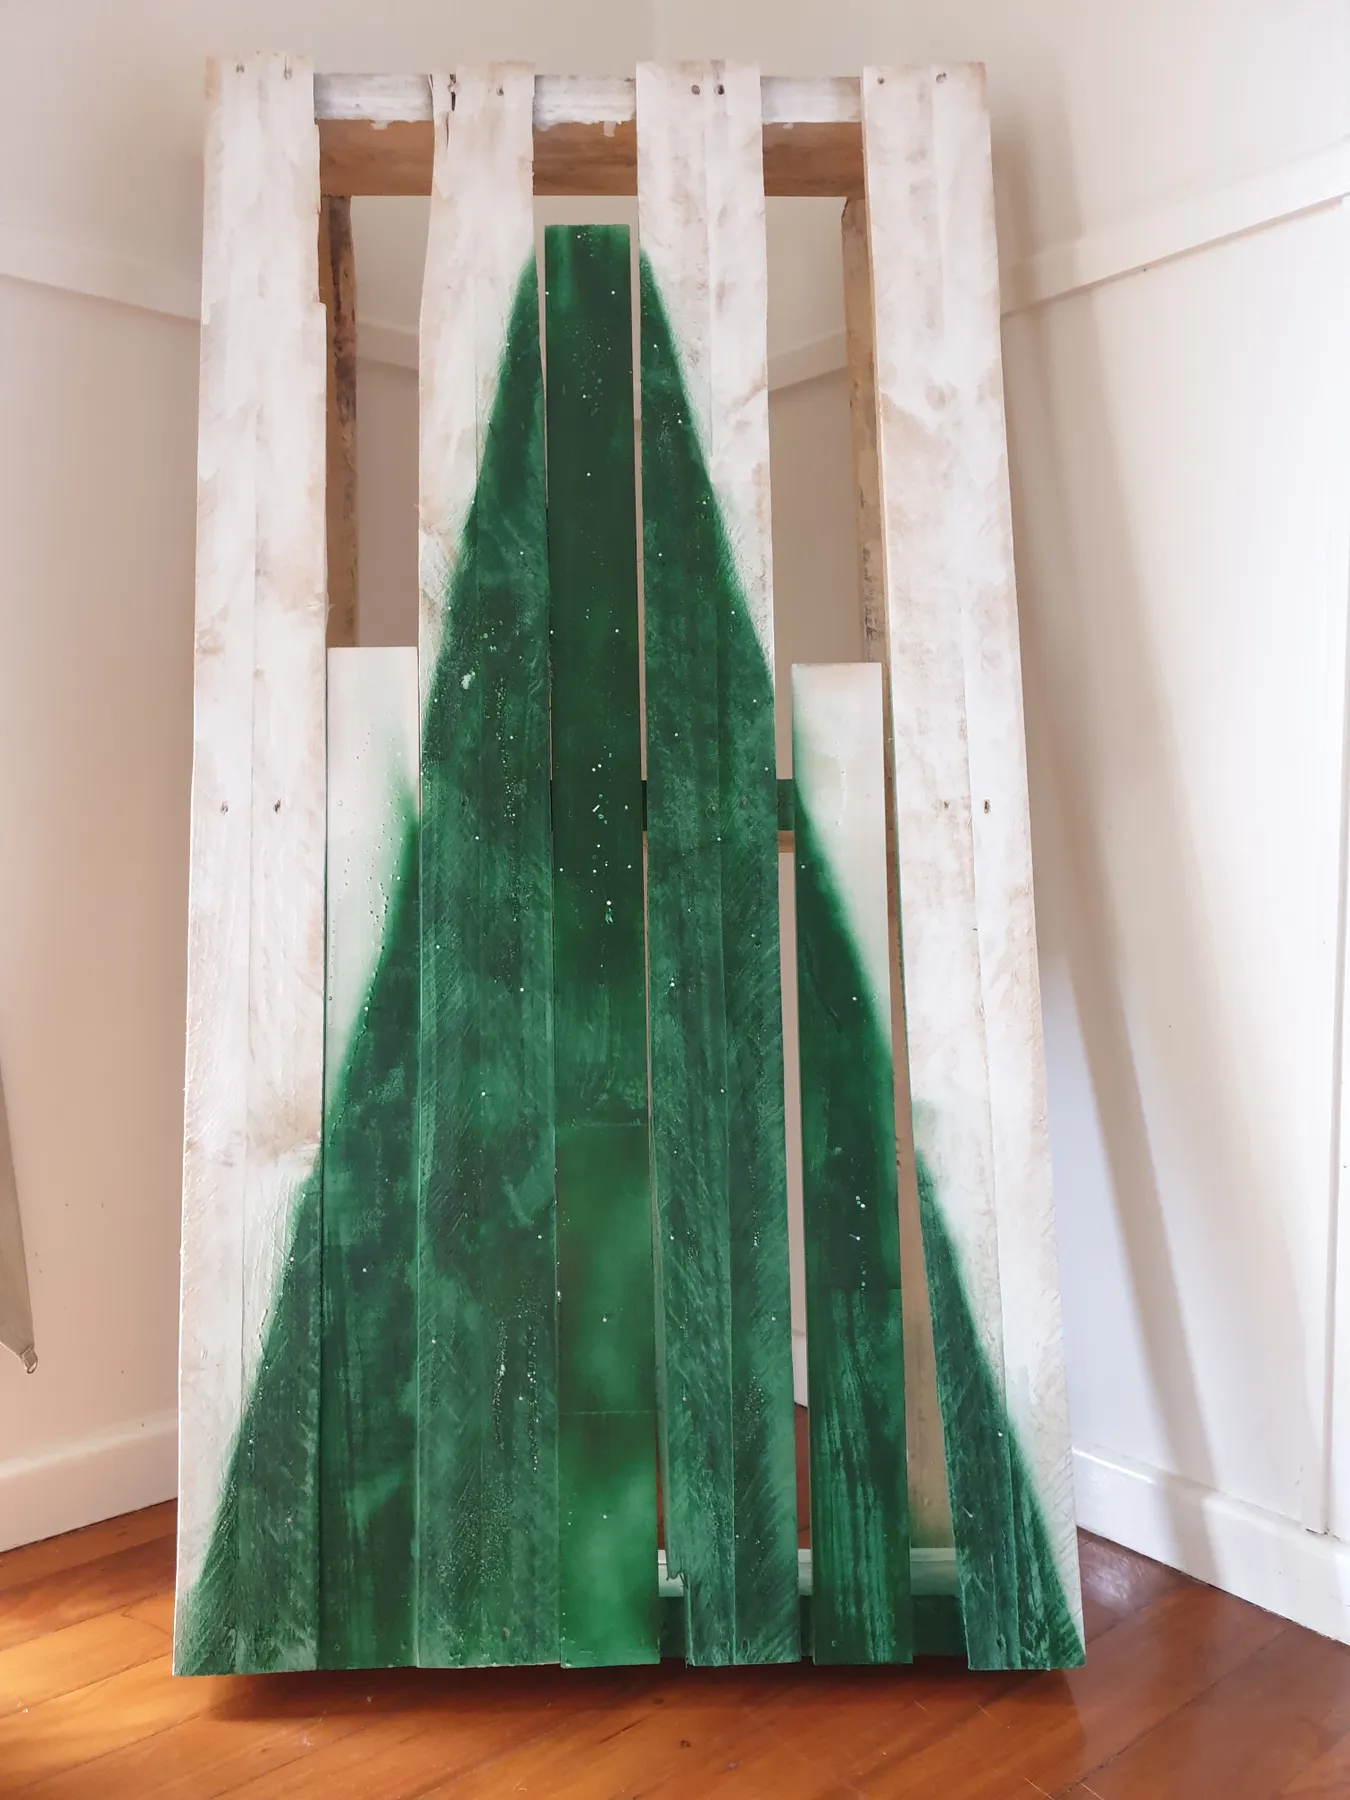
4. Distressed Green Pallet Tree Layered Like an Arrow
It is the offset second layer. Some planks are painted a chalky distressed green and others left raw, and the two sets do not sit flush — they are staggered by a couple of inches, which throws real shadows down the front of the piece. That shadow line is what turns a flat arrow into something with depth. Remove the layering and you would still have a perfectly nice pallet tree, but it would read as a sign instead of an object.
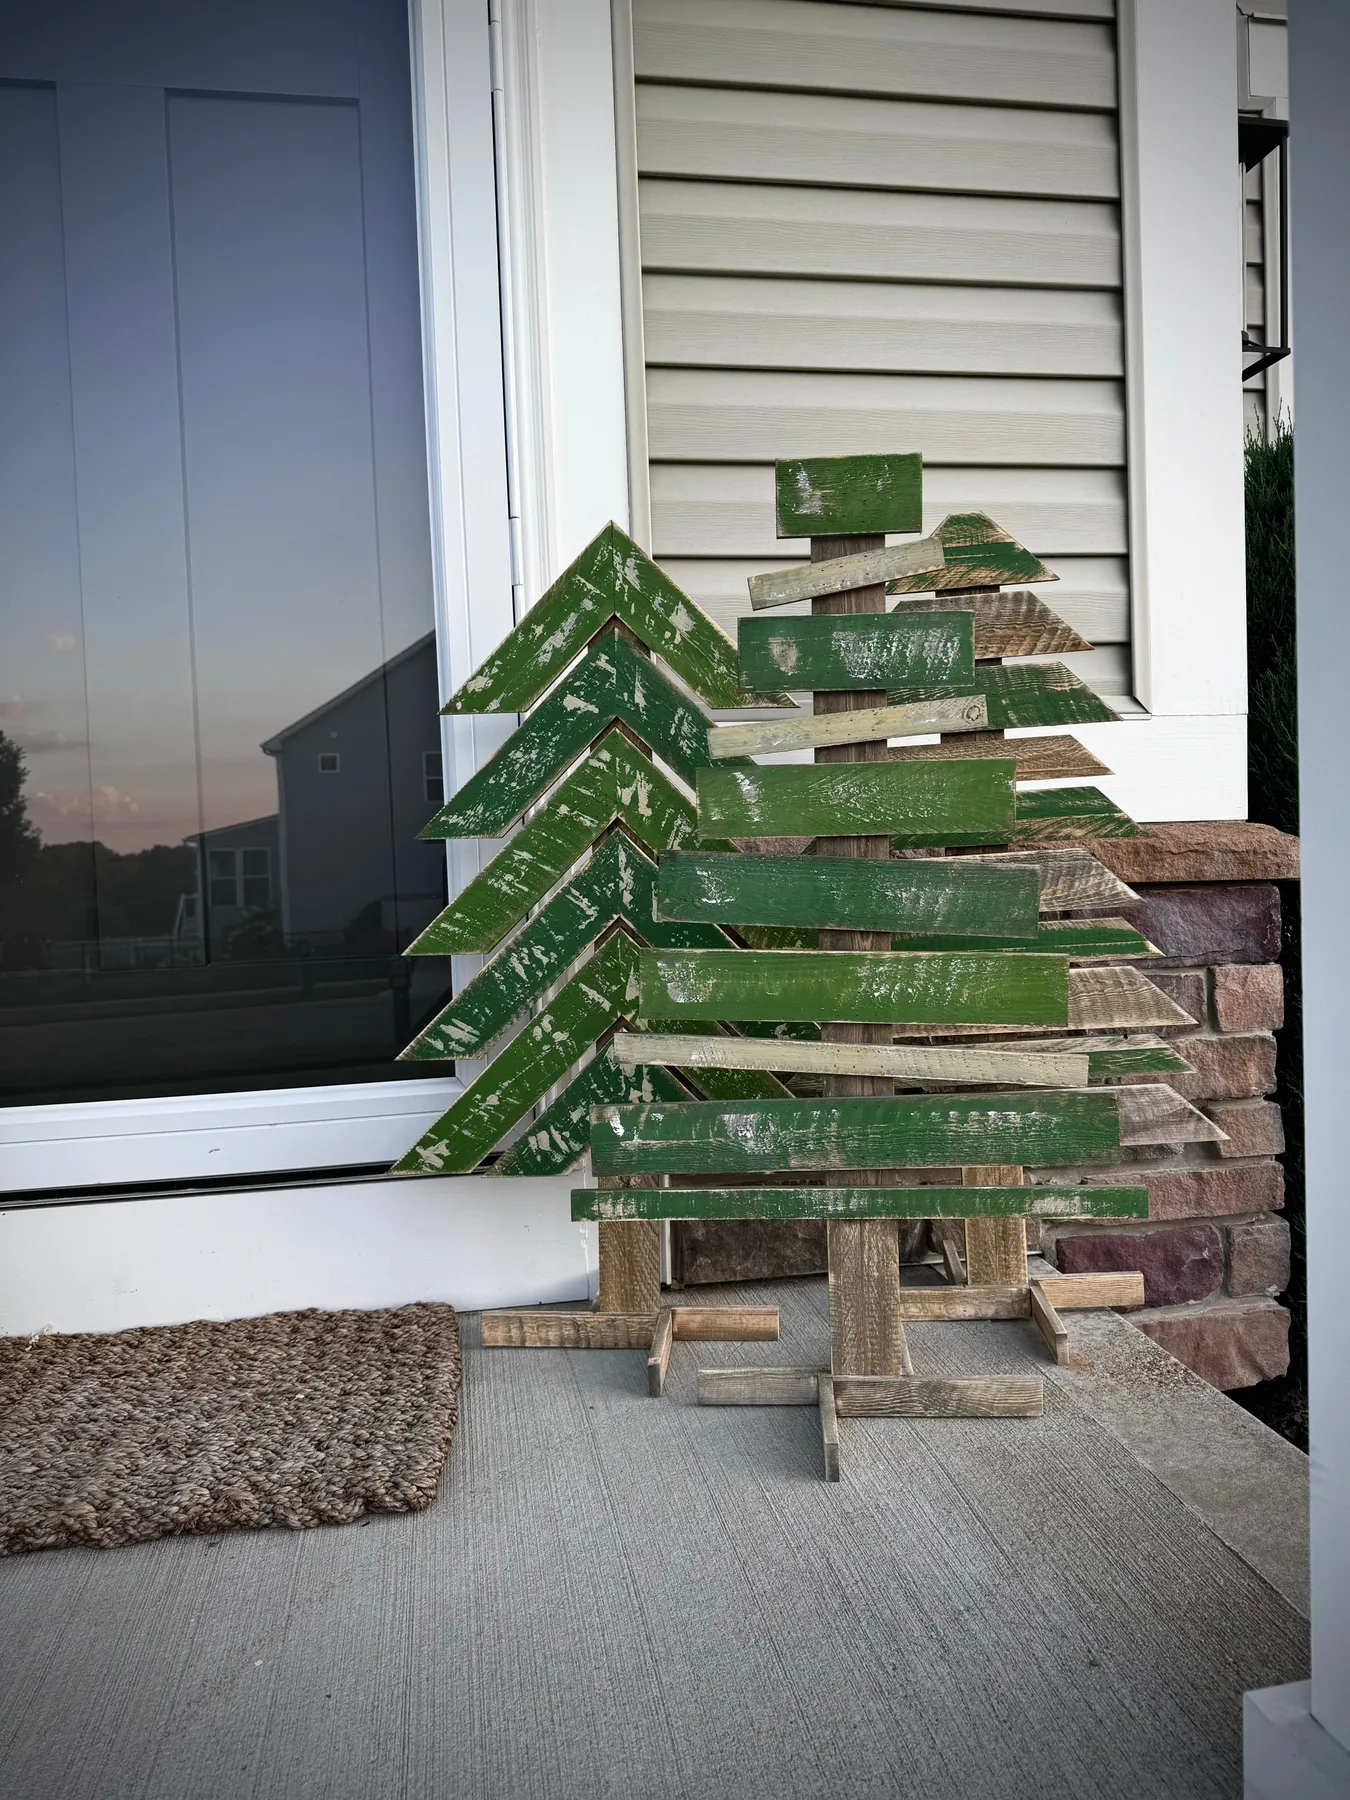
This is a genuine under-$30 project. Free pallets turn up on Facebook Marketplace and behind garden centres constantly — just check the stamp. Paint comes from the mis-tint shelf at any hardware store, usually $3 to $6 a quart, and a chalky sage or olive is almost always sitting there. Cut the planks with a circular saw, sand the edges by hand, and attach everything to two vertical braces on the back. Under $25 if you already own a saw.
5. White Advent Tree With 24 Numbered Fabric Bags
Twenty-four bags need a grid, not good intentions. Mark your hanging points every 5 inches along each plank before you drill anything, and use 3-by-4-inch muslin drawstring bags — anything bigger swallows the plank, anything smaller makes the numbers unreadable from across a room. Number them with a fabric paint pen rather than a marker, which bleeds into muslin and turns grey by December. Leave the top row empty for your star.
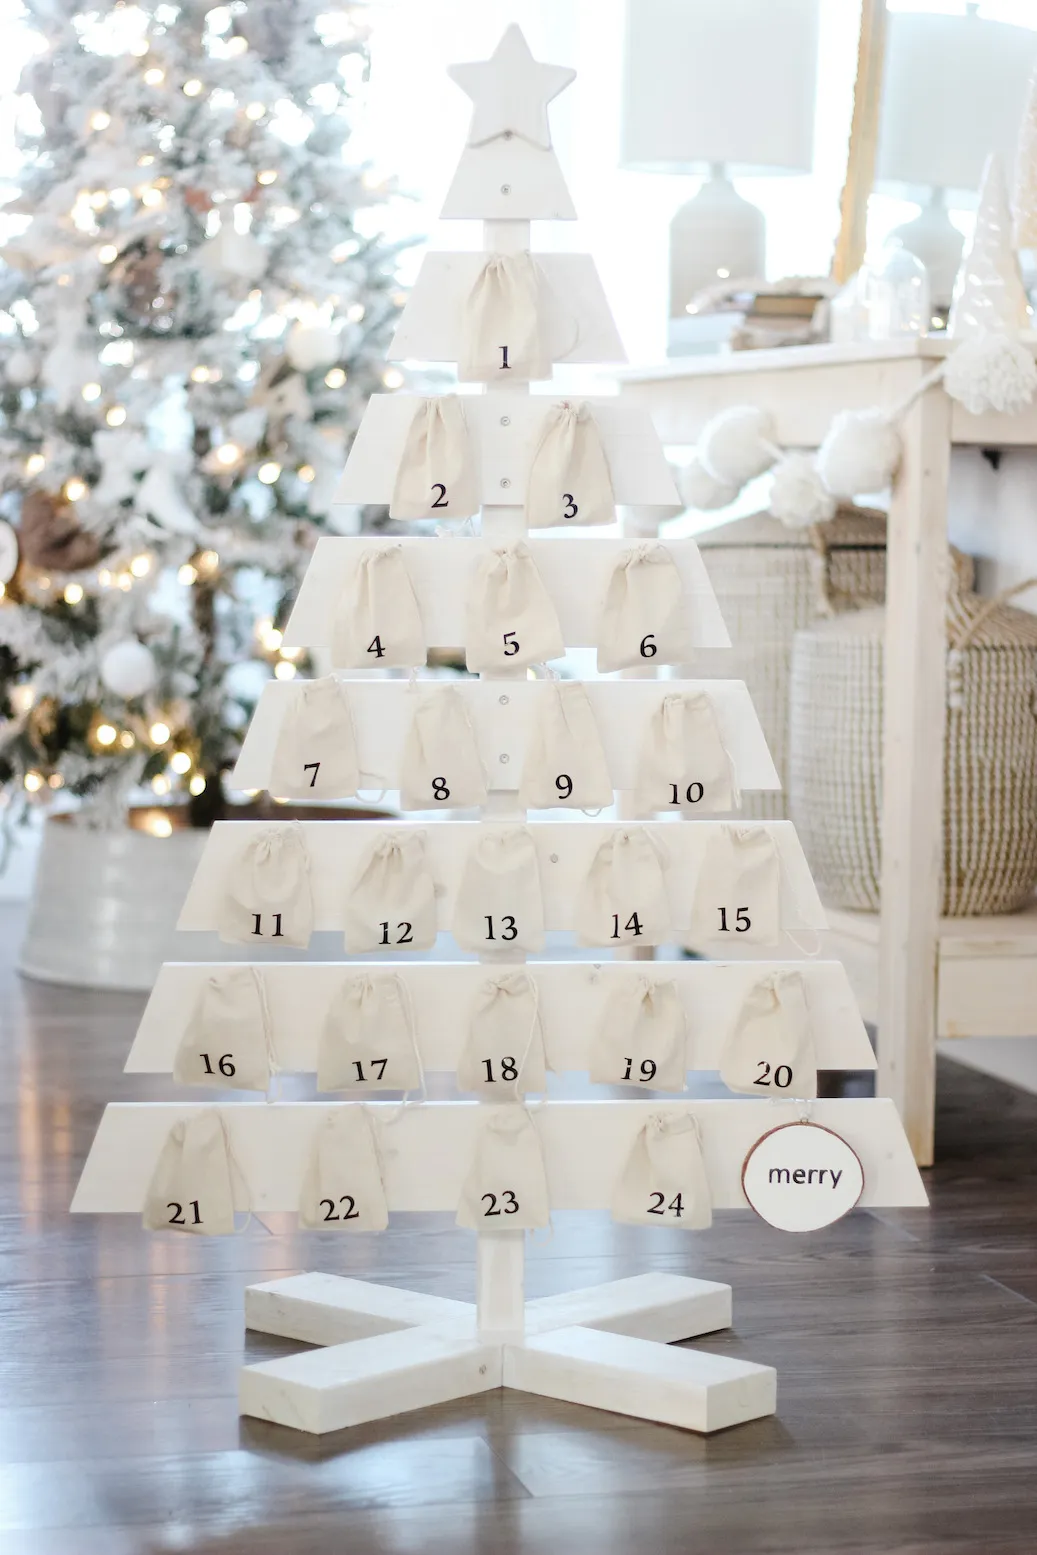
This style wants at least 30 inches of clear wall width and a floor or console below it — the bags need to hang free or they get crushed. A 48-inch version with 24 bags spaced five inches apart works in a hallway or beside a kitchen cabinet run. Shorter 36-inch versions fit narrow entry walls nicely. For a bigger room where the tree itself is the moment, compare with Idea #20 and its floor-length wall build.
6. Tabletop Tree With Name Ornaments in a Galvanized Bucket
Here is what this little display actually costs.
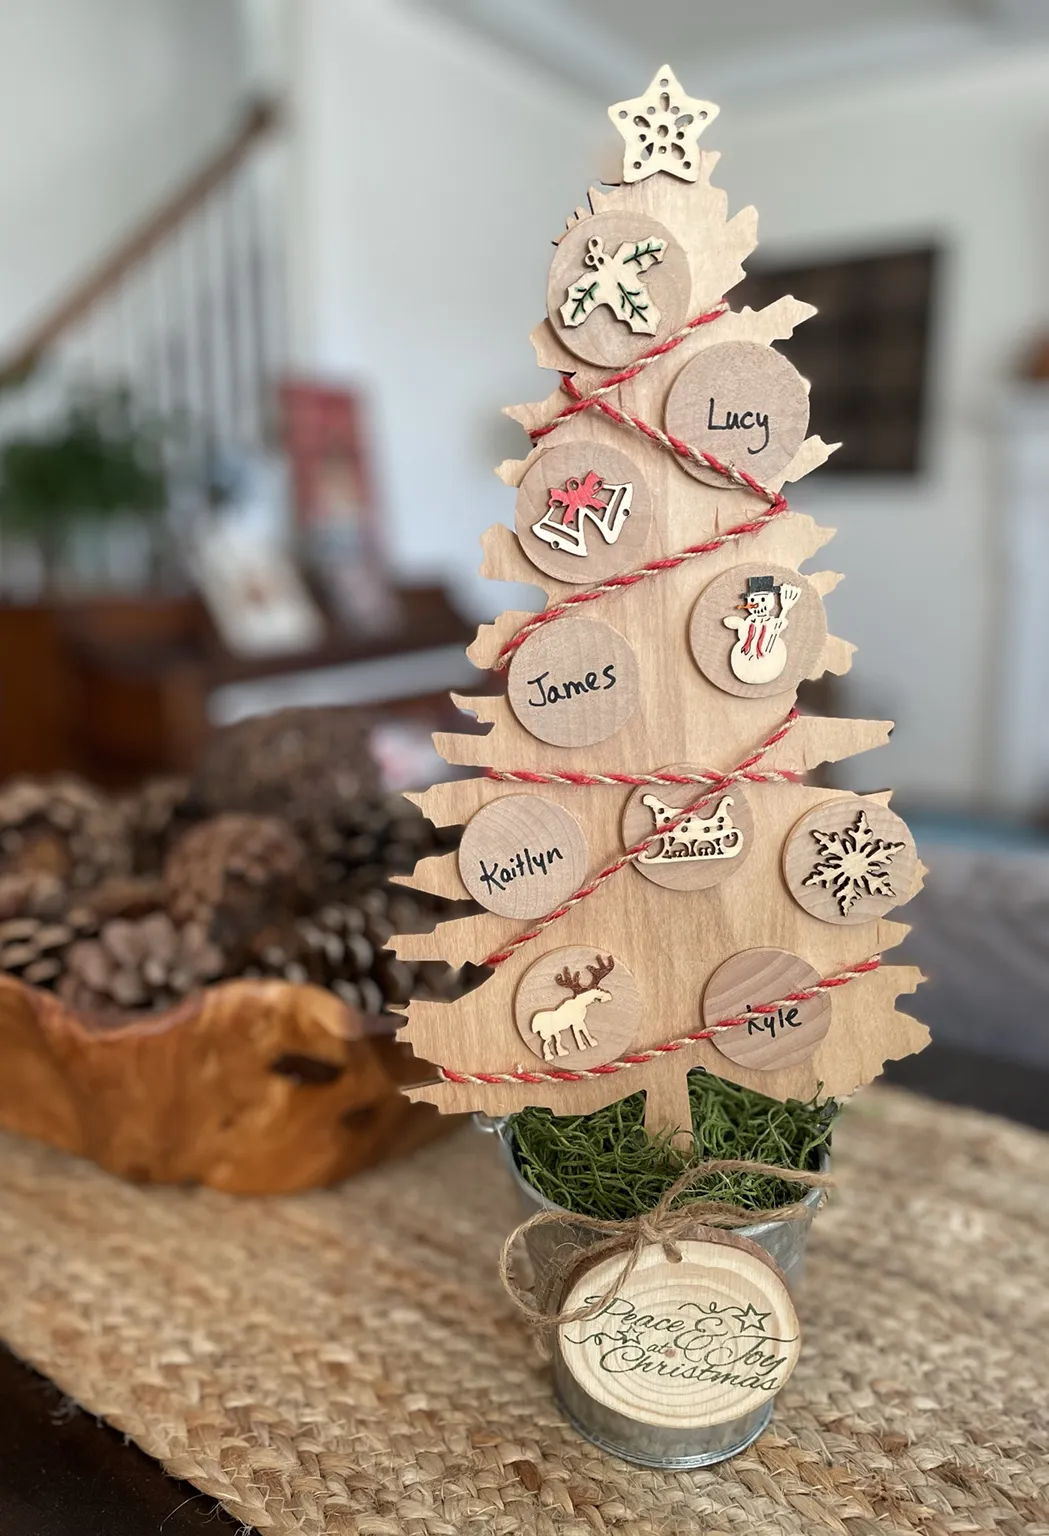
- Pre-cut wooden tree blank or 1×10 board: $8–$16
- Personalized wooden name discs (six to eight): $12–$30 on Etsy
- Galvanized bucket: $6–$12
- Preserved moss or florist foam: $5–$10
- Red and white twisted cord garland: $4–$8
- Woven table mat: $10–$25
Total: roughly $45 to $100, depending on how many names you order.
Budget alternative: print the names on cardstock, glue them to wooden circles cut from a dowel, and skip the Etsy order. That drops it to about $30.
The galvanized bucket. It is the cheapest thing in the arrangement and it is doing the most work. Sitting a flat cutout in a metal pail filled with moss gives a two-dimensional shape an actual base with height and weight — suddenly it is an object on a table rather than a sign leaning against a wall. Any small container does it: a zinc planter, an enamel pot, even a stack of three books with moss tucked around the base.
7. Whitewashed Pallet Tree With Silver Bead Garlands
The recipe is about 65 percent whitewashed wood, 25 percent silver, and 10 percent warm light. That is it. The silver shows up three ways — beaded garland, star topper, and miniature baubles — and the warm white string lights are the only warm element in the entire piece. Swap silver for antique brass and the tree goes traditional. Swap it for matte black beads and it goes modern farmhouse. Keep the ratios and it always hangs together.
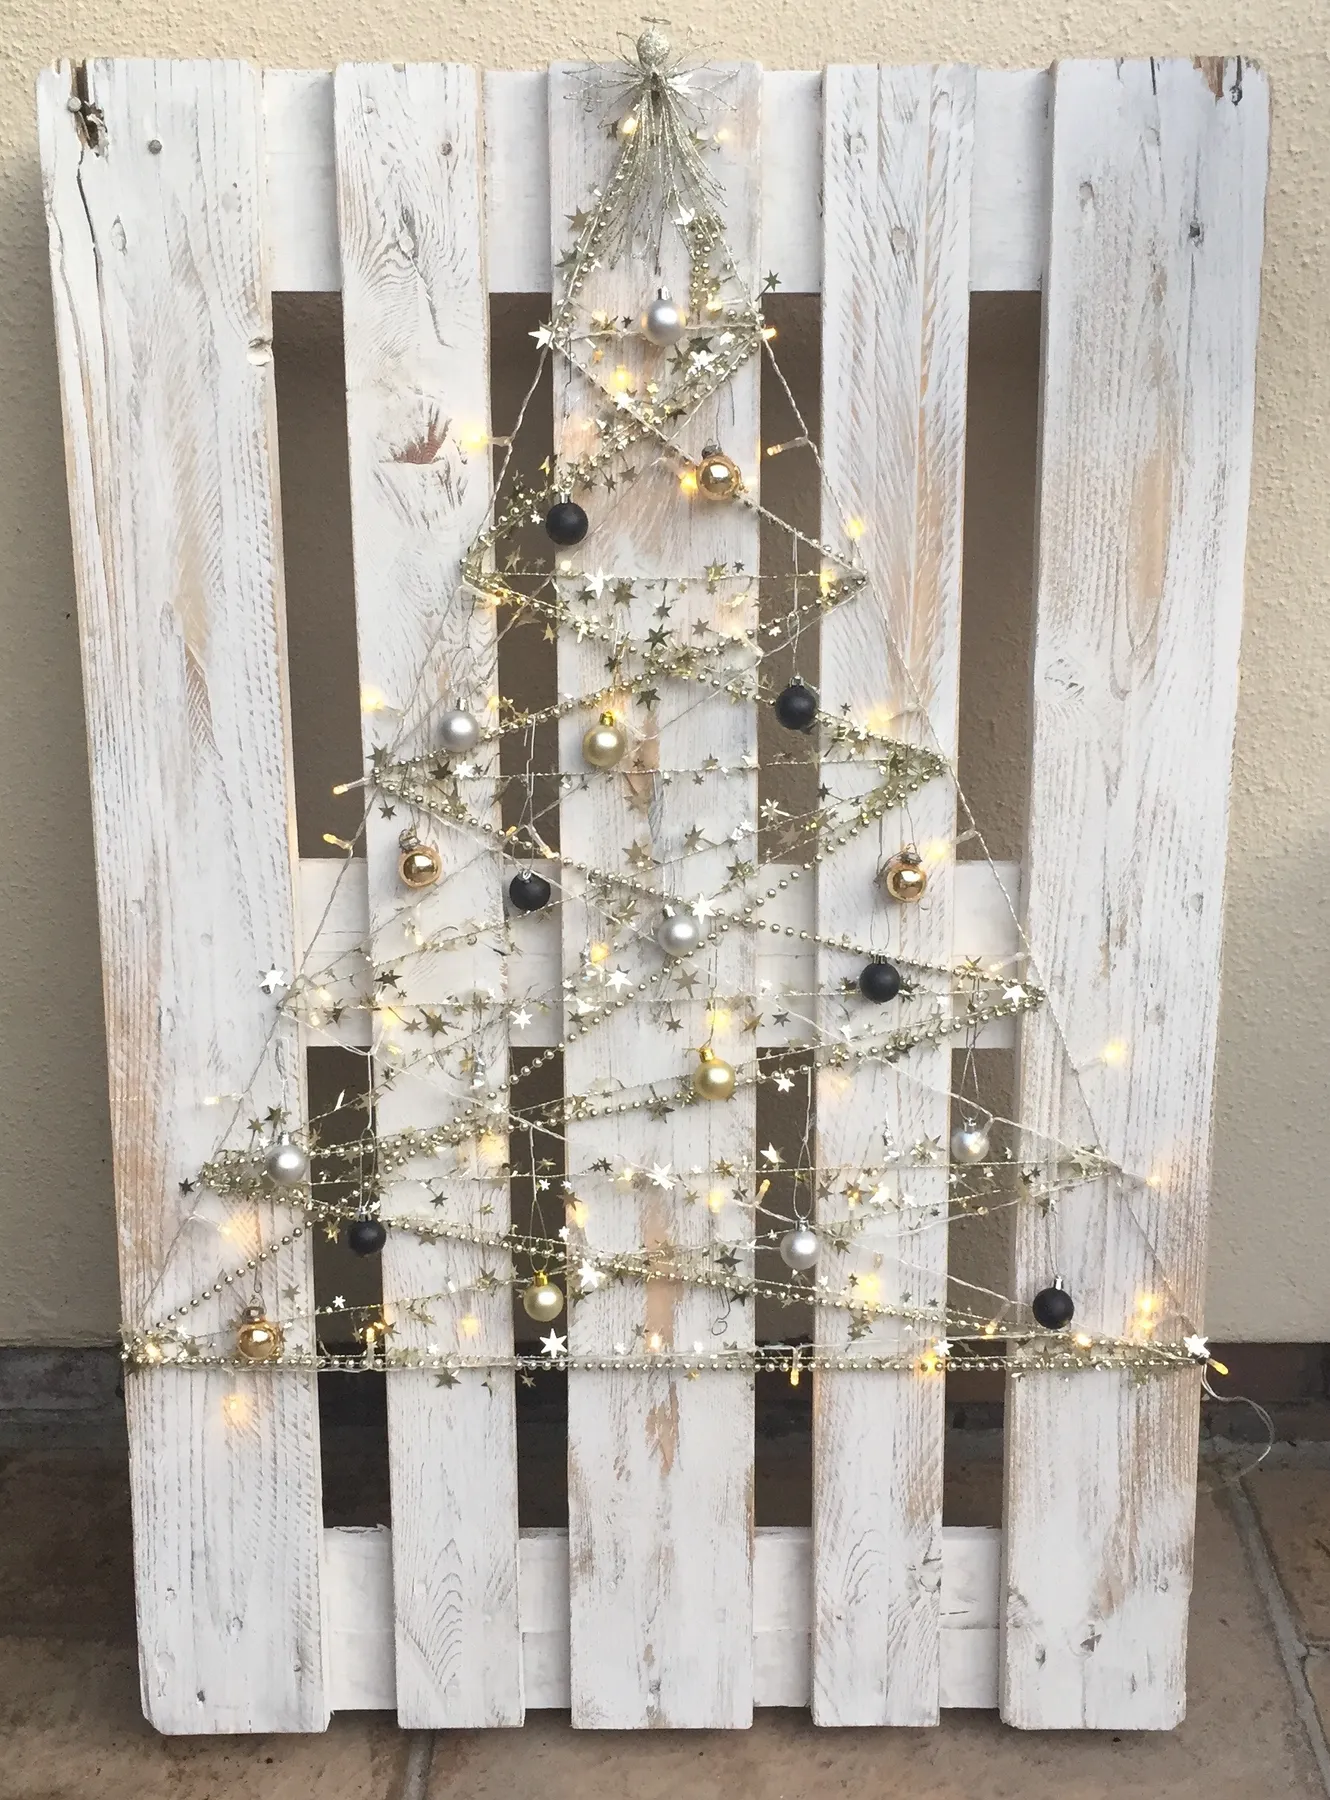
Whitewash is the least forgiving finish on this list. Chalk paint over raw pallet wood scuffs when you drag it across a porch, and a glitter topper sheds a small pile of sparkle every time you touch it. Plan on a light touch-up coat each November. If it lives outside, the white will yellow slightly within two seasons unless you seal it with an exterior matte poly. The metallic bead garland, on the other hand, is nearly indestructible and will outlast the tree itself.
8. Pyramidal Slat Tree Standing on a Flat Wooden Base
Build the ladder first, shape second.
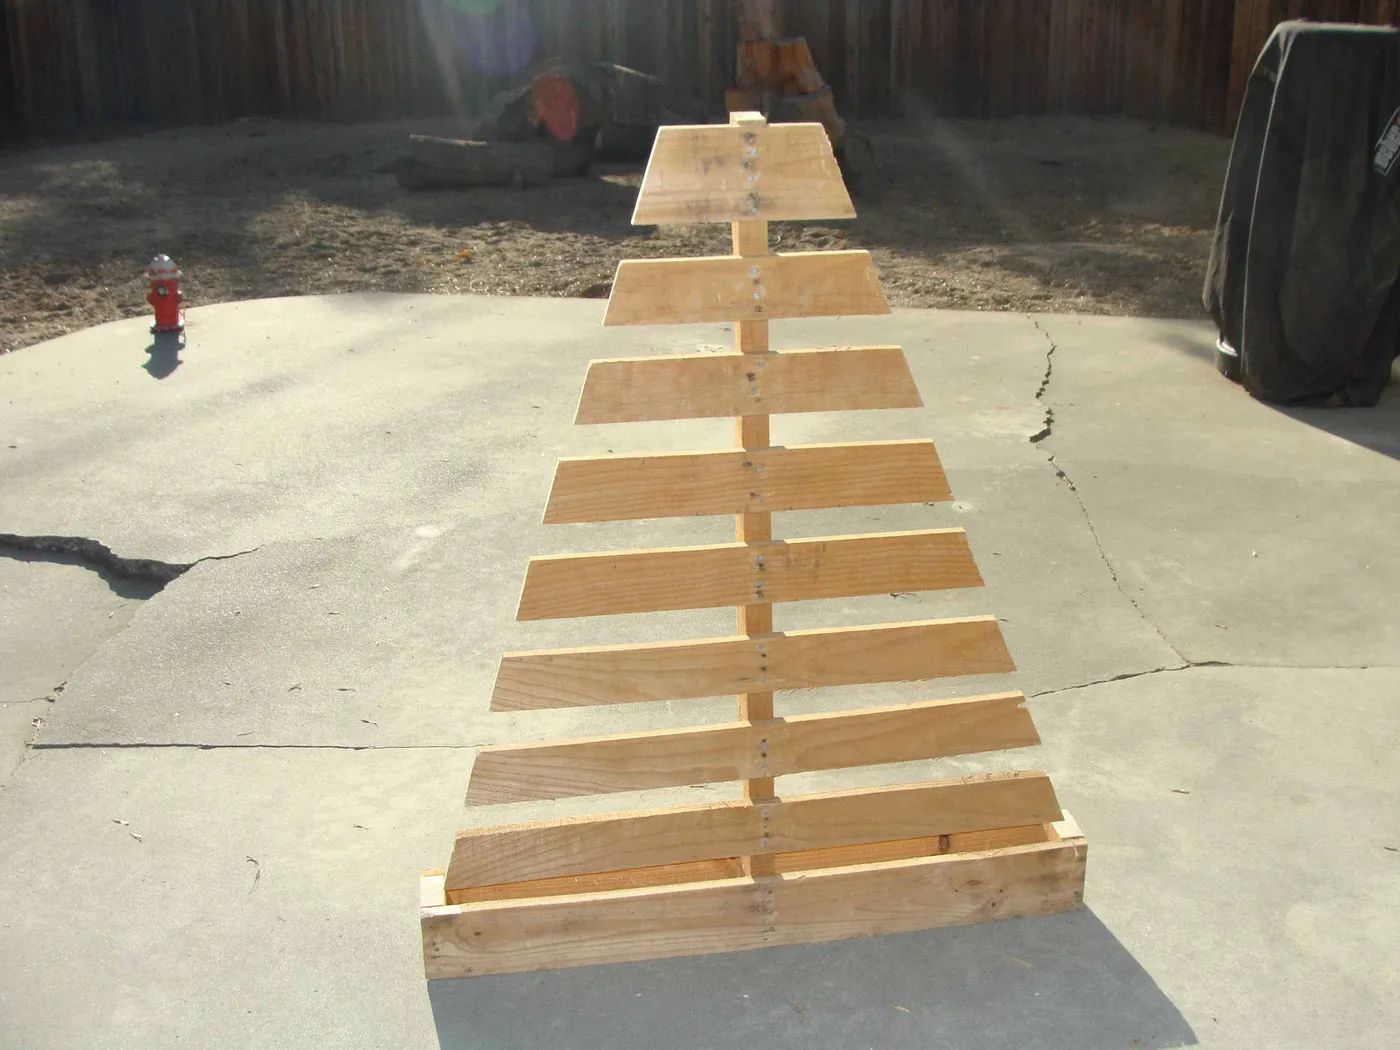
- Cut a central post to your finished height — 60 inches is the sweet spot for a patio.
- Cut slats in pairs, starting at 32 inches and dropping 2½ inches per row.
- Clamp each pair level, then drive two 2-inch screws through the front into the post.
- Finish with a flat base at least 24 inches wide to stop it tipping in wind.
- Sand every cut end — splinters are the reason people stop liking these.
Two to three hours for a first-timer, about $45 in lumber.
Five feet tall is the sweet spot on a standard 8-by-10 patio, leaving room for a chair without crowding. Go to seven feet and you will want at least 12 feet of wall or fence behind it, otherwise the taper reads as a spike instead of a tree. Indoors, a 60-inch model needs at least a 9-foot ceiling to look intentional. Compare with Idea #1 — same construction, completely different setting.
9. Light Wood Plank Tree With Multicolor Lights
Multicolor string lights look cheerful in a photo and chaotic in a small room. On a covered porch they are wonderful. In a living room, swap to warm white and add your colour through ornaments instead. Battery packs hate cold. Below 20 degrees, standard rechargeable packs drop to about half their runtime, so either run a cord or bring the pack inside overnight. Solar packs simply will not work in a shaded yard, no matter what the box claims.

A fabric skirt under a plank tree does not work the way it does under a real one — there is no trunk to wrap around, so it slides. Build a 14-inch circular wire wreath ring, zip-tie it to a 12-inch concrete paver, and drape the red fabric over the pair. Weight plus structure. The paver disappears underneath and the base stays exactly where you put it, even in wind. About $15 and ten minutes.
10. Distressed Triangle Trees With Carved White Swirls
The carved white swirls. Take them away and you have three distressed triangles — pleasant, entirely forgettable. The carving gives the wood a texture you can feel from across the room, and because the pattern is scalloped rather than geometric, it pushes the group toward folk-art territory instead of country craft. The visible metal screws are part of the same story. Nothing here is pretending to be factory-made.
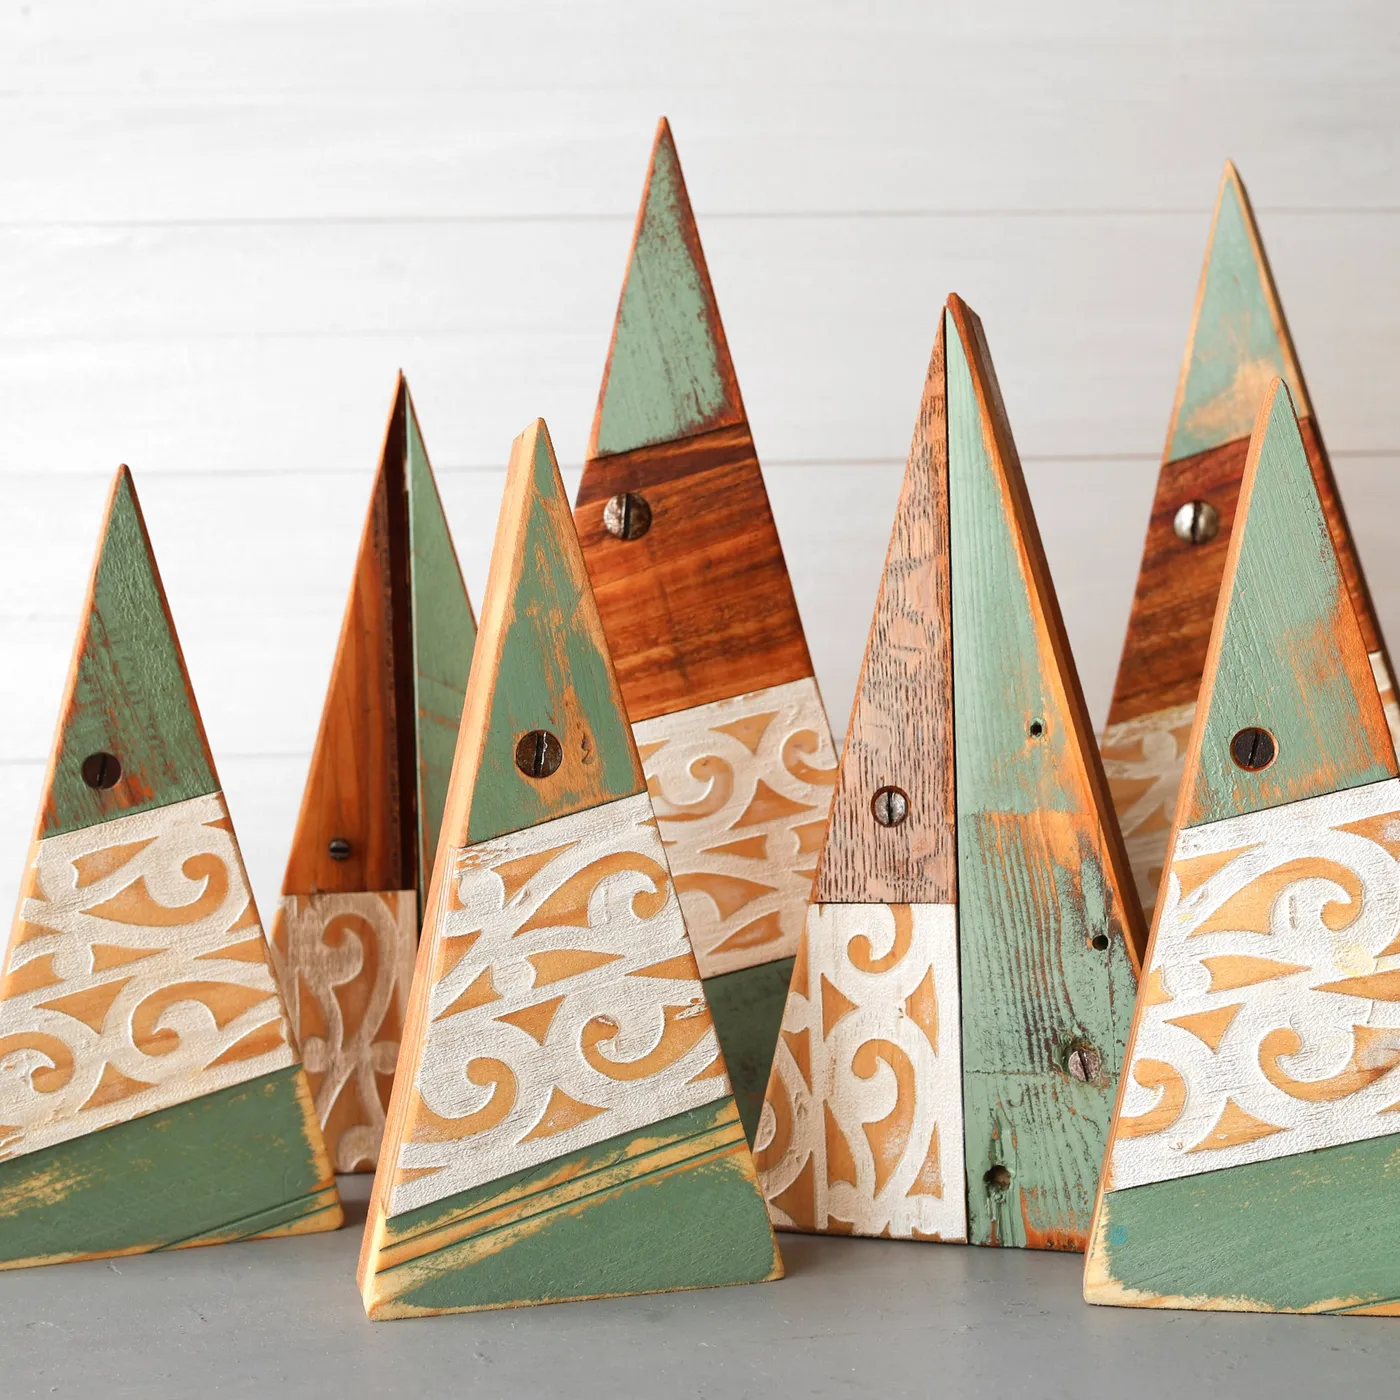
Roughly 45 percent natural orange-brown wood, 30 percent distressed blue-green, 20 percent carved or chalky white, and 5 percent exposed metal. The dark grey tray and white plank wall are neutral stages, not part of the formula. To shift the mood, swap the blue-green for a faded terracotta wash and the white carving for a raw chalk finish — same percentages, warmer palette, completely different room.
11. Three Painted Pallet Trees With Red Bows and Tinsel
Three trees look like a bigger investment than they are. Scrap pallet wood is free, and the red, green, and white paint can all come from sample pots at $4 to $5 each. Red bows are sold in bulk bags of twelve for around $8, and a single strand of warm white lights per tree runs $6 to $10. Realistically you are at $60 to $80 for the whole trio — roughly what one mid-range artificial tree costs. This is the scaled-up outdoor version of Idea #4.
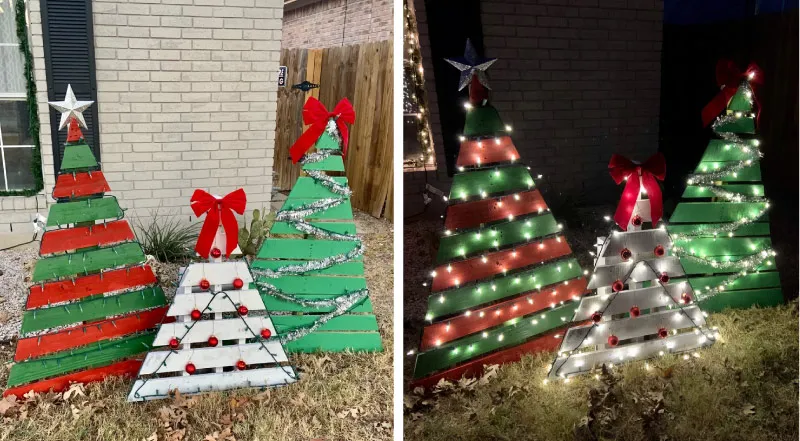
Three freestanding trees in a yard are three separate wind sails. Anchor each one with a ground stake driven through the base, or set them against a fence and weight the bottoms with pavers disguised under leaves. Grass does not hold them, and dry autumn ground holds them even less. Keep the display at least 18 inches back from a walkway — a wooden triangle at shin height is exactly what people trip over in the dark.
12. Small Distressed Triangle Tree With Wooden Button Accents
Getting this three-tone distressed look is about brush discipline, not paint quantity. Load a stiff brush, then wipe most of it off on a paper towel — you want maybe 20 percent of the bristles wet. Drag it in one direction, with the grain, and stop before the coverage looks even. Do the muted green section first, let it dry fully, then the white. The raw wood gets nothing at all. Two ounces of paint covers the whole piece.
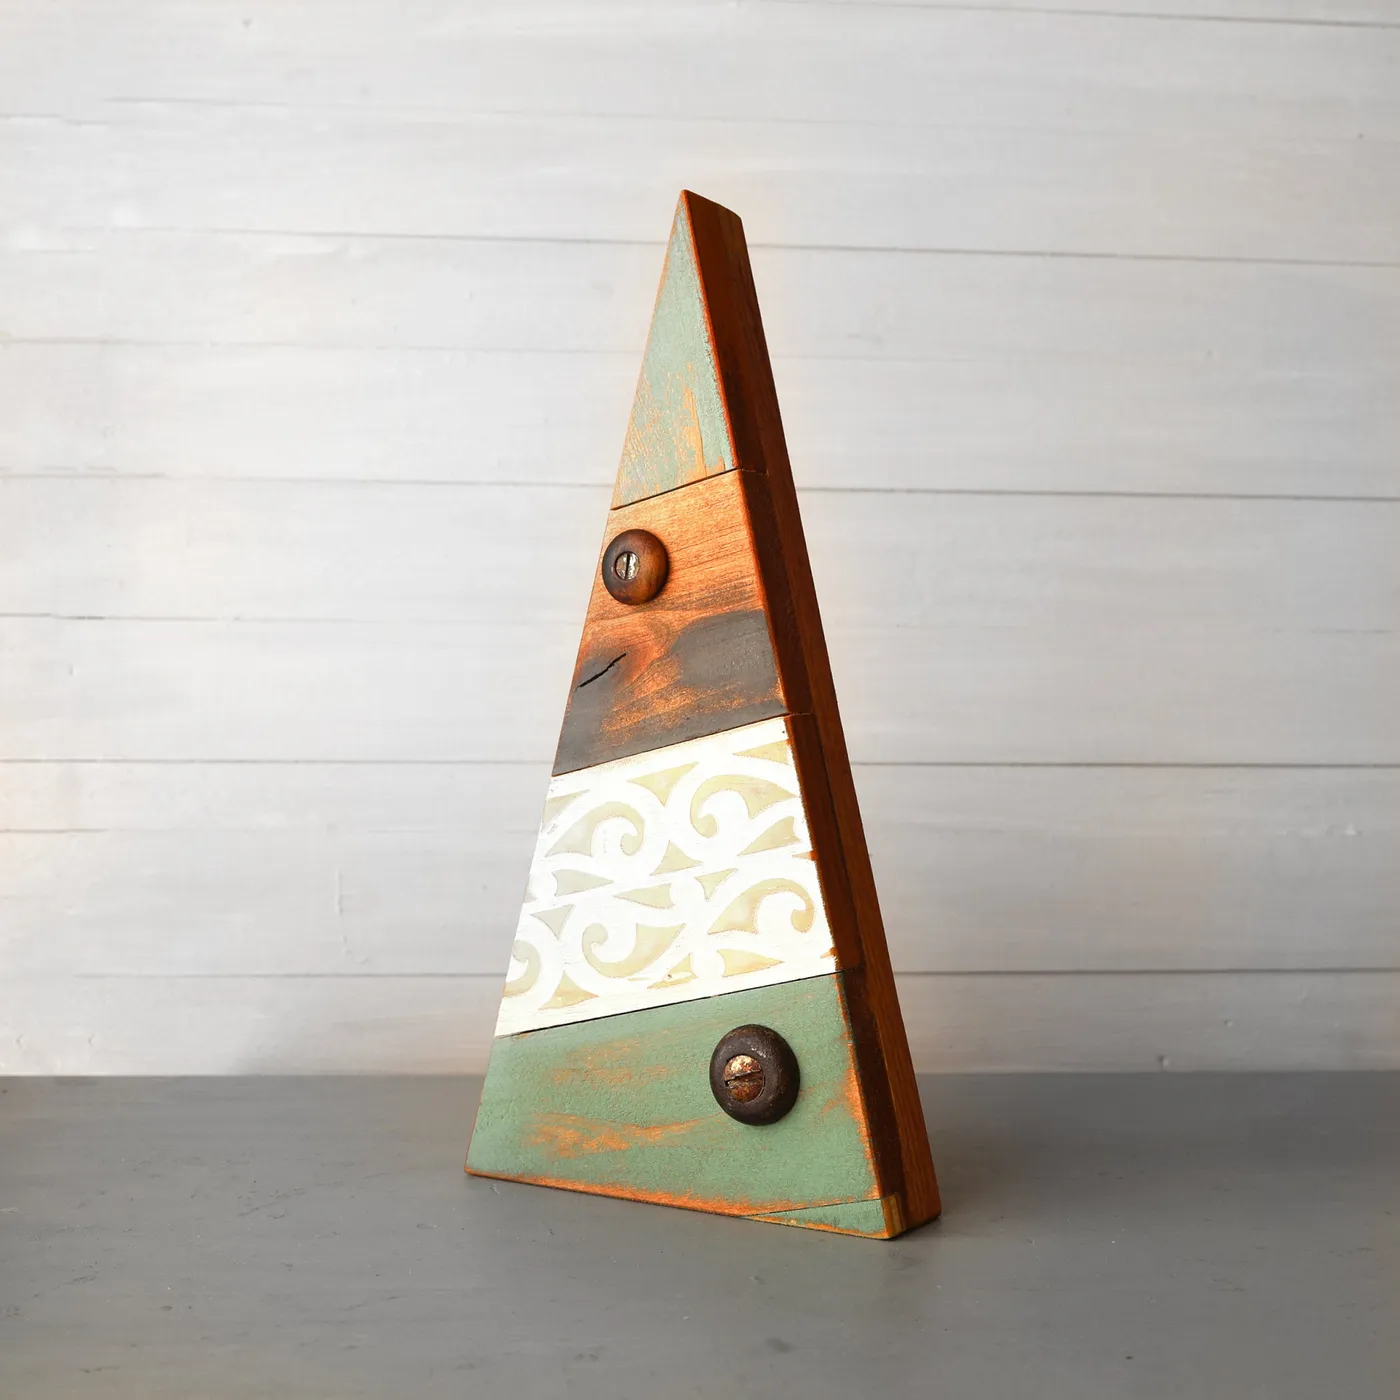
Those two oversized wooden buttons. They are the difference between a decor piece and a handmade object. Buttons read as sewing, as mending, as something pulled from a family tin — and that association is doing exactly what distressed paint cannot do on its own. If you cannot find large wooden buttons, use two wood slices with holes drilled through, or a pair of vintage horn coat buttons.
13. Three Plank Trees in Alternating Grey and Brown
A trio wants a surface at least 24 inches deep and 36 inches wide, which is most dining tables and any decent console. Heights of 18, 14, and 10 inches read as a set; bring them any closer together and it looks like a mistake. Alternate grey and brown across all three so your eye keeps moving instead of grouping by colour. On a dark glossy table, put a runner or mat underneath — the reflection doubles the display and softens the hard edges.
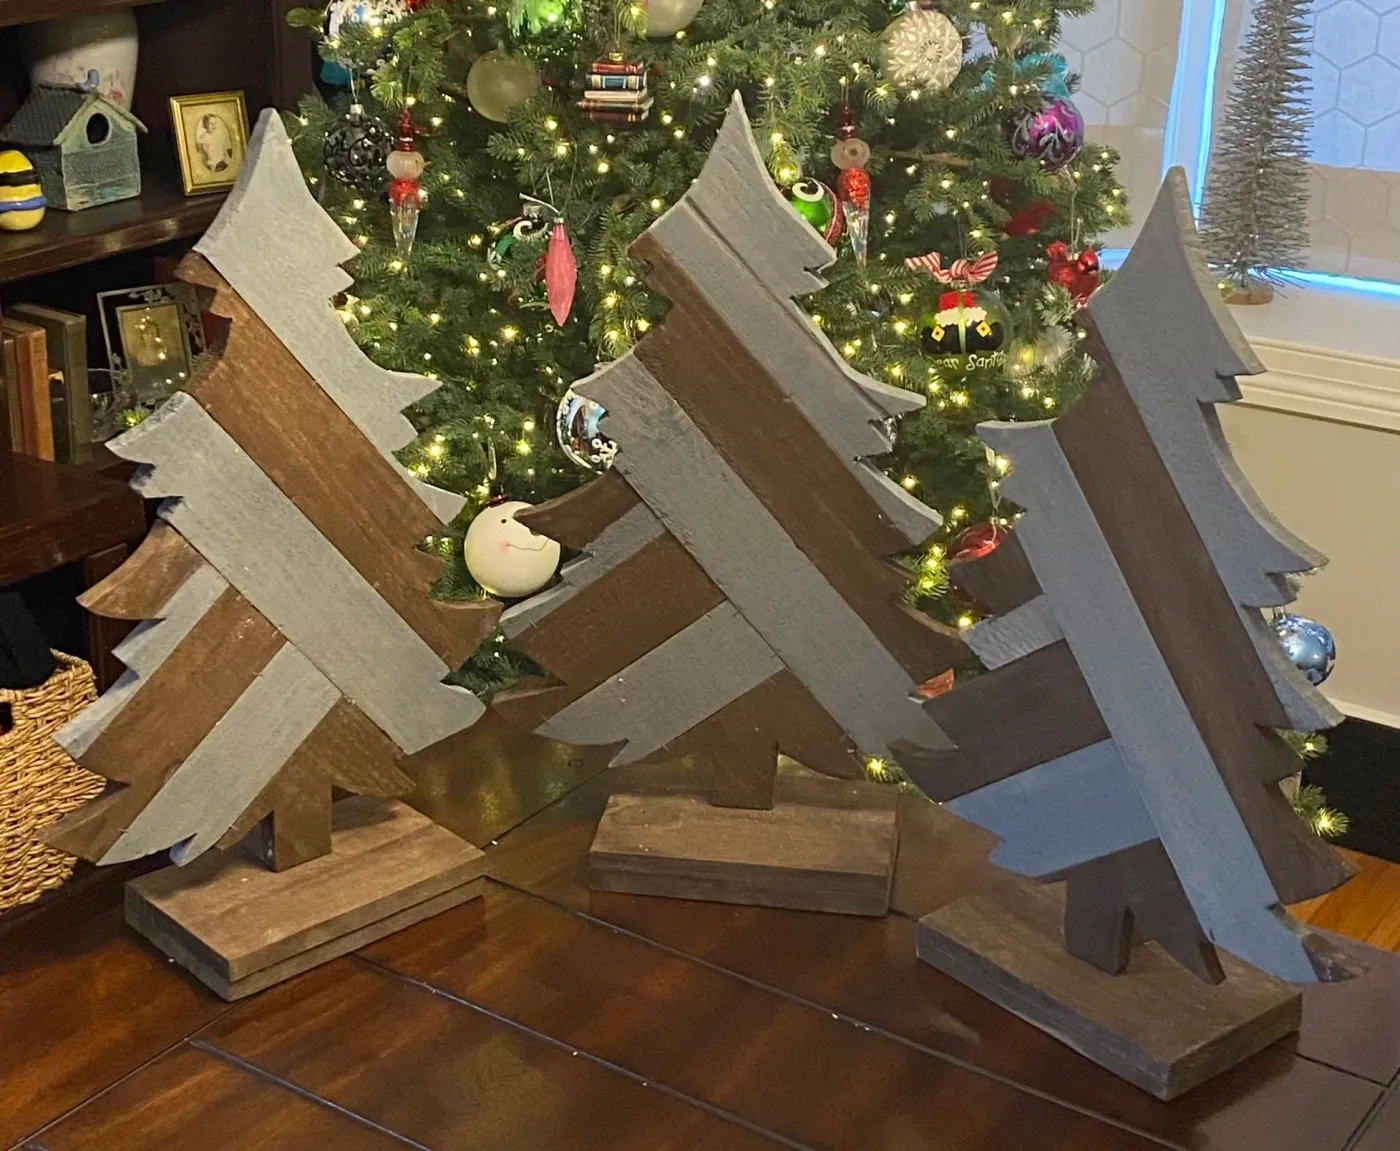
This is the cheapest idea in the entire article to copy. Three trees, all from one donated pallet. If you do not have grey and brown paint on hand, buy two sample pots at about $4 each and thin them with water so the grain shows through. Skip the wooden bases entirely and stack the planks straight on the table — you save an hour and nobody notices. Under $20, start to finish, if the pallet is free.
14. Layered Wood Tree and Star on Wavy-Edge Planks
Two things. First, layering: the dark green tree and dark blue star sit proud of the cream backing, so the piece casts its own small shadows and reads as dimensional even though it is flat. Second, contrast of edge — the backing planks have soft wavy edges while the tree and star are cut in clean straight lines. That tension keeps a very simple piece from looking plain. The red brick wall behind it does the same job in colour.
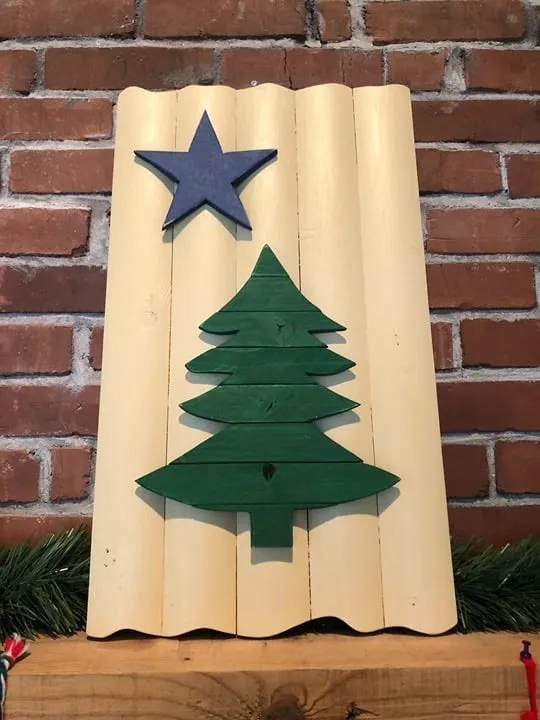
Layered scrap-wood cutouts are everywhere in 2026, largely because this is the one holiday project where a beginner with a jigsaw and three sample pots can make something that looks genuinely designed. The palette here — cream, deep green, navy — is part of a broader shift away from red-and-green maximalism toward what people are now calling quiet Christmas decorating. It has staying power, because it works as a neutral wall piece in February too.
15. Distressed Green Metal Tree on a Herringbone Floor
Buying this look costs more than you would expect.
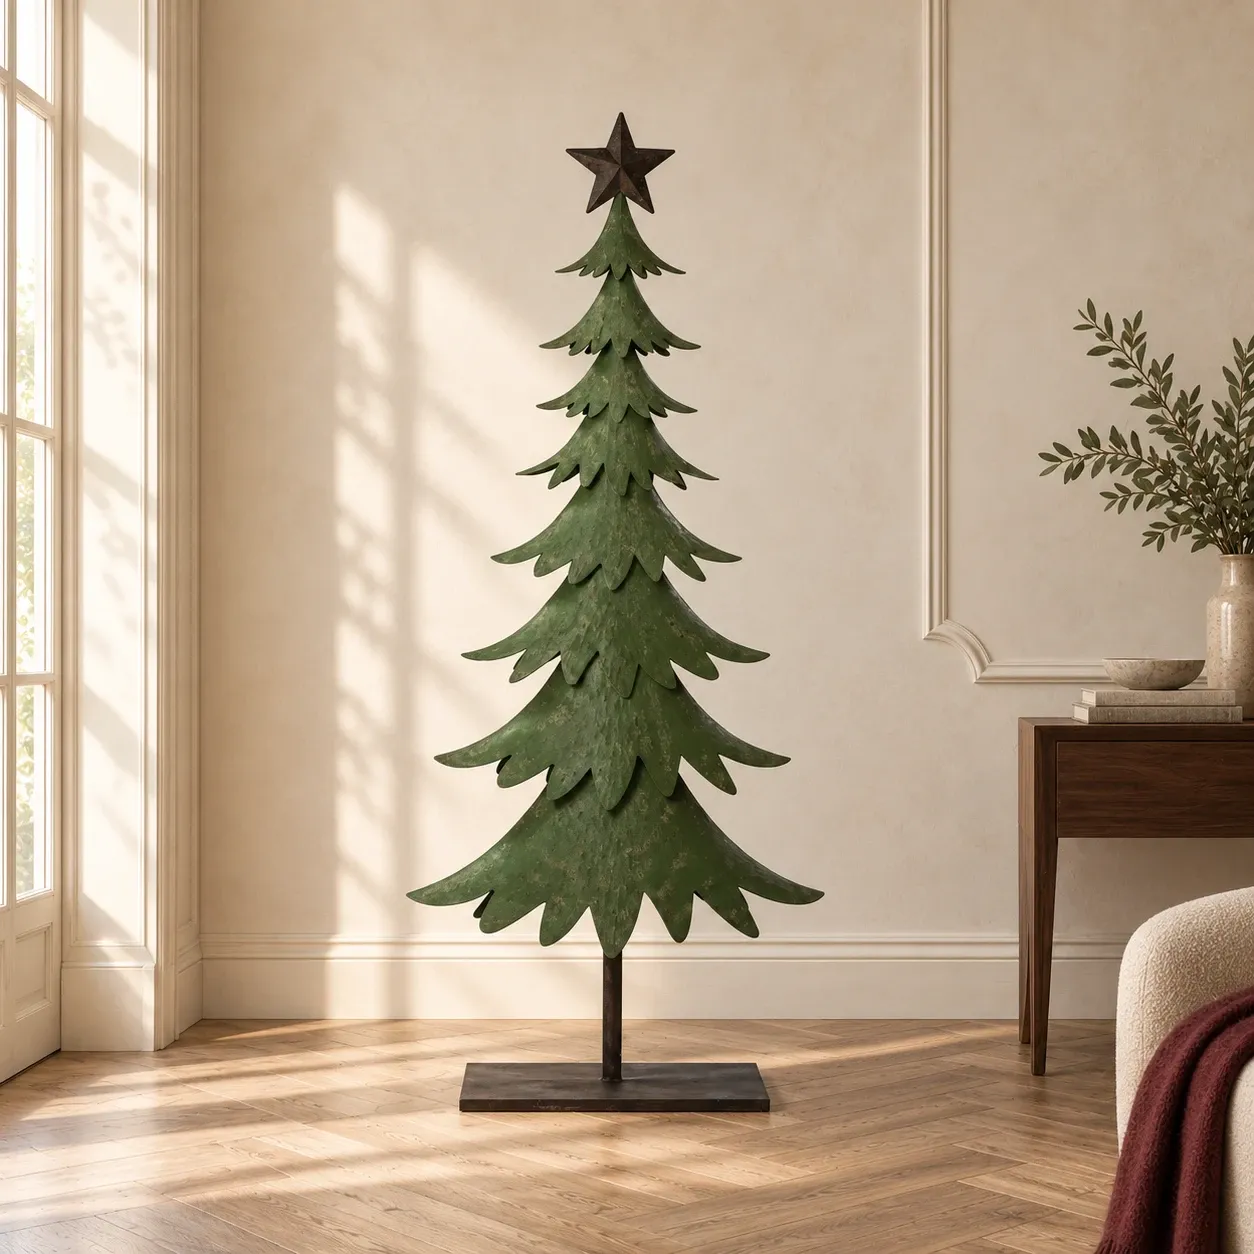
- Distressed metal tree sculpture, 40–48 inches: $120–$260
- Dark wood console table at comparable scale: $180–$450
- Decorative objects (books, vessel, greenery): $30–$70
- Dark metal topper star: usually included
Total: roughly $330 to $780 if you are starting from an empty corner.
Budget alternative: the same silhouette in black wire or matte-black painted dowel runs $35 to $60, and most people already own a console.
Metal silhouettes need air around them, and that is a measurement rather than a feeling. Leave at least 12 inches of empty wall on both sides, and keep the tree height within two-thirds of the console beneath it — taller and it starts to look like a coat rack. On a pale sunlit wall, place the piece where light rakes across it instead of hitting it flat. The shadow is half the sculpture.
16. Unfinished Pallet Frames Built as a Batch
Building several at once is far faster than building them one by one — but only if you sort your material first.
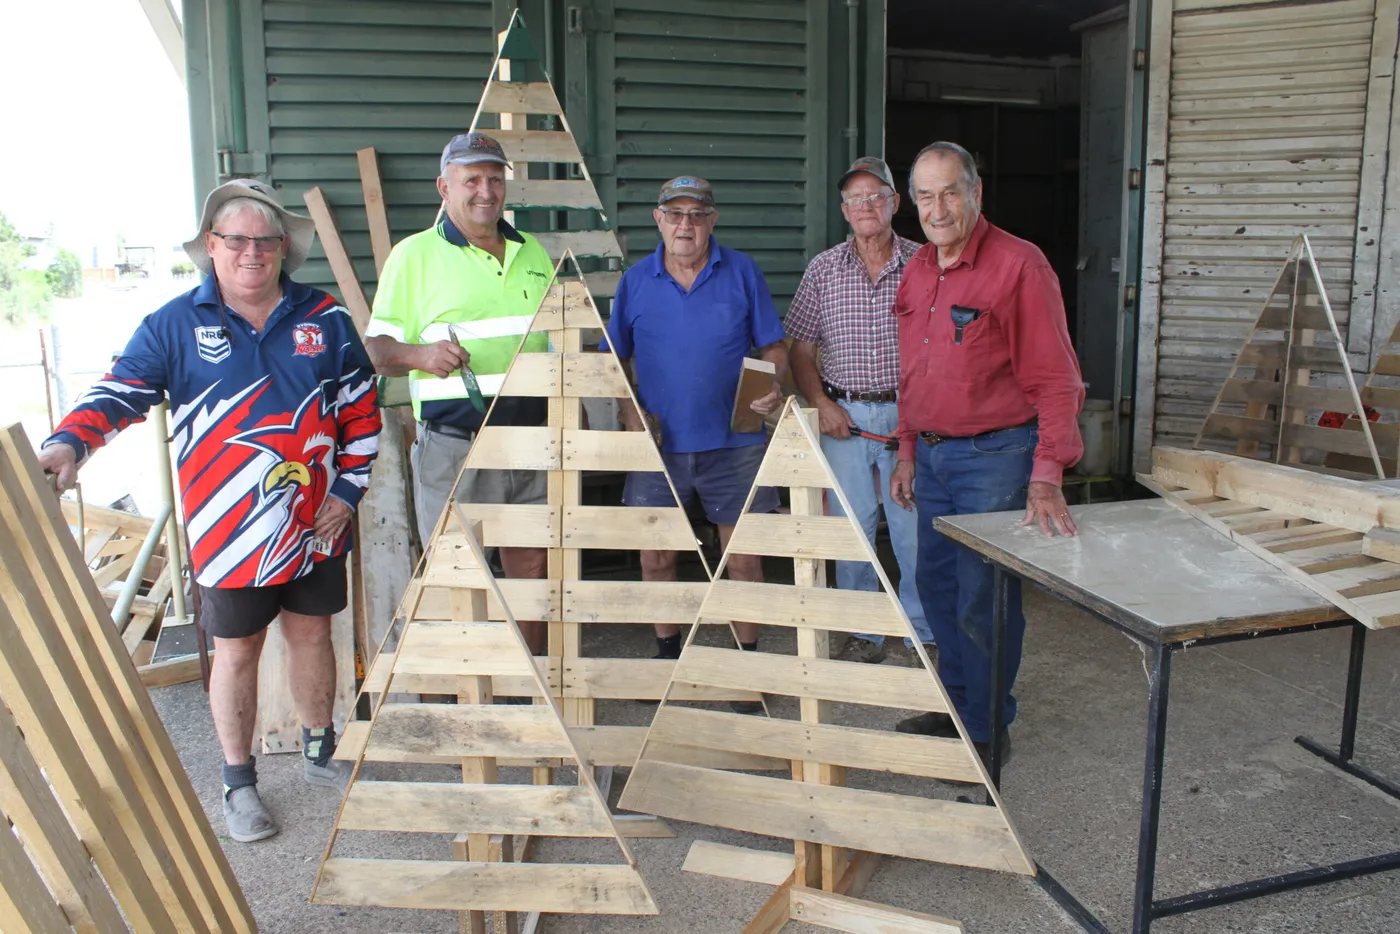
- Break down every pallet and pull all nails before making a single cut.
- Sort planks by thickness; mixing half-inch and three-quarter-inch stock makes wobbly frames.
- Cut all slats to length in one pass and label them by row.
- Set a stop block on your saw so every piece matches.
- Decide the finish before assembly — painting an assembled frame is miserable.
The batch method, in order.
- Build one frame completely as your template.
- Use it to set your stop blocks and jigs.
- Cut every slat for every frame in the same session.
- Assemble in a chain — attach row one on all frames, then row two, and so on.
- Sand and finish the whole batch outdoors in one go.
Roughly four hours for six frames once you are set up, versus three hours for a single one.
17. Blue-Grey Pallet Tree With a Gnome at the Base
Painted wood on a deck is a moisture problem waiting to happen. The bottom plank sits in snowmelt and splashback all winter, so seal the base and stand the piece on two small blocks to lift the raw end grain off the boards. The gnome beard and hat will fade faster than anything else in the display — a budget dollar-store version is honestly the right call, because you will want to replace it in two seasons anyway. Fresh pine branches need water or they drop needles within a week.
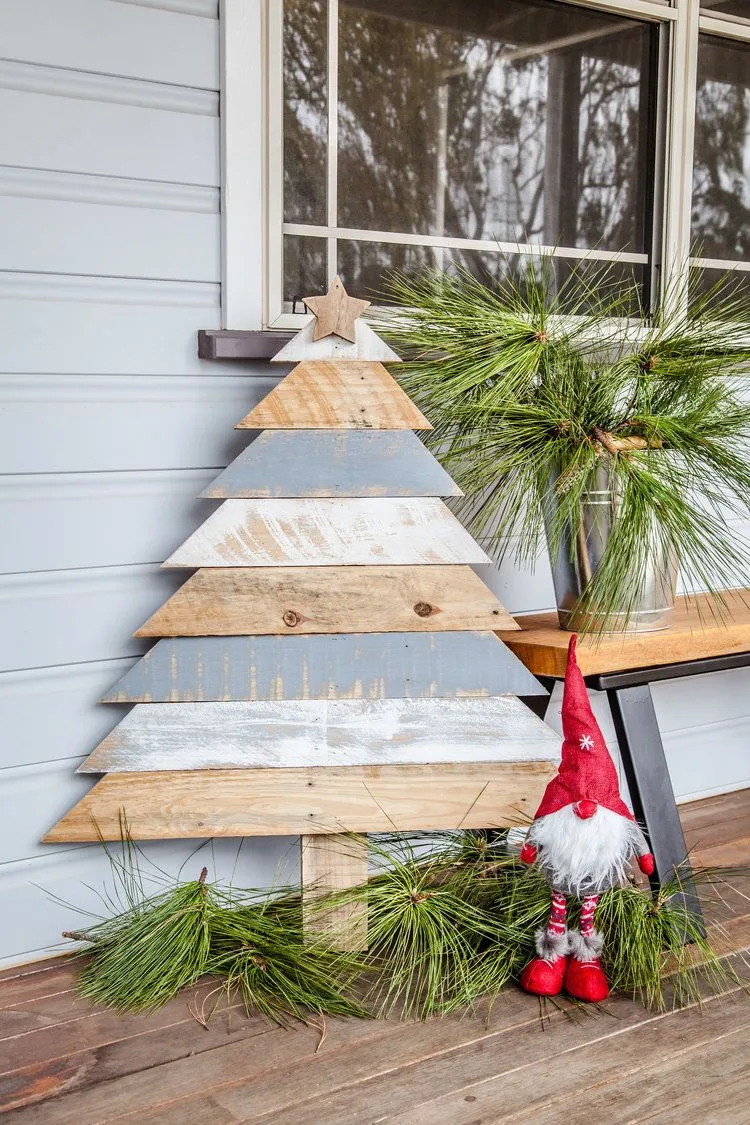
Everything here is buyable for under $50. Sample pot of light blue exterior paint, $5. Distressed white is whatever is already in your garage thinned with water. Small star topper, $4 from a craft store. Gnome, $8 to $15 depending on size. Fresh pine branches free if you have a tree or a neighbour who does, otherwise $12 at a garden centre. Call it the outdoor, high-charm cousin of Idea #20.
18. Dark Green Slat Tree on a Chunky Brown Base
Roughly 75 percent dark forest green, 20 percent dark brown, 5 percent white punctuation. It is a very tight palette, and that is why this simple build feels more considered than most pallet trees. The brown lives almost entirely in the base, which acts as a visual full stop under all that green. Want it lighter? Drop the green to a sage and the base to a warm oak — same ratio, softer result. Want it moodier? Go near-black green with an espresso base.
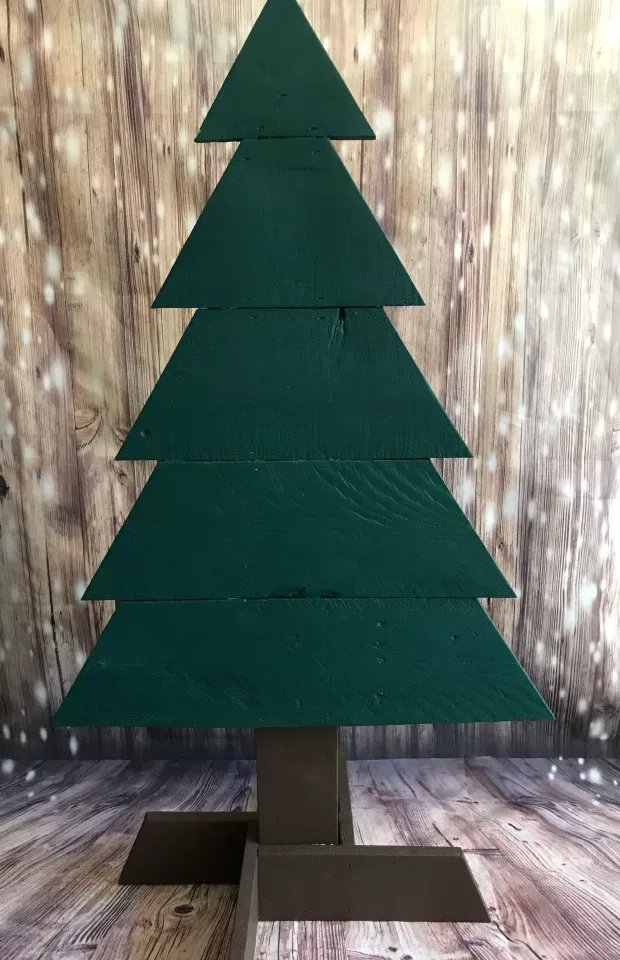
The proportions here are deliberately squat — a wide base and a shallow taper, which reads as sturdy rather than festive. That works beautifully on a sideboard, a hearth, or a covered porch step. It is much less successful in a tall narrow hallway, where a low wide silhouette gets lost at ankle height. On a two-foot-wide console, 30 to 36 inches tall is close to ideal. On a ten-foot wall, you would want three times that size or not at all.
19. Marbled Green Tree Sign With Bright Red Lettering
Marbling on a flat shape is easier than it looks if you use the dirty-pour method: mix emerald and lime acrylic in separate cups, add a few drops of pouring medium, then tip them onto the board and tilt instead of brushing. Tilt fast — slow tilting makes mud. Once dry, mount the raised red letters with wood glue and a thin bead of clear silicone along the edges to stop them lifting in humidity. The finish takes about 90 minutes of drying between coats.

Dimensional lettering on wood signs has been rising steadily since about 2023, and 2026 is the year it moved from craft fair to living room. What changed is the finish: marbled and poured backgrounds replaced flat chalk paint, so a sign now reads as art rather than a seasonal prop. The dark stained plank backdrop is the same instinct — high contrast, gallery-style presentation. It will stick around, because you can change colours every year without rebuilding anything.
20. Wall-Mounted White Pallet Tree With Paper Gifts Below
The wall version is the most affordable of the full-size builds.
- White-painted plank tree, 48–60 inches: $25–$60 in materials
- Warm white string lights: $10–$18
- Small red and white ornaments, 20–30 pieces: $12–$25
- Rustic star topper: $6–$15
- Kraft paper and red ribbon for gifts: $10–$20
Total: roughly $65 to $140.
Budget alternative: thrift the ornaments in a single bag for $5 and use plain twine instead of ribbon. That lands around $45.
A wall tree means no floor footprint and no watering, but it does mean weight on your drywall. A 60-inch plank build runs 15 to 25 pounds before ornaments, so find two studs or use toggle bolts rated for 50 pounds each. And remember, there are no branches to hide the cord — run it down the back of the trunk plank to the outlet before you hang a single ornament.
21. Weathered Blue-Green Planks on a Central Trunk
The visible trunk. Most pallet trees hide their structure on the back — here it is out front, a plain vertical board that the planks are obviously nailed onto. That honesty is the entire design. It also changes the proportions: the tree gets a spine, the planks read as branches rather than a solid mass, and the wood shavings scattered at the base suggest it was just built. Remove the trunk and you are back to a generic triangle.
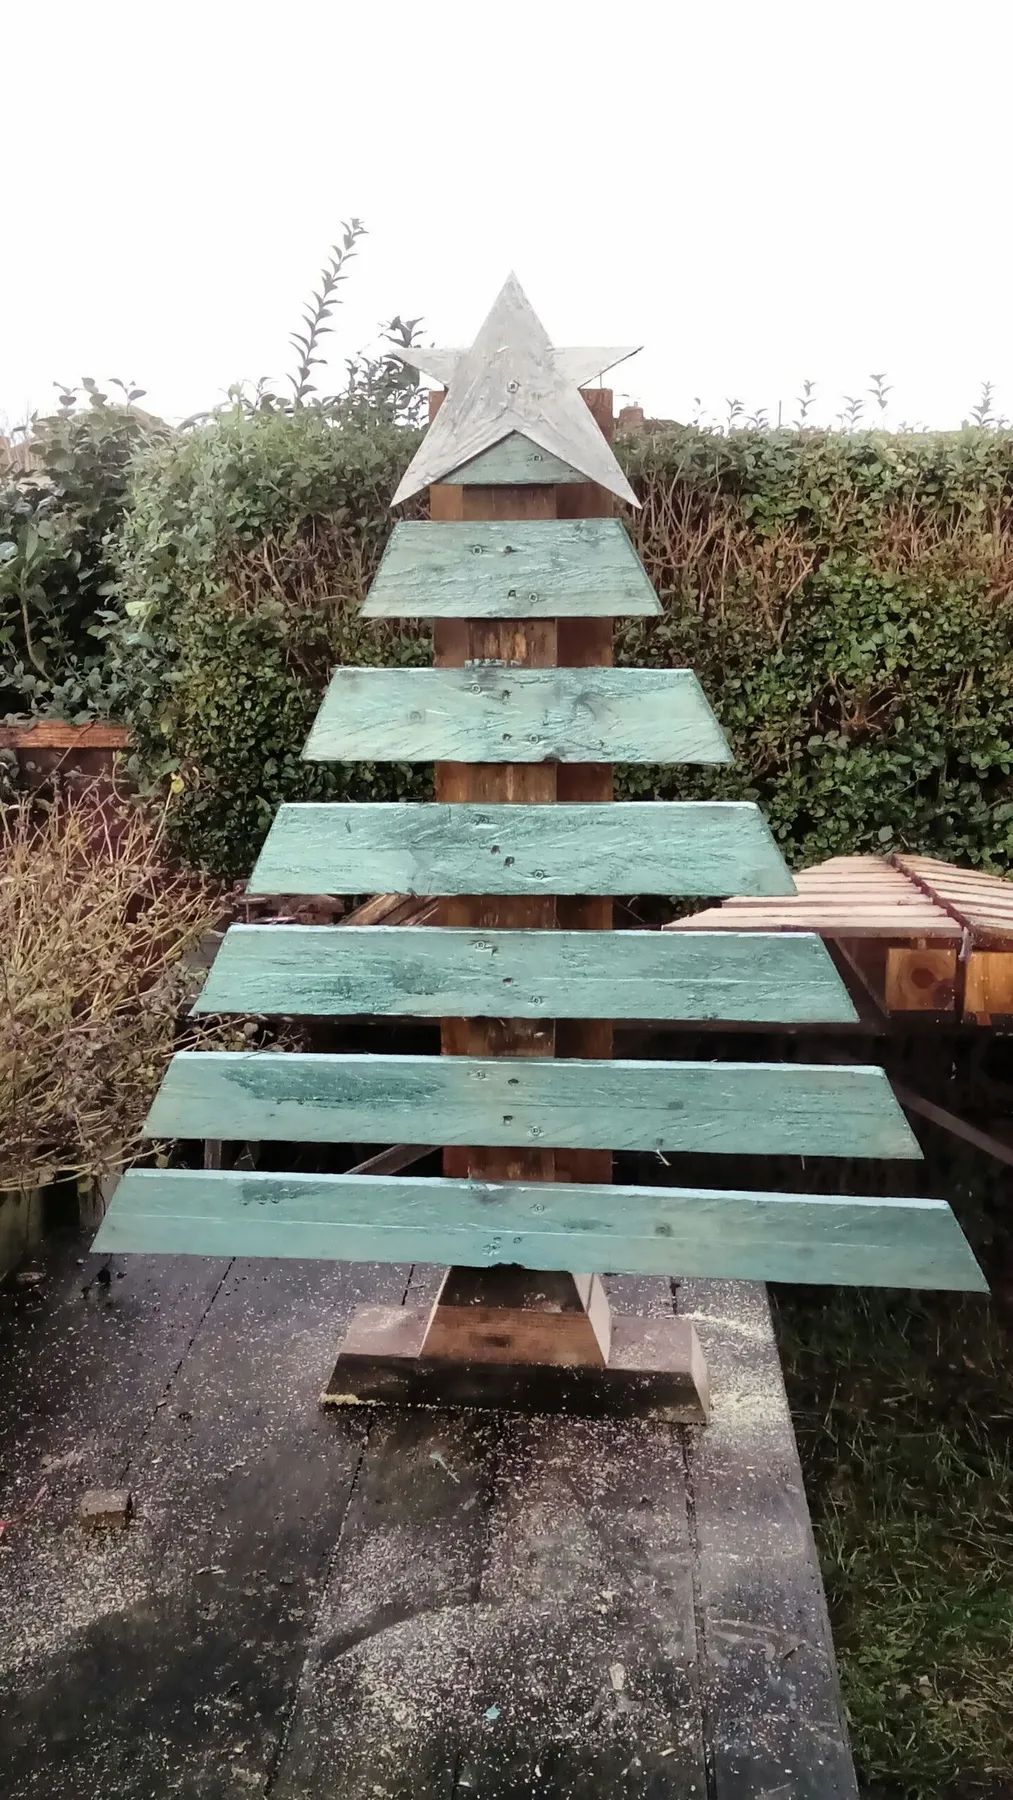
Three things to sort before you cut anything.
- Choose your trunk board first — a straight 1×3 with few knots, since every inch of it stays visible.
- Cut the three longest planks, lay them out, and check that the taper reads correctly before cutting the rest.
- Decide the base location now; a square wooden base sitting on carpet needs a thin board underneath or it will lean.
- Test your paint on an offcut — greenish-blue goes grey fast over orange-toned wood.
22. Distressed Wood Block Snowmen With Fabric Scarves
Block snowmen are a two-evening project.
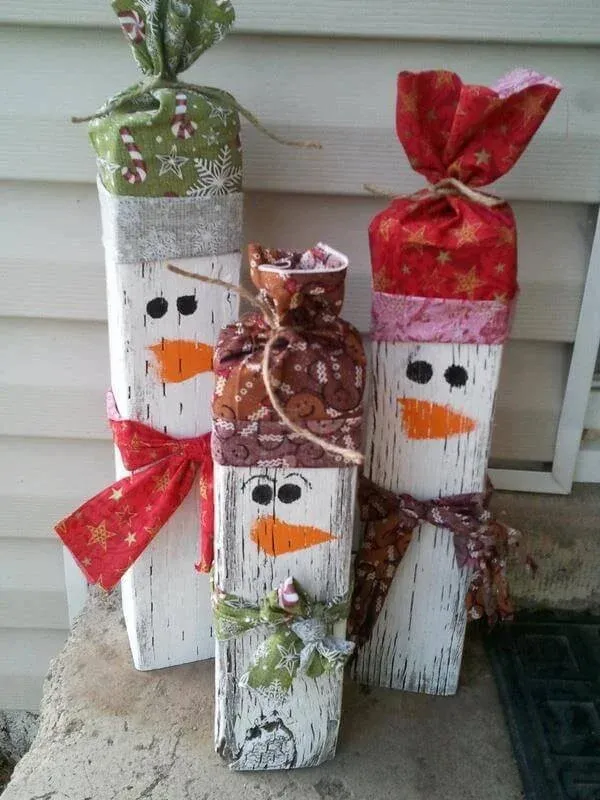
- Cut 2×4 offcuts into three heights: 7, 5½, and 4 inches.
- Sand the edges, paint white, then wipe the edges back with a damp rag for a distressed look.
- Dot the eyes with the handle of a small brush and paint the carrot nose with a fine liner.
- Cut fabric strips 2 inches wide and knot them at the back for scarves.
- Gather a fabric square into a hat shape and tie it with twine.
About two hours, under $12 for all three.
The entire point of these is that they cost almost nothing. Fabric scraps come from a shirt or a curtain hem you were about to throw out. Paint is leftover trim paint from your garage. The wood is one 2×4 offcut. If you do not own a saw, ask for pre-cut blocks at a hardware store — they will usually cut three pieces for free. For a smaller-scale take on the same handmade wood approach, look at Idea #25.
23. Six Stacked Planks, Each Hand-Painted Differently
Do the base coats on all six planks first, one colour per plank, and let them cure a full 24 hours before adding patterns. Taping stripes on tacky paint is how you get pulled edges. For crisp snowflakes, use a stencil with spray adhesive on the back rather than a brush — you get a clean line in one pass. Keep each plank to one idea: a star, or stripes, or dots. Two patterns on one plank and the whole stack starts to look noisy.
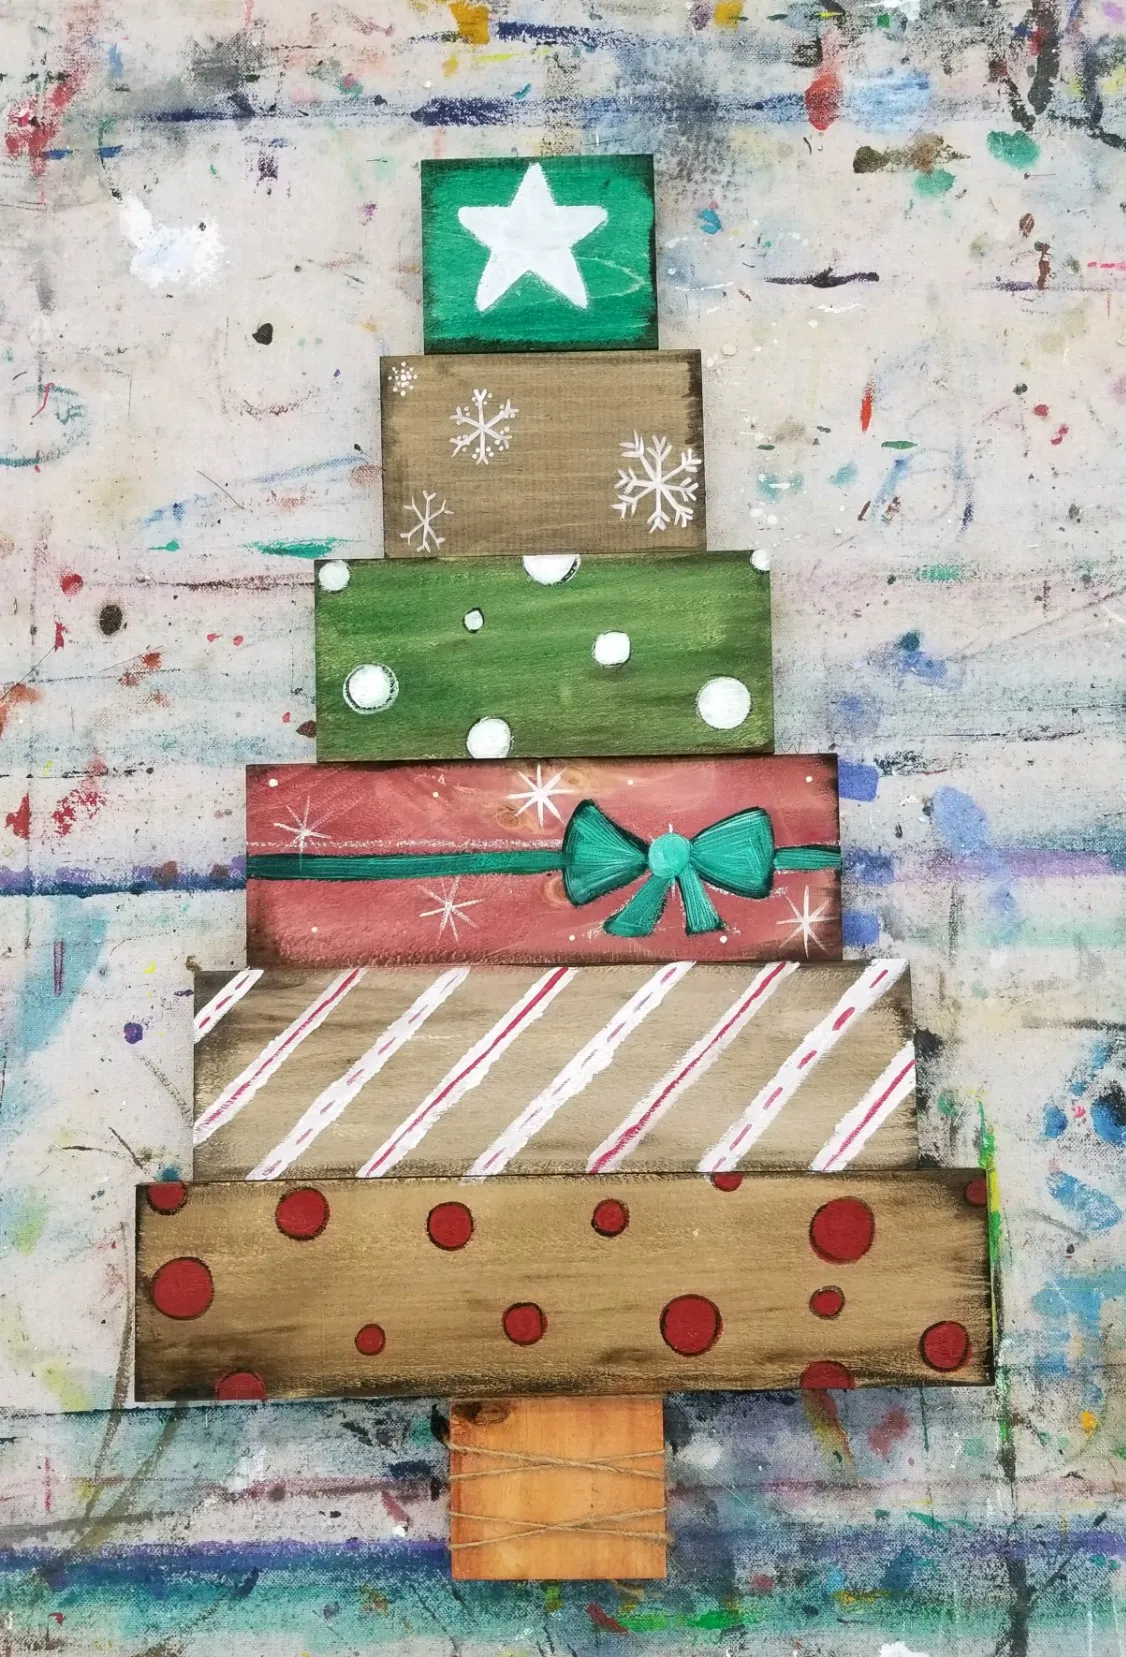
It is the same principle as a charm bracelet: repetition gives you structure, variation gives you interest. Six planks of identical width create a strong horizontal rhythm, and the fact that every single one is painted differently stops your eye from settling. The twine-wrapped block at the base is doing quiet work too — it signals handmade without a single word. This is what playful looks like when it has actually been edited.
24. Distressed Plank Tree With a Rope-Outline Red Star
The rope is the clever bit, and it costs about $4. A star topper outlined in thin jute or cotton rope glued around the edge reads as far more expensive than a plain painted star, and it takes ten minutes. Everything else here comes from leftovers: muted green, light blue, and speckled off-white from sample pots, planks from a pallet. Realistically under $25 for the whole piece, and the little red bird silhouette is a $2 craft-store find.
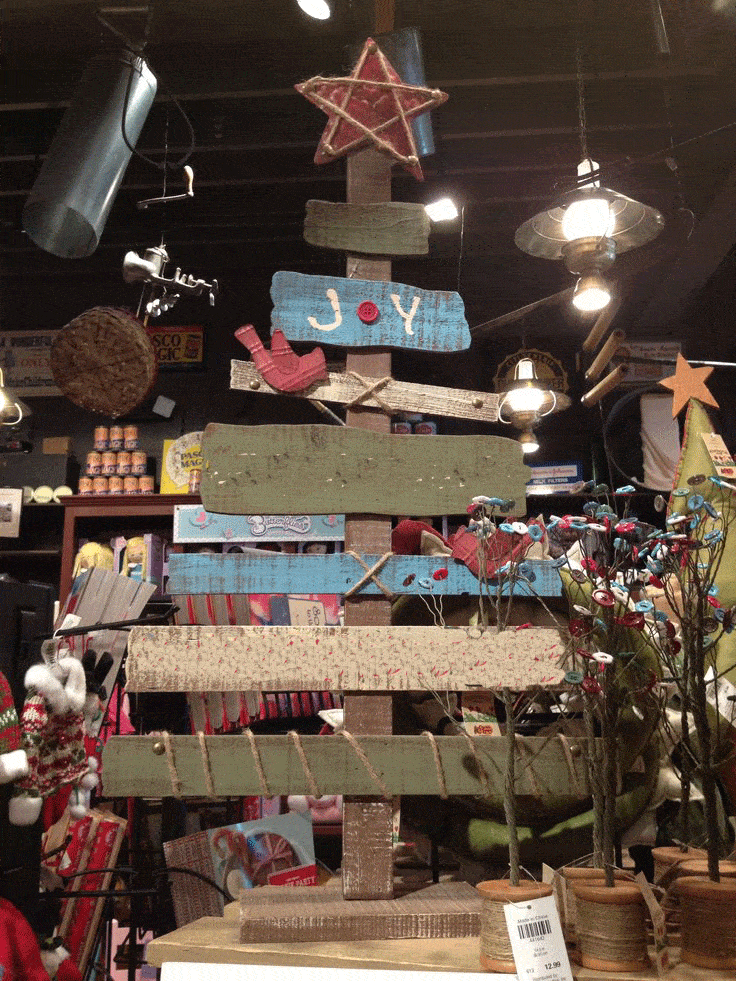
Call it 55 percent distressed light blue, 30 percent muted green, 10 percent speckled off-white, and 5 percent red accents. The red never covers a full plank — it appears as the star, the lettering, and the bird, which is why it feels like punctuation rather than a colour scheme. Swap red for mustard and the piece turns autumn-rustic. Swap it for charcoal and it turns coastal. The percentages are the recipe; the accent is the seasoning.
25. Stacked Wood Disc Trees With Amber Bead Toppers
The amber bead. Each tree is a stack of wood discs, which is charming but common — the faceted amber bead with its tiny gold loop is what makes people pick one up. It catches light the way a glass ornament does, and against raw wood grain it reads as jewellery rather than craft supply. Take it away and you have a nice wooden stacking toy. Keep it and you have something people ask where you bought.
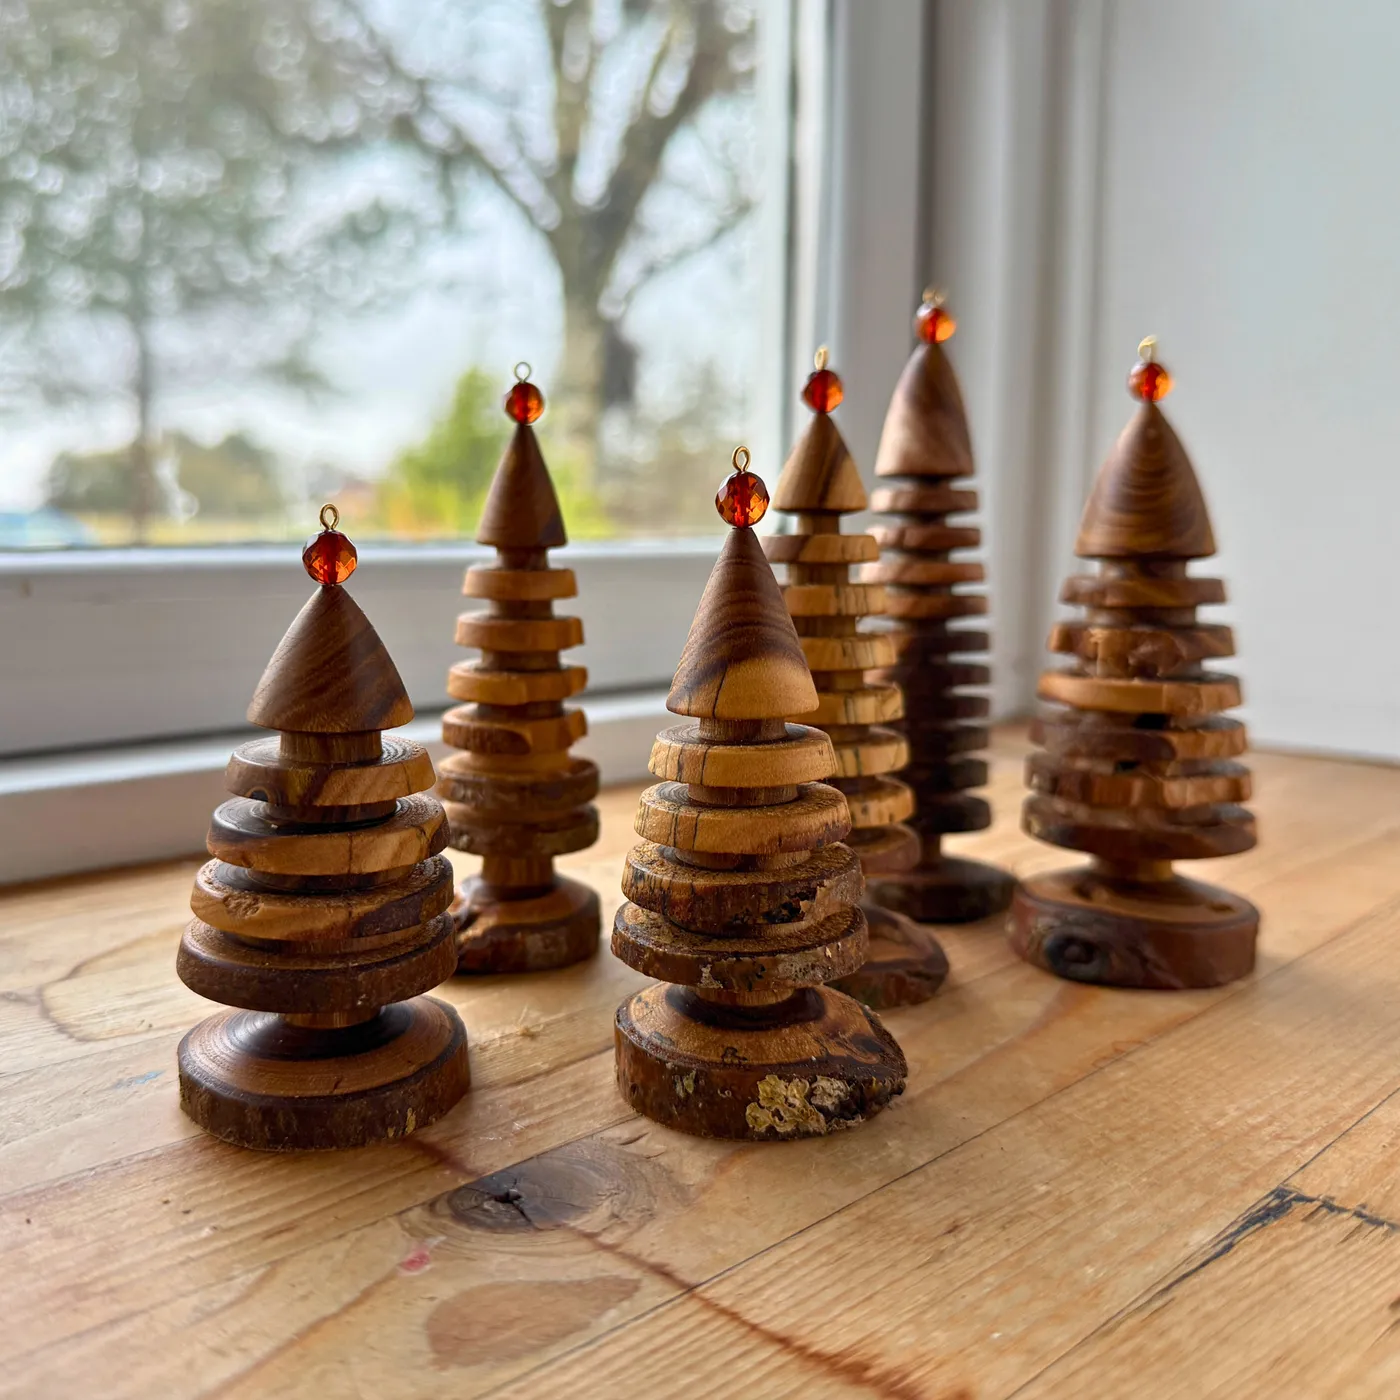
Raw wood shows everything — fingerprints, water rings, the fine dust film that settles into open grain. A wipe with a dry microfibre cloth every couple of weeks is genuinely enough. If you want to stop the discs darkening unevenly, one coat of clear wax a year does it. Skip oil-based finishes; they amber over time and fight the bead. These are also the least kid-friendly items here — small stacked pieces tip easily and the beads are a choking hazard.
26. Herringbone Plank Tree With a White-and-Green Wash
Herringbone looks complicated and is not, as long as the angles stay consistent.
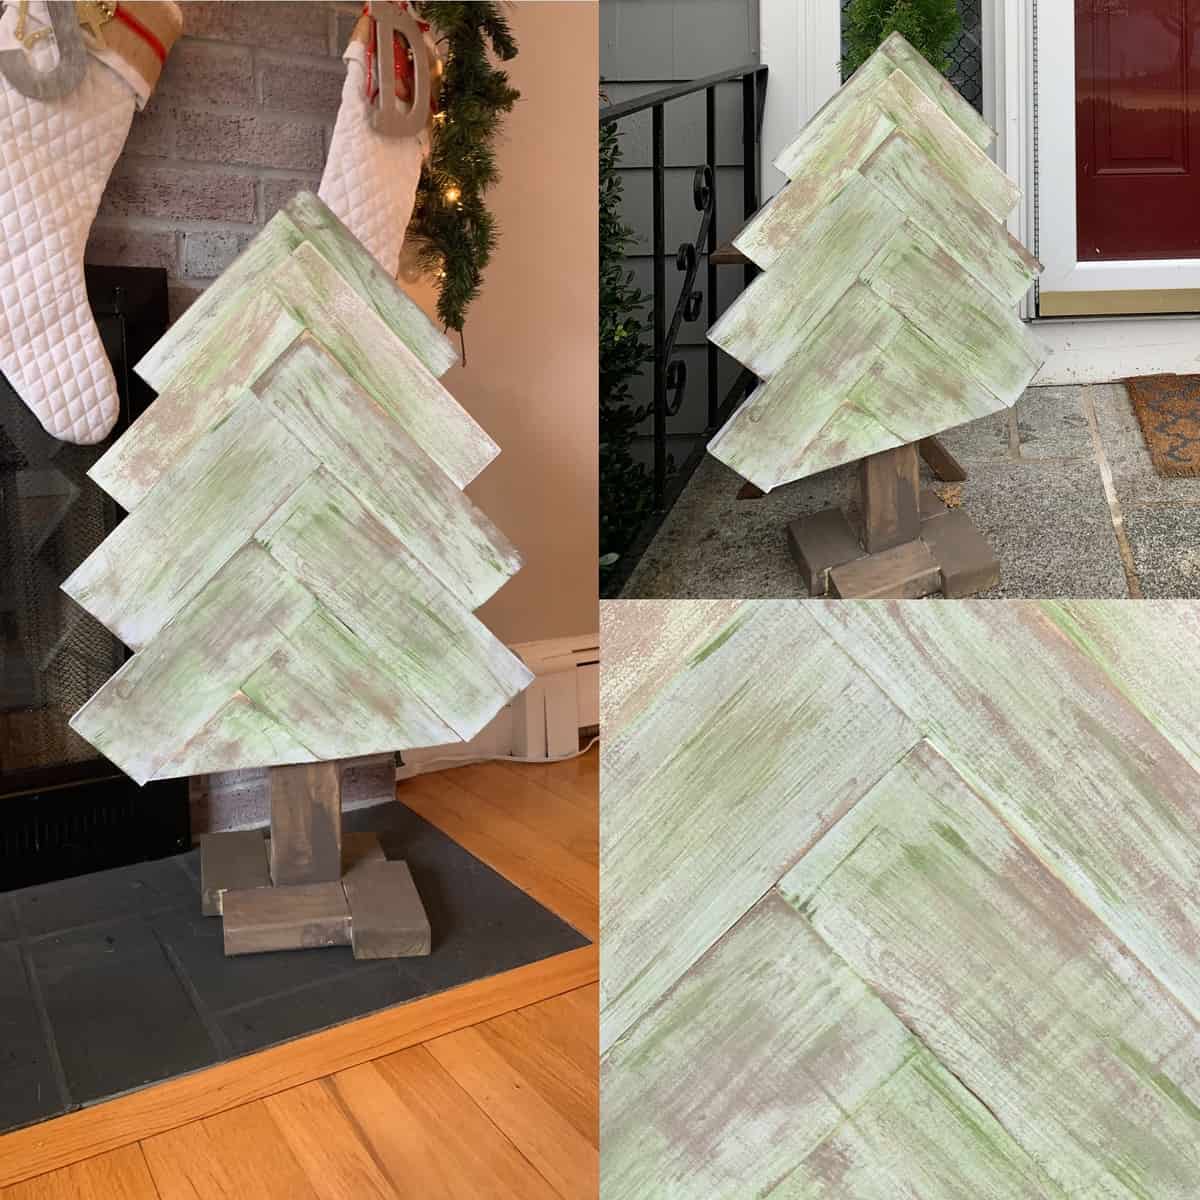
- Cut all planks to one length — 6 inches works well for a 24-inch tree.
- Set your mitre saw to 45 degrees and cut a batch of lefts and rights.
- Lay the pattern out dry on a flat surface before gluing anything.
- Glue and nail row by row onto plywood cut to the tree shape.
- Trim the outer edges with a jigsaw once the glue is set.
- Wash with watered-down white and light green, then wipe back.
Around three hours, $30 to $40 in materials.
Herringbone reads best at 20 to 30 inches tall — much bigger and the individual planks get lost, much smaller and the pattern turns to mush. It wants a shelf or mantel with at least 6 inches of clear space behind it, since the plywood backing makes the piece about an inch deep. On a standard six-foot console, two of these side by side is plenty. Fewer, bigger objects always beat a crowded shelf.
27. Modern Slat Tree on a Round Grey Felt Mat
Three things are happening. The slat spacing is wider than on most pallet builds, which makes the piece feel airy rather than heavy. The round grey felt mat gives it a defined footprint, so it reads as an object placed with intent instead of a thing propped against glass. And beside that big window, light passes through the gaps and lands on the floor — the tree casts its own second silhouette. Think of it as the quieter sibling of Idea #2.
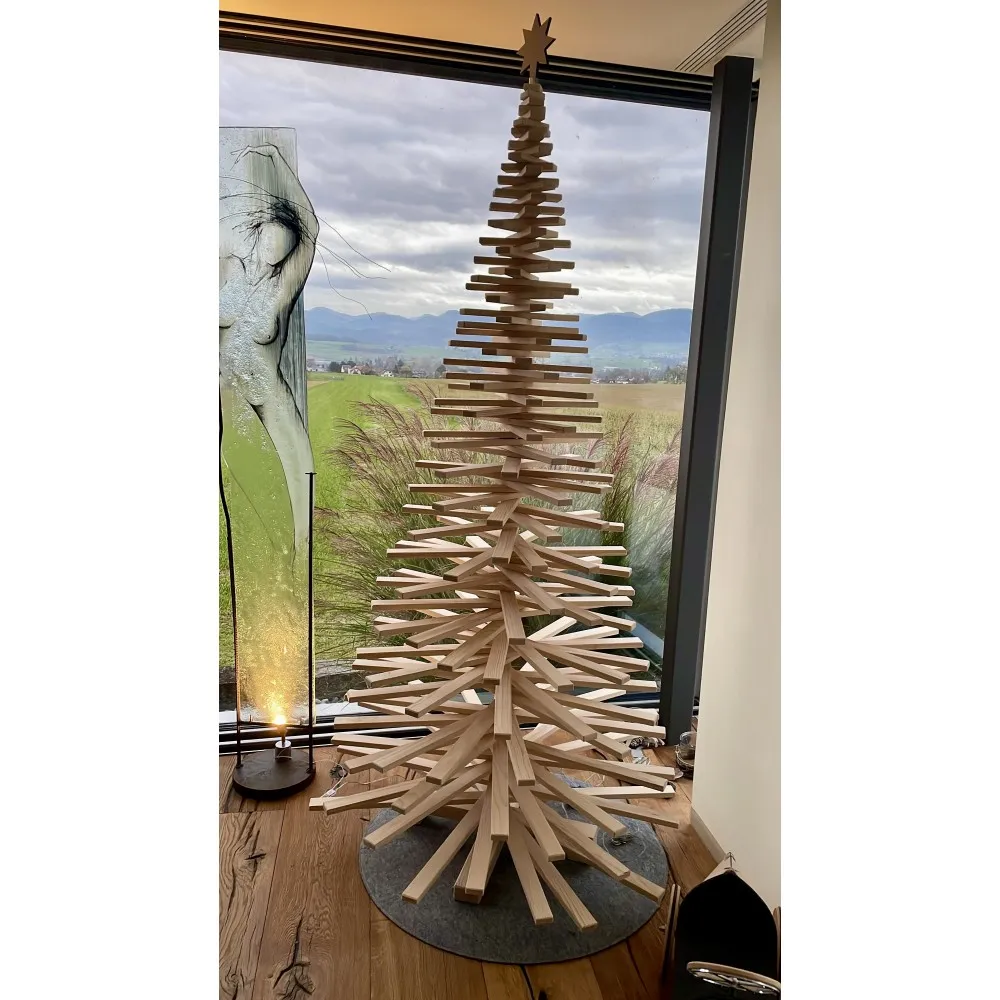
Modest materials, big effect.
- Light pine slats, roughly 40 linear feet: $30–$55
- Central post and cross base: $10–$18
- Wooden star topper: $8–$20
- Round grey felt mat, 24–30 inches: $15–$35
- Warm white string lights (optional here): $10–$18
Total: roughly $73 to $146.
Budget alternative: pallet wood instead of new pine, a grey rug sample as the mat, and no lights at all. Under $40.
28. Geometric Wood Tree With a White Ceramic Reindeer
About 50 percent warm brown wood grain, 30 percent olive and white pattern, 15 percent white ceramic, and 5 percent dark grey. That dark grey matters — without those lines inside the geometric pattern, olive and white alone can look washed out. Swap olive for deep rust and the display turns distinctly autumnal. Swap the ceramic reindeer for a matte black one and the whole vignette tightens up considerably.
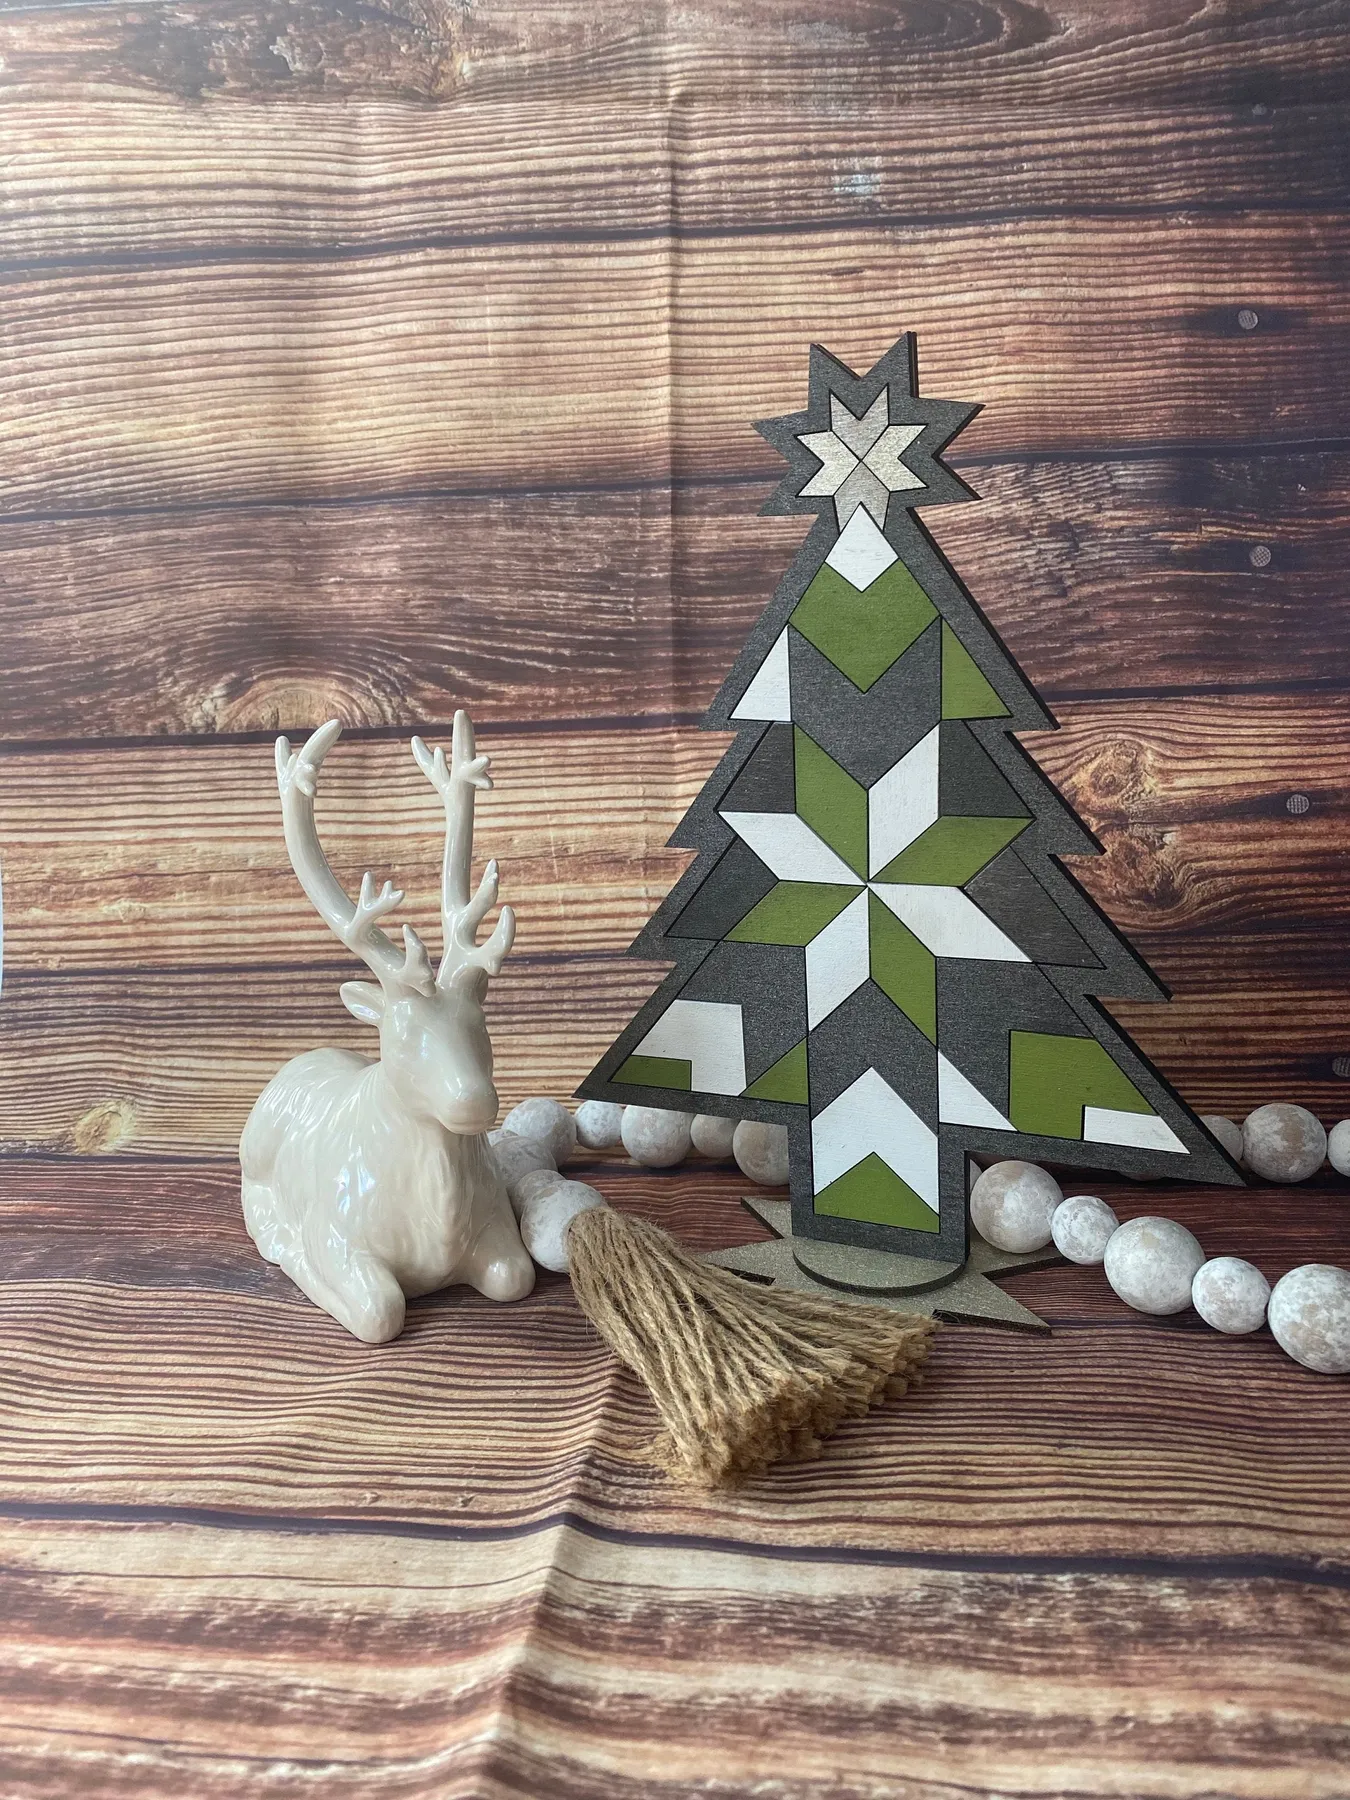
Tape is your friend on geometric patterns, and painter’s tape is the wrong one — it bleeds on raw wood. Use vinyl or automotive masking tape, press the edges down hard with a fingernail, and pull the tape while the paint is still slightly tacky. That last part sounds backwards, but it is what gives you a clean line instead of a chipped one. Work horizontal bands first, let them dry, then rotate the board for the diagonal set.
29. Dark Stained Triangle Tree Glowing on Shag Carpet
Dark stained wood plus warm lights is the most atmospheric look in this whole collection, and it is also the one most likely to disappoint on a bright afternoon. In daylight this silhouette reads as a dark brown triangle; nearly all of its charm shows up after sunset. If your room is bright with south-facing windows, either go with a lighter stain or accept that it is an evening piece and keep the lights on a schedule.
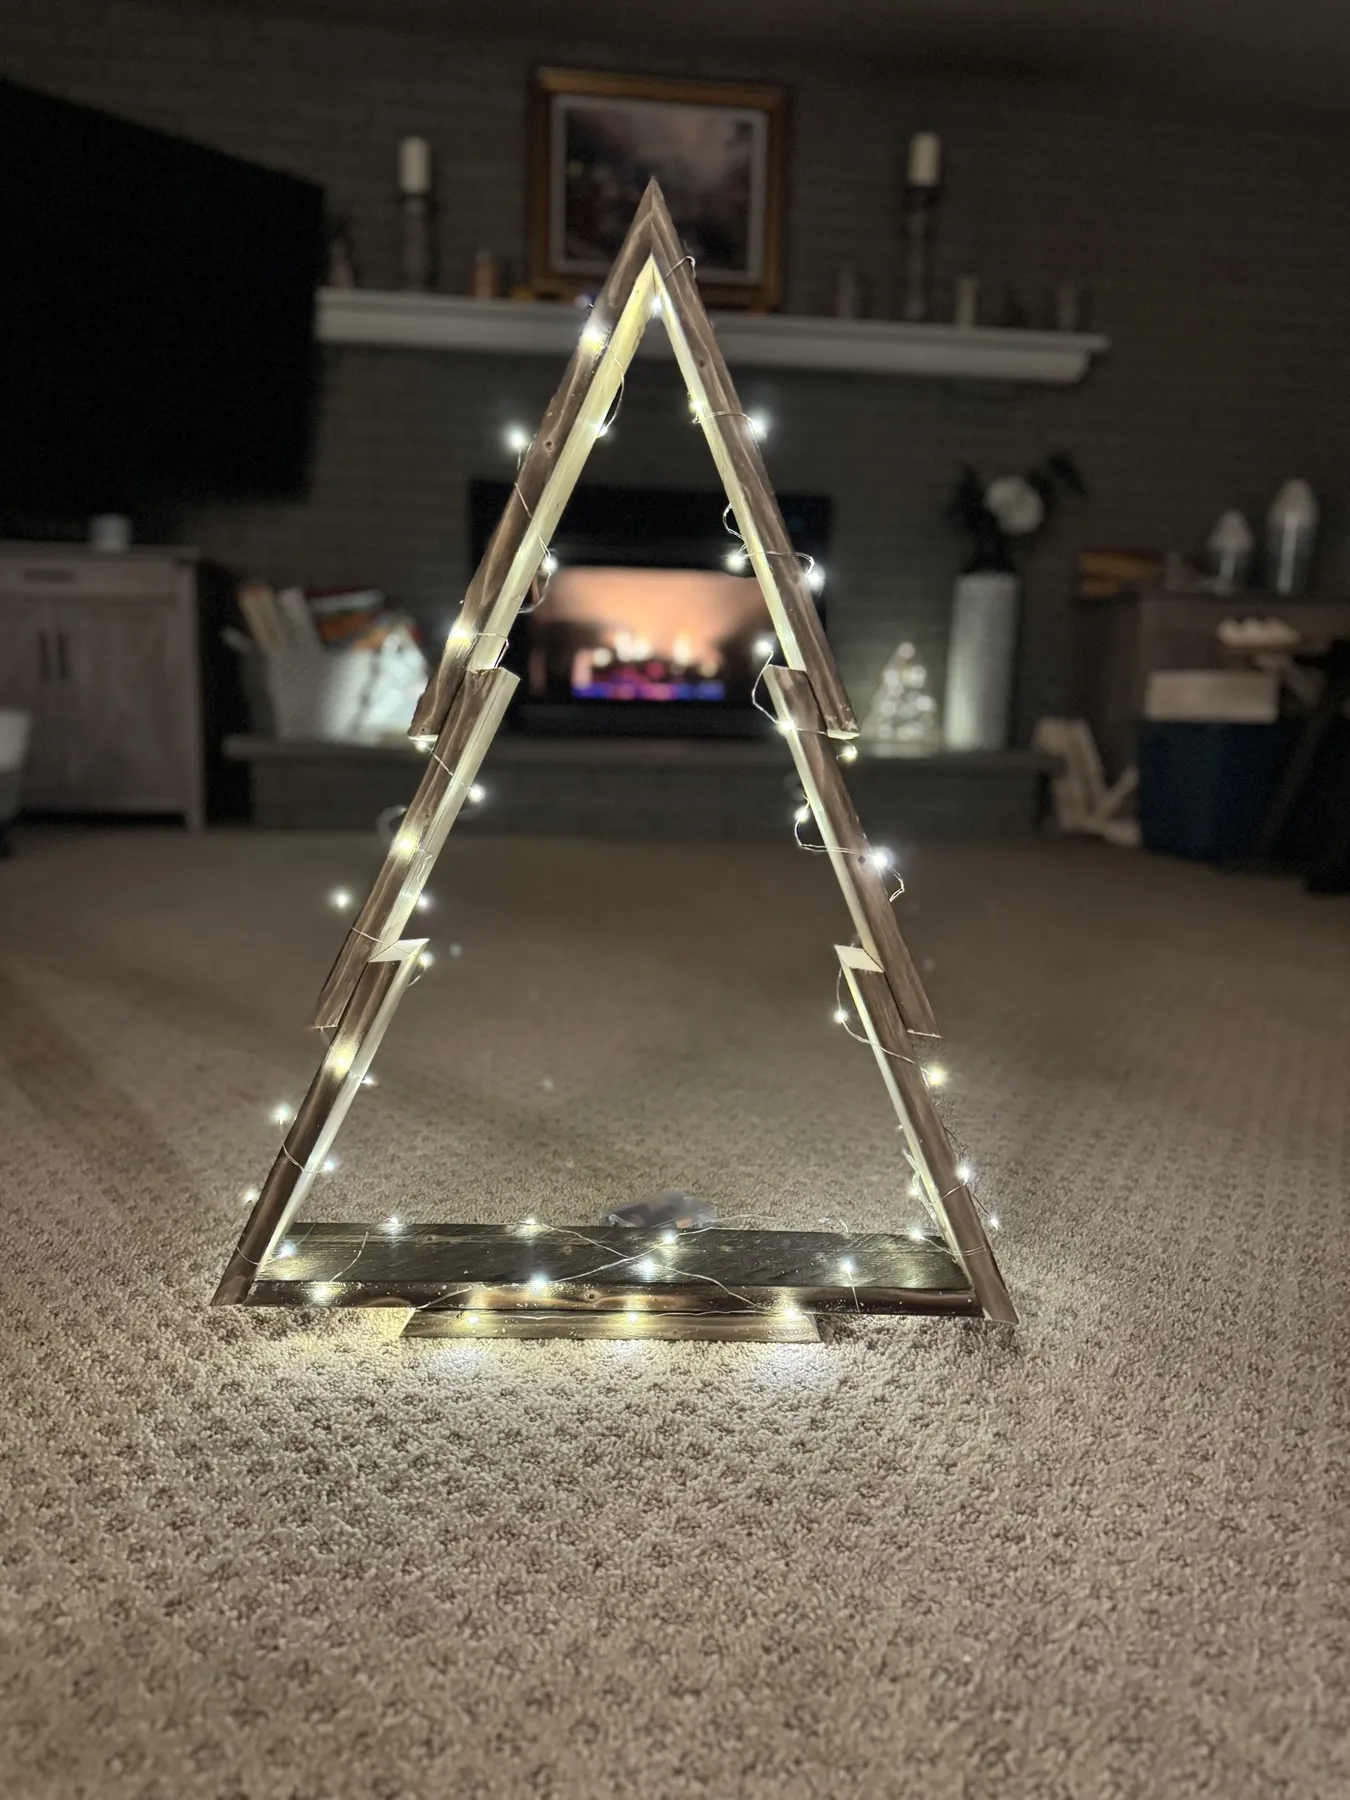
Shag carpet plus a lit wooden frame is a lint-magnet combination, and dark stain shows every dust particle. Vacuum around the base weekly through December rather than trying to dust the planks. Use LED strands — a warm white incandescent against dark stained wood gets genuinely hot, and dry wood is not a surface you want it touching. Expect to replace budget LED strands every third season as individual diodes fail.
Your Pallet Is Already Waiting in the Garage
Every single one of these builds started life as a stack of rough boards somebody was about to throw out, which is a pretty good reminder that the best holiday decor usually comes from a Saturday afternoon rather than a checkout page. Pick one idea, measure twice, and do not stress about getting the taper perfect on the first try — the slightly wonky ones are the ones people ask about. 📌 Pin this guide to your Christmas board now, because next November you will be glad you did.