Most Christmas village displays don’t fail because you stopped loving them — they fail because every house gets parked at the same height and one cool-white bulb sneaks in. We spent serious time browsing Etsy, Target, and Michael’s (plus a few late-night Amazon rabbit holes) to bring you only what’s actually worth your attention this year, and we narrowed it down to 35 village ideas spanning roughly $6 to $450.
Inside you’ll find everything from thrifted kraft-paper cottages to full castle builds, across retro-playful, farmhouse-rustic, elegant white-and-gold, and full fandom styles — with budget and luxury versions compared side by side. In 2026 the shift is toward one big, layered display instead of five small ones, and Pinterest is already full of people building in tiers and hunting vintage ceramic pieces at thrift stores. And stay until the end — we break down the most common mistakes that can ruin these looks.
This post contains affiliate links, which means we may earn a small commission at no extra cost to you. 📌 Save this to Pinterest for later — you’ll want to revisit these ideas.
1. A Tiered Snowy Village Circled by a Moving Train
The tiers do the heavy lifting. Stacking faux snow across a dark brown circular base gives you three heights in a footprint barely two feet wide, so your eye keeps traveling instead of stalling on one rooftop. The red train circling the bottom edge is the payoff — motion low in the frame quietly anchors everything stacked above it. And notice the tallest pines sit at the back: that’s the rule of thirds turned vertical, and it’s why the church spire never gets lost in the crowd.
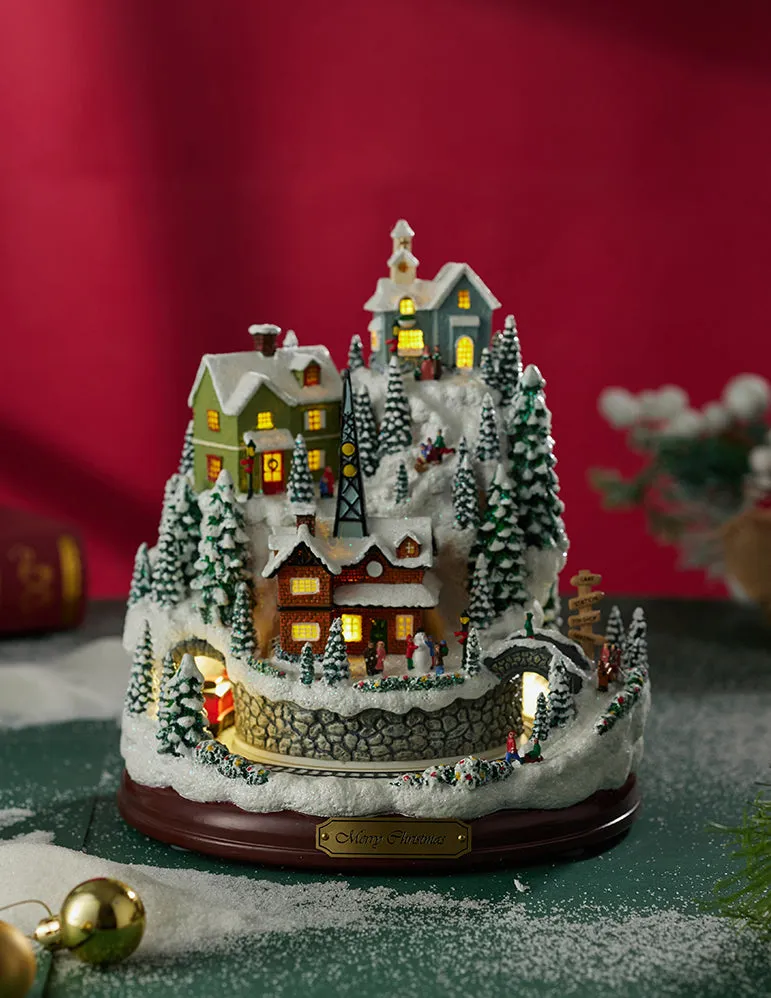
- Round base and foam risers: $25–$60
- Miniature houses and church, 6–9 pieces: $80–$220
- Faux snow, glitter, and pine trees: $20–$45
- Train set with track: $40–$90
- Figures, lampposts, and the Merry Christmas sign: $15–$35
Total: $180–$450. Swap in thrifted village pieces and a discount-store battery train and you land closer to $110.
2. Farmhouse Lantern House with a Red Ceramic Pickup
Build this cluster on a 14-inch wood board and keep the truck’s bumper about 2 inches from the lantern door — close enough that they read as one vignette, far enough that the light doesn’t wash out the truck’s paint. Those tiny wreaths on the black street lamps are 1-inch dollhouse miniatures. Set the lamps at the outer edges of the board and angle them slightly inward, so your eye bounces back to the center instead of drifting off the table.
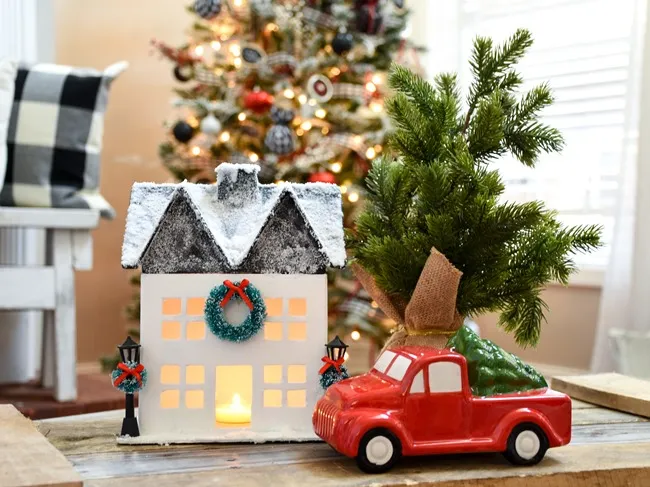
It’s the burlap-wrapped tree riding in the truck bed. Without it, you’ve got a lantern and a toy car sitting near each other. With it, the truck has somewhere to be. That one bundled shape tells a story — tree picked, heading home, snow coming. Wrap a mini bottlebrush in a 4-inch square of burlap, tie it with twine, and an arrangement turns into a scene. About $3.
3. Ceramic Houses on a Sunny Wallpaper Mantel
The formula is 50% white ceramic, 30% warm citrus from those orange, peach, and cream bottle brushes, 15% multicolored string lights, 5% pom-pom pink. The sun-patterned wallpaper is already doing the accent work, so the village itself stays mostly white and lets the wall be loud. Swap the citrus trees for sage and dusty blue and the same layout reads coastal-winter instead of retro-playful — same math, entirely different mood.
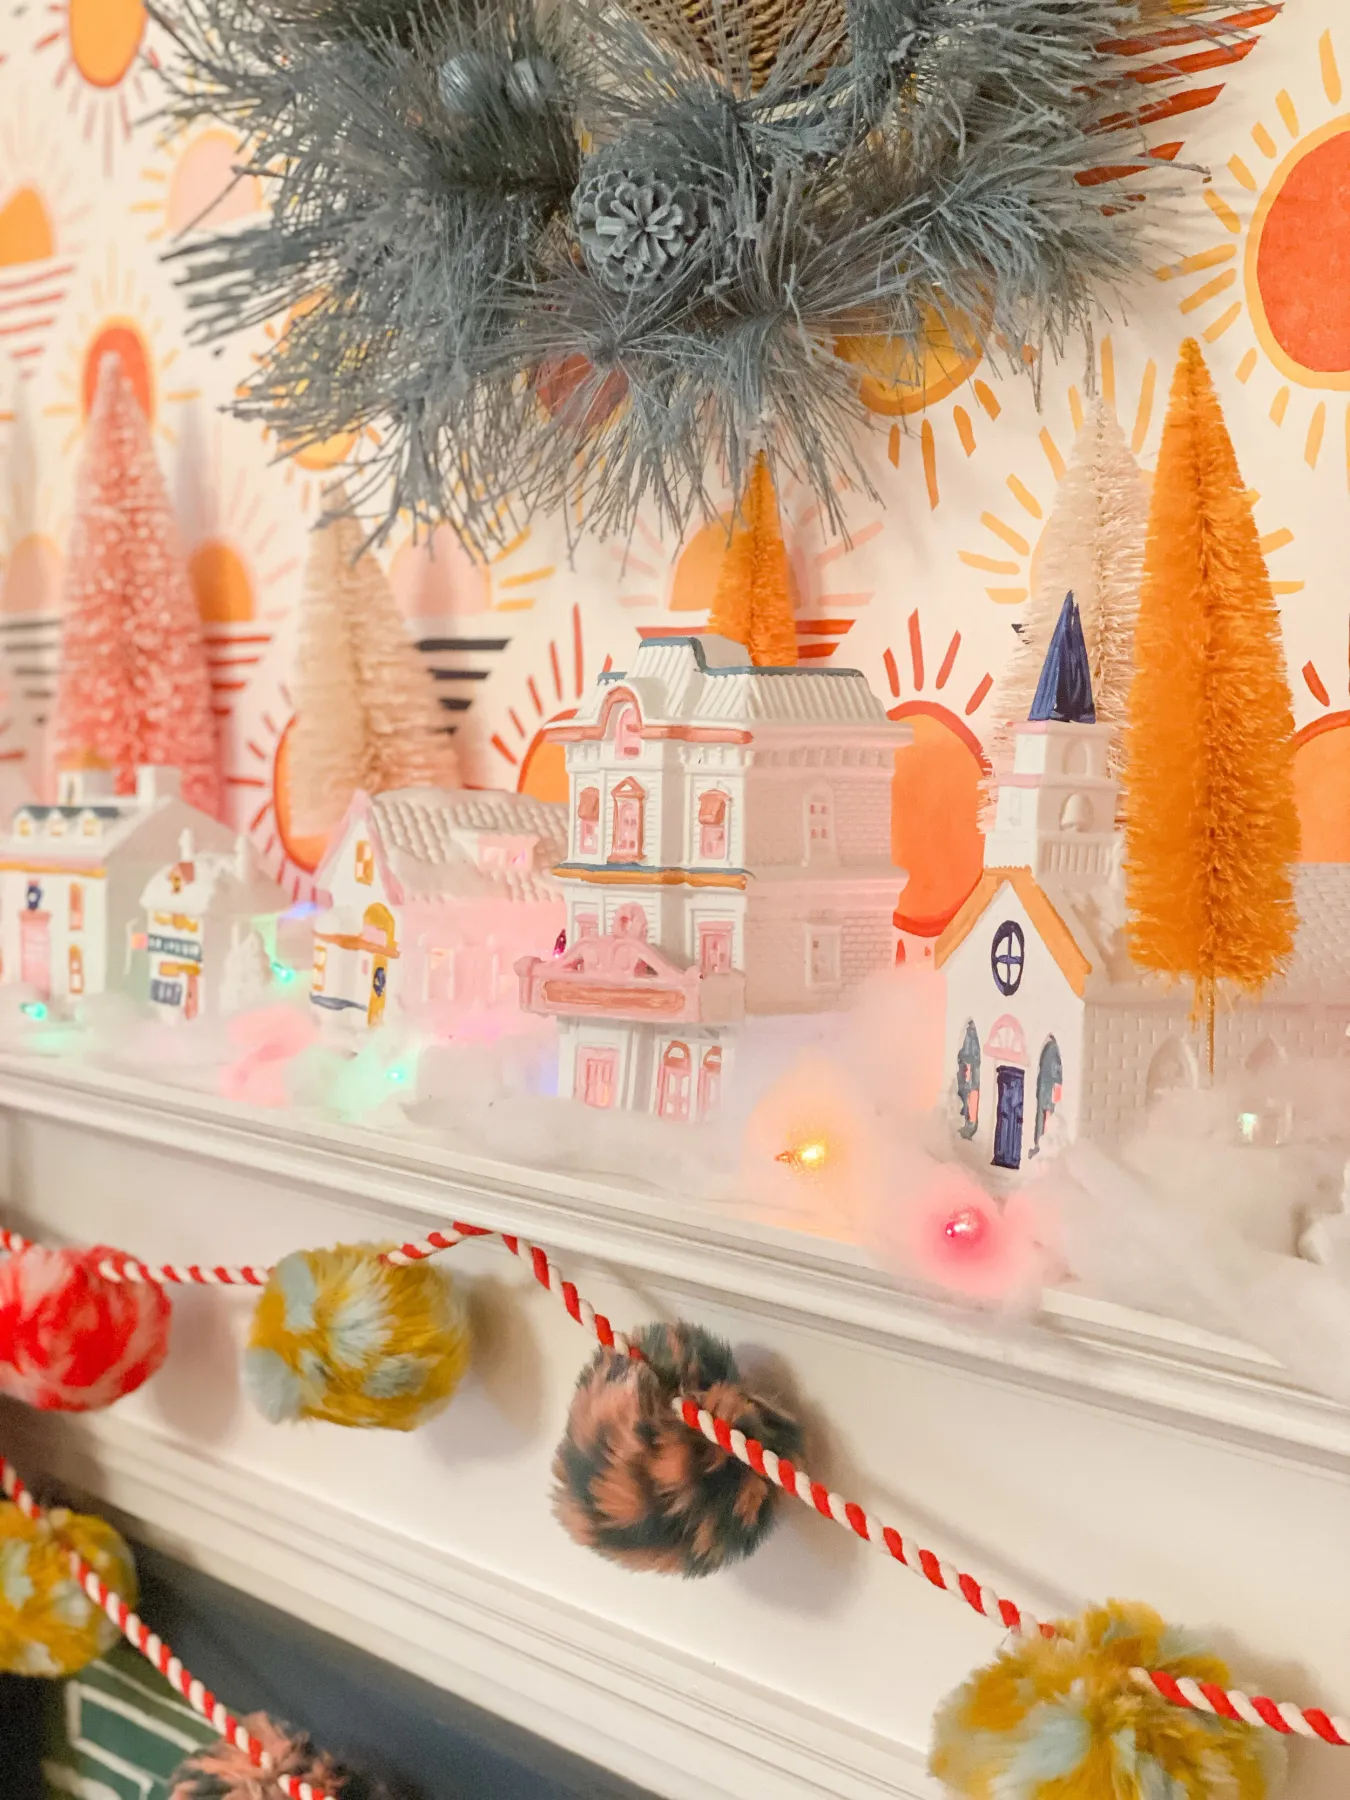
- Measure the mantel and cut cotton rope 12 inches longer than the span.
- Slide 1-inch pom-poms onto the rope through their centers, about 5 inches apart.
- Tie a knot between each pom-pom so nothing slides.
- Drape the frosted blue pine garland first, then lay the rope just below it.
- Tuck both ends behind the ceramic houses.
Roughly 45 minutes and about $18 in supplies.
4. A Full-Wall Village on a Glittery White Base
Plan on a table or sideboard at least 5 feet long and 20 inches deep, with 30-plus inches of clearance behind it for the tree and lights. Ceiling height barely matters here; floor space does. You want about 3 feet of walkway so the village can be seen from more than one angle. Working with something smaller? Idea #11 gets the same snowy feeling into 12 inches of shelf.
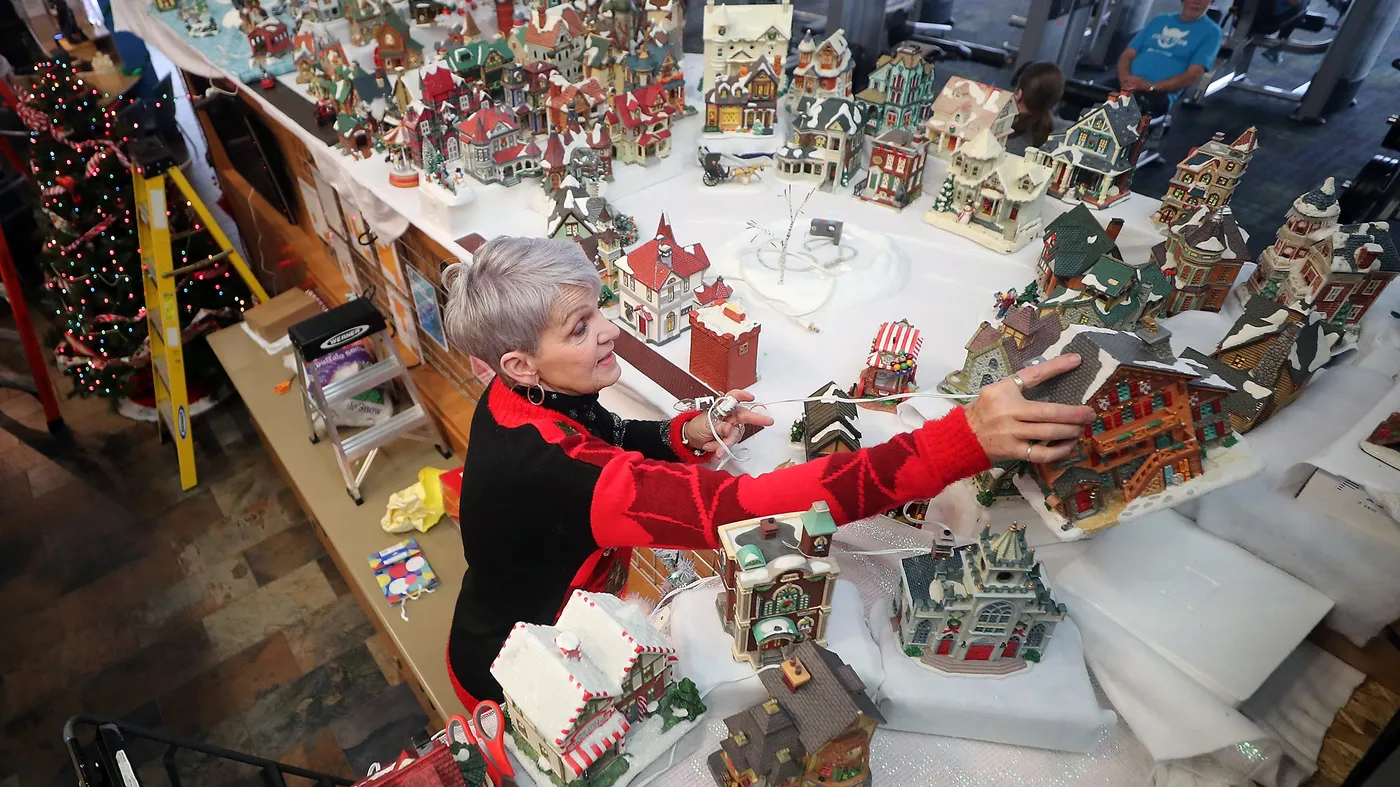
Two things nobody warns you about. Glittery base material travels — you’ll find it in the carpet until March, so put a low tray or mat underneath. And if you’re layering string lights into the snow by hand, check that every bulb is fully seated before you bury it. Digging a dead bulb out of a finished village is a special kind of holiday frustration.
5. Kraft Paper Cottage with a Red Arched Door
- Cut a 7 x 10 inch rectangle of kraft paper and score three fold lines to form a box.
- Fold a separate piece into a triangle for the roof and glue the edges down.
- Cut the door as a rounded arch with a craft knife and back it with red paper.
- Punch the front windows and lay black grid ribbon behind them.
- Glue on a cardboard chimney and dot a black knob on the door.
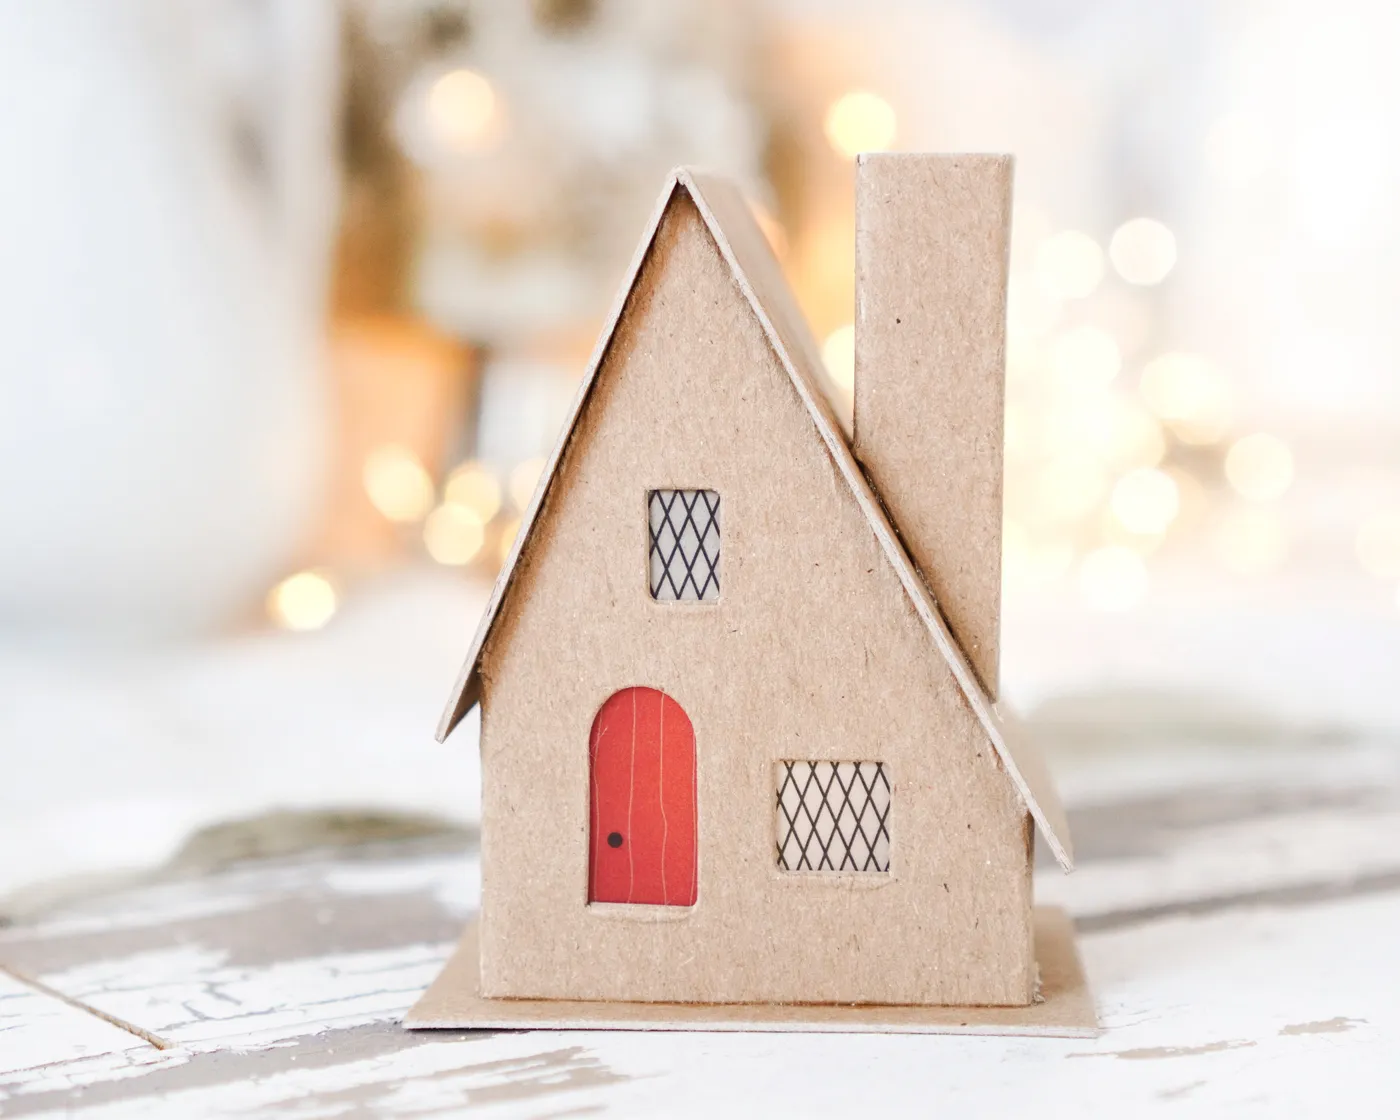
About 40 minutes, under $8 in materials.
This is the version you build when the ceramic villages are out of reach. Kraft paper, a glue stick, and a craft knife run about $10 at any dollar store, and one roll makes five houses. Thrift stores in January are goldmines too — I’ve seen full ceramic sets go for $12 after the holidays. Set the paper cottages on a thrifted white wooden tray and nobody clocks the difference in a dim room.
6. Batting Snow, Tunnels, and a Train That Doesn’t Derail
It’s the tunnels. Anyone can pile buildings on batting. Cutting stone-like portal openings so the track disappears and reappears makes the layout read as landscape instead of shelving. Take them away and the train just circles a pile of cotton. Two cardboard arch forms with faux stone texture painted on, and suddenly your village has geography.
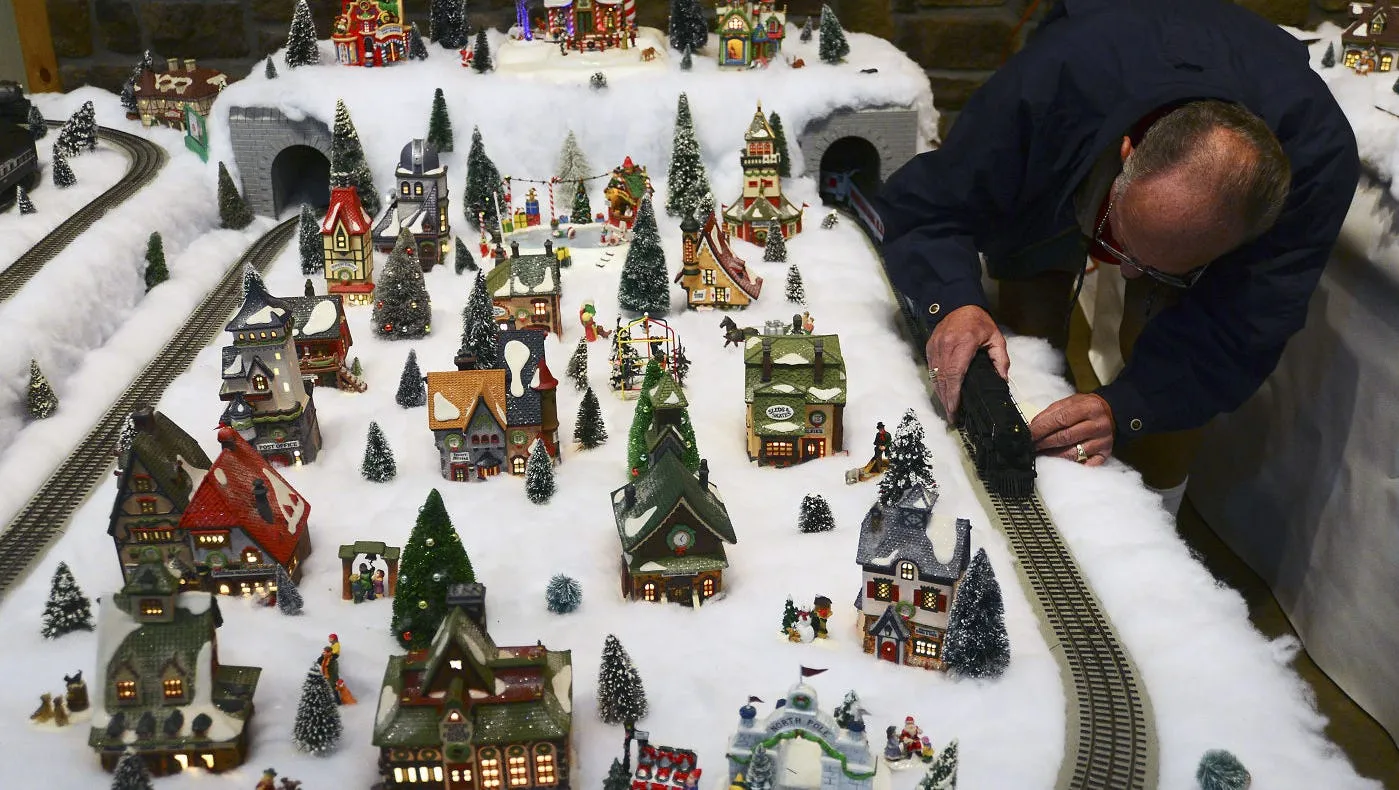
White batting looks magical in November and tired by New Year’s. It pills, it collects dust, and it yellows where sunlight hits it. Budget on replacing it each season — about $12 a roll. Wipe the track with a dry cloth before every run, and unplug any transformer nightly. The lit buildings themselves are low-maintenance; a soft paintbrush once a season clears dust from all those tiny windows.
7. A White Castle with a Sleigh Pulled by Dogs
Storybook villages are having a moment — displays that are less tiny-accurate town and more somebody’s imagination with a light kit attached. The white castle, the twisted wire trees with star toppers, and that red and gold sleigh pulled by two dogs all point in the same direction: villages are becoming character-driven scenes rather than collections. It’s also why vintage figurines are reselling for triple their original price right now.
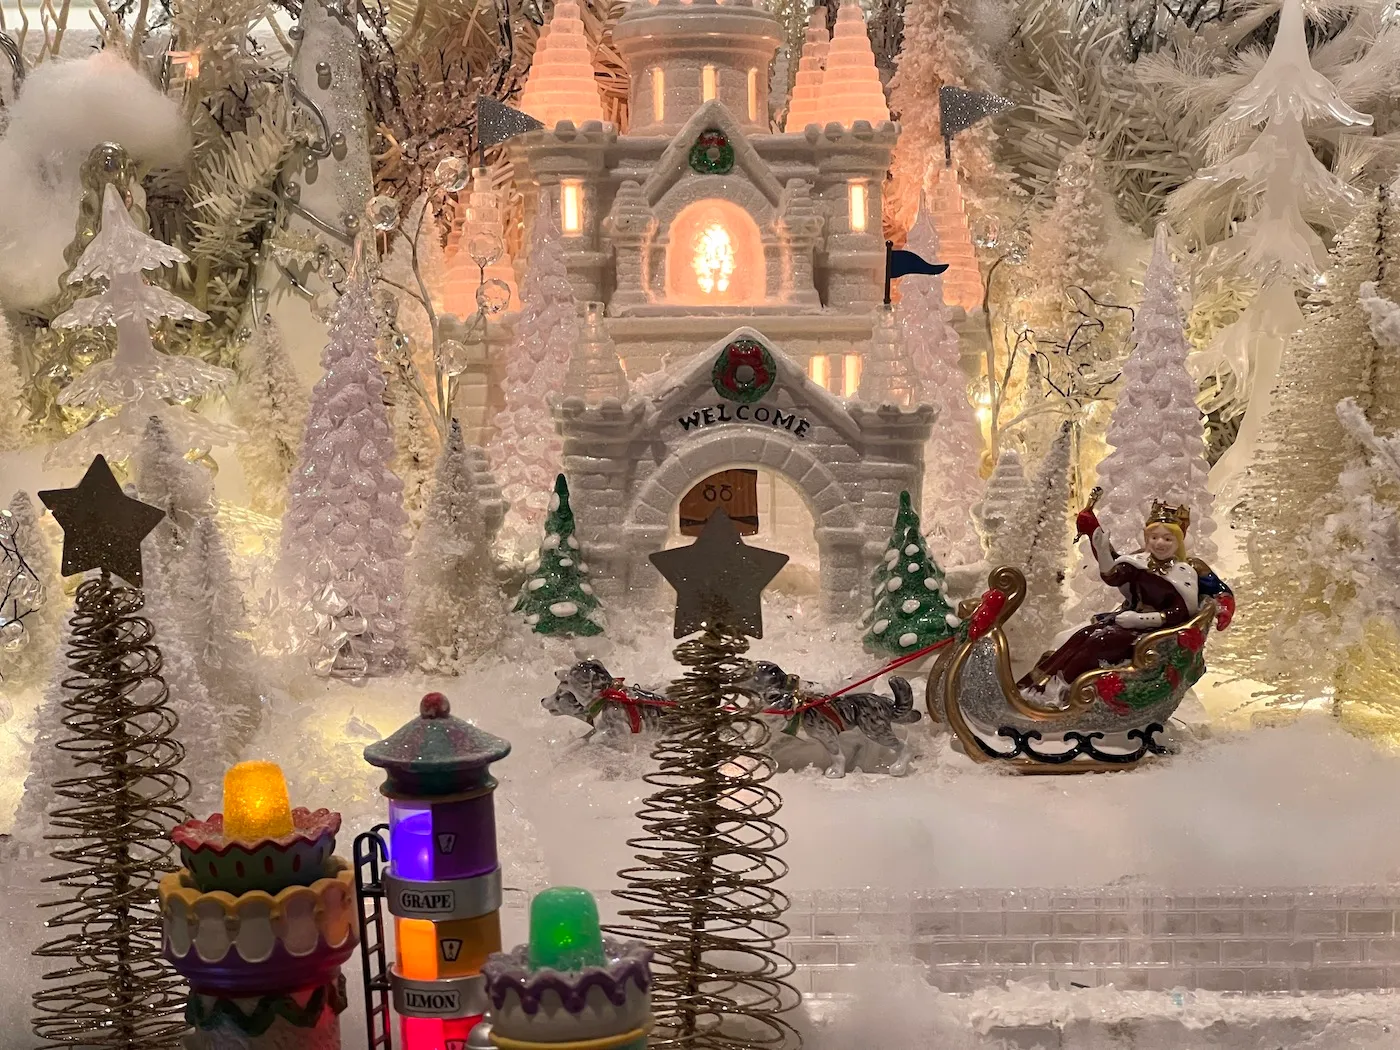
Twisted wire trees are the cheat code for tall villages on narrow surfaces — almost no footprint, but they read as 8 inches of height. Cluster them in threes at varying heights and put your brightest light source behind them, not in front. Backlighting makes wire look like it’s glowing instead of just standing there, and it costs you nothing but a repositioned bulb.
8. A Working Town with Bikes, Vans, and Little Bench Sitters
Here’s the ratio that keeps a busy village from reading as clutter: 60% buildings, 25% landscape, 15% life. Landscape means trees, snow banks, and street furniture. Life means the figures — the horse and rider, someone parked on a bench, the van and the bicycle. Most people invert that and end up with 80% buildings. Swap the architecture and the math still holds.
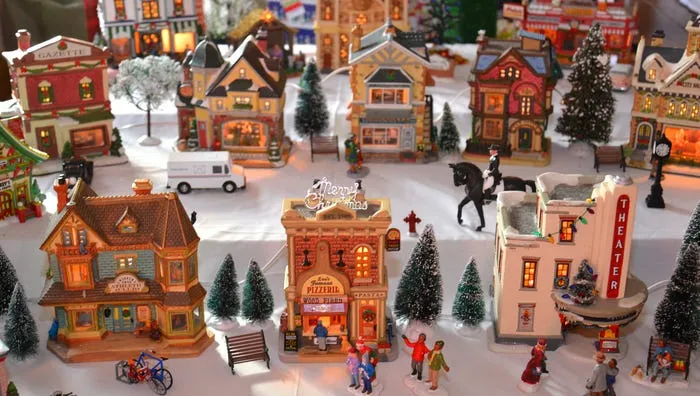
- Measure your surface and leave at least 3 inches of snow border in front of the closest building.
- Lay every piece out on the bare table first and photograph it before any snow goes down.
- Check that outlets or battery packs reach without cords crossing the front edge.
- Count your figures — if you can’t hit that 15% life ratio, buy two more before you commit to a layout.
9. Warm Glow from Every Tiny Theater Window
Every window is lit, and that consistency is the whole trick. Let one building go dark and the eye reads it as a hole; the village stops feeling inhabited. The other move is color temperature — that warm yellow-amber reads as lamplight rather than LED. And the theater sign with its colorful bulbs gives you one small hit of saturation in an otherwise cream-and-snow scene, which is exactly where your eye gets to rest.
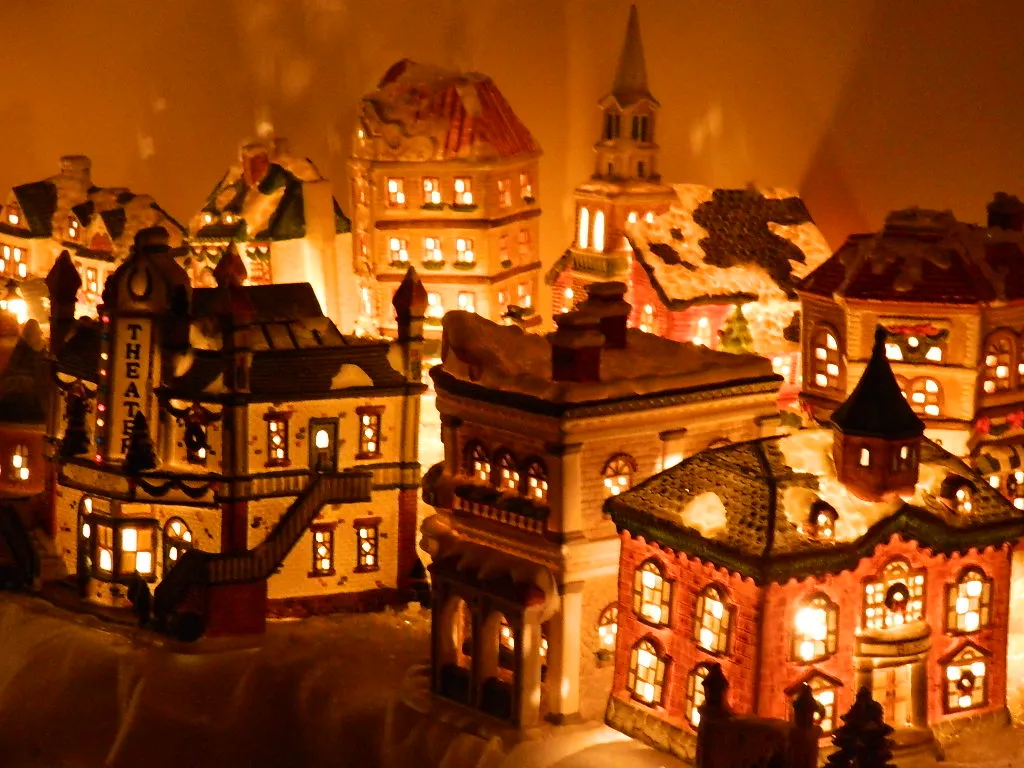
- Lit ceramic or resin buildings, 4–6 pieces: $100–$260
- Replacement bulbs and spare light cords: $10–$25
- Faux snow and roof flocking: $15–$30
- Miniature wreaths and trees: $10–$25
- White base cloth or board: $8–$20
Total: $145–$360. Buying unlit buildings and adding your own LED kit cuts this by nearly half.
10. Santa, a Train, and Where the Cords Are Supposed to Go
If you’re running a train and lights on the same table, give them two separate power sources. Most train transformers can’t handle a village’s light load, and the flicker that results looks exactly like a fault. Also, pets. A train at floor level is a cat toy with a motor. Keep anything that moves at least 30 inches up unless you enjoy relocating Santa every night — that’s the power-strip problem we flag in the mistakes section.
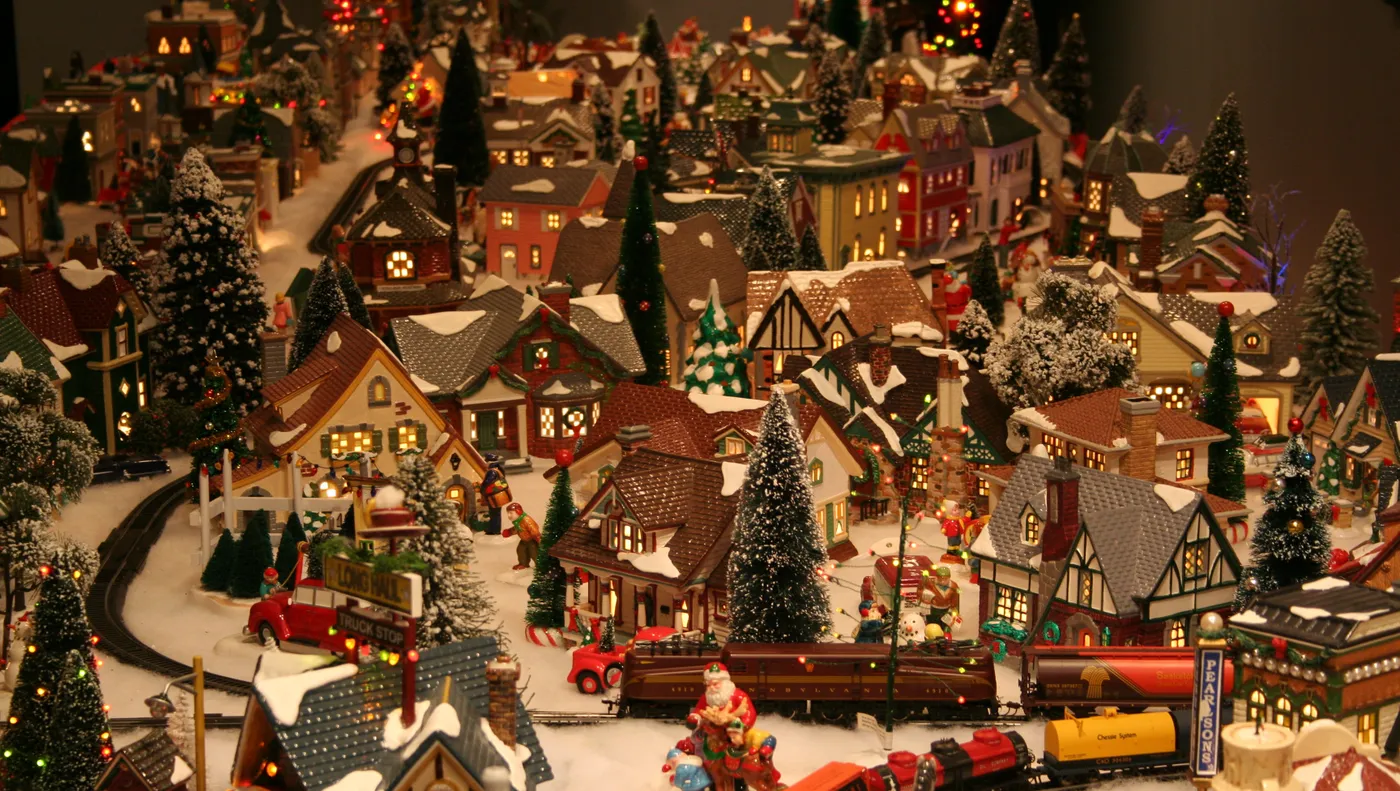
Run every cord to one back corner, bundle it with a black zip tie, and hide the bundle behind a snow bank made from a folded white towel. Almost nobody builds a snow bank tall enough to actually cover hardware — 6 inches is usually the number. Two minutes of work, and it’s the difference between a display and a display with a power strip sitting in the middle of it.
11. Red Cottage on a Wood Slice, Sized for a Shelf
The wood slice is the secret budget move. A 10-inch natural slice runs about $8 at a craft store, or free if you know anyone with a chainsaw and a fallen branch. Bottle brush trees are a $1–$3 staple at Target and Walmart, and the miniature snowman usually comes six to a pack for around $6. With a thrifted red wooden house you can land this whole scene under $35 — and it fits on a windowsill.
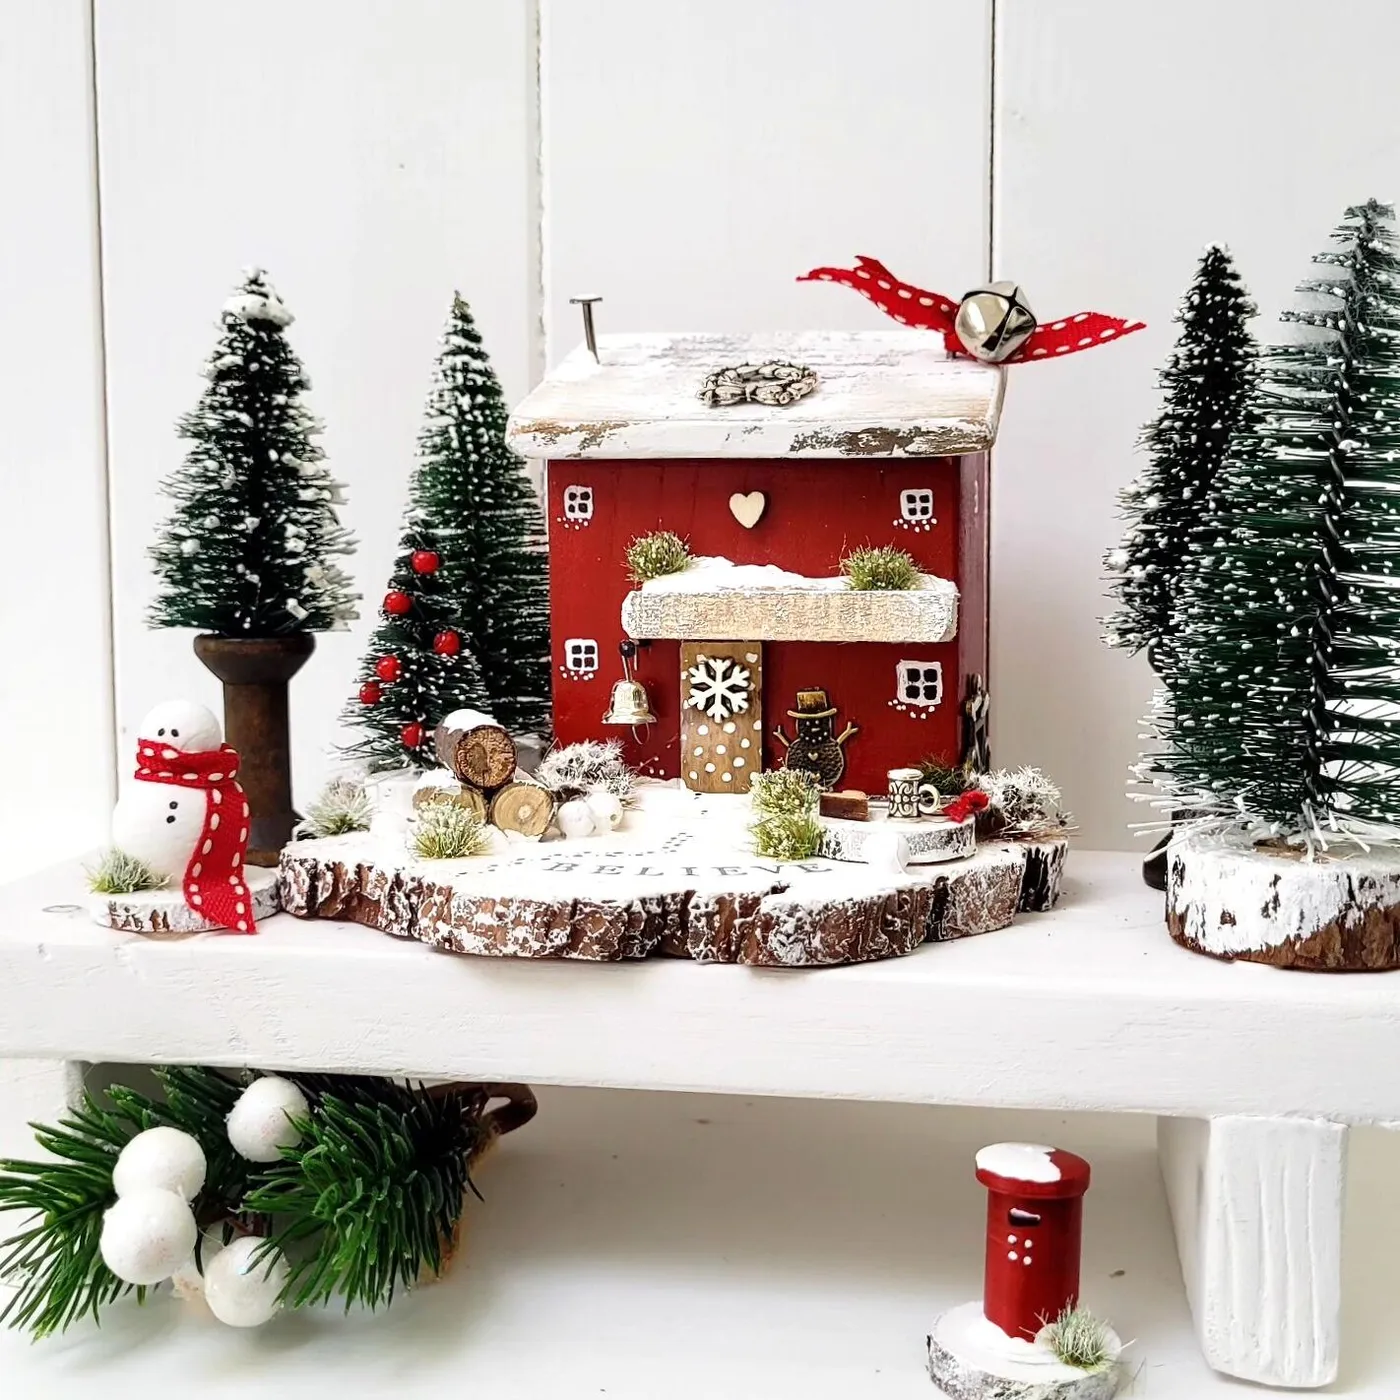
It’s the little silver bell with the red ribbon on the front of the house. Everything else here is a category you can buy: house, tree, snowman, logs. That bell is a choice. Without it, you’ve got a red house. With it, someone decorated the house. That’s the gap between a display and a scene, and it costs about two dollars.
12. Iridescent Bakery and Candy Shop with a Ceramic Snowman
The palette math is deceptively simple: 70% iridescent white, 20% gold trim, 10% punch of red and blue on the figures. The iridescence is what makes it read expensive — that soft pink-silver shift catches light from every direction, including whatever lamp is behind you. Swap the gold trim for matte black and the same two buildings turn modern-minimal. Swap the figures for pastels and it goes full candy-land.
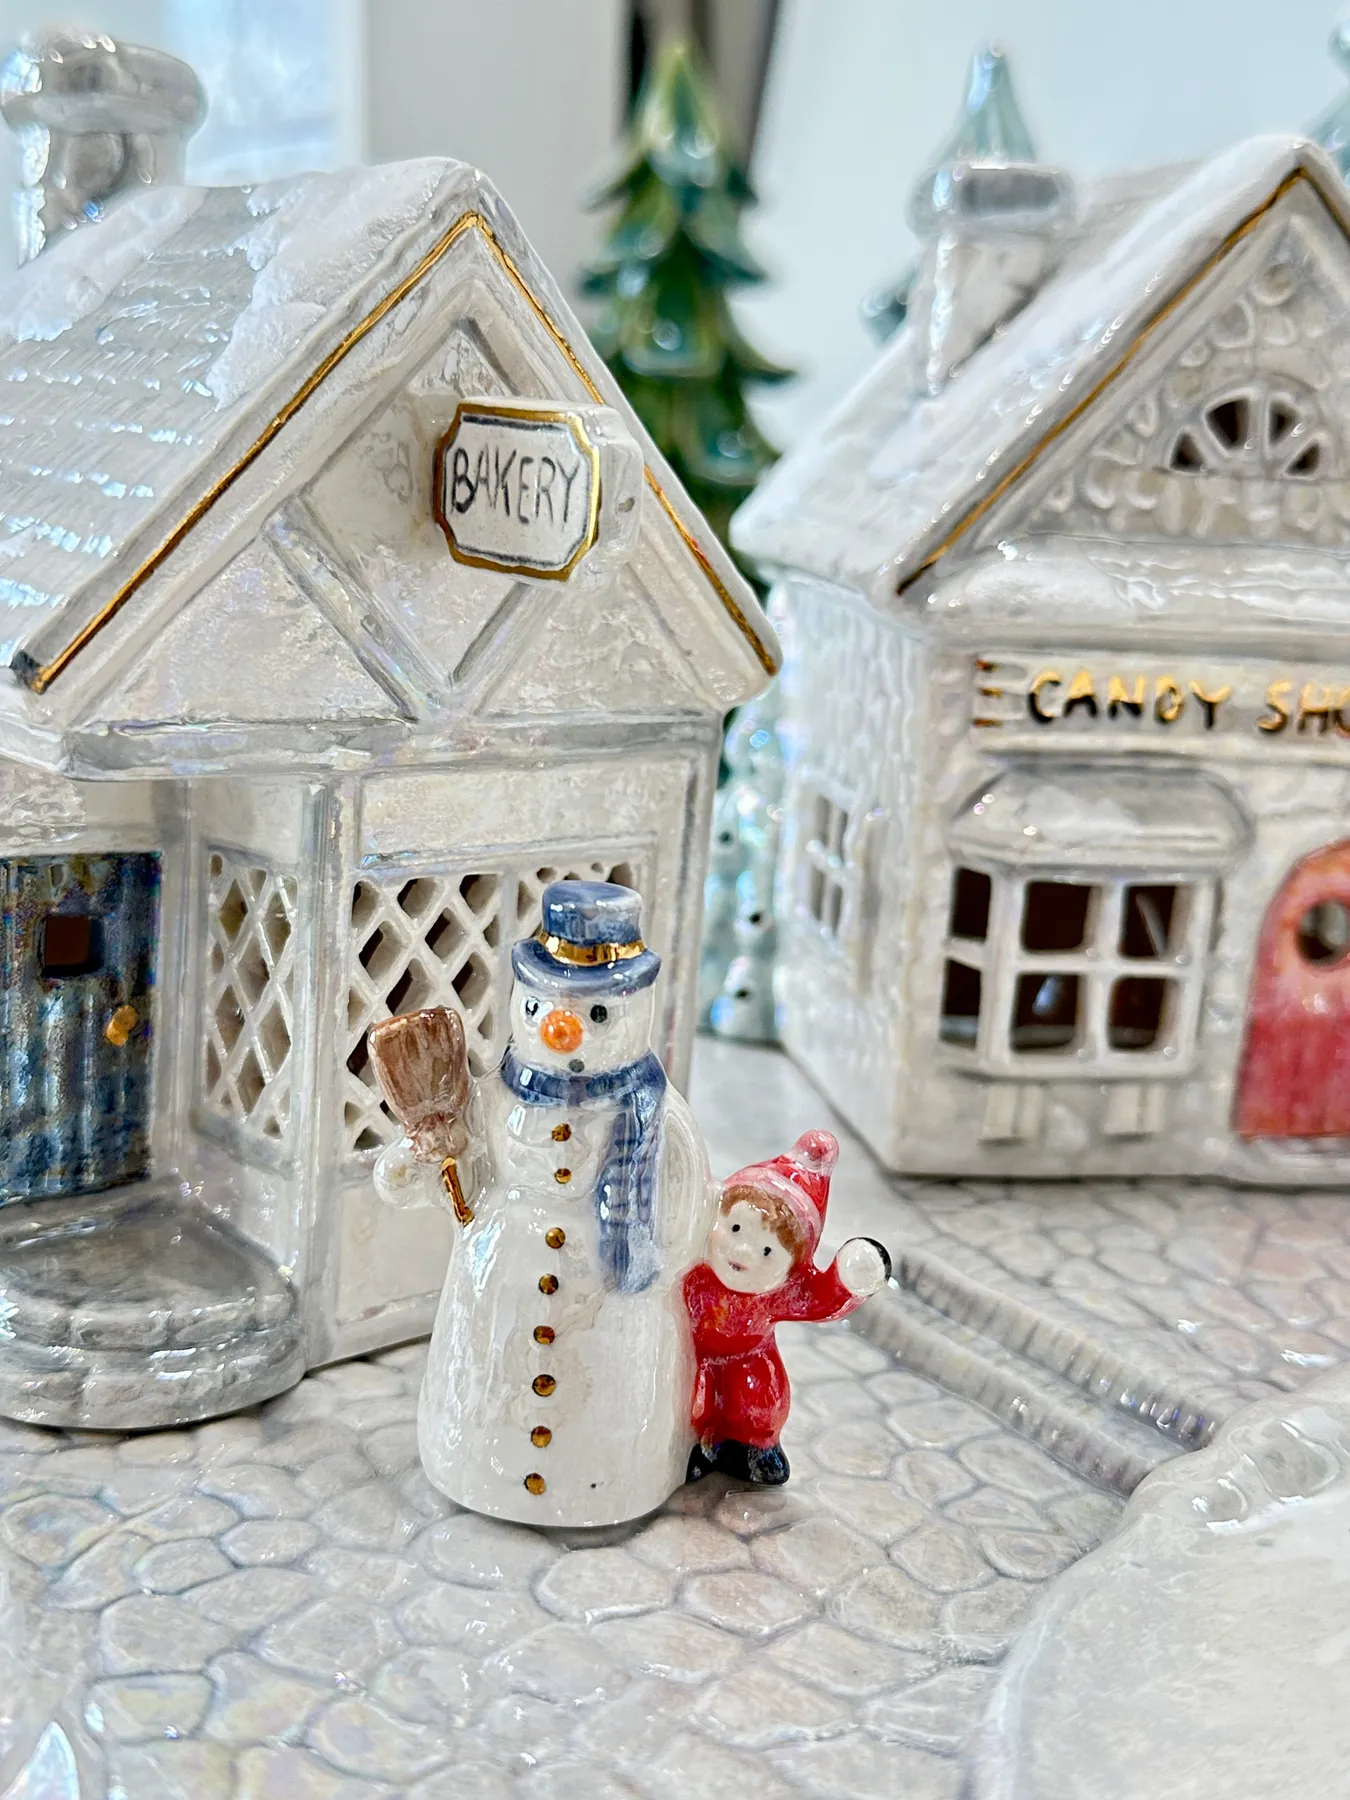
This one wants a small stage: anywhere from a 12-inch shelf to an 18-inch tray. Go much bigger and the two buildings get lonely. The textured cobblestone base is doing real work here, giving you depth cues in almost no footprint. If you have a full mantel to fill instead, pair this with Idea #13 and let the larger houses carry the height while these two hold the center.
13. White and Gold Blocks on a Mantel with Green Garland
Alternate your house colors instead of grouping them — white, gold, white, gold. It creates a rhythm that reads intentional rather than collected. Keep every piece under 6 inches tall on a standard 5-foot mantel, and run the bottlebrush trees at the ends only. The middle should stay low so your garland and whatever hangs above the fireplace still get seen.
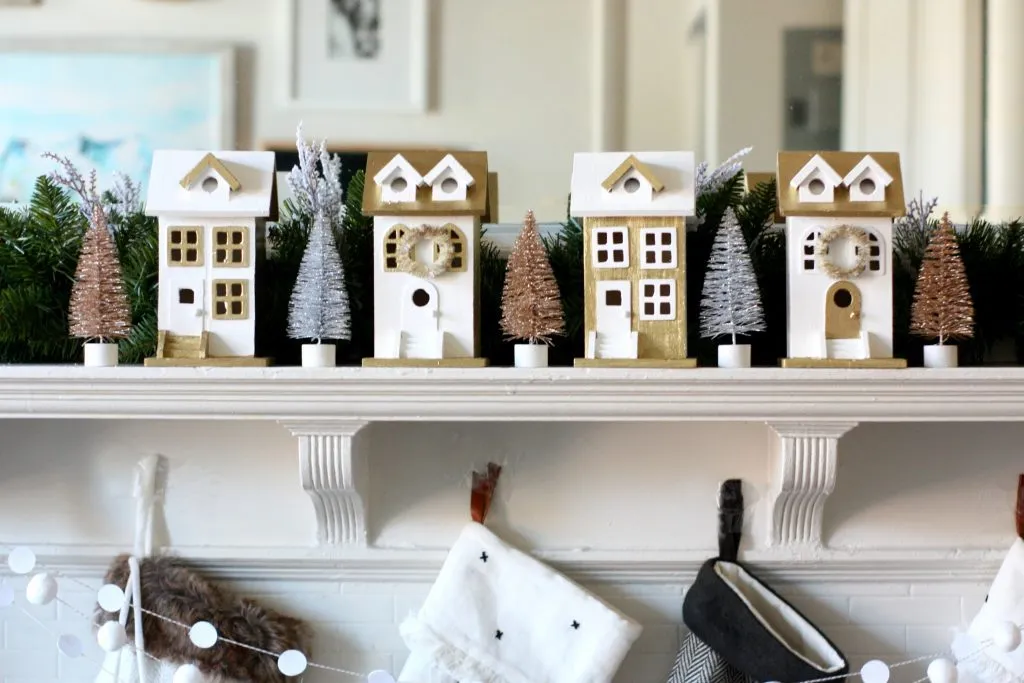
Three things are carrying weight here. Repetition — the same house silhouette in two finishes, so it reads as a set rather than a flea market haul. Metallic spread — silver and rose gold bottle brushes mean the shine isn’t concentrated in one lonely spot. And contrast: that dark green pine garland against all the white and gold is what keeps the arrangement from going flat and bridal.
14. Elevated Train Tracks Above a Snow-Draped Table
Elevated track means elevated problems. Those supports have to be level or the train stalls on the incline — check with a small bubble level before you bury anything. White drape fabric shows every footprint, so keep a lint roller close, and dust rooftops with a dry paintbrush once a month. When you store it, bag the track separately. Bent rail joiners are the number one reason a village train won’t run next December.
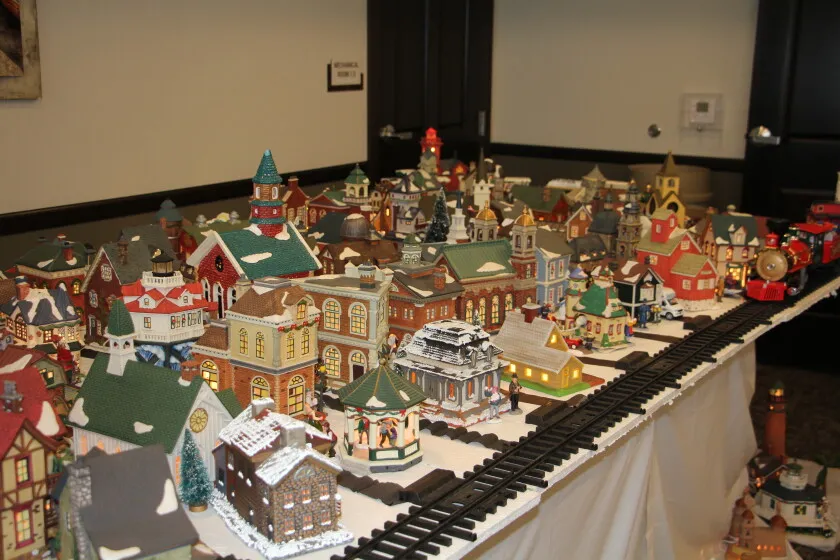
- White table drape or batting: $15–$35
- Lit buildings, 8–12 pieces: $180–$420
- Elevated track supports and risers: $20–$50
- Train set: $60–$150
- Trees, figures, and snow: $30–$70
Total: $305–$725. A big share of that is the train — a used set from Facebook Marketplace often lands under $40.
15. A Tudor Pub with Two Lanterns on a Wooden Tabletop
- Wrap each lamp post in a 12-inch strip of thin ribbon, crossing twice.
- Tie a small bow at the top, just under the lantern head.
- Loop a 4-inch piece of faux pine around the base.
- Run the cord behind the building, never through the snow in front.
- Test both lamps before the figurines go down.
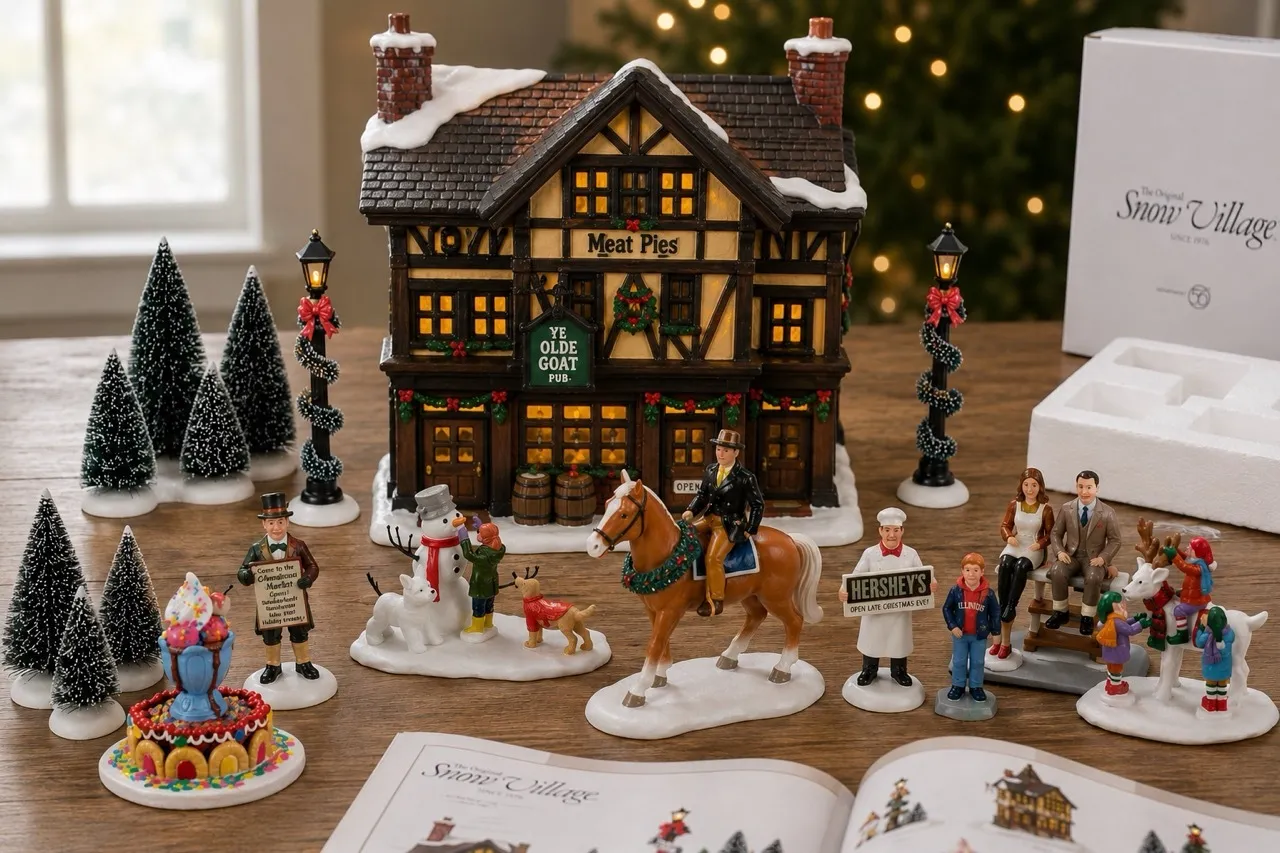
Twenty minutes, about $6 in ribbon and greenery.
Two lanterns and one two-story building is the sweet spot on a standard dining table. Go past three lit pieces and you’re blocking sight lines to the food. And if this display lives where people eat, everything needs to move in one lift — set the whole thing on a tray so you can relocate it for dinner instead of disassembling a Tudor pub every night.
16. A Brick Pub on a Golden Tray with Eucalyptus
That eucalyptus garland is doing something no bottle brush tree could. It’s soft, matte, and slightly out of scale, which makes the tiny pub feel bigger by comparison. Without it, you’ve got a nice lit building on a brass tray. With it, you’ve got a corner of a village. The fairy lights buried in the greenery also give you a second, quieter light source so the pub windows aren’t the only glow.
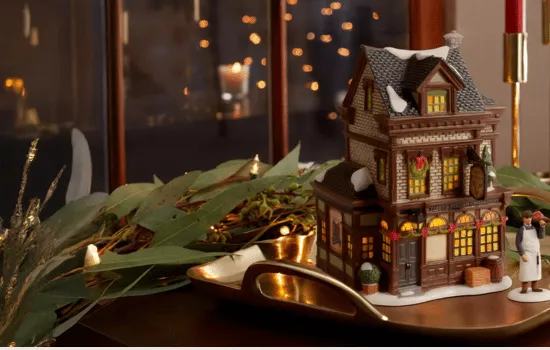
The formula runs 55% warm brick and wood, 25% deep green eucalyptus, 15% brass and gold, 5% white snow accent. That last 5% matters more than it sounds — without snow on the roof, the garland starts reading summer. Swap eucalyptus for cedar and the tray for slate and the whole thing shifts moodier, almost English-pub-in-February, with every proportion intact.
17. A Glittered Green House with a Red Woody Wagon
Retro road-trip villages are quietly one of the biggest things in holiday decor right now — vintage cars, glitter finishes, and a nostalgia for mid-century Christmas cards. It’s the same cultural pull behind tinsel and bubble lights coming back. Glittered resin also holds up; it doesn’t date the way novelty lighting does, so one good car bought this year still looks intentional five Decembers from now.
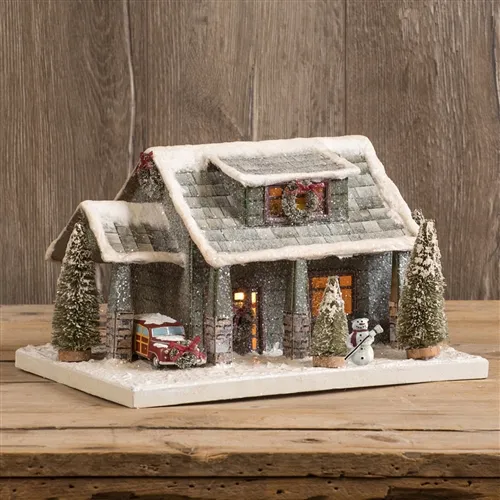
Skip collector pricing. Michael’s and Walmart both carry $5–$12 glittered miniature houses that read nearly identical to the $60 versions once the lights are on, and the red woody wagon is a $4–$8 toy car from the stocking-stuffer aisle. Add frosted bottle brushes at about $1 each and a dollar-store snowman multipack. The whole vignette lands around $25, which leaves you money for a piece you’ll actually keep.
18. A Brick House and a Church with a Clock Tower
This one’s a middleweight — roughly 30 x 15 inches, which makes a console table ideal. It’s a spot you walk past rather than sit beside, and that’s fine, because the money shot is those arched windows lit from inside. If your console is under 24 inches deep, drop the carriage and keep the church and street lamp only. For a narrow surface, Idea #26 gets a similar glow in half the width.
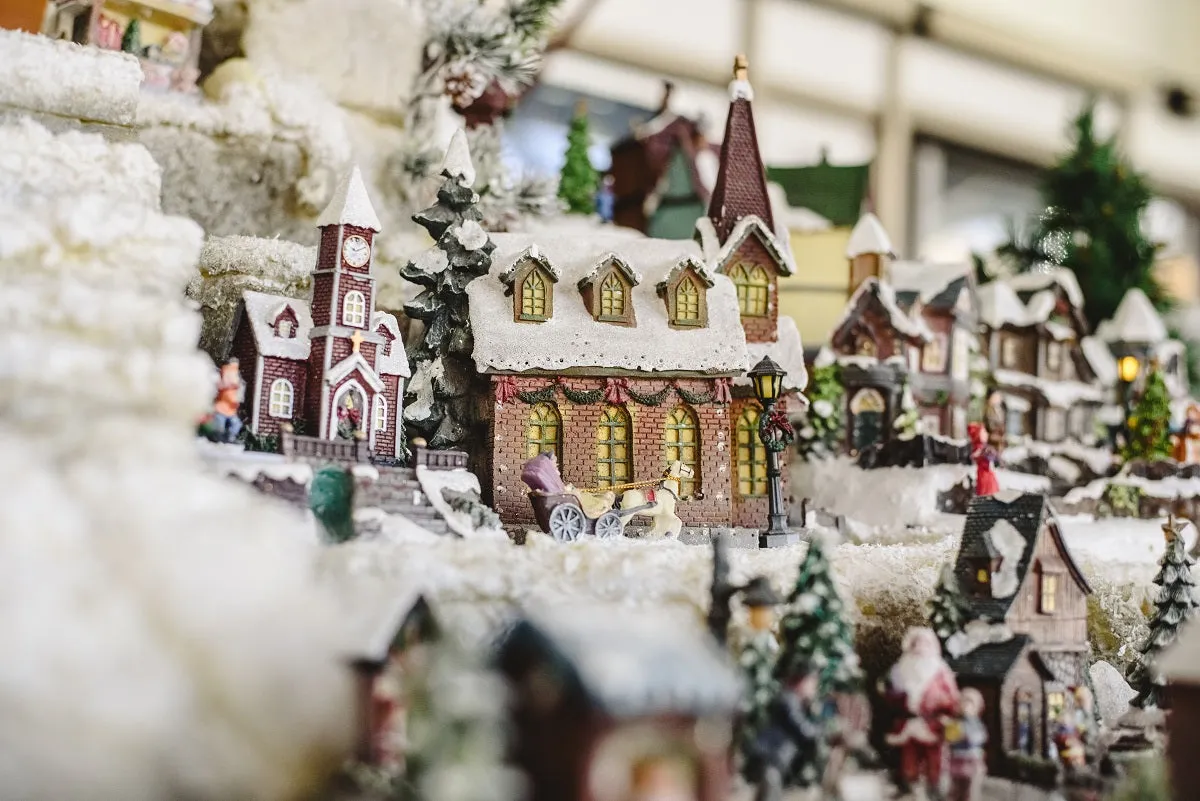
Put your tallest vertical element — here, the clock tower — off-center, about two-thirds to the right. A centered tower splits a display into two halves the eye can’t choose between. And keep the horse-drawn carriage moving toward the light, never away from it. Directional figures always read better heading into the glow instead of out of it.
19. A Hilly Village That Takes Over the Dining Table
The hills are the whole idea. Flat villages read as dioramas; layered ones read as landscape. By stepping the snow up on both sides of the table, the buildings sit in a valley and your eye gets a real horizon line. Draping garland on the wall trim behind everything is a sneaky move too — it borrows vertical interest from the room so the village doesn’t have to provide all the drama itself.
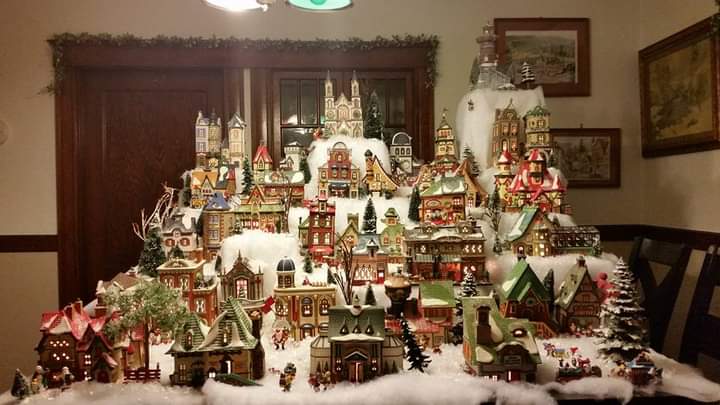
- Stack foam risers under the batting, tallest at the back, secured with double-sided tape.
- Drape a white cloth so it breaks over each edge like snow.
- Place your largest lit building slightly off-center as the anchor.
- Add trees in odd-numbered clusters to hide the riser seams.
- Run all cords to one back corner and cover with a snow bank.
About two hours and $25 in risers and batting.
20. A Canal, Arch Bridges, and a Tiny Rowboat
A reflective canal is stunning and it’s also the most fragile thing on your table. Any bump sends the surface wobbling, and real water is a hard no with kids or cats. Use a mirror tile or a strip of acrylic cut to fit — lighter, spill-proof, and it won’t evaporate over the month. Also, never place the canal directly in front of your main light; a glossy surface with a source behind it throws glare straight into every photo.
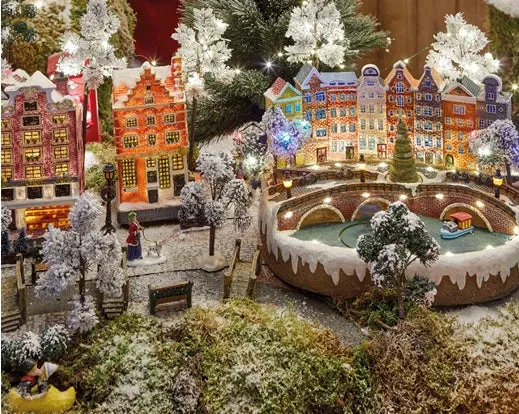
- European-style lit houses, 6–8 pieces: $140–$320
- Mirror tile or acrylic for water: $10–$25
- Arch bridges and boat miniatures: $15–$40
- Flocked trees and moss ground cover: $20–$45
- Warm white string lights: $12–$25
Total: $197–$455. Using acrylic instead of mirror tile and thrifting the bridges can pull this under $150.
21. White Houses and Green Bottle Brushes by the Stockings
This is 65% white, 20% green, 10% black-and-white buffalo check, 5% gray fur. The check is doing heavy lifting even though you barely see it — it’s the only pattern in the frame, so it gives the white village something to push against. Swap buffalo check for a red tartan and the whole display warms up instantly. Swap it for plain gray and you’re in minimalist-winter territory.
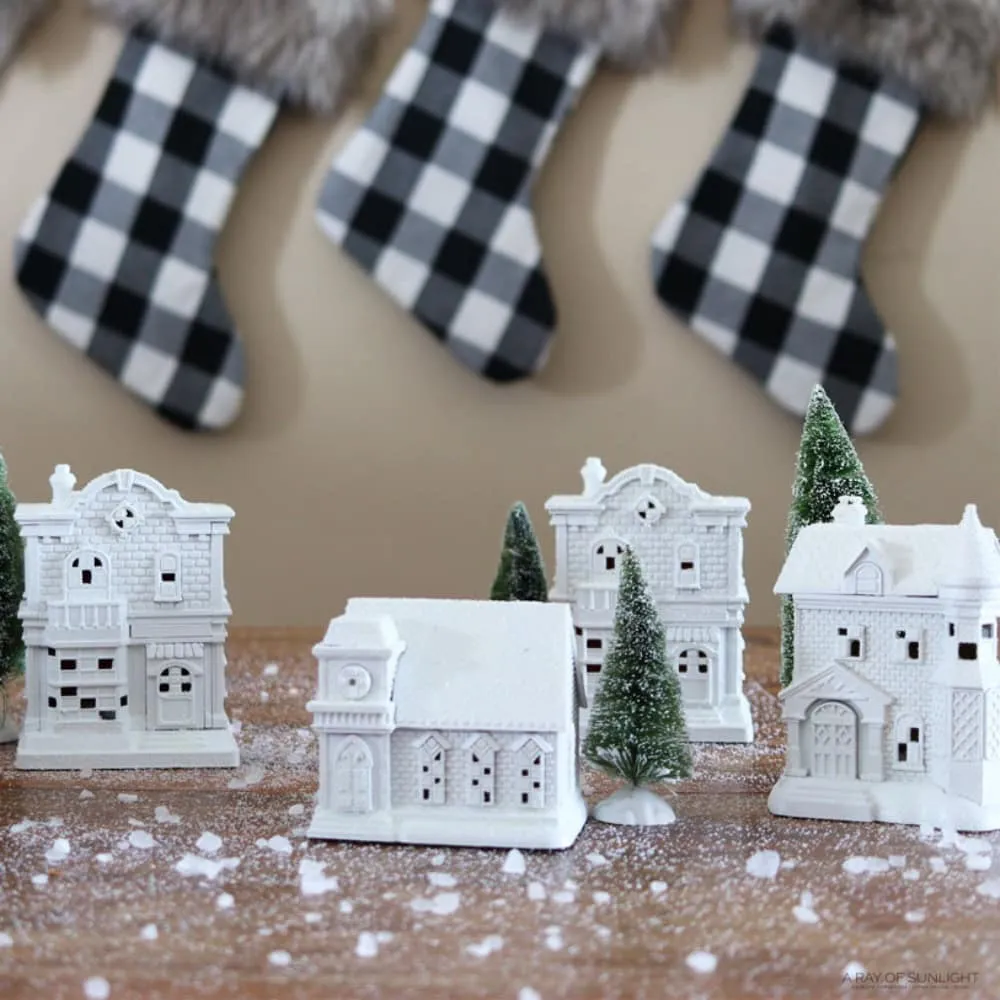
The green bottle brush trees. White houses on white snow on a wood shelf would be pretty and completely forgettable. A handful of green gives you a color anchor, and they echo the stockings hanging behind, tying two separate parts of the room together. Take them away and the village floats, disconnected from everything else in the house.
22. A Gold Glitter Lantern in Front of a Printed Fireplace
A printed backdrop is the cheapest way to fake depth, and the trick is distance. Set it at least 10 inches behind your rearmost house — closer and the print looks flat and obvious. Light the backdrop separately with a small warm clip light angled across it, never straight on. That raking angle is what makes a $15 printed panel read like a room instead of a poster.
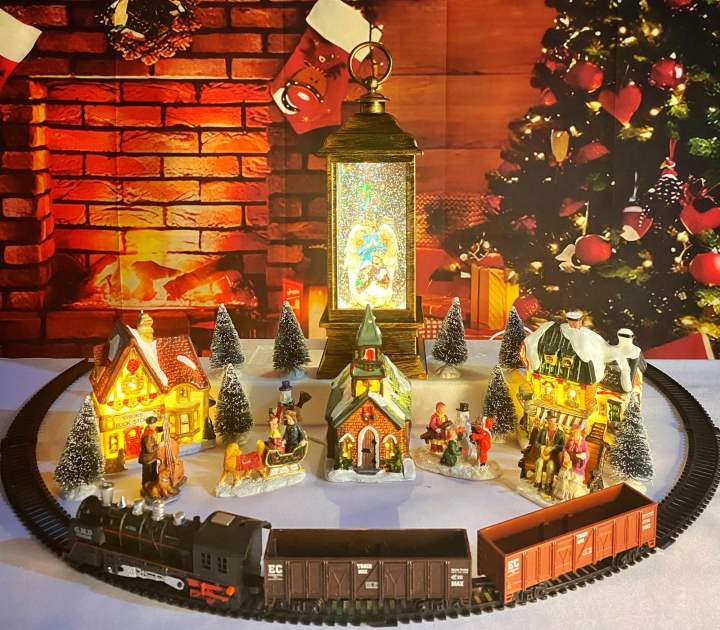
- Check the backdrop height against your tallest building — the top edge should never be visible.
- Confirm the lantern’s internal light is warm, not daylight, or it will fight the printed scene.
- Leave 6 inches of table in front of the train for the track’s curve radius.
- Test the train on its track before you build anything around it.
23. A Handmade Village with a Tiny Ice Rink
The ice rink is the easiest thing on this list to fake: a 6-inch mirror tile, a strip of white card stock for the boards, and two or three plastic figures. Under $10. The glittery snow base is a $5 bag of iridescent flakes over batting. And if you’d rather not buy houses at all, wooden craft blanks at $2–$4 each paint up fast with white acrylic and a light kit. Entire village, about $45.
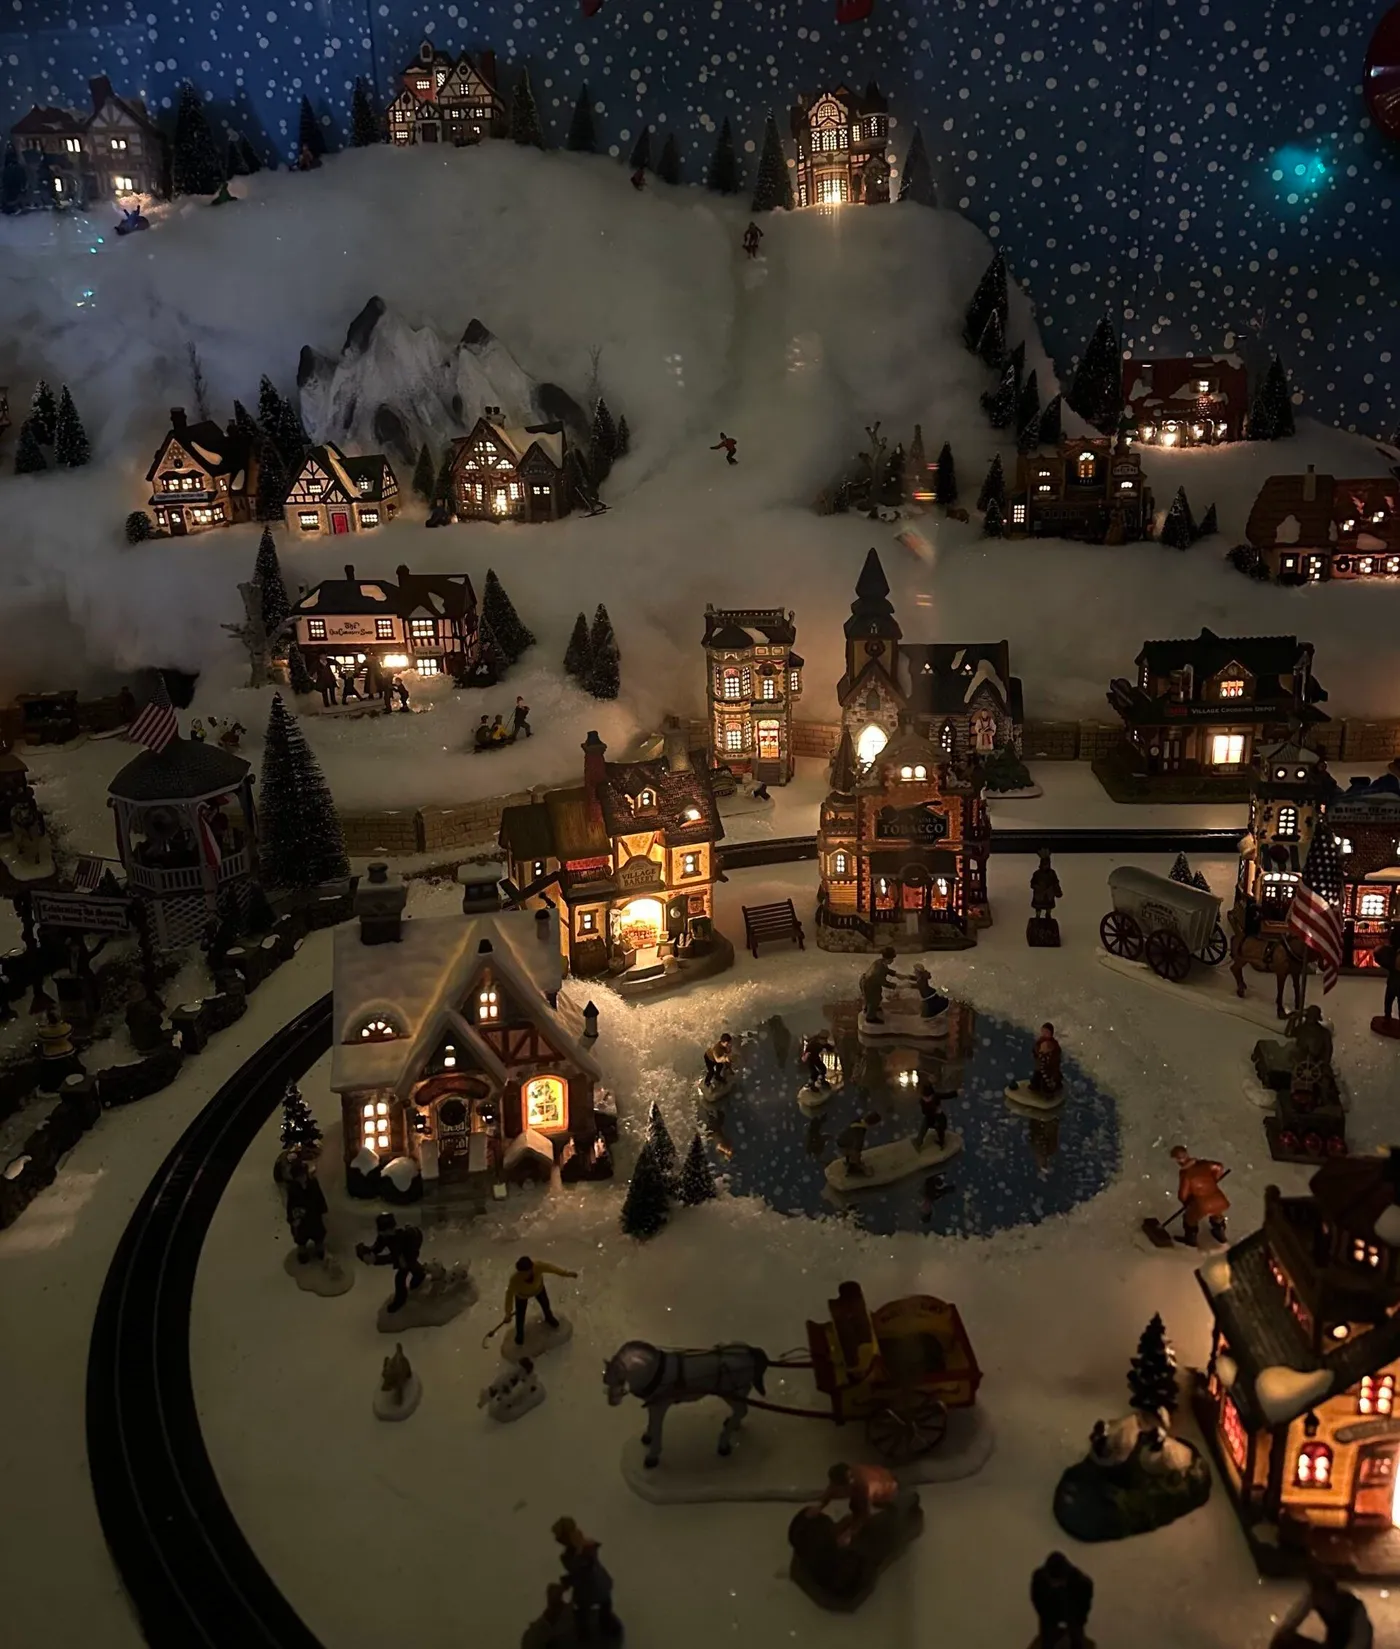
It’s the one spot in the scene where something is happening. Static villages are pretty; a rink with figures on it gives your eye a destination and your imagination a story. The other smart move is that tiny wooden fence — it creates a boundary, which makes the rink feel like a real maintained space rather than figures standing on a mirror. Boundaries make miniature worlds believable.
24. A Grand Church on a Long Table Under Gold Cloth
This is the big one: a 6-foot table minimum, and 24 inches of depth to handle a train loop plus a mountain. It also wants to sit below eye level, ideally at dining-table height or on a low console, so you look slightly down into the valley. On a standard 5-foot table, shrink the mountain and use the layered approach in Idea #19 instead.
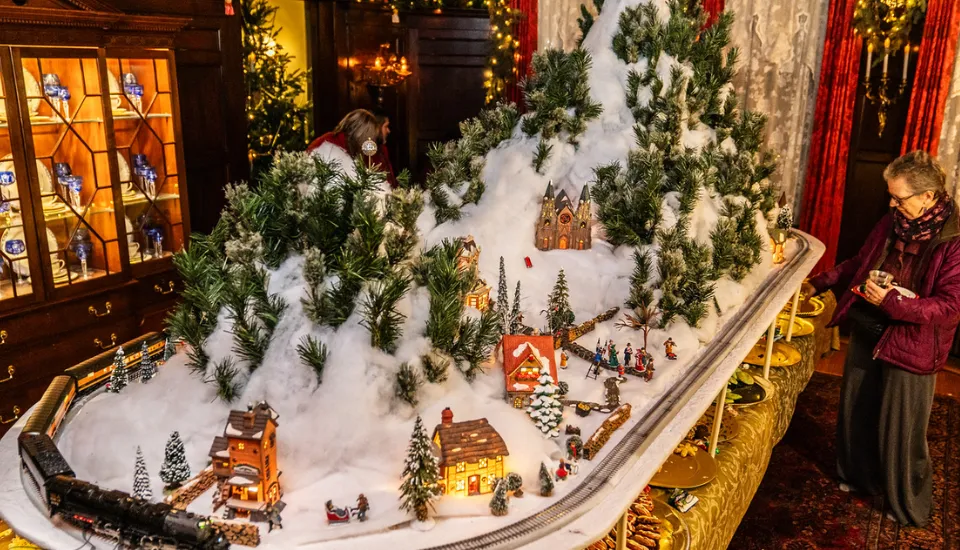
Grand, multi-level villages built to be walked around are 2026’s answer to staying home for the holidays. People are investing in one big display instead of scattering five small ones — the same instinct behind oversized trees and single-statement mantels. The side benefit: these layouts photograph beautifully, which is exactly why they keep circulating on Pinterest and in holiday reels.
25. Purple Night-Sky Lighting Over a Pastel Village
Colored bulbs fade in output long before they burn out, and purple is the worst offender — you’ll notice it going pinkish by year three. Buy a spare strand now while the colorway is current. Also, if the whole village runs off one plug, that’s a lot of draw. Use an LED set with a fused plug and unplug it at night rather than trusting a switch you can’t reach behind the snow.
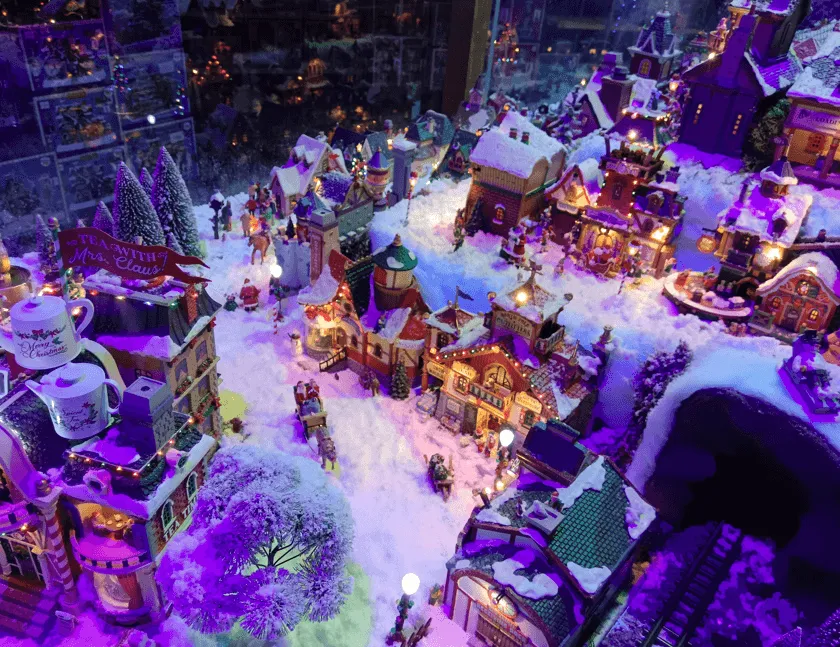
This scene runs 40% white snow, 35% pastel architecture, 20% purple ambient light, 5% warm window glow. That last 5% is non-negotiable. Without warm interior light, a purple-lit village reads like a haunted house. The purple is atmosphere; the yellow is life. Swap purple for deep blue and you get a colder, more Nordic feeling with the same proportions intact.
26. Light Wood Houses with Cotton Snow and Silver Stars
The unfinished light wood. Everything else in Christmas decor is glossy, glittered, or painted, and these houses are just wood with warm windows. That restraint is why they read calm instead of chaotic. Take the wood away and you’ve got another white ceramic village. Keep it and you’ve got something that looks like it belongs in a Scandinavian living room in February, not just December.
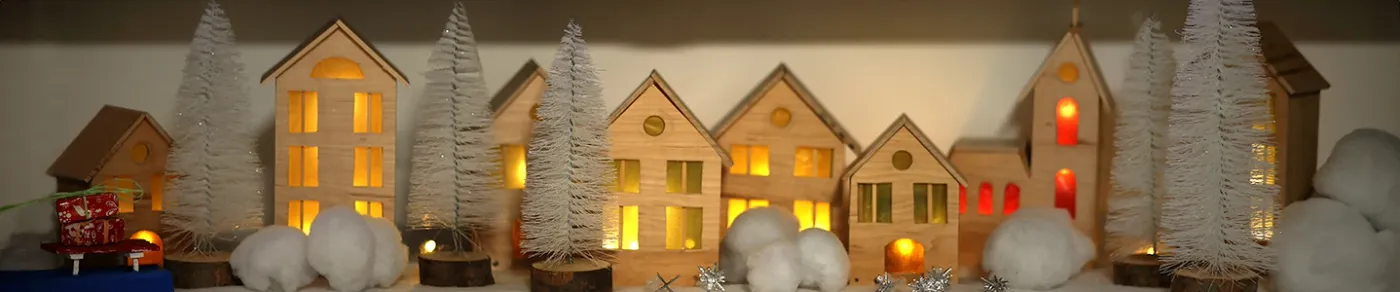
Use real cotton batting, not polyester fill, for the snow — cotton has weight and clumps naturally around a house base like drifting snow. Pull it in thin, uneven layers instead of one big puff, and let the wood bases show through in a few spots. And keep your red accents to exactly two: the little bench and one small tree. A third red and the neutral palette collapses.
27. A Gift Shop and Candy Store on a Coffee Table
This is the layout that fits where people actually live — a coffee table, a low console, a shelf. Which means it has to survive being bumped. Nothing here should be taller than it is wide; shop buildings tip. Keep the bottle brush trees away from the table’s edge, because dogs and toddlers both reach for soft, grabby shapes. And on an oiled wood table, never let faux snow sit directly on the surface — some snows leave marks.
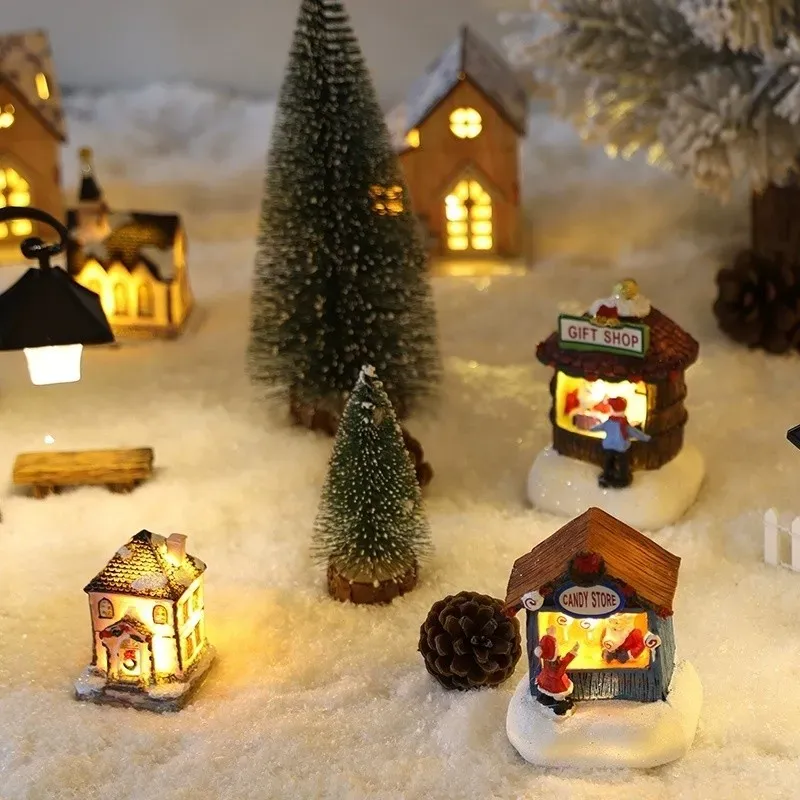
Shop the craft store clearance bin in mid-November, not December. The miniature gift shop and candy store shapes are usually $6–$12 each at Michael’s or Walmart, and pine cone decor is free if you have a yard. Use a plain white tea towel as snow instead of buying batting. Start to finish, this whole setup can happen for under $40.
28. A Brick Path Winding Through Timber-Frame Shops
- Lay a 3-inch-wide strip of brown textured paper or ribbon down first as the street.
- Place buildings along both sides, alternating heights.
- Cut brick-patterned scraps into short cross-paths leading to each doorway.
- Push snow up to the path edge so the street reads as cleared.
- Set figures walking the path, all facing the same direction.
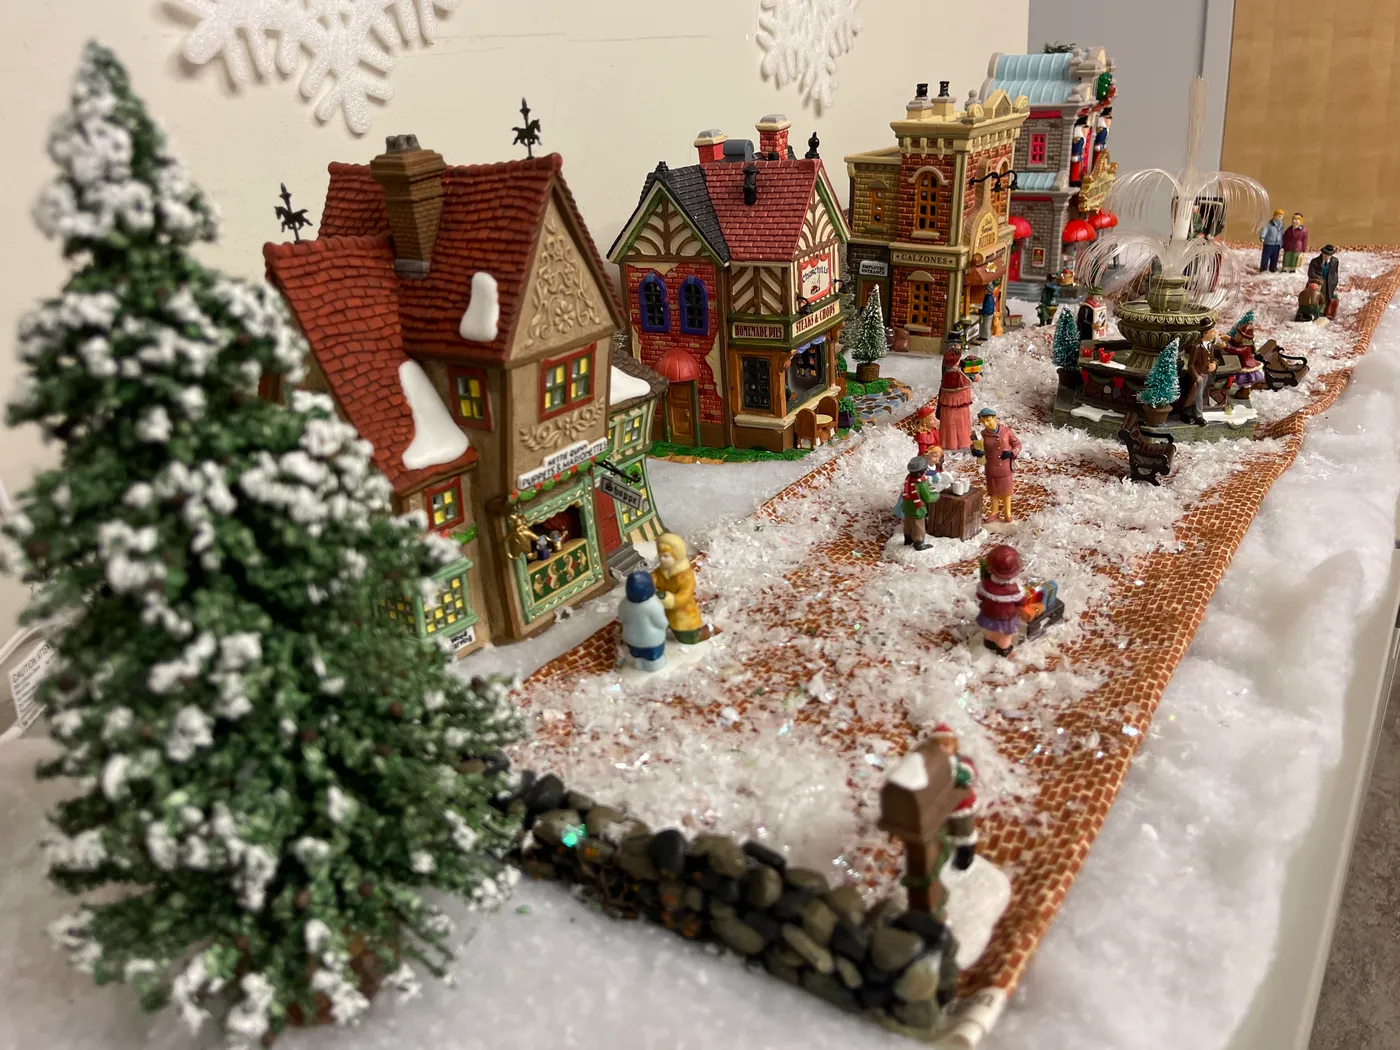
About 40 minutes and $12 in materials.
A winding path needs roughly 36 inches of length to read as a street instead of a driveway, plus 14 inches of width for buildings on both sides. That’s sideboard or entry console territory. Under 30 inches, use a straight path — a curve that’s too tight looks like a mistake rather than a design choice.
29. A Castle Village with a Train and a Red Starburst Backdrop
Fandom villages are the fastest-growing pocket of holiday collecting, and Harry Potter sets lead the pack — licensed pieces resell within hours on Etsy and Mercari all through December. The appeal isn’t just the franchise. A story gives you a reason for every piece to be there, which is why these displays hold together better than anything bought by the box. Expect this to keep expanding into other universes.
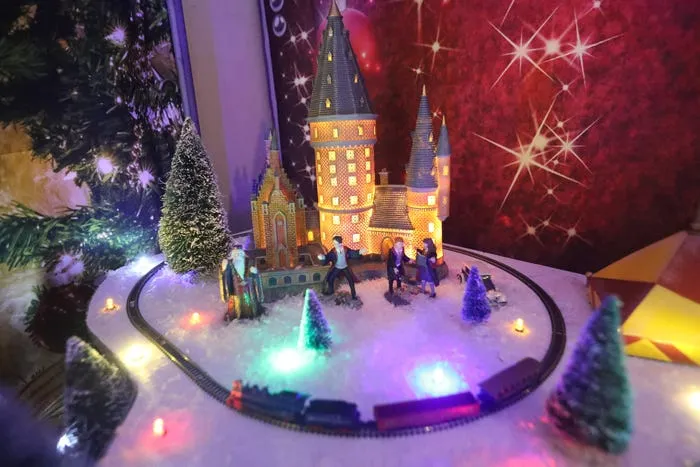
The red starburst backdrop is doing the work of a proscenium arch — it frames the castle and pushes it forward. And the multicolor LED lights at ground level give you a completely different light source from the warm windows above, which is what makes the scene feel like a place rather than a diorama. Two light temperatures, one story.
30. Silver Glitter House with a Neon Green Window
- Glittered house, or a plain house plus glitter spray: $12–$45
- Single-color LED bulb or fairy light insert: $6–$15
- Glittered picket fence strip: $5–$12
- Frosted bottle brush trees, 4–6: $6–$18
- Artificial snow and flocking powder: $8–$15
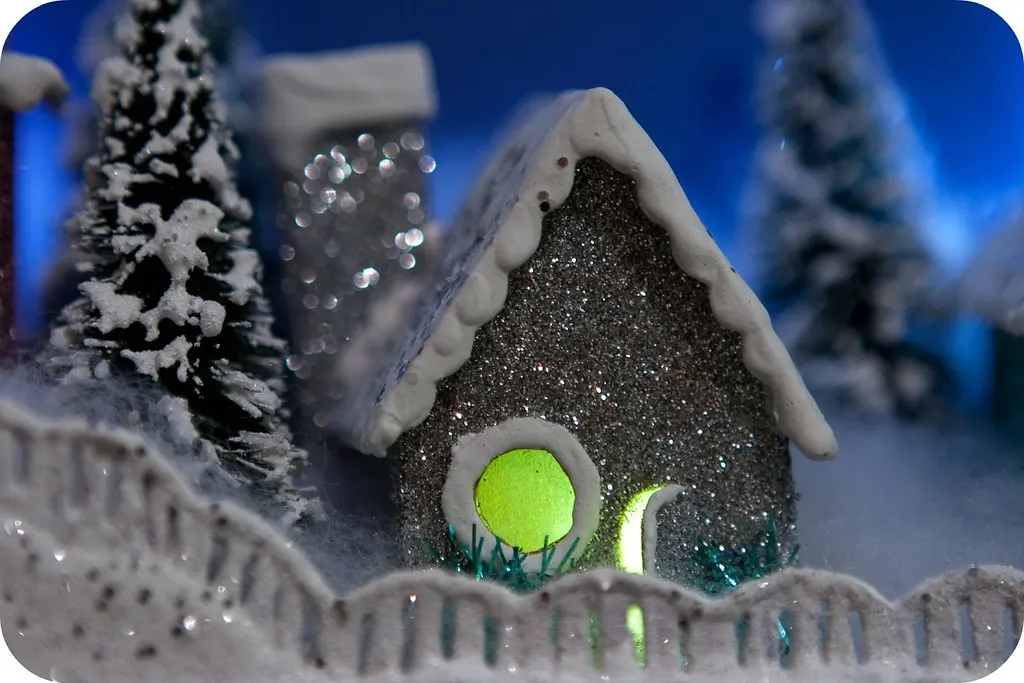
Total: $37–$105. Spraying a thrifted house with silver glitter yourself is the budget version of this exact look.
Neon green is a commitment. It photographs like a dream and, in a room with lots of warm lighting, it can look like a glow stick wandered into a nativity scene. Test it in place before you finalize the display, and be ready to swap in a warm bulb by January. Also, glittered houses shed. Put a tray under anything glittered or you’ll be vacuuming microplastic for two months.
31. A Gray Snow-Laden House with Wreaths on the Windows
For realistic snow-laden rooflines, don’t sprinkle — build up a ridge of batting along the roof edge and dust it with glitter after it’s placed. Flocking powder pressed on with a soft brush gives you that thick, settled look. And make the tiny wreaths yourself from 1-inch chenille stems bent into circles with a thin ribbon bow. Four wreaths for under a dollar.
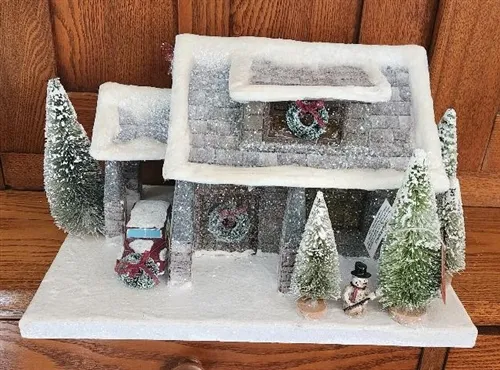
Thrift stores in mid-January are the real hack — holiday villages get donated in bulk and marked down to a fraction of retail, so plan next year’s display in the weeks after Christmas. The little snow-covered red car is a $2 toy, and bottle brush trees come 12 to a bag for around $6 online. This entire snowy corner can come together for $30 and look like it cost four times that.
32. Half-Timbered Ceramic Houses with Red Tiled Roofs
60% cream and white ceramic, 25% red roof tile, 10% dark green evergreen, 5% dark brown timber detail. The roof color is what gives this collection its personality — that red is the reason it feels like a European village rather than a generic one. Switch the roofs to dark gray and the exact same buildings read as a Dickensian London street.
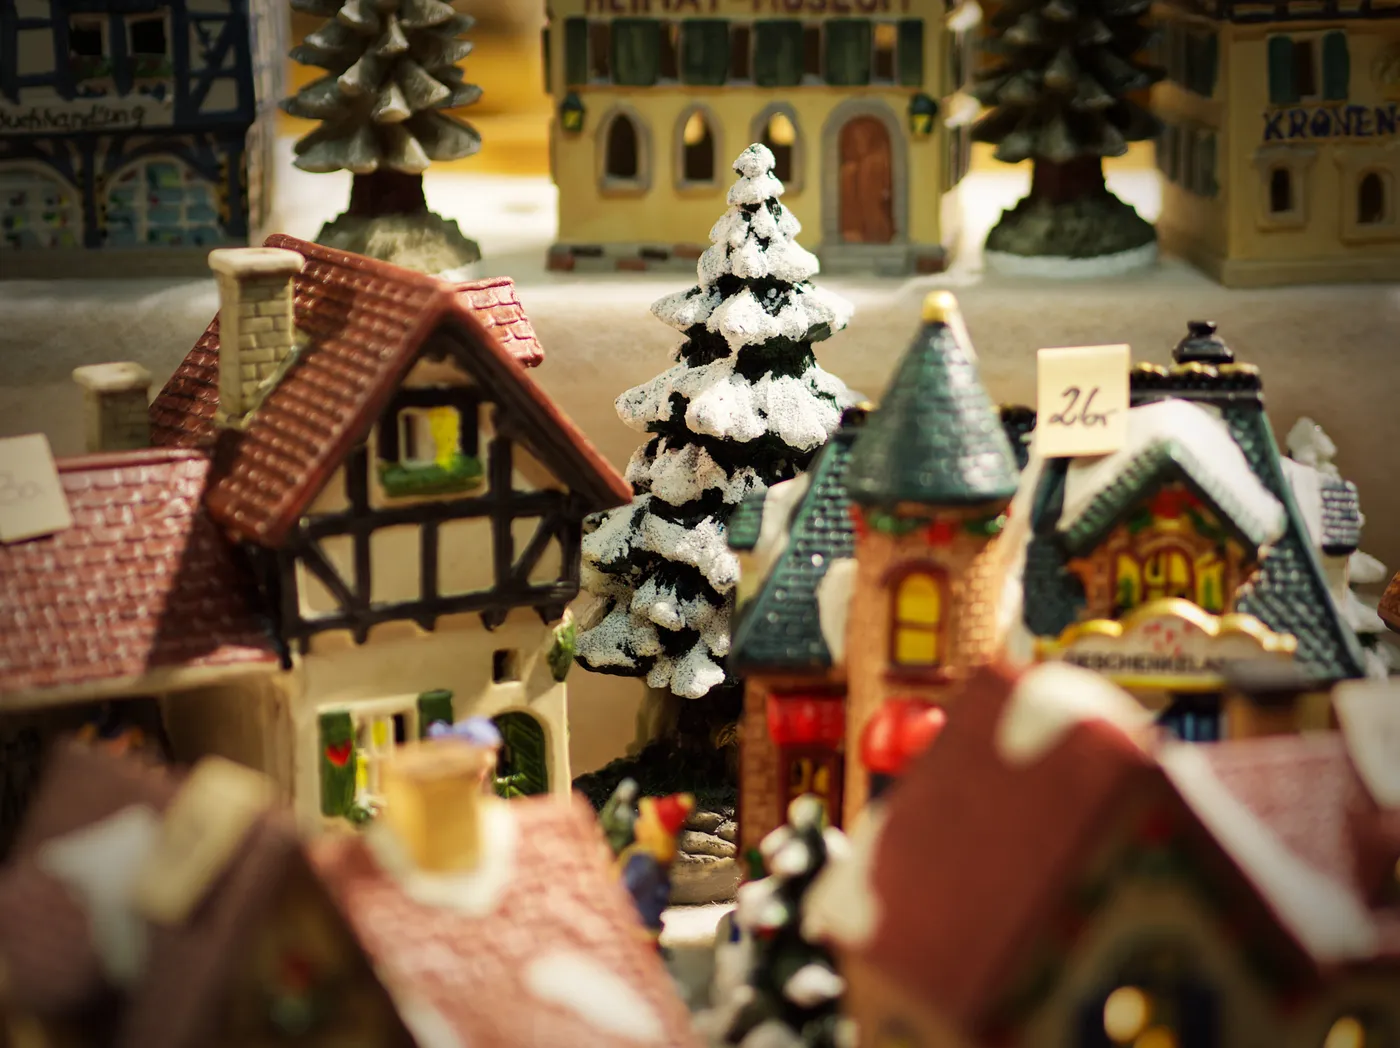
The half-timbered facades. Tiny brown crossbeams over a cream wall are the single detail that makes these houses feel historic instead of decorative. They also create contrast and texture at a scale your eye can actually read from a few feet away, which is more than most miniature detailing manages. Plain-faced houses with those same red roofs would carry half the charm.
33. A LEGO Elf Clubhouse That Comes Apart in Ten Minutes
- Check that your shelf or table can take the weight — built LEGO sets are heavier than they look.
- Confirm any light kit uses USB and can actually reach a power source.
- Decide on a baseplate now so minifigures don’t wander off mid-season.
- Keep the instruction booklet with the display, not in a drawer, in case a piece goes missing.
- Set a rule about who’s allowed to rearrange the elves.
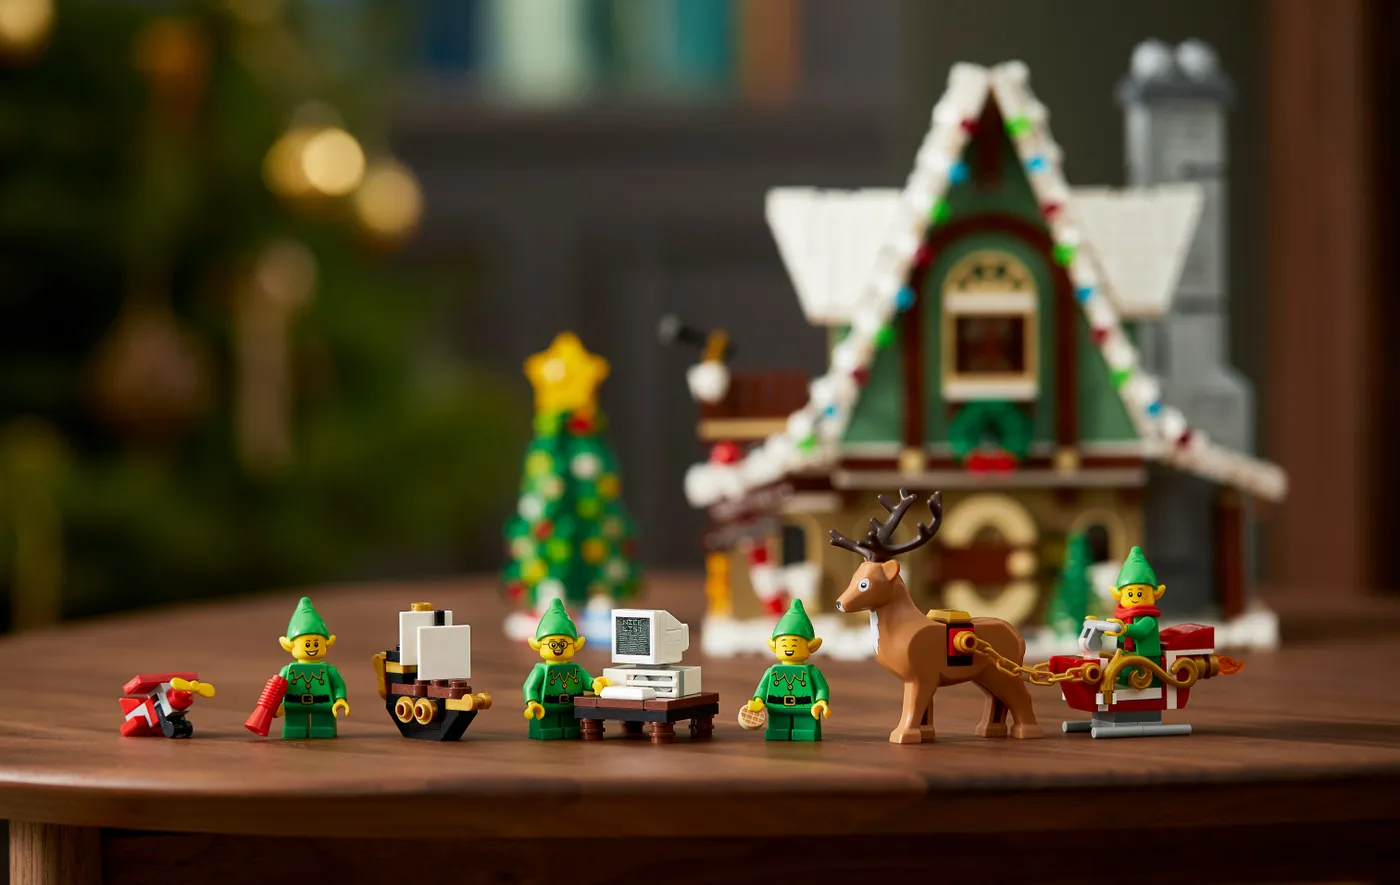
LEGO is the lowest-maintenance village on this list. A dry microfiber cloth or a soft makeup brush is all it needs, and it never sheds, fades, or yellows in a month. The tradeoffs are dust in the stud textures and one missing reindeer antler every year. Store it assembled on a baseplate in the off-season, covered with a cotton pillowcase — not in a bin, where pieces scatter.
34. A Brick Cottage Framed by Frosted Pine and Red Berries
Framing is underrated. Instead of perching this house alone on a shelf, the frosted pine branches with red berries arc around it, cropping the edges of the view the way a camera would. It makes a 4-inch house feel like a window into a larger world. The warm yellow windows against that dark green foliage also give you the sharpest value contrast anywhere in the display.
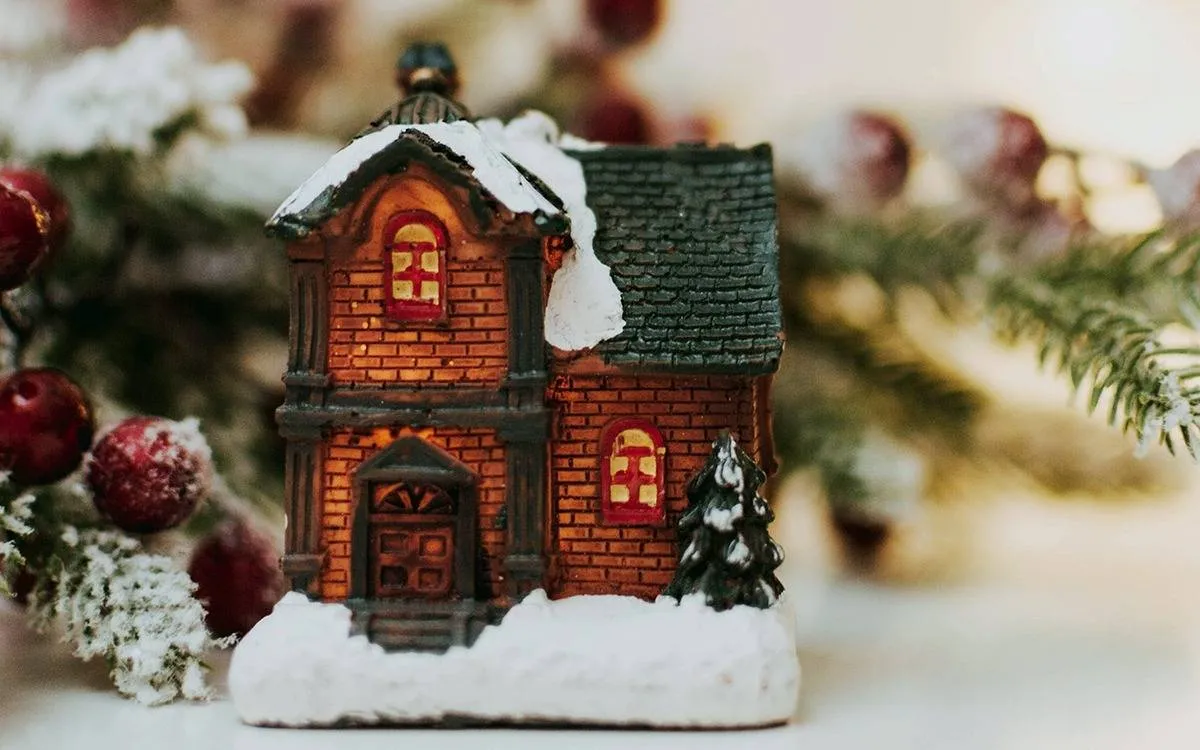
Red berries are the cheapest way to add sparkle to evergreen — one branch runs about $3 and you only need a dozen berries to make the greenery read festive. Push them slightly into the branch junctions so they look like they grew there instead of being stuck on. And always place greenery behind and beside lit windows, never in front of them.
35. A Night-Sky Backdrop Behind a Multi-Tiered Village
- Multi-tier risers and base boards: $30–$70
- Lit buildings, 10–15 pieces: $220–$500
- Dark backdrop fabric with small lights: $20–$50
- Frosted trees, snow, and ground cover: $35–$75
- Figures, vehicles, and garland accents: $25–$60
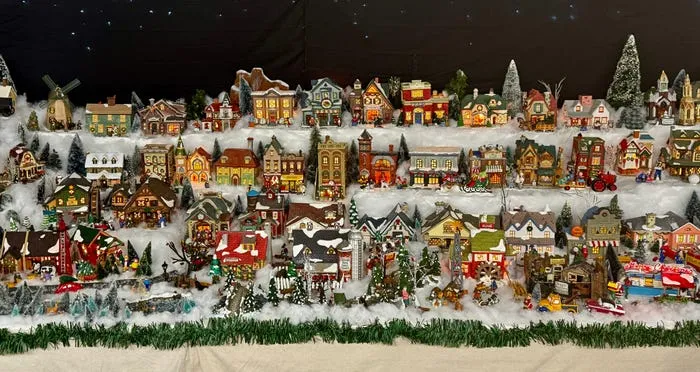
Total: $330–$755. Buying half the buildings pre-owned from Etsy or eBay sellers is where most of the savings hide.
Tiered villages need depth more than width. Budget 24 inches front-to-back so each level can step up and still leave visible snow in front of it. Keep the top tier below eye level when seated — roughly 15 inches above the table. On a shallow 12-inch surface, skip this entirely and go with Idea #11, which was built for exactly that constraint.
Go Build a Little Town That Glows at 6 PM
Start with one tier, one tray, or one thrifted cottage on a wood slice — the villages that last are the ones built slowly over a few seasons. Pick a single idea above, give it a corner this year, and let next December’s version be bigger and a little braver. And honestly? The imperfection is the charm. A crooked pine tree has never ruined a good snowbank.
📌 Save this to Pinterest so it’s waiting for you when the holiday bins come out — and tag us when your village lights up.