
34 Stunning Homemade Christmas Ornaments You Absolutely Need to Craft This Holiday Season

You know that feeling when you pull out a box of ornaments you made three years ago and they still look better than anything you bought on sale? That is the whole promise of homemade Christmas ornaments in 2026 — small, honest objects that get better every December.
After filtering through hundreds of options across Dollar Tree, Etsy, and Michaels, we narrowed it down to 34 ideas that actually deliver, from a $1 book-page ornament to an $82 clay-and-watercolor set, with budget and luxury versions compared side by side.
Inside you will find rustic natural looks, minimalist beadwork, nostalgic candy-cane stripes, and a whole lot of kid-friendly crafts that do not look like kid crafts.
2026 is the year of personalization and unexpected color — state shapes, pet portraits, and crackled ceramic glazes are replacing the all-beige tree, and Pinterest has noticed.
Go ahead and save this — you are going to want to reference it.
1. Paper Cone Angels with Wooden Bead Heads
These little angels come together in an afternoon, and the charm is in the imperfection — slightly uneven cones, visible paper texture, halos that sit a little crooked.
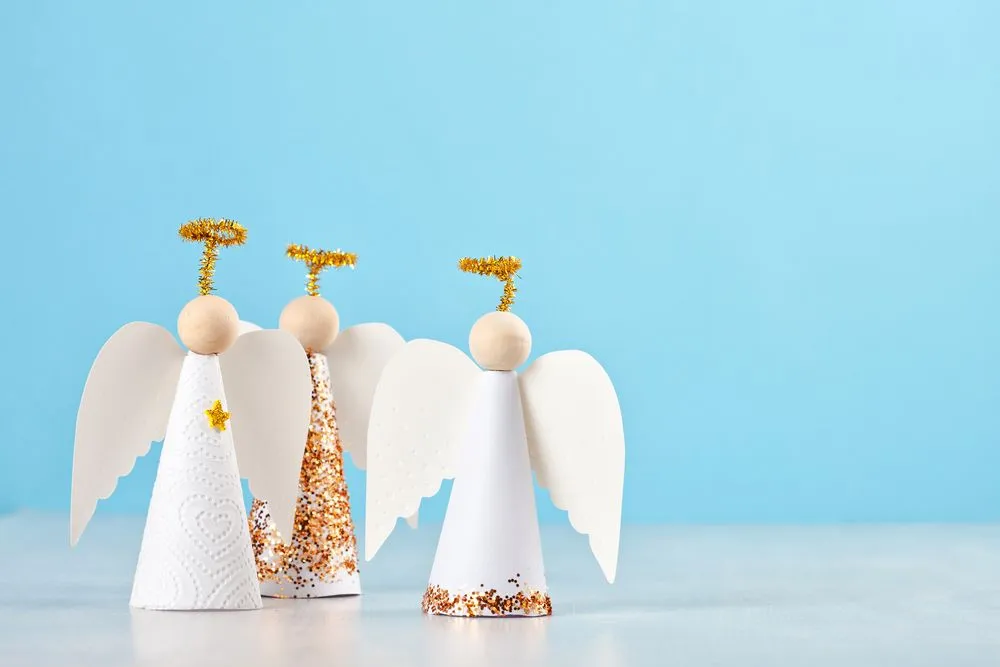
- Roll a 6-inch paper half-circle into a cone, glue the seam, and trim the base flat so it stands.
- Cut two scalloped wings from white paper, crease them down the center, and glue them to the back.
- Glue a light wooden bead on top for the head.
- Twist a gold tinsel pipe cleaner into a small loop and press it behind the bead.
- Brush the body with glue and dip it in fine glitter, or leave it matte and stamp an embossed heart instead.
About 45 minutes for three, and under $12 in supplies.
Skip the craft-store glitter and buy fine glass glitter instead — that swap is the entire ornament. Craft glitter reads flat and plasticky under tree lights; glass glitter catches each bulb and throws specks of light onto the branches behind it. One 1-ounce jar runs about $9 and covers a dozen angels.
Keep the halos small, too. A tinsel loop wider than the bead head makes the whole angel look top-heavy; aim for roughly the bead’s own diameter, about 10mm.
2. Stacked Wooden Beads on a White Tree
The formula is almost aggressively simple: 90% white and cream, 8% natural jute, 2% warm light. Stack three round beads in graduated sizes — 20mm, 16mm, 12mm — onto braided jute twine, knot below the bottom bead so nothing slides, and leave a long enough tail to tie a hanging loop.
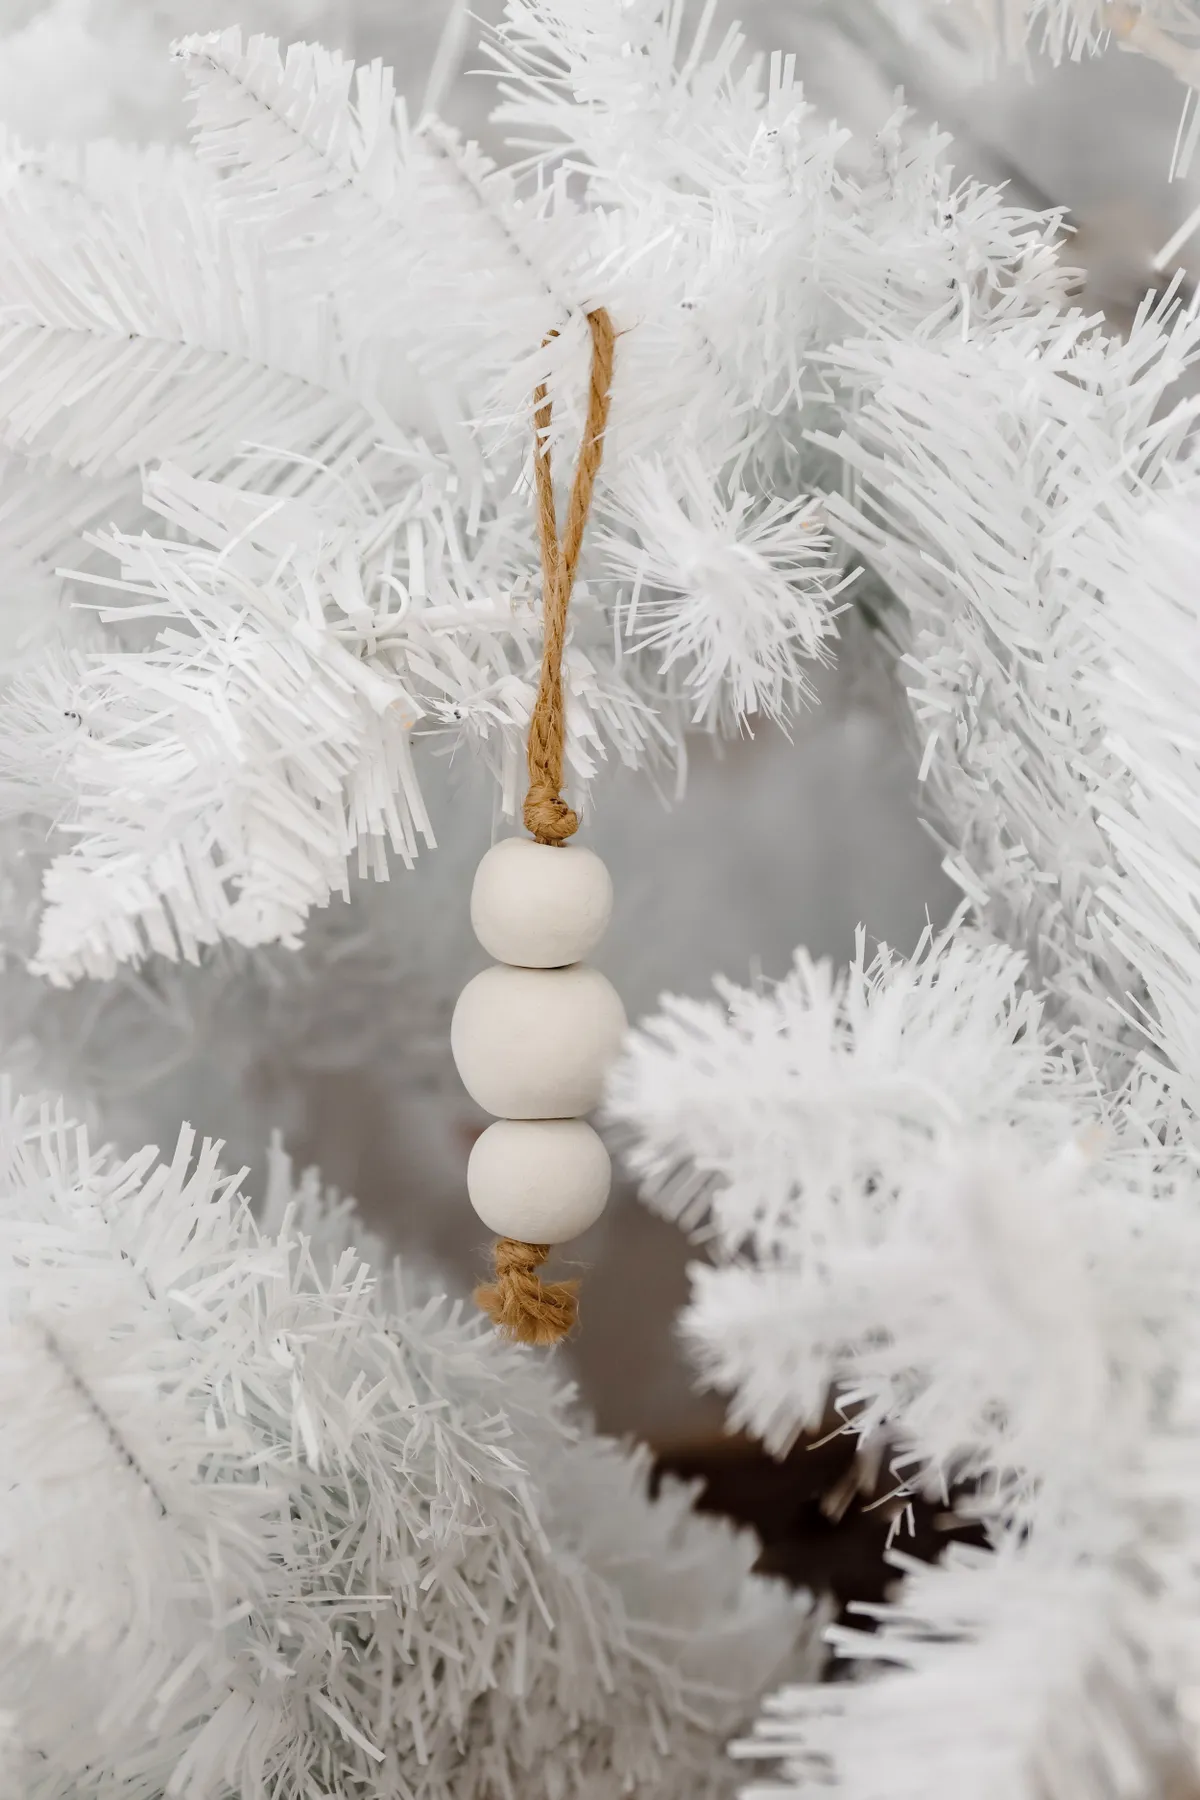
Swap the beads for wood discs and the mood goes beachy. Swap for matte black and it turns modern. The math holds as long as one material dominates and one accent material does all the talking.
White trees get a bad reputation for looking like a hospital hallway, and the culprit is usually contrast, or the total lack of it. This ornament works because it adds texture without adding color: stacked beads give the eye a vertical shape to follow, and the jute introduces a rough natural fiber against all that smooth, glowy plastic. It is the quiet counterpoint to Idea #1.
There is a scale trick at play too. Three beads read as one object rather than three, because they sit tightly stacked with no gaps, which keeps a small ornament from vanishing into the branches.
3. Watercolor Floral Angel Ornaments with Embossed Hearts
- Blanks: blank white angel-shaped ornaments, set of six — $14–$26
- Paint: watercolor set plus a fine liner brush — $12–$22
- Texture: embossing stylus or a simple ball tool — $8–$15
- String: gold cord or thin gold ribbon — $4–$7
- Sealer: matte acrylic spray — $8–$12
Total: roughly $46–$82 for a set of six.
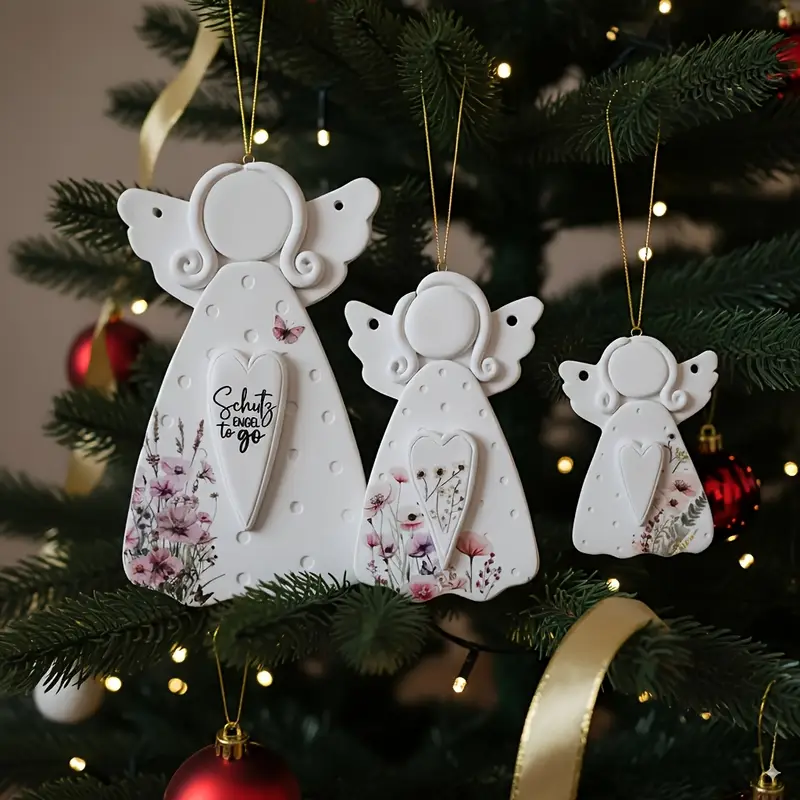
Budget alternative: unfinished wood angel shapes run about $0.79 each, a toothpick handles the dot texture, and embroidery floss you already own works fine for hanging. That lands the whole set under $25.
Paint the watercolor florals first, let them dry completely, then add the raised heart and dot texture — texture has to sit on top or it smears. Use barely-there pink and sage washes and let the white of the ornament do the heavy lifting. Load your brush, then blot it once on a paper towel before it touches the surface; that is the difference between a delicate wash and a blob.
Seal with matte spray, never gloss. Gloss turns a soft watercolor into something that looks like a sticker.
4. Candy-Cane Striped Bow Ornament with Satin Ribbon
The creamy white satin ribbon is what saves this ornament. Without it, a candy-cane-striped bow is just a painted bow — cute, a little flat. Threading that satin loop through the small gold ring changes the read entirely: it turns a paint project into something that looks bought, and it introduces a second material next to the painted surface.
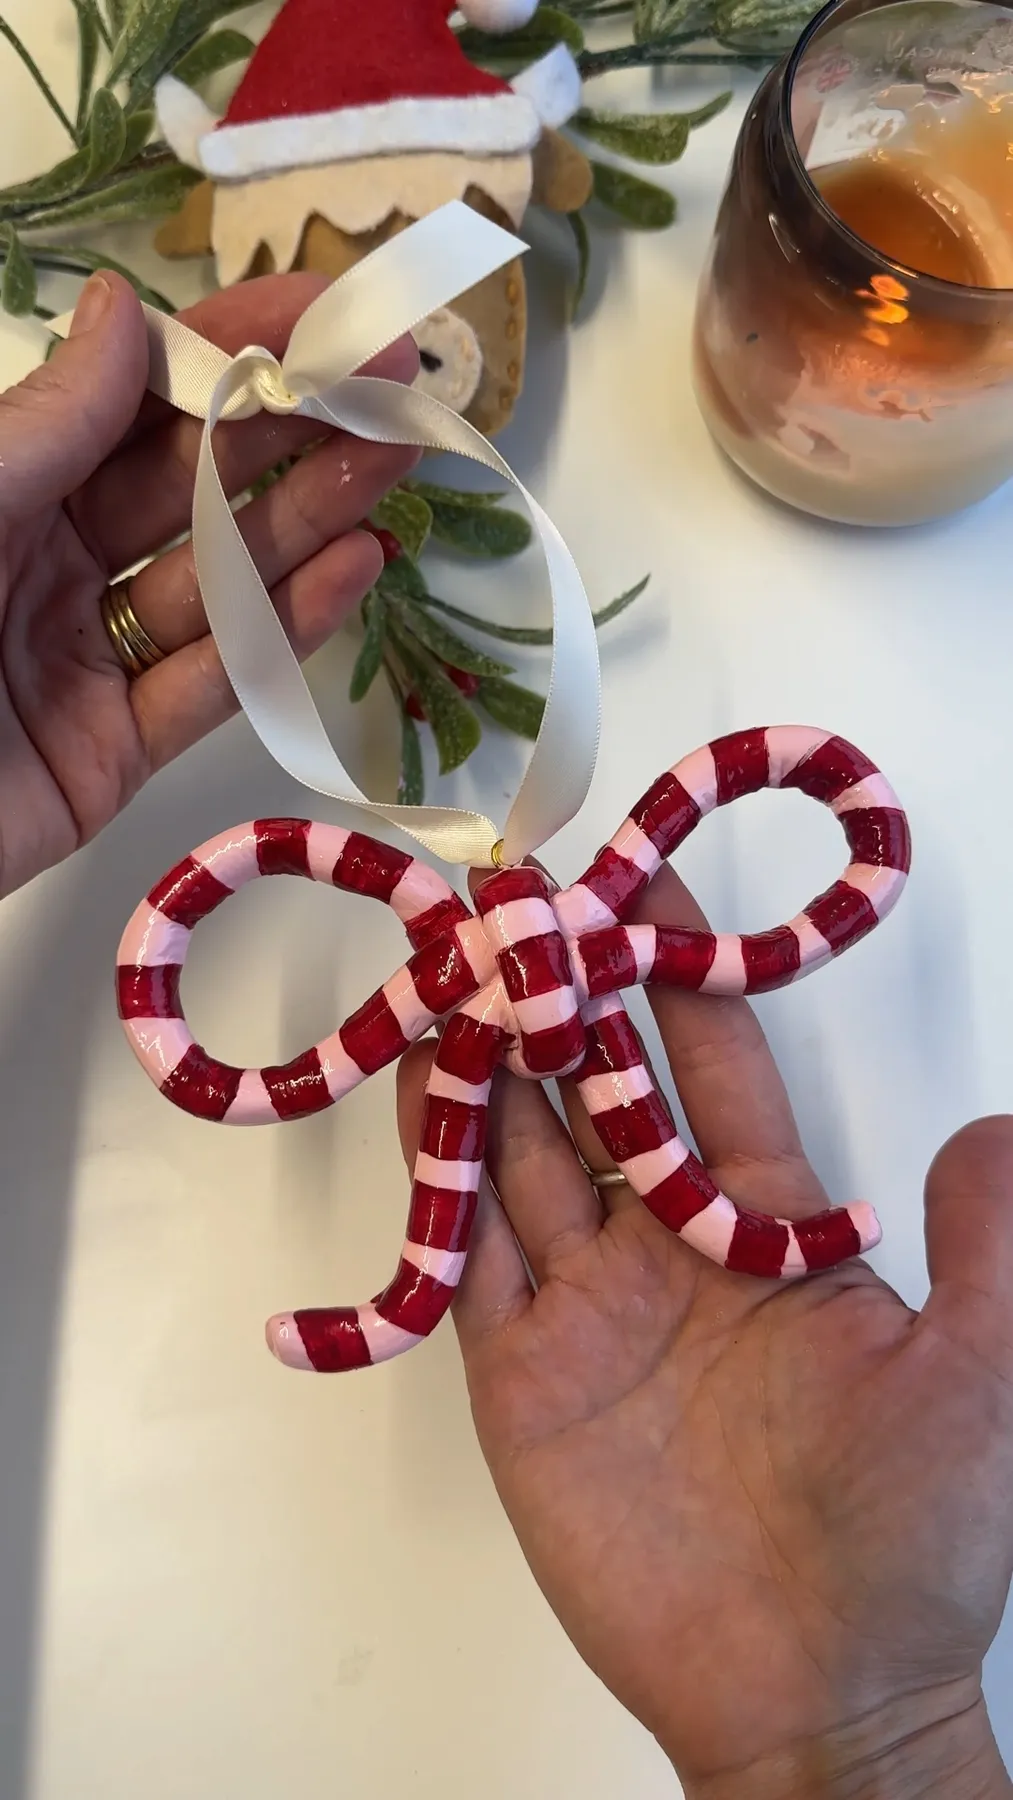
If you change nothing else, change the ribbon. Keep it wide, keep it cream, and tie a simple overhand loop instead of a fussy bow. Skip the red ribbon — the stripes are already doing that job.
Painted stripes are unforgiving. If your lines wobble, the ornament looks homemade in the wrong way, and people do look closely at ornaments. Tape off your stripes with painter’s tape and pull the tape while the paint is still tacky, not fully dry, or you will get ragged edges.
One more thing: satin frays. Pass the cut ends over a lighter for a single second so the ribbon does not unravel by New Year’s.
5. Rolled Paper Trees and Red Glitter Flowers
Roll your paper strips around a pencil first, then let them relax a little before gluing. Tight coils look machine-made; slightly looser ones read as handmade. For the tree, cut strips in three lengths so the tiers step down — about 4 inches, 3 inches, and 2 inches — and join the tiers with a small dot of glue at the center, pressing for a slow 20 seconds before moving on.
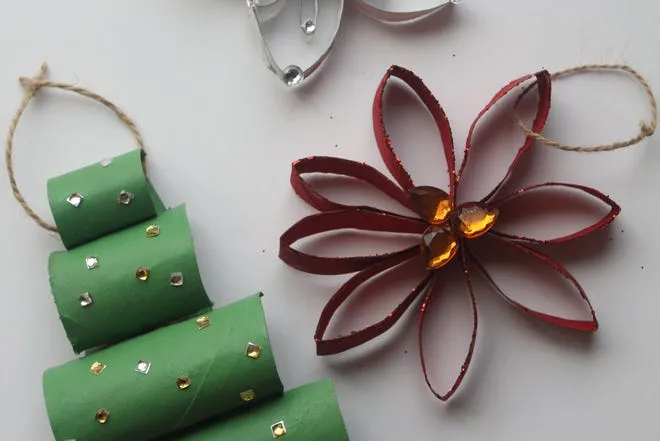
For the flower, run glue along the petal edges only, then dip. Glitter across the entire surface kills the red.
Everything here is paper, glue, and dollar-store glitter, which is the whole appeal — you can make a dozen for under $8. Grab scrapbook paper from the dollar aisle instead of a craft-store pad, and use a chopstick instead of a quilling tool for the rolls.
If you want the same tiered silhouette with less rolling, cut triangles from green cardstock and layer them, then top with metallic confetti squares. Same shape, a tenth of the fuss.
6. Yarn-Wrapped Mini Wreaths on Canning Jar Rings
Canning jar rings are the stealth hero of this project — they give you a perfect circle for about fifty cents, and the yarn wrap hides the metal completely. Because the base is rigid, the wreath keeps its shape all season instead of sagging the way wire or cardboard versions do.
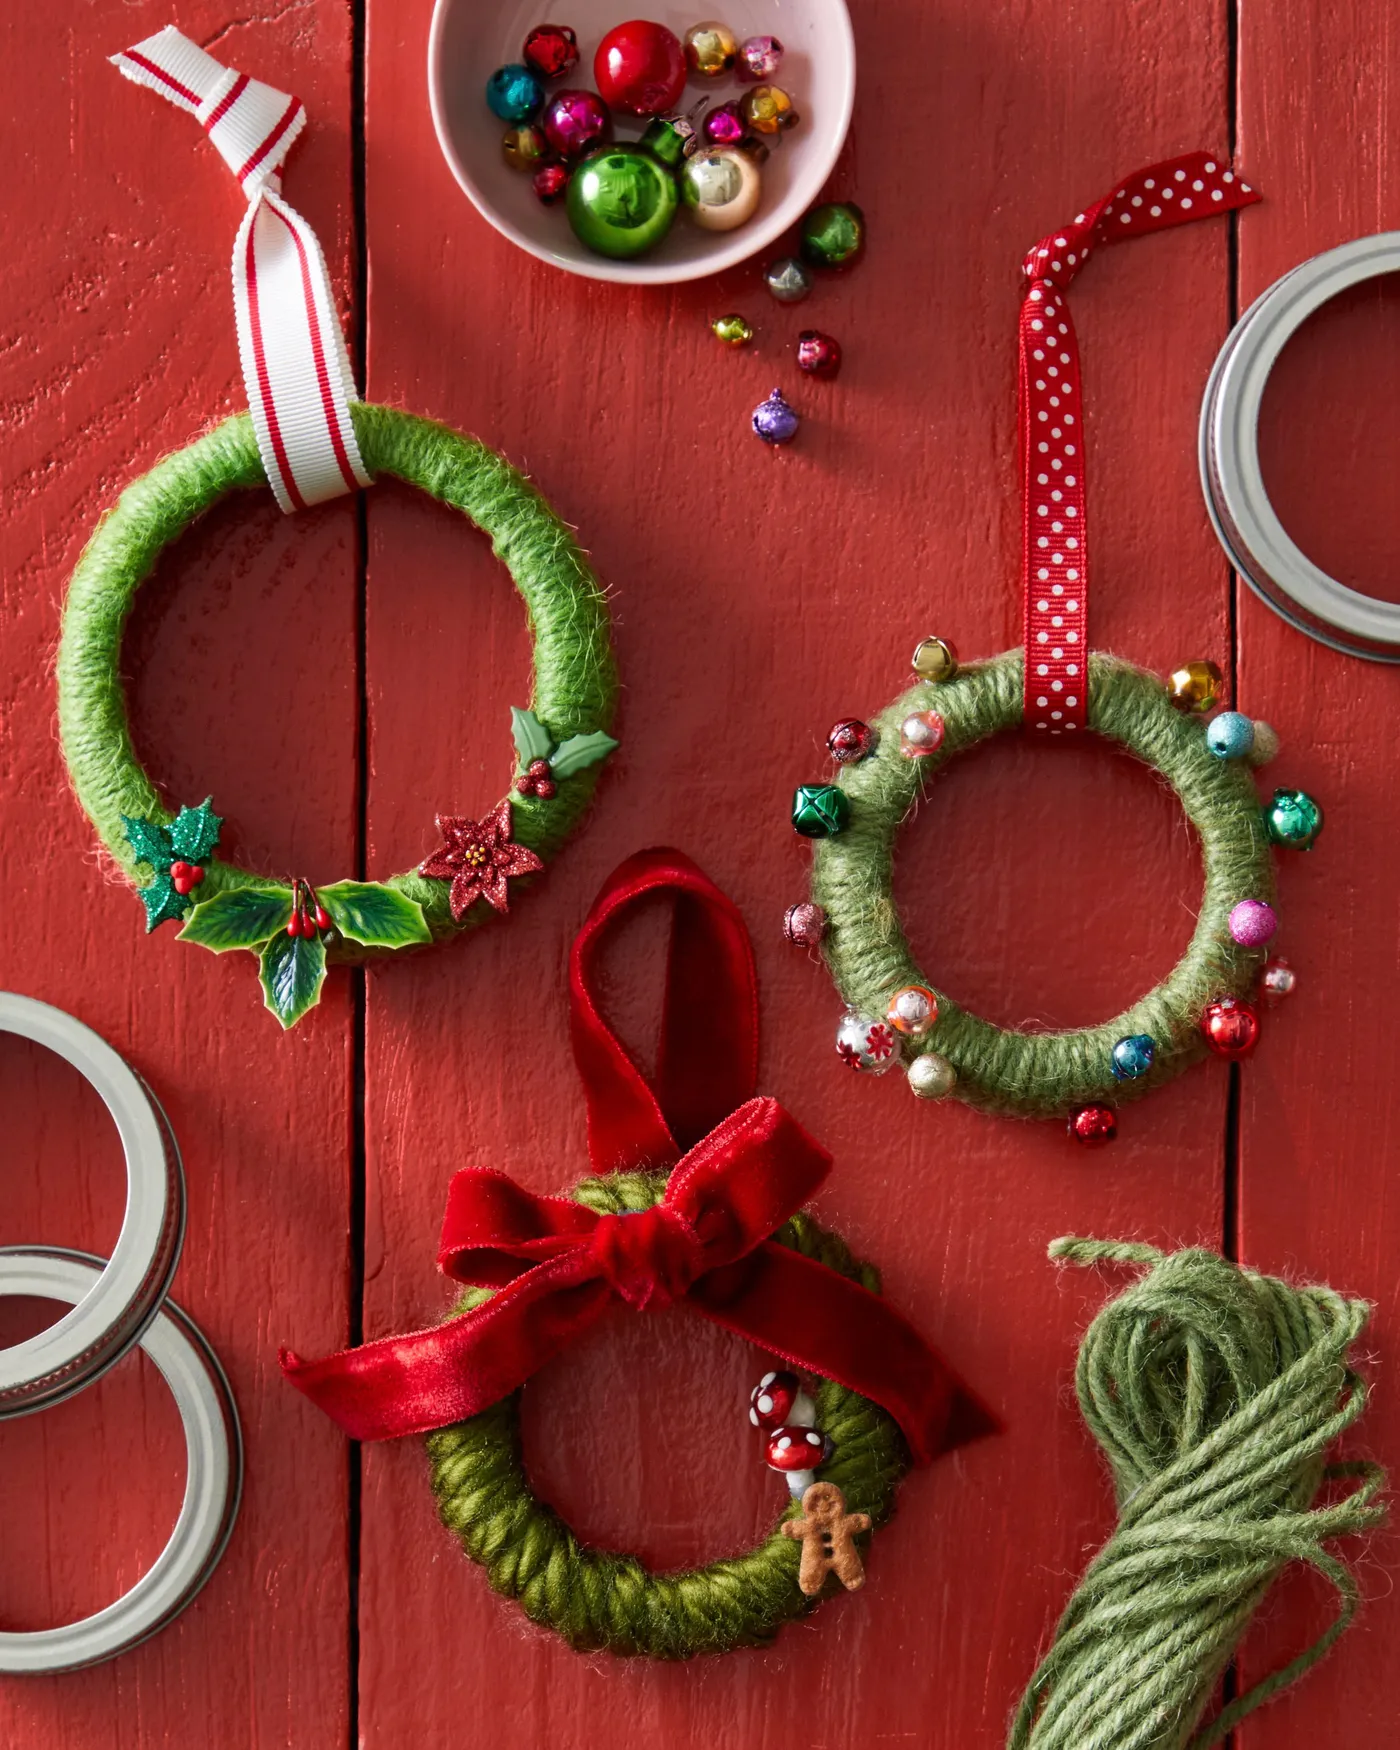
Scale contrast is the other thing working here. A 3-inch wreath next to full-size baubles looks intentional, almost like a miniature collection. Group all three on one branch for impact rather than scattering them.
- Wrap a jar ring in green yarn, holding the tail down with your thumb for the first three wraps and keeping strands snug and side by side.
- Press a dab of tacky glue on the back and let it set five minutes.
- Build one small cluster — a velvet bow, tiny mushrooms, a gingerbread charm, or jingle bells — glued in a single spot rather than spread around the ring.
- Tie a loop of red-and-white baker’s twine through the ring for hanging.
About 20 minutes per wreath, roughly $3 each if you are buying yarn new.
7. Peppermint Swirl Baubles on a Classic Green Tree
Swirl ornaments read best at 3 inches or larger. Anything smaller and the spiral turns to a blur from more than three feet away. On a 7-foot tree, plan on about 12–15 of these as statement pieces, spaced roughly 10 inches apart, and let smaller ornaments fill in between.
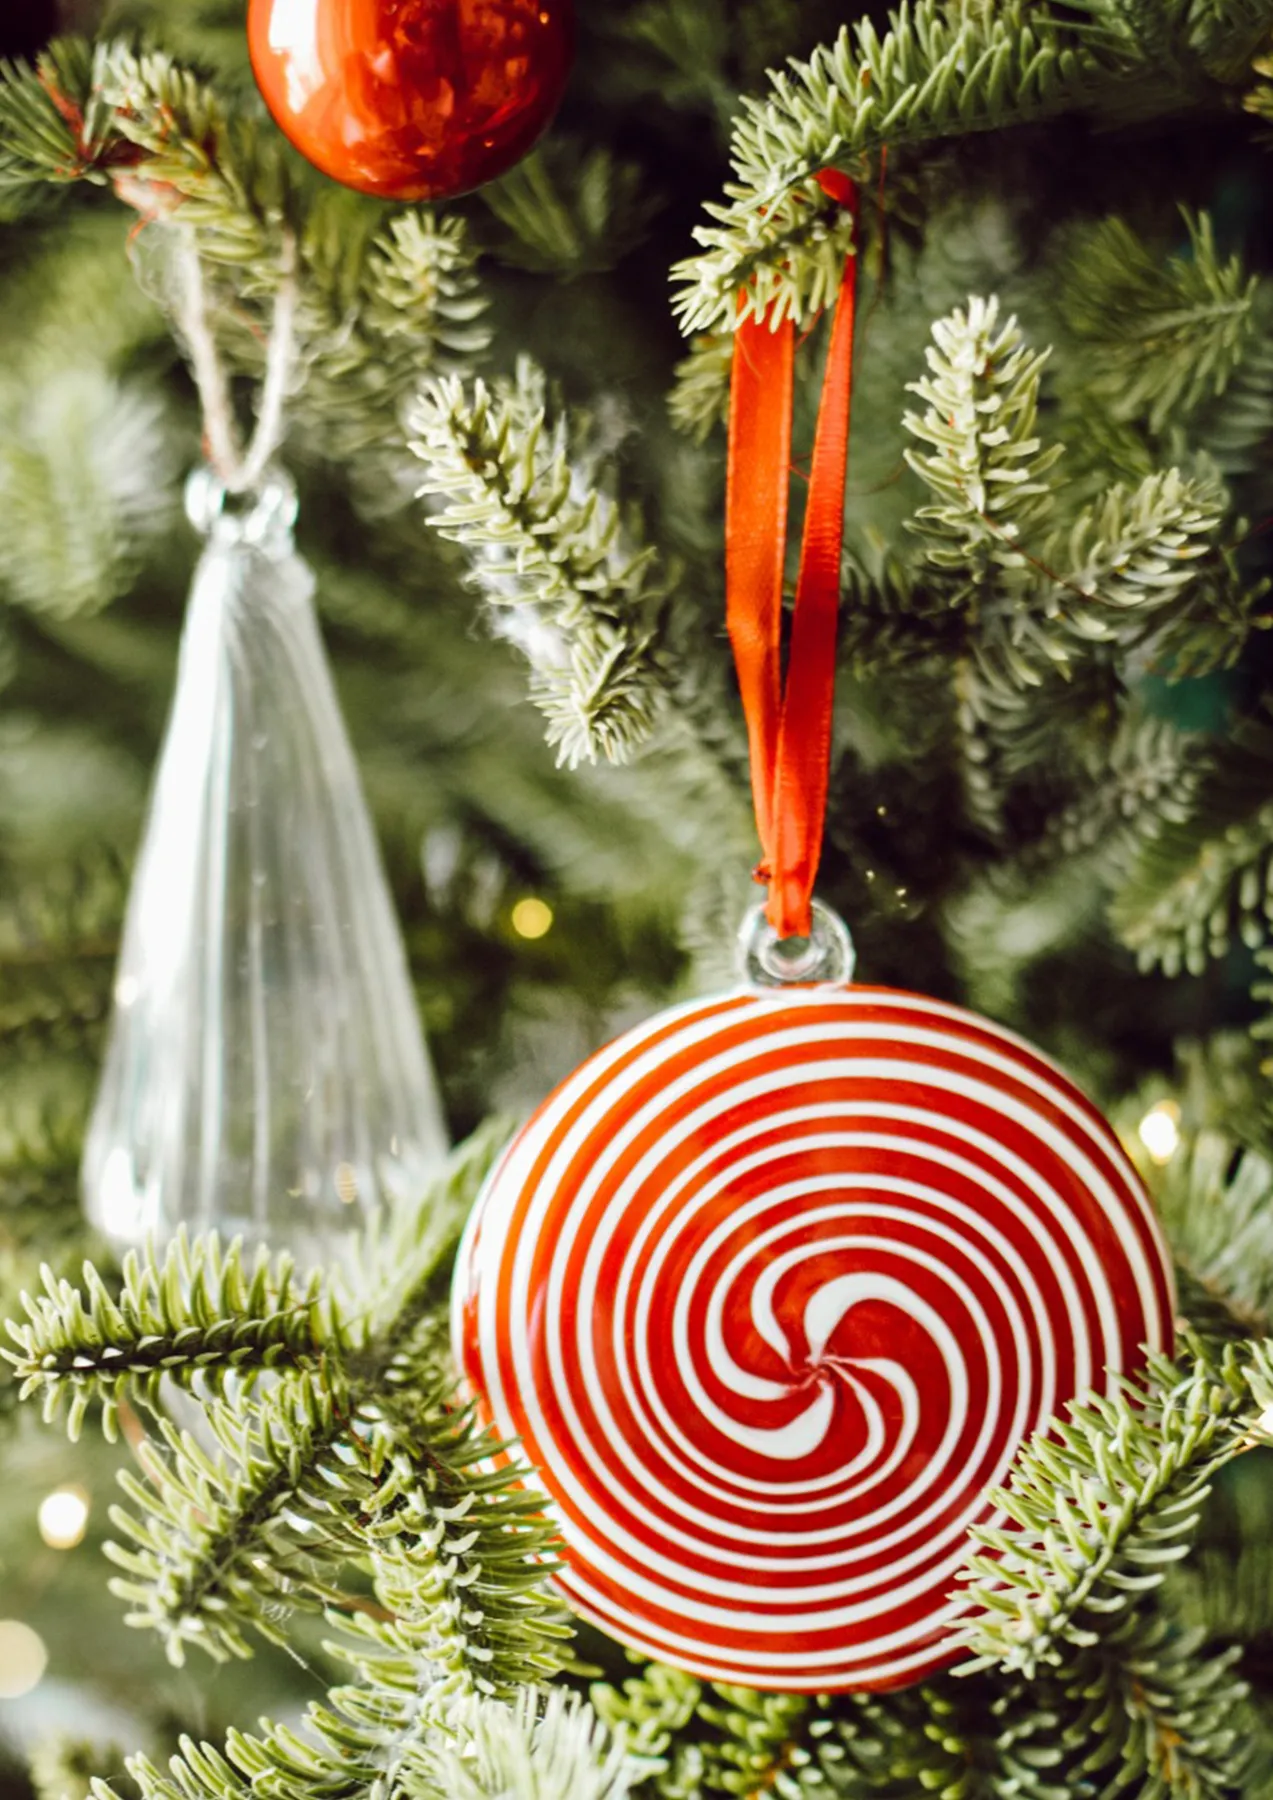
On a tree under 6 feet, use 8–10 and keep them in the lower two-thirds where the branches are widest — the spiral catches light better down there.
Peppermint everything is back in a big way for 2026. It is the pendulum swing away from the beige-and-cream Christmas that has dominated the last few years: red and white reads nostalgic without tipping into vintage-store clutter, and it photographs beautifully, which is exactly why it keeps surfacing on Pinterest.
The staying power is genuine. Candy cane stripes have cycled through every decade since the 1950s, and they are cheap to make. Skip the full candy-cane tree, though — one or two focal swirls is plenty.
8. Dried Orange Slices and Pinecones on a Rustic Fir
- Slice oranges 1/8 inch thick — any thicker and they mold instead of drying. Blot both sides with a paper towel.
- Bake at 200°F on a wire rack set over a sheet pan for 3–4 hours, flipping hourly, until the centers are dry but not browned.
- Poke a small hole near the edge with a skewer while the slices are still slightly warm.
- Thread with twine, then pair each slice with a small pinecone on the same branch so the weight is balanced.
Roughly four hours, mostly unattended. About $6 for a bag of oranges.
Dried citrus is the rare ornament that actually improves with age — for about two seasons. After that the color fades to a dull tan. Store them in an airtight container with a silica packet, because humidity is what turns them soft and eventually moldy.
Skip them entirely in a humid climate or if your tree lives near a kitchen. For the look without the upkeep, buy pre-dried slices sealed in resin, or paint wooden discs orange and leave the food out of it.
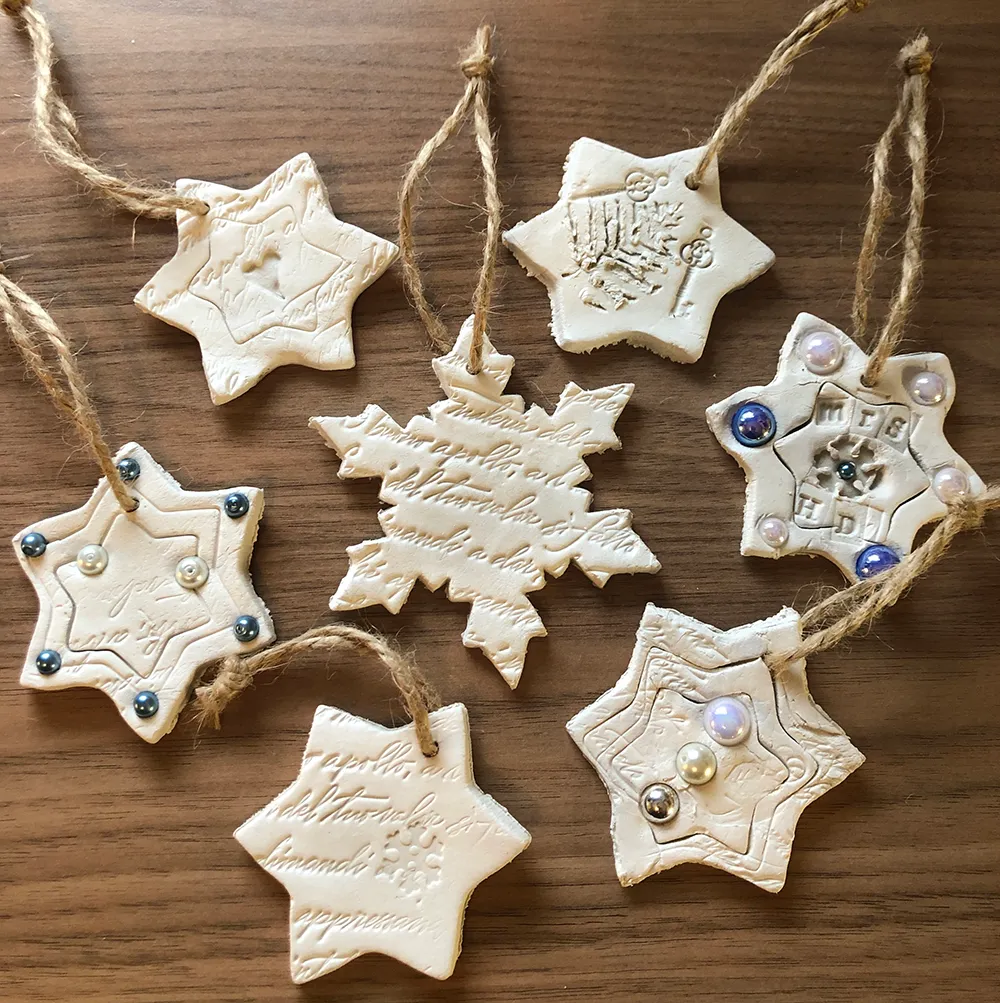
9. Cream Clay Stars with a Pressed Snowflake Pattern
- Air-dry clay, 2 lb block (makes 15–20 stars) — $8–$14
- Star cookie cutter — $2–$5
- Texture: lace trim, a snowflake stamp, or a rubber stamp from your drawer — $0–$8
- Twine — $3–$5
- Rolling pin and parchment — $0–$10 if you already bake
Total: $13–$42 for twenty ornaments.
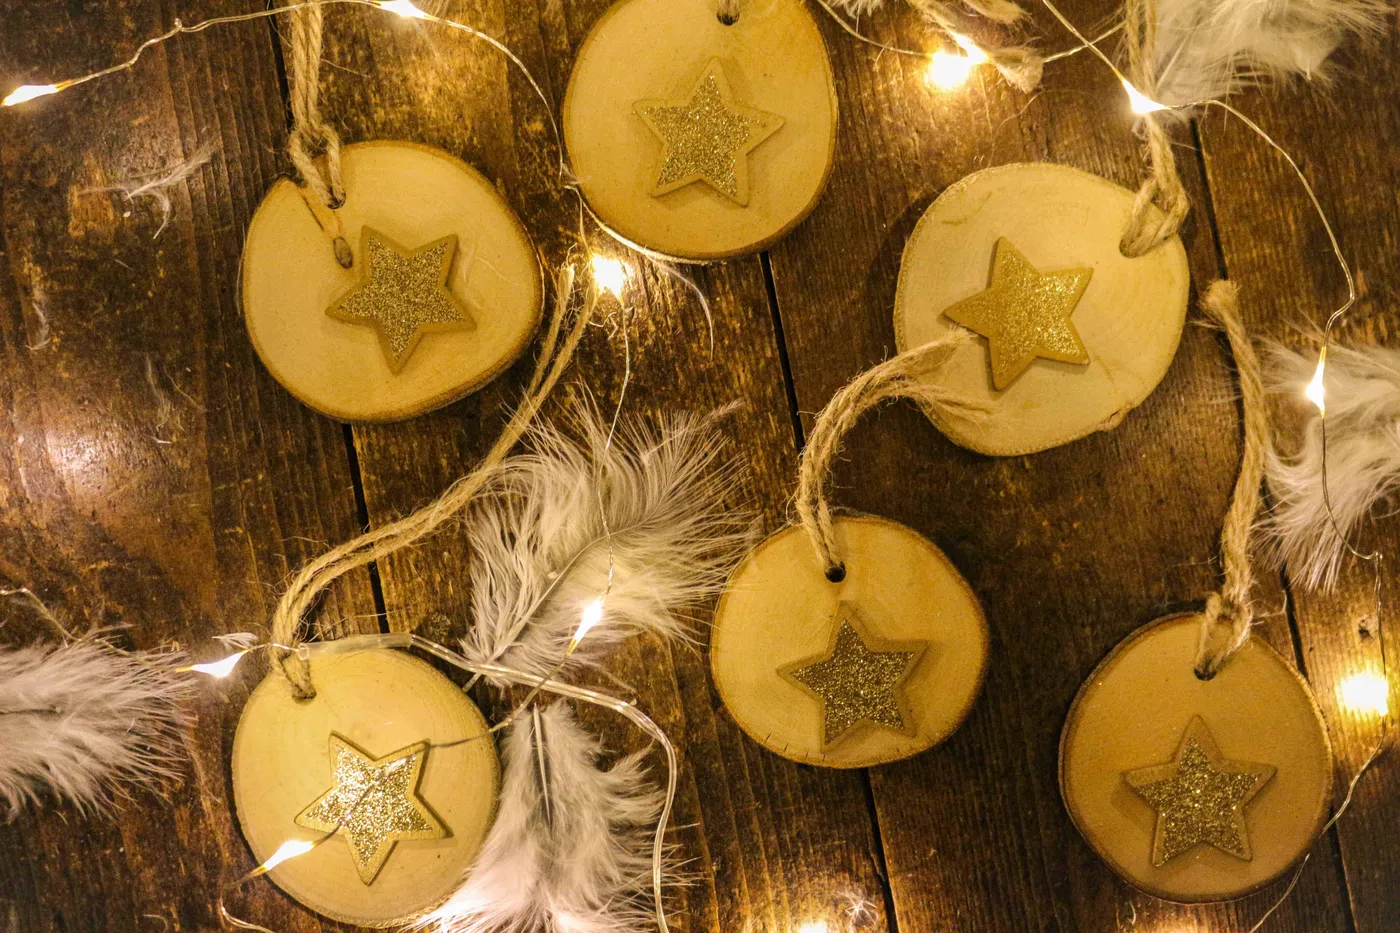
The budget version really is the same ornament: dollar-store air-dry clay and a star cutter from the baking drawer. You are saving on tools, not on looks.
Air-dry clay shrinks as it cures — about 5–8 percent — so if you punch the hanging hole with a skewer, make it noticeably wider than your twine or it will close up overnight. Roll to an even 1/4 inch; thin spots are exactly where stars snap.
Do not rush the dry time either. Two full days on a wire rack, flipping once. A star that feels dry on the outside can still be soft at the center, and that is the one that cracks in storage.
10. Painted Pine Branch Discs with Real Berries
Wooden disc blanks run about $8 for a pack of 25, which makes this one of the cheapest projects in the whole list — and the natural bits are free if you take a walk. Small pinecones from the yard, a sprig of greenery from the tree’s trim pile, three or four berries off a craft stem you already have. If you liked the warmth of Idea #8, these discs give you the same feeling in a form that lasts a decade.
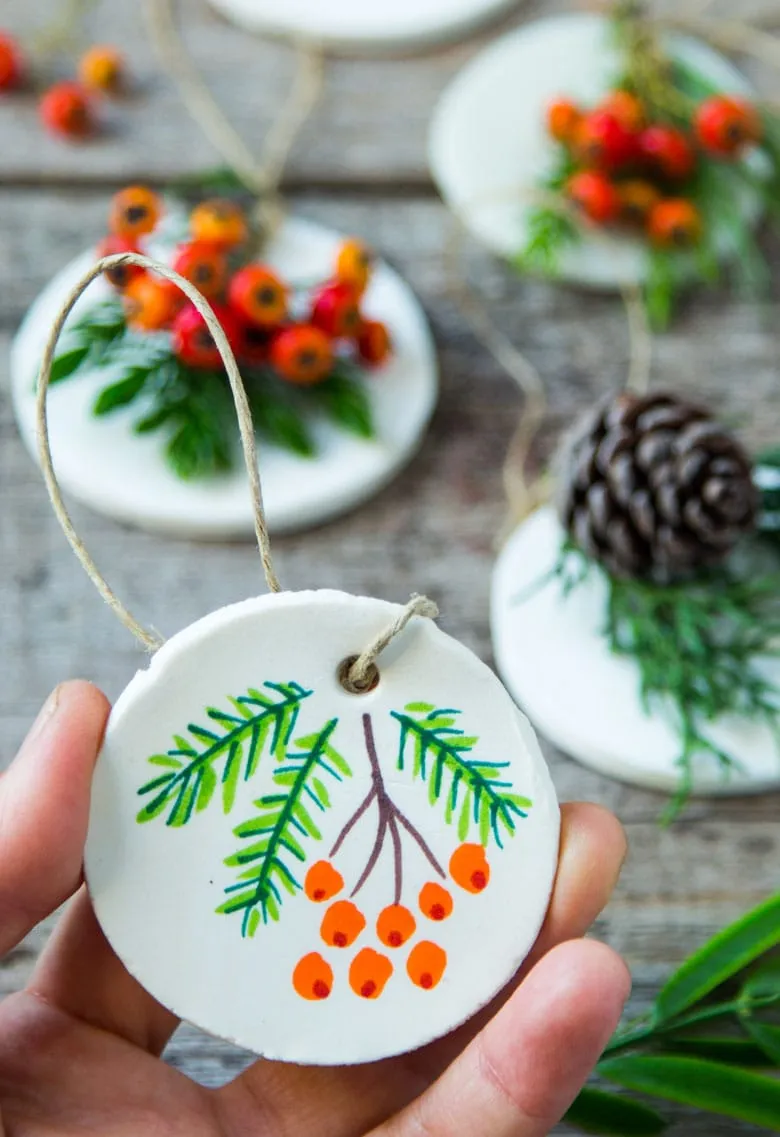
Swap the real berries for small wooden beads painted orange-red if you want them to survive more than one season. A dozen comes in around $15.
The single thing that makes these work is that the painted branch runs off the edge of the disc. A centered motif looks like a sticker; a branch that enters at one side and exits the other makes the ornament feel composed rather than decorated. It is a two-second decision that changes everything.
Load the brush with green and orange and make one confident stroke instead of three careful ones. Confidence, weirdly, is the skill here.
11. Paper-Mache Mushroom, Crumpled Heart, and Bird’s Nest
This cluster works because it follows a rule that has nothing to do with Christmas: three textures, one color family. Paper-mache (matte and lumpy), crumpled paper (crinkled), and natural twigs (rough and organic), all in reds, browns, and whites. Nothing matches, and nothing fights.
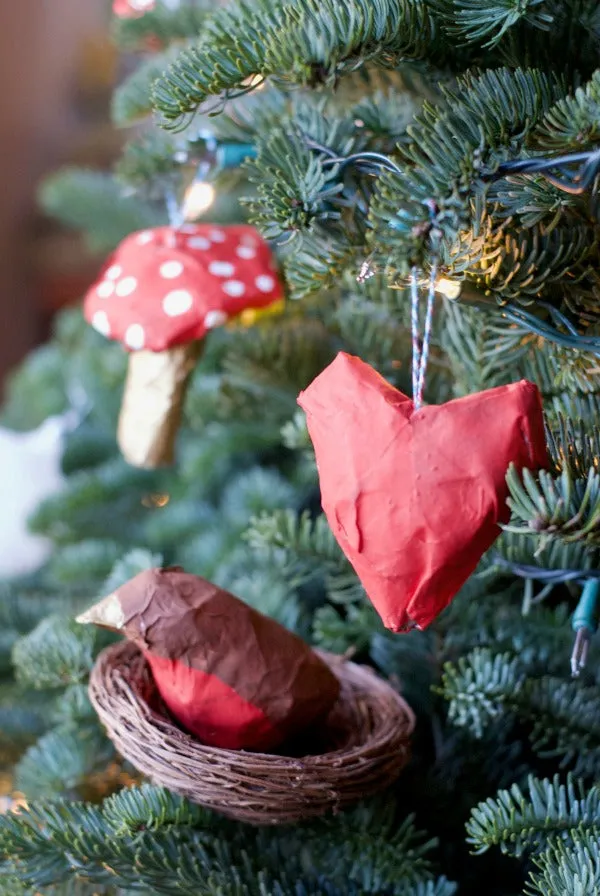
The bird’s nest is the anchor. It is the one element that is obviously not a bauble, which makes everything around it feel collected instead of purchased.
Make your paper-mache with diluted white glue — one part glue, one part water — over a balloon or a foil form. Two coats with drying time between; three coats gets heavy and the ornament starts pulling the branch down. Once dry, paint the mushroom cap red and let it dry fully before adding white dots with the handle end of a paintbrush, not the tip.
Keep the whole cluster inside a 10-inch circle on the tree so it reads as a vignette rather than random objects.
12. State-Shape Clay Ornaments on Evergreen Branches
Place-based ornaments have quietly become the biggest growth category in handmade Christmas decor. People want objects that say where they are from, especially as more families spread out across states. Personalization is the through-line for 2026: monograms, zip codes, state shapes, pet silhouettes.
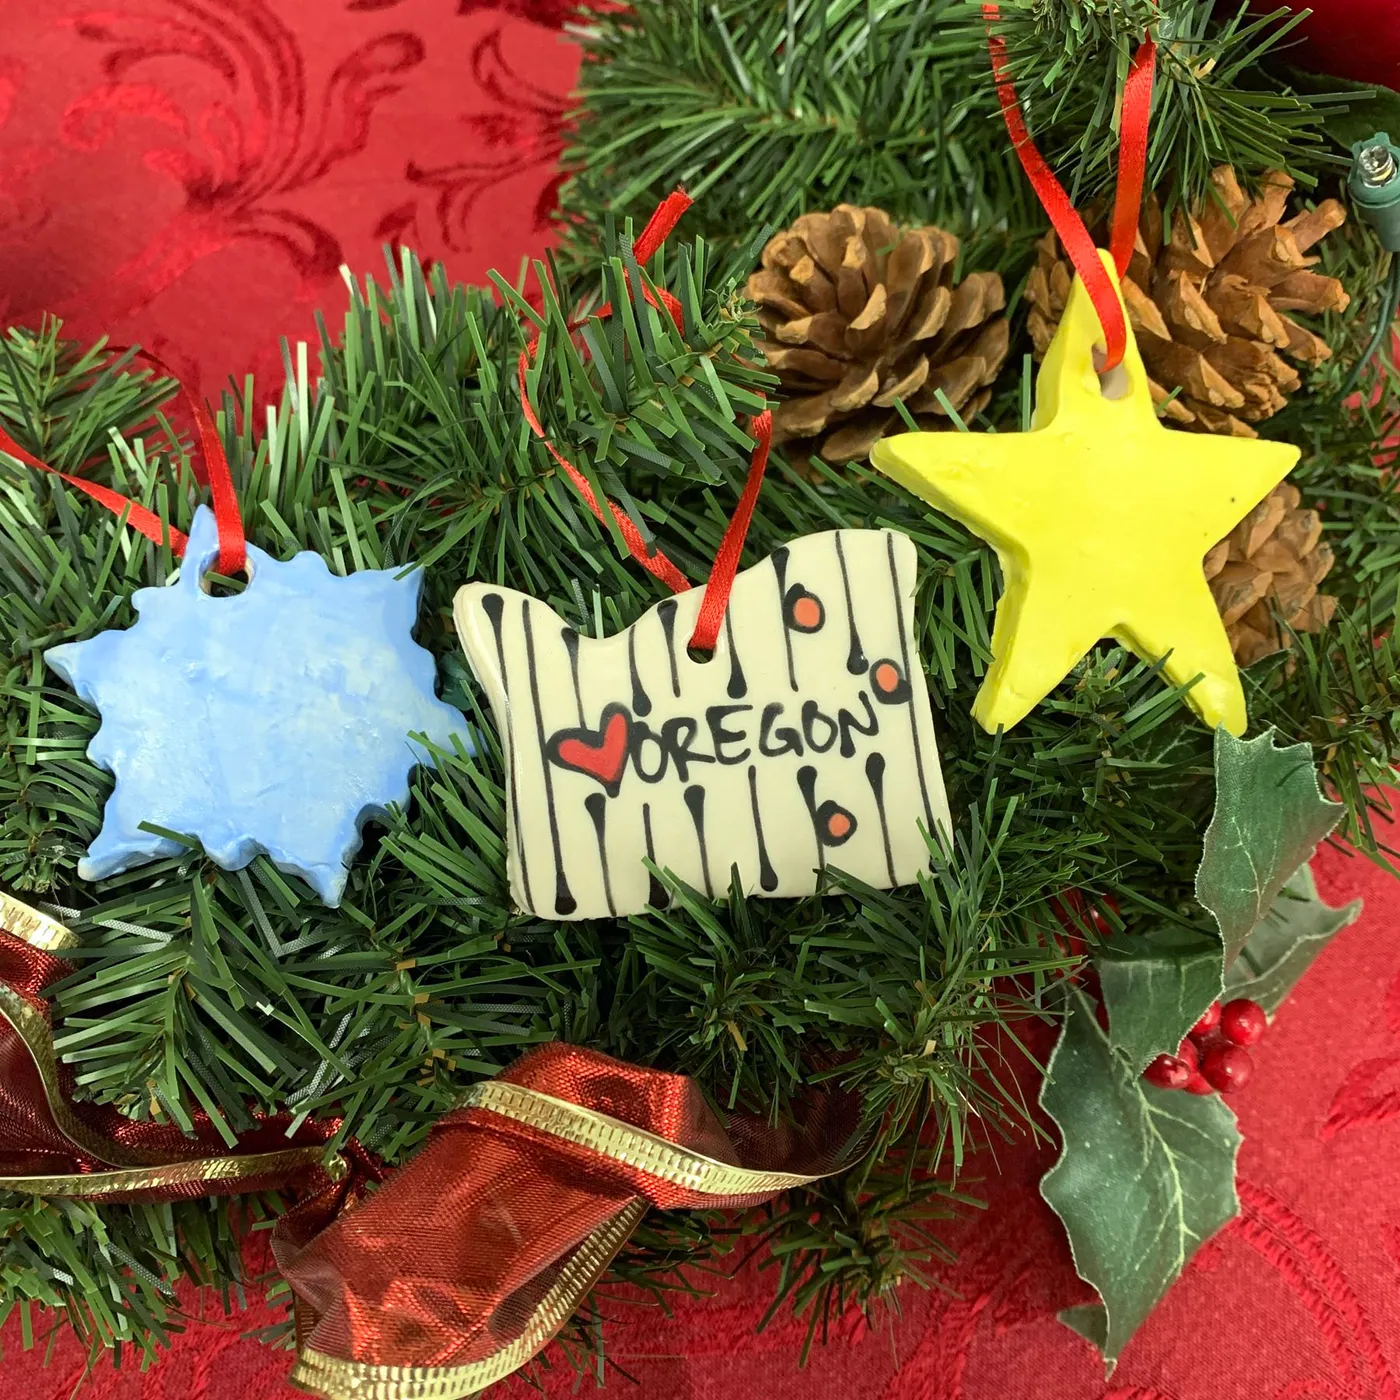
The staying power beats most trends, because it is sentimental rather than stylistic. A state-shaped ornament does not go out of fashion. It just becomes the one your kid argues over in twenty years.
- Print a state outline about 3 inches wide, cut it out, and trace it onto 1/4-inch air-dry clay.
- Cut with a craft knife, smooth the edges with a damp fingertip, and punch the hanging hole now.
- Dry flat for 48 hours, flipping at the 24-hour mark.
- Paint a small red heart on the city you call home, then seal with matte medium.
About $4 per ornament and one evening of work, most of it drying time.
13. Brown Paper Bag Gnomes with Cotton Ball Beards
Googly eyes are the make-or-break detail, and most people glue them too high. Set them just below the fold of the hat so the brim overlaps the top of the eyes slightly — that is what gives the face its personality. Then glue the red pom-pom nose between them, touching both.
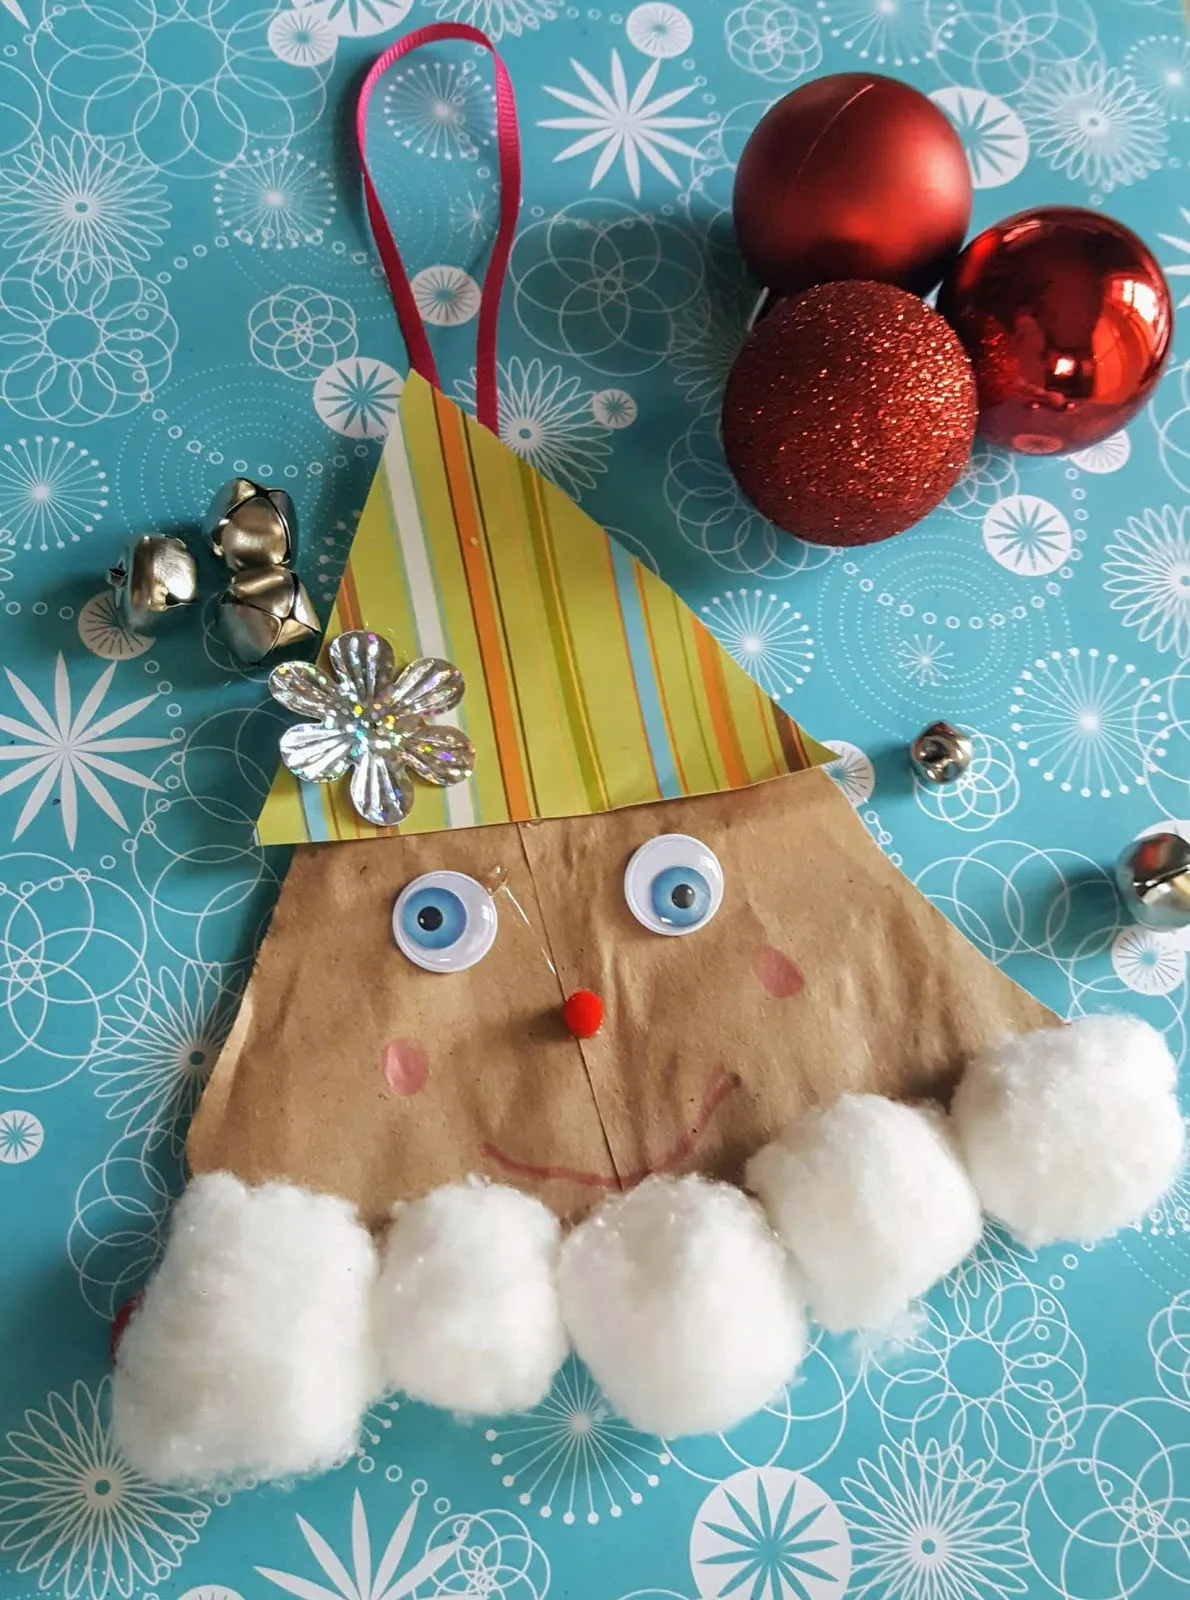
For the beard, unroll the cotton balls and layer them in overlapping rows starting at the bottom, working upward. Flat, stretched cotton looks like a beard; whole balls look like a cloud.
This is the ultimate zero-budget ornament: a brown paper bag, cotton balls, one pack of googly eyes, and a scrap of striped paper. If you already have a craft drawer, you are spending nothing.
Sub in a paper cupcake liner for the hat or a coffee filter for the beard if you are out of cotton. Dollar Tree sells the pom-poms, jingle bells, and eyes in one trip for about $4. It is the same project kids bring home from school, which is entirely the point.
14. Tissue Paper Ice Cream Cone Ornaments in Bright Scoops
The crumple is everything. If you smooth the tissue paper flat, you get a sad paper cone. Crumple each square into a loose ball first, then glue it down — the wrinkles create shadow and dimension that flat paper cannot fake.

And the cone matters as much as the scoop. Roll kraft paper into a real cone rather than folding a flat triangle, so the ornament has an actual 3D profile from the side.
Four scoops, four colors, no repeats: hot pink, orange, lime, turquoise. The formula is maximum saturation plus one neutral — kraft brown — holding it together. Because the cone is the only muted element in the mix, the colors read cheerful instead of chaotic.
To move the same formula to a calmer palette, swap the brights for blush, butter yellow, and sage. Same construction, completely different mood. Keep the kraft cone either way; it is the anchor.
15. Craft Stick Ornaments Loaded with Gold Glitter
- Craft sticks, 150-count box — $3–$6
- Craft glue — $2–$4
- Glitter, multi-pack — $6–$12
- Acrylic paint, small bottles — $5–$10
- Ribbon or twine for hangers — $3–$5
Total: $19–$37 for a whole afternoon of ornaments.
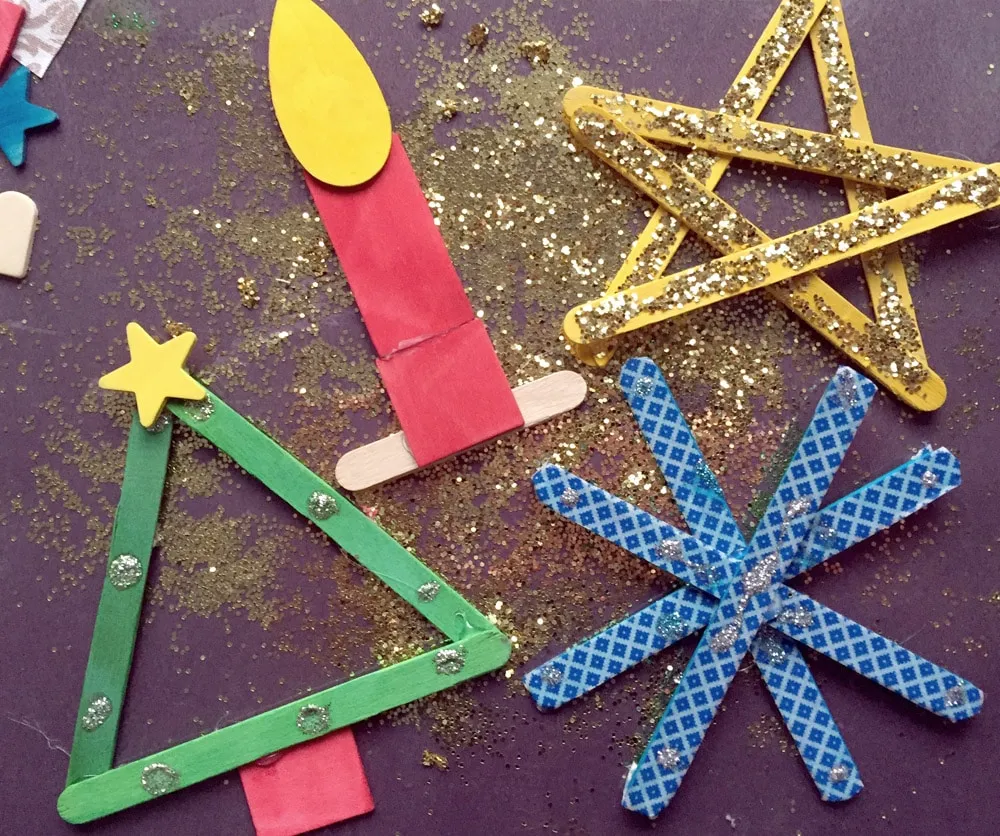
Budget version: dollar-store sticks and one jar of gold glitter instead of four colors. Under $10, and honestly the all-gold set looks better on a tree anyway.
Glitter will be in your kitchen until March. Do the glitter step over a sheet pan lined with parchment, pour the excess back into the jar, and wipe your hands on a damp cloth rather than a dry towel.
And be honest about what this is: a craft stick tree is a kids’ project and it looks like one, which is fine as long as you style it that way. Put these on a small tabletop tree or a playroom garland, not the formal living room tree.
16. Accordion-Folded Paper Ornaments in Red and Cream
Two colors, one fold, three shapes: 50% deep red and 50% cream. Cut paper strips to equal widths, alternate the colors as you stack them, then fan-fold the entire stack at once so the accordion lines up. Those alternating stripes are what make the shape read as a designed object rather than folded scrap.
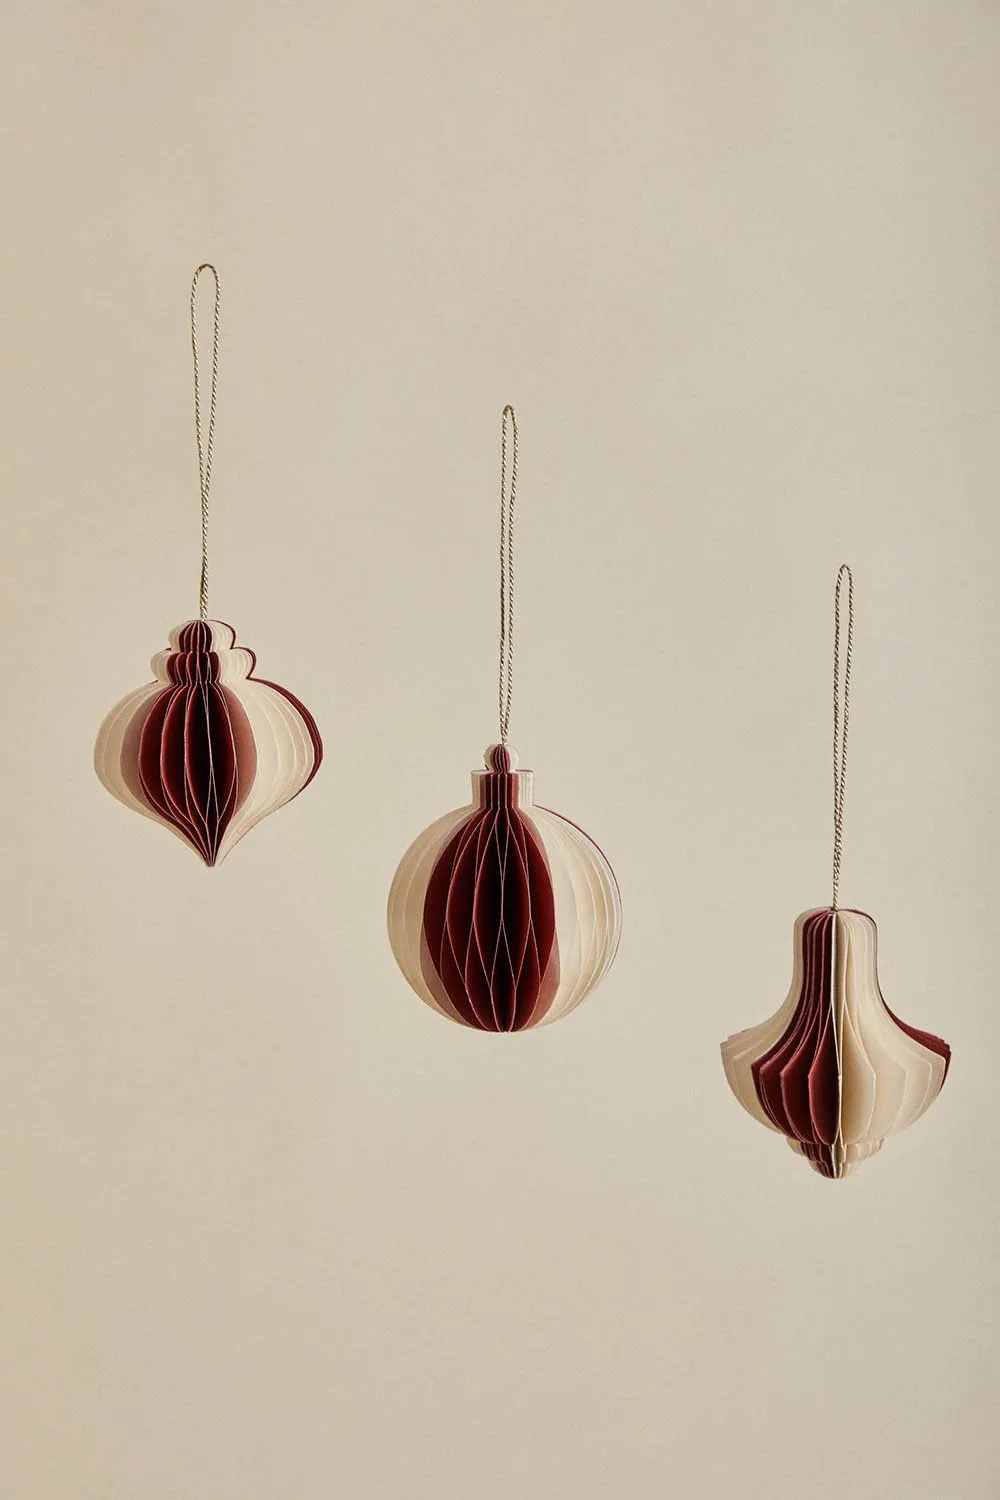
To adapt, keep the alternating structure and change the colors — forest green and white for a traditional tree, dusty blue and cream for something wintery. Keep the proportion at 50/50. Anything more lopsided and the stripes look like a mistake.
Score every fold line with a bone folder or the back of a butter knife before folding. It takes thirty extra seconds and it is the difference between crisp, even pleats and a lumpy mess. Fold the whole stack at once, then open it into a fan and glue the two ends together — the ornament holds its own shape with no internal support.
Use paper no heavier than 65 lb. Cardstock cracks along the fold lines when you fan it open.
17. Quilled Paper Miniatures: Cake, Drum, and Candle
- Quilling paper strips, multi-color pack — $8–$15
- Quilling tool or a bamboo skewer — $4–$12
- Tacky glue with a fine tip — $3–$6
- Cardstock backing circles — $4–$8
- Ribbon hangers — $3–$5
Total: $22–$46 for a set of five miniatures.
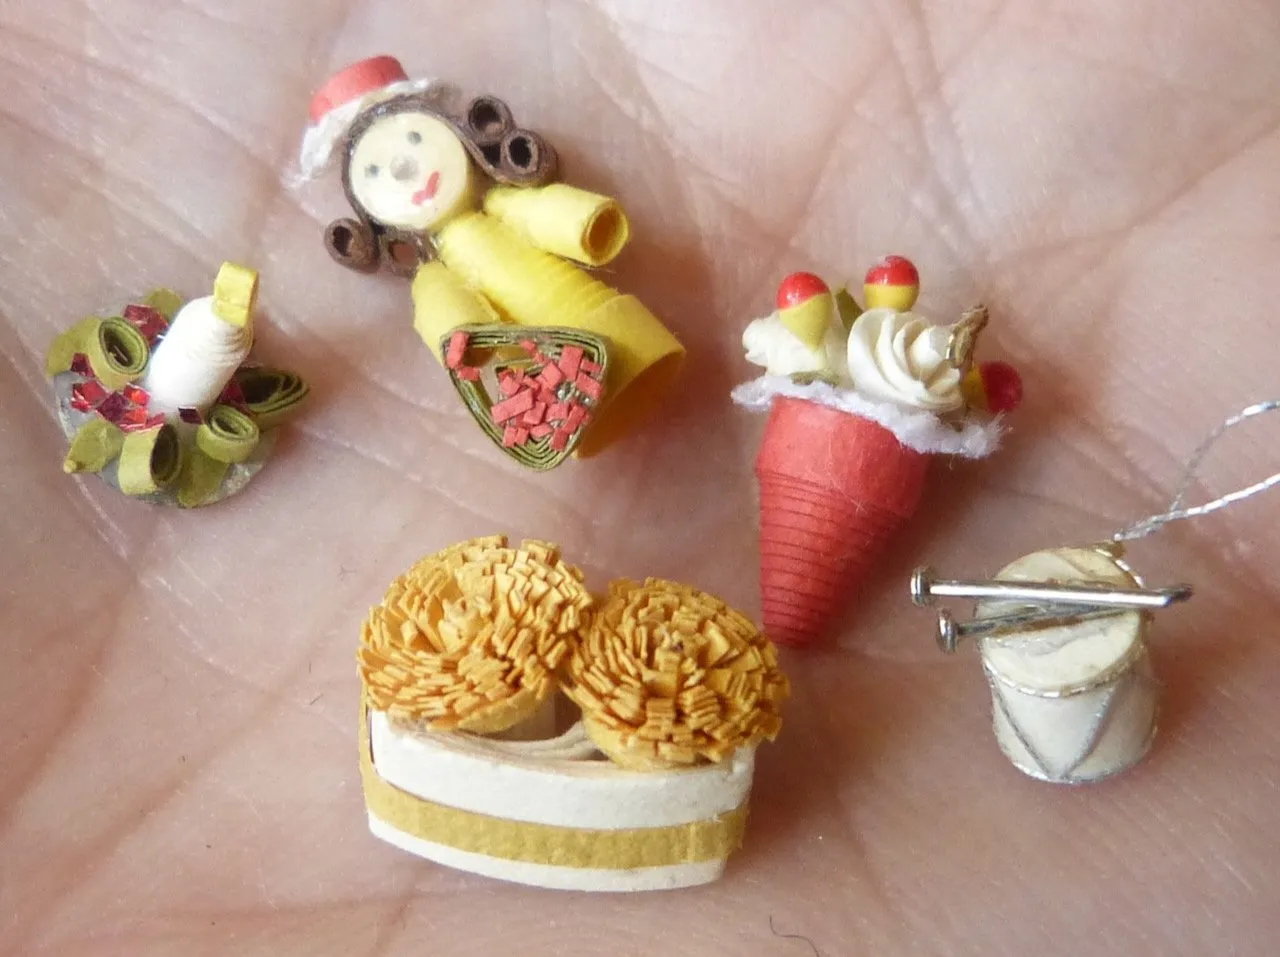
Budget alternative: cut your own strips from colored printer paper with a paper trimmer at 1/8 inch wide, and roll around a toothpick. That brings the whole set under $12.
Quilling is slow, and your hands will cramp. Each miniature here — the cake, the drum, the little doll — is somewhere between 30 and 60 minutes of rolling and gluing, and there is no shortcut that preserves the look.
It is also delicate. Quilled ornaments dent if they are packed loose, so store each one in its own small box or a compartment tray. If you have toddlers, put these up high. They are the most fragile project on this entire list.
18. Hand-Painted Santa and Gingerbread Ornaments with Blue Ribbons
The blue satin ribbon is the smartest choice on this table. Red and green ornaments hung on red ribbons disappear into each other; a blue ribbon gives the eye a third color to rest on, and it makes a very traditional palette feel current. Same trick as adding one cool tone to a warm room.
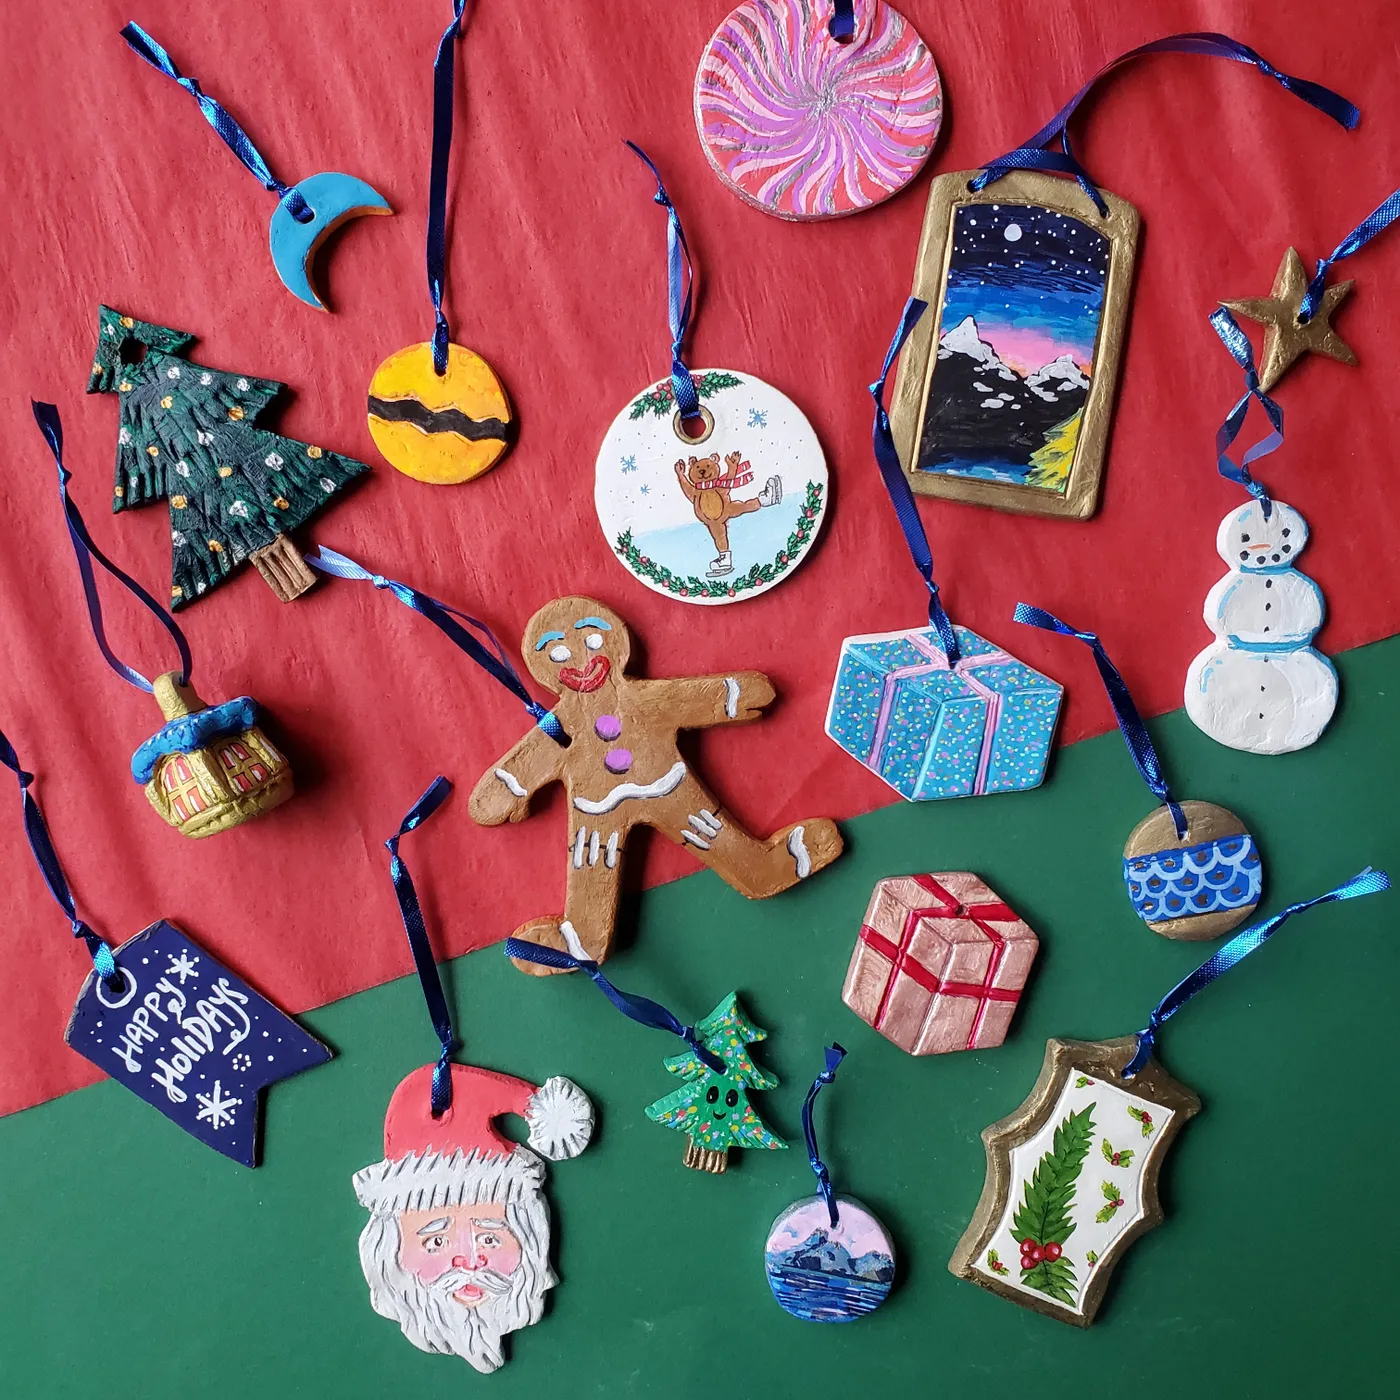
Variety in silhouette is the other principle. Santa, gingerbread man, tree, gift box — four shapes, one painting style. Repetition in technique plus variety in form is what keeps a collection from looking like a pile of duplicates.
Buy plain wooden shapes at a craft store — usually $0.50 to $1 each — and skip pre-painted sets entirely. Acrylic craft paint, a fine brush, and one roll of blue satin ribbon gets you a dozen for around $20.
If painting faces makes you nervous, do the easy ones well: gift boxes and trees with simple stripes and dots. A well-painted gift box beats a smudged Santa. Compare with Idea #13, where the face is built from googly eyes and needs zero painting skill.
19. Paper Straw Trees with Yellow Pom-Pom Toppers
- Cut patterned paper straws into graduated lengths: 4, 3, and 2 inches.
- Glue a green craft stick vertically as the trunk, then glue the straws horizontally, widest at the bottom.
- Top with a yellow pom-pom, pressing it into the glue for a full ten seconds.
- Thread a silver ribbon loop behind the top straw and knot it.
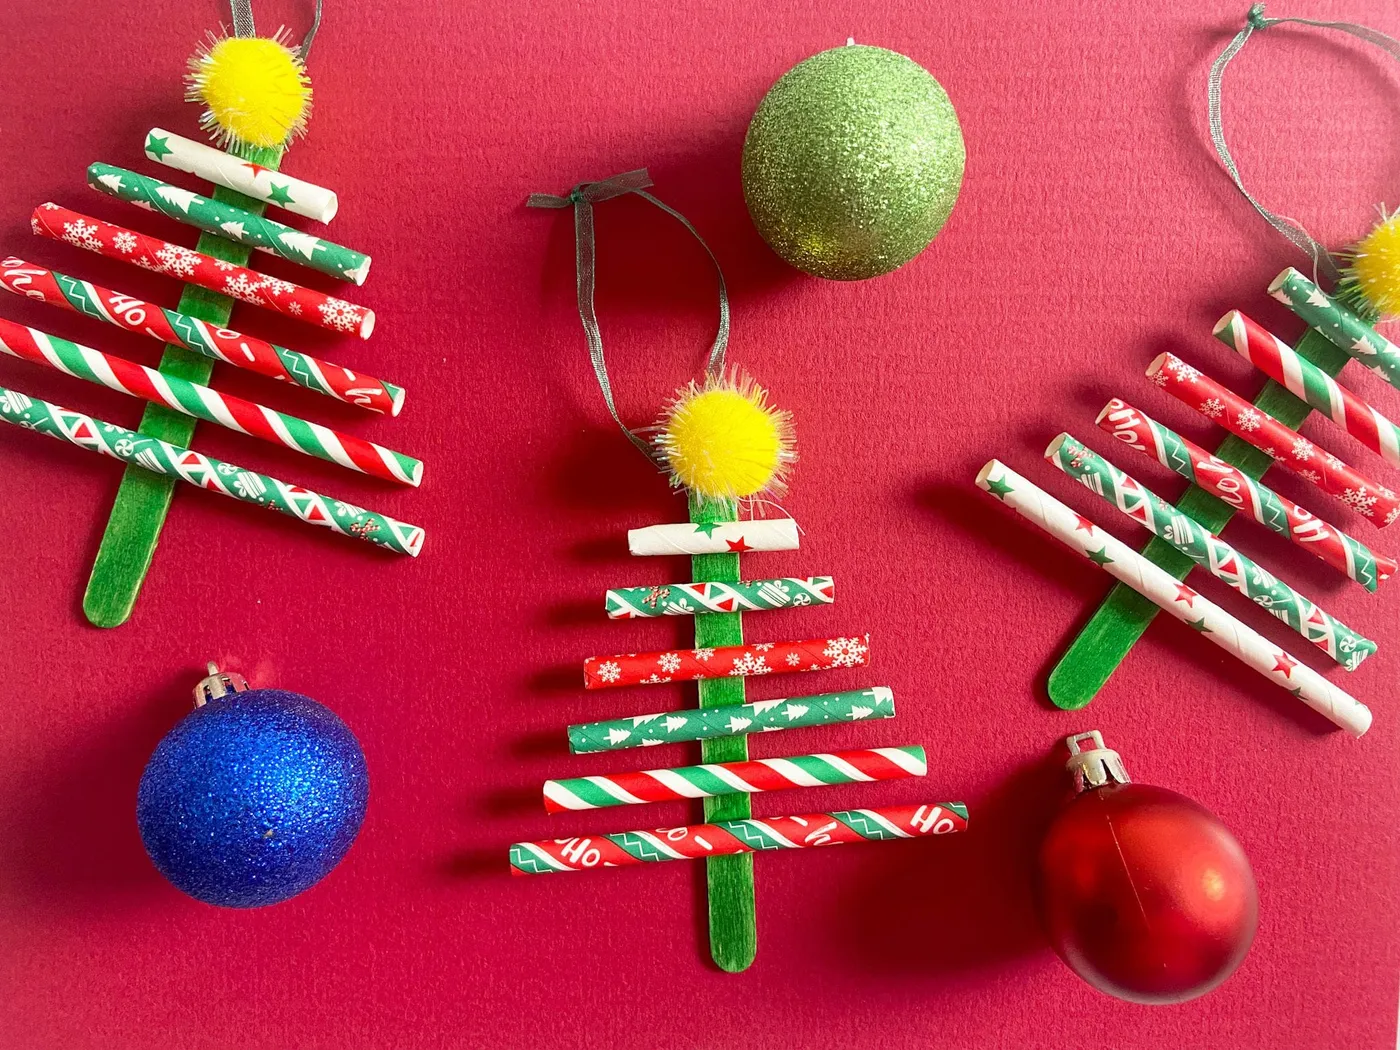
About 15 minutes per tree and $6 in supplies for six of them.
It is the yellow pom-pom topper that makes this. Without it, these are straw triangles. With it, they are Christmas trees with a star, and the pom-pom’s soft, fuzzy texture against crisp paper straws is what makes the whole thing read as a craft object worth keeping.
Go oversized on purpose. A pom-pom that is slightly too big for the tree is charming; a proportionate one disappears.
20. Teardrop Paper Strip Ornaments in Candy Brights
100% saturated paper, 0% neutral. That is the formula, and it is deliberately different from almost everything else on this list. Pink, sky blue, orange, lime — no white base, no kraft paper, no gold. The white hangers do the resting; the paper does all the shouting.
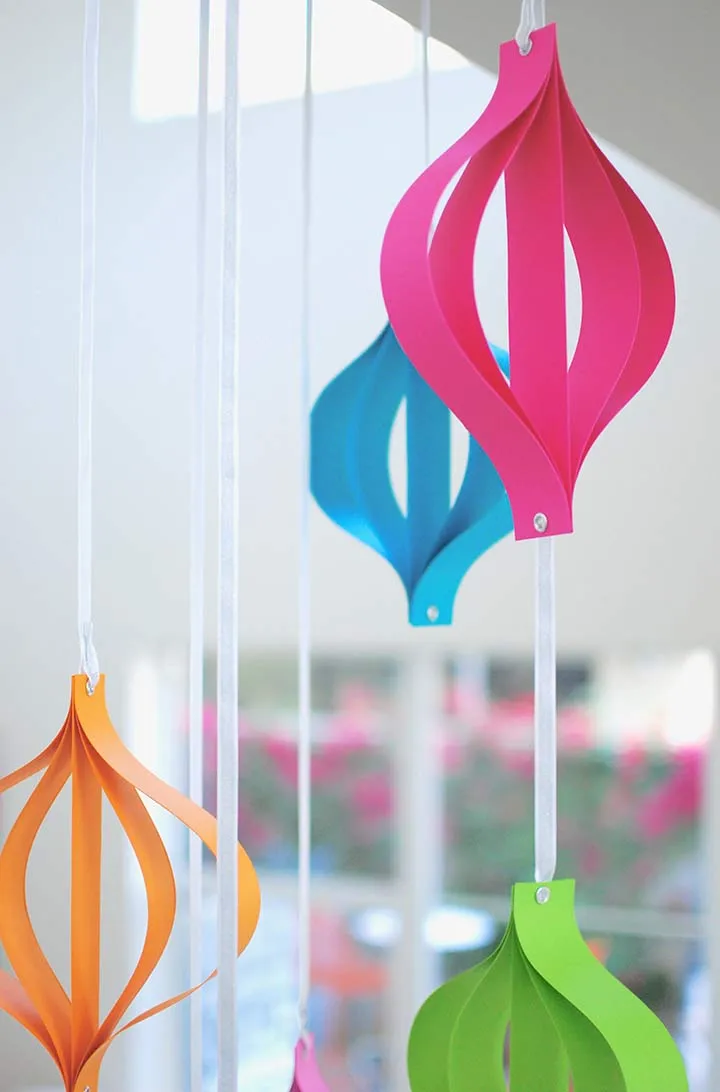
Construction is what keeps it from becoming chaos. Every ornament is the same shape, made the same way, so the colors read as one family rather than a pile. If you change one variable, change the color, never the shape.
These want a tree with space between the branches and a light background. On a white or brightly lit tree a dozen of these glow; on a dark, heavily decorated tree they get swallowed. Give each one about 8 inches of breathing room.
- 4-foot tabletop tree: 6–8 ornaments
- 6-foot slim tree: 10–12
- 7-foot full tree: use them near the bottom as filler, or skip
Best in a small room where you will see them up close — a kid’s room tree, a kitchen table tree, a dorm room.
21. Glossy Red Ring, Star, and Heart Ornaments with Glass Drops
These are durable in a way plastic is not and glass is not. The glossy coating resists chipping, but the faceted drops at the bottom are the weak point. Store them with the drops hanging free — if they get pressed against anything in a box, they crack.
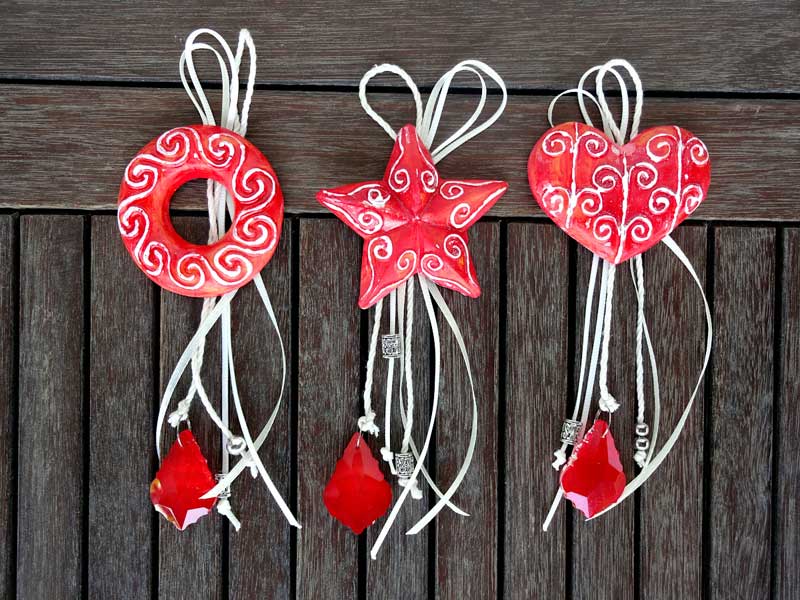
Wipe with a dry microfiber cloth only. Water spots dull the gloss, and once a glossy finish goes cloudy it does not come back. Ten careful minutes of packing in January buys you a decade with these.
Paint the white swirls with a liner brush and let the brush do the work — one continuous stroke per swirl, rotating the ornament instead of your wrist. Keep it to about four swirls per ornament, and do not center them perfectly. Off-center reads as hand-painted; centered reads as stenciled.
For the drops, wire-wrapped beads glued below a small punch hole work just as well as glass and survive storage. Compare with Idea #20, where the shapes are simple paper strips and there is no drop detail at all.
22. Hand-Painted Reindeer and Candy Cane Ornaments
Plain wooden cutouts in holiday shapes run about $0.79 each at any craft store, and the paint is the cheapest part — a few acrylics from a multi-pack you probably already own. Twenty ornaments for under $30, easy. This is one of the rare projects where buying blanks is genuinely cheaper than making them.
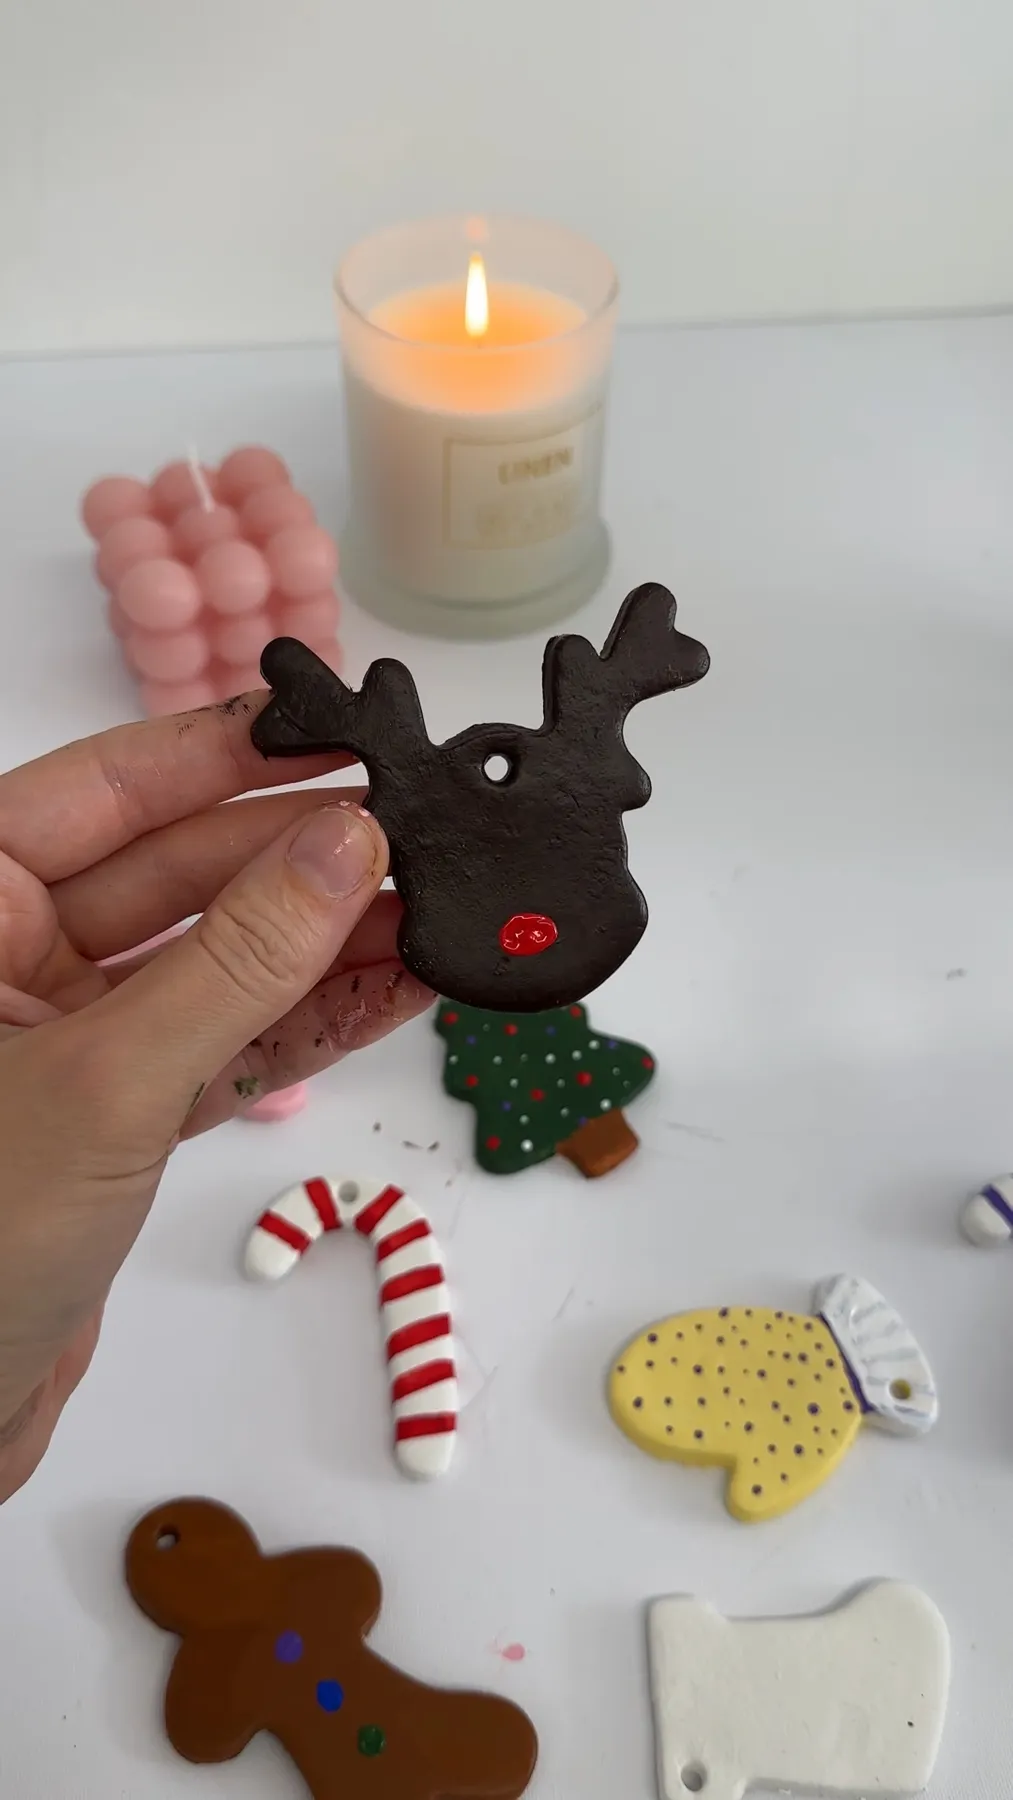
Check Facebook Marketplace and thrift stores in November; people unload full boxes of blank wood shapes and half-used acrylic paint for a few dollars. Buy the paint, skip the kits.
Stick-on googly eyes and pom-pom noses fall off, especially on ornaments that get handled. If you are making these with kids, use a strong tacky glue rather than school glue and press for a slow count of ten. Otherwise you will find a reindeer nose on the floor in February.
And paint the back. It is the step everyone skips and the one that makes them look finished when the tree turns.
23. Crackled Teal Ceramic Trees with Jute Twine
The raised bumps. A smooth teal tree would just be a teal tree; it is the small dimensional dots pressed into the surface that catch light and create shadow, so the ornament reads as ceramic rather than something molded. The crackle glaze does the rest — a fine web of lines that makes a small object look like it has had a life.
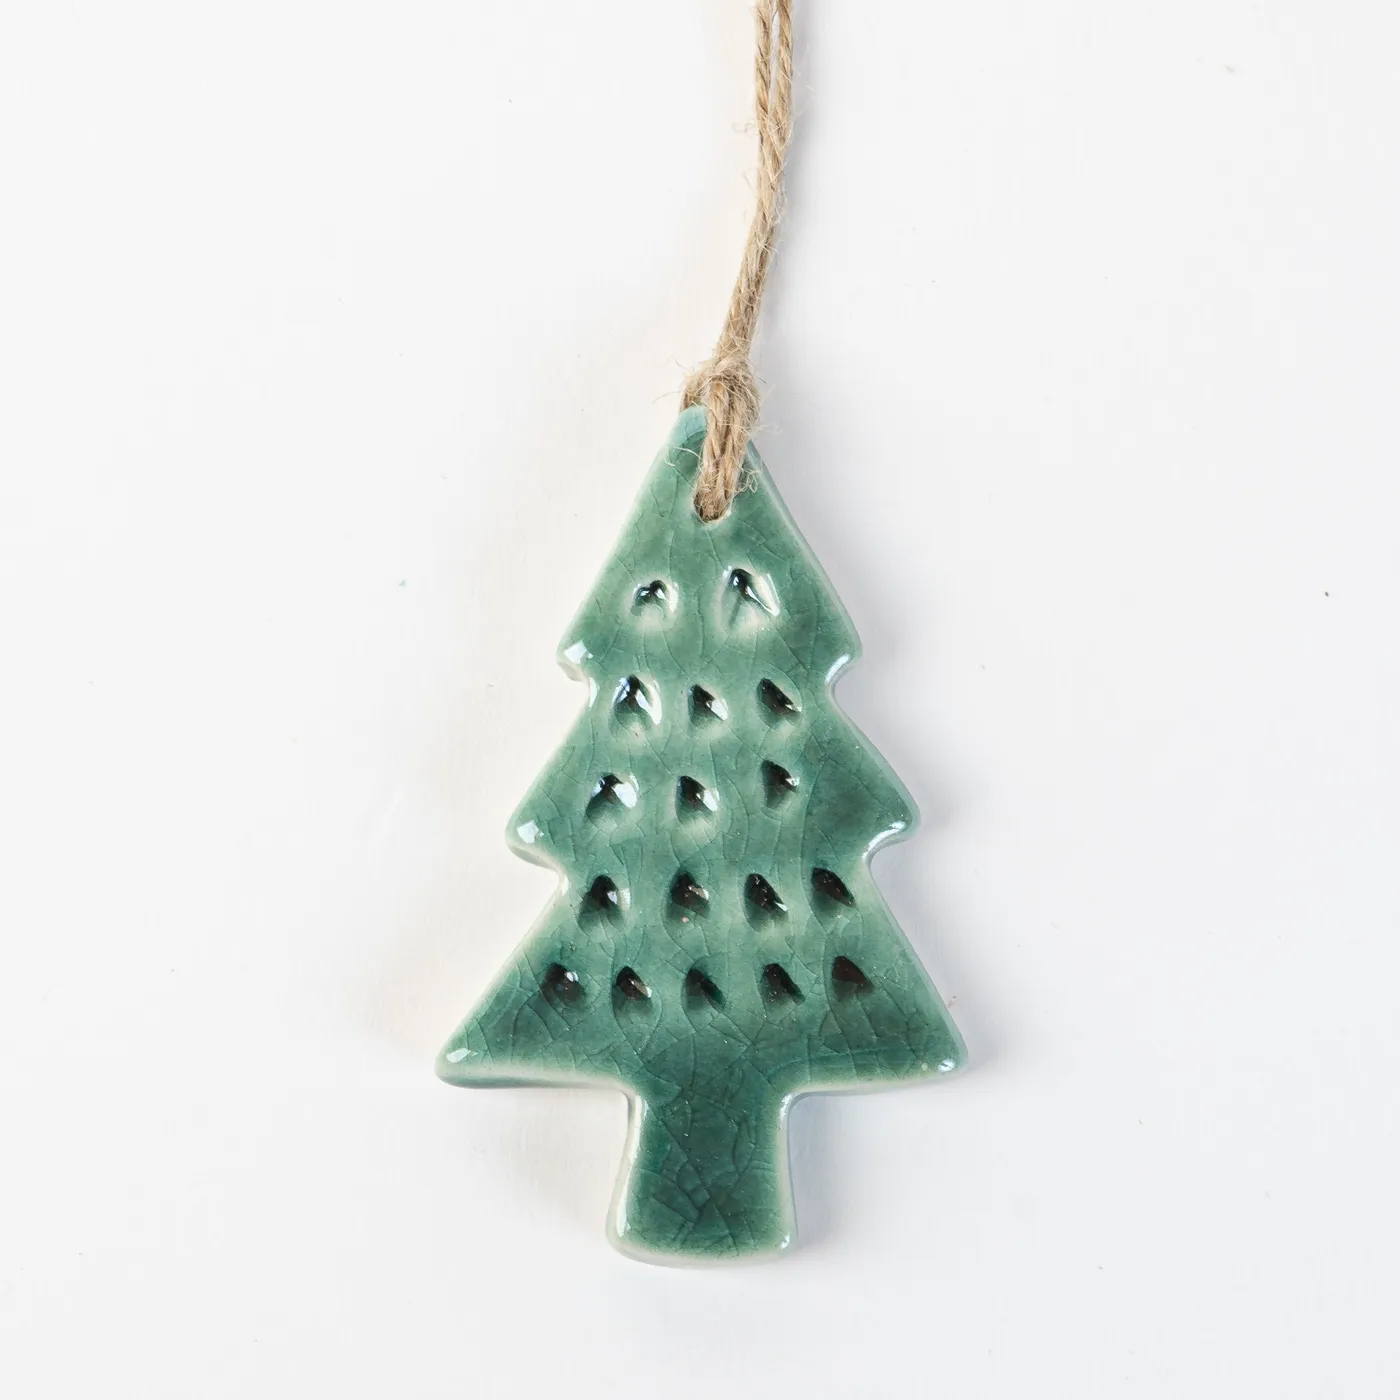
If you are making these yourself, press the texture in with the blunt end of a paintbrush while the clay is still soft. One step, and it is the one that matters.
Unexpected color is where handmade ornaments are headed for 2026. After years of cream, sage, and natural wood, people are reaching for glazes and colors that are not quite Christmas — teal, mustard, dusty lavender. Part of it is a reaction to beige saturation; part of it is the ceramics obsession that has been running through interiors for a few years now.
Crackle specifically has real staying power, because the effect is a finish, not a motif. It will not look dated in five years the way a trendy shape would.
24. Plaid and Illustrated Baubles in a Wooden Bowl
Laying ornaments in a wooden bowl instead of hanging every one is one of the most underrated styling moves in holiday decorating. It slows the eye down: instead of a wall of baubles, you get a small collection you can actually look at, and the bowl’s curve echoes the round shapes sitting inside it.

The plaid-and-illustration mix works because both are two-color patterns. Plaid, gold-on-green snowflakes, gold-on-red illustrations — all flat, graphic, high contrast. One photo-printed ornament in that pile would break the whole thing.
This needs a bowl at least 12 inches across or the ornaments look crammed. On a sideboard or side table, leave 3–4 inches of bare wood around the bowl — a vignette needs negative space the way a room needs floor space. Scale up if your table is longer than 5 feet.
It is also the most apartment-friendly idea here: no tree required, works on a 24-inch console, and takes ten minutes to set up.
25. Folded Book Page Ornaments with Sheer Ribbon
- Old paperback or thrift-store book — $1–$3
- Sheer ribbon, 1/4 inch — $3–$6
- Glue stick or tacky glue — $2–$4
- Bone folder or a butter knife — $0
Total: about $6–$13 for a dozen ornaments.
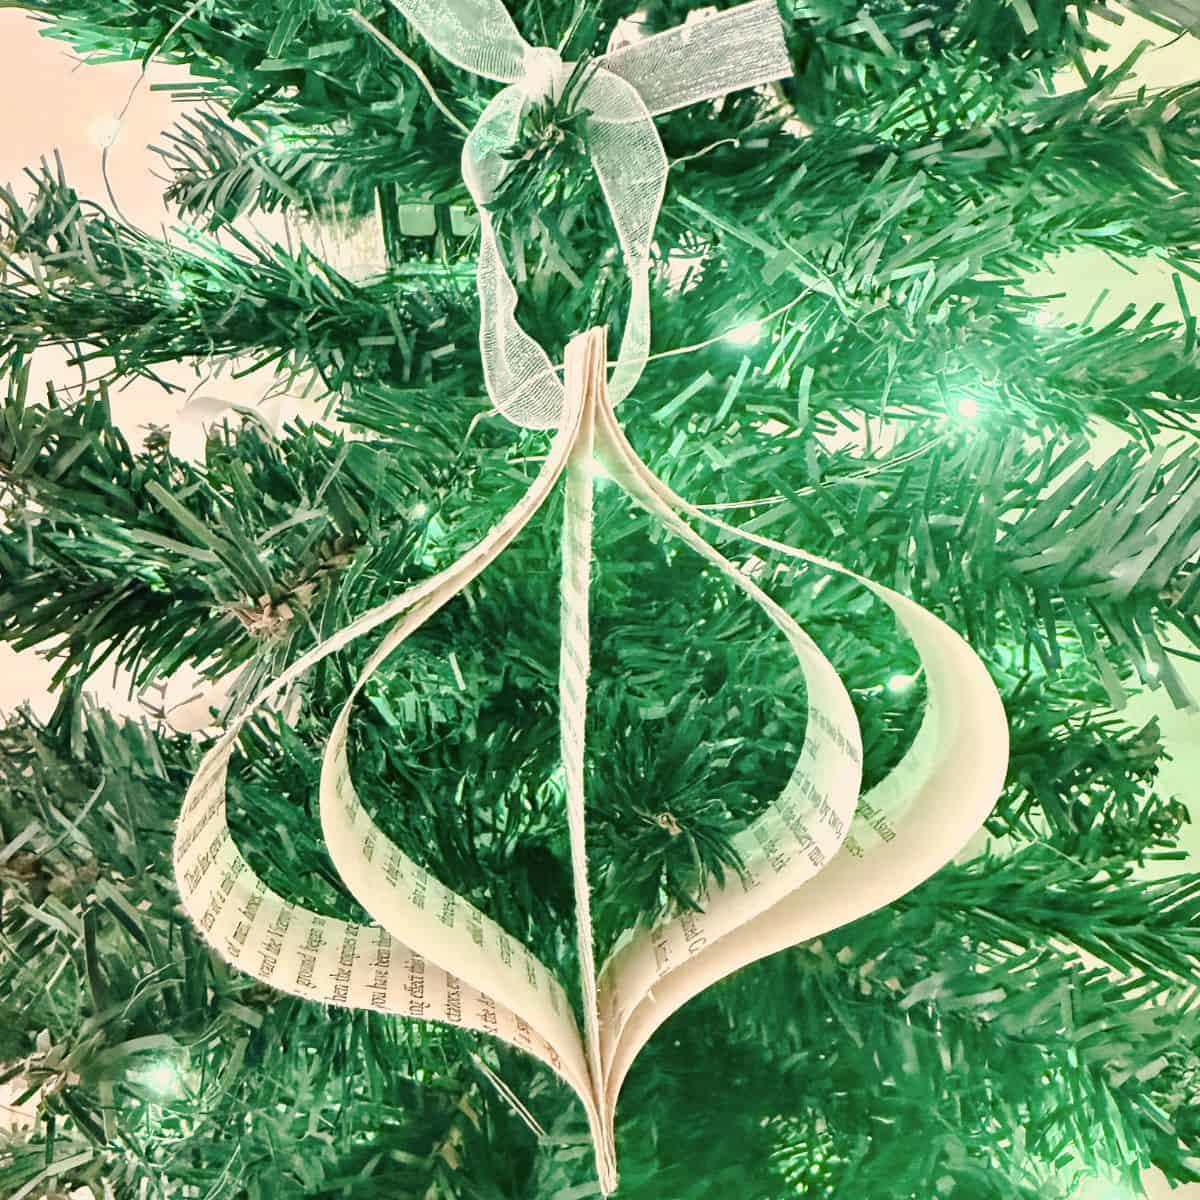
This might be the cheapest project on the entire list, and it might be the prettiest. Buy the book at a library sale for a quarter and you have enough pages for thirty ornaments.
Paper is fragile in ways people forget. Book pages yellow, especially if they spend a season on the sunny side of a window, and they tear if they are yanked out of a packed box. Store them flat in a shoebox with tissue between layers, not dumped in a bin.
Humidity is the real enemy — a damp basement will leave them limp and wavy by next December. Keep them in a closet inside the house and they will hold their shape for years.
26. Embossed Gingerbread Man on a White Tree
Sculpt the face before the clay dries, while it is still leather-hard — that is the window where a toothpick makes a clean line and a dull pencil eraser makes a perfect button circle. Wait too long and you crack the surface; work too early and the impression slumps closed.
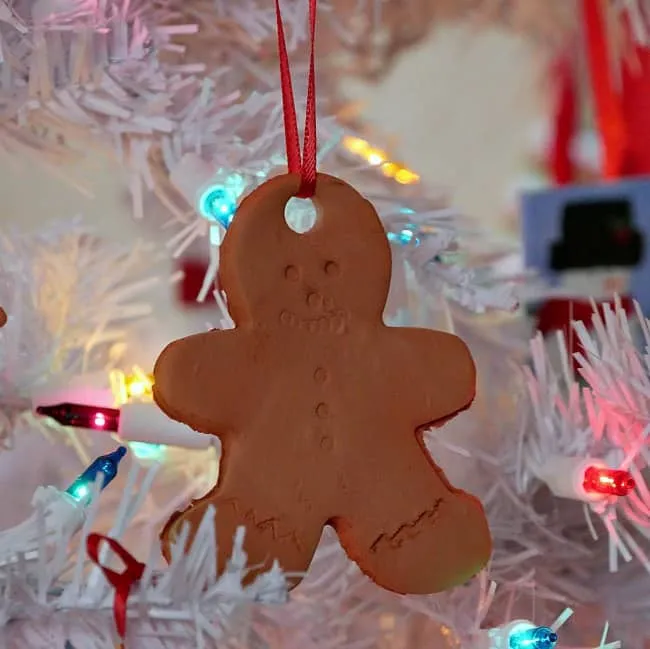
Use a slightly darker brown for the embossed details than the body, and apply it with a dry brush so it catches only the raised surfaces. That is the difference between a face and a flat cookie.
White tree, one brown ornament, four colors of lights. That is a lot of competing color for one small object, and it works because the gingerbread man is the only matte, unlit thing in the frame — everything around him reflects light, and he absorbs it.
To keep it from getting messy, limit the tree to two ornament colors besides the brown. The red ribbon here is the third. Add a fourth and the whole thing tips into chaos.
27. Tiny Elf and Gift Boxes on a Candy Cane Swirl
- Polymer clay, small blocks in red, white, and green — $10–$18
- Craft knife and toothpicks — $0–$8
- Acrylic paint for the face — $3–$6
- Ribbon hanger — $2–$4
Total: $15–$36 for a set of two or three.
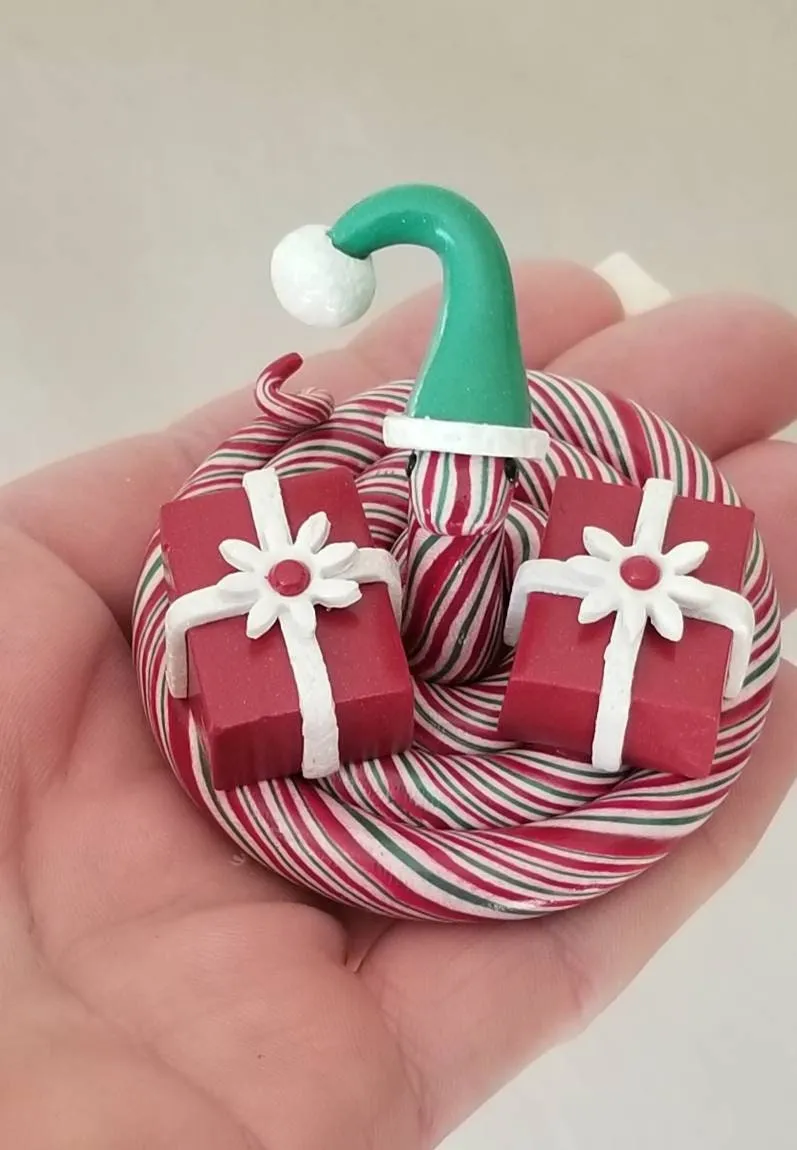
Budget alternative: use air-dry clay instead of polymer — roughly half the price, and you skip the oven. It is more prone to cracking on tiny pieces, so keep the elf’s limbs thick.
The coiled candy-cane base is the whole trick. Everything above it — the elf, the two little gift boxes — is tiny and would otherwise look like loose clutter. That spiral gives the scene a stage, which is what turns a figurine into an ornament.
It also gives you somewhere to hold it while you hang it, which matters more than you would think with something this small.
28. Vintage Glass Ornaments with Stitched Red Ribbon
Mercury glass and hand-painted finishes both hate water. Wipe with a dry, soft cloth only, and never spray cleaner anywhere near them — one errant spritz and the finish clouds permanently. Same story with glitter accents: they shed, and once they shed, they do not come back.
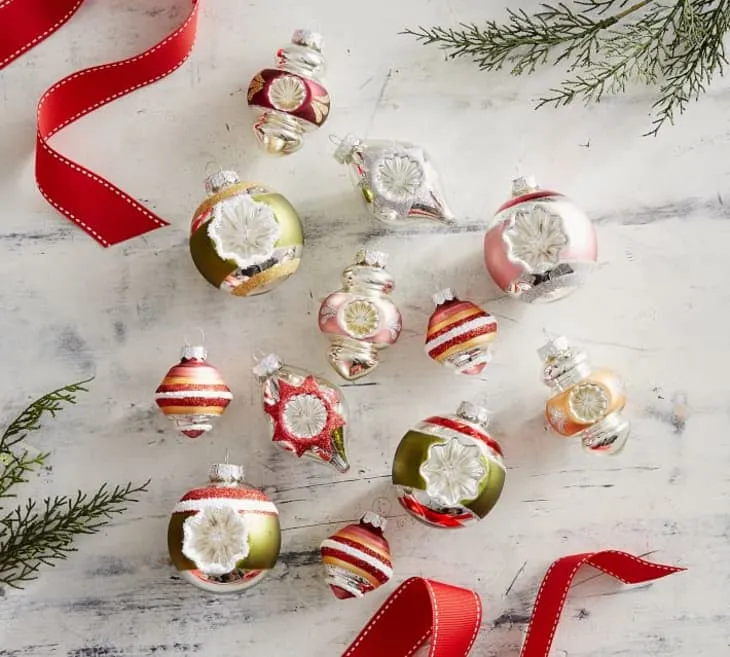
Store them in a divided tray or a box with individual compartments. Loose-packed glass ornaments chip each other, and a chip is obvious against the light.
- Measure your shelf or table — this arrangement needs 18 inches minimum to look intentional.
- Count what you already own. Most people have 8–12 usable ornaments hiding in a basement box.
- Check your light source. Backlit or side-lit, glass looks incredible; overhead-only, it goes flat.
- Pick one ribbon color and stick to it. Red with white stitching here, nothing else.
Ten minutes of sorting before you style saves an hour of rearranging. If you want a second, all-white arrangement nearby, pair it with Idea #33.
29. Sweater-Shaped Animal Ornaments in Santa Hats
The ugly Christmas sweater is having an unusually long moment. It has gone from party joke to genuine design motif, showing up on ornaments, wrapping paper, and throw pillows. For 2026 the twist is adding glasses and cartoon animal faces — pet portrait energy applied to a sweater shape.
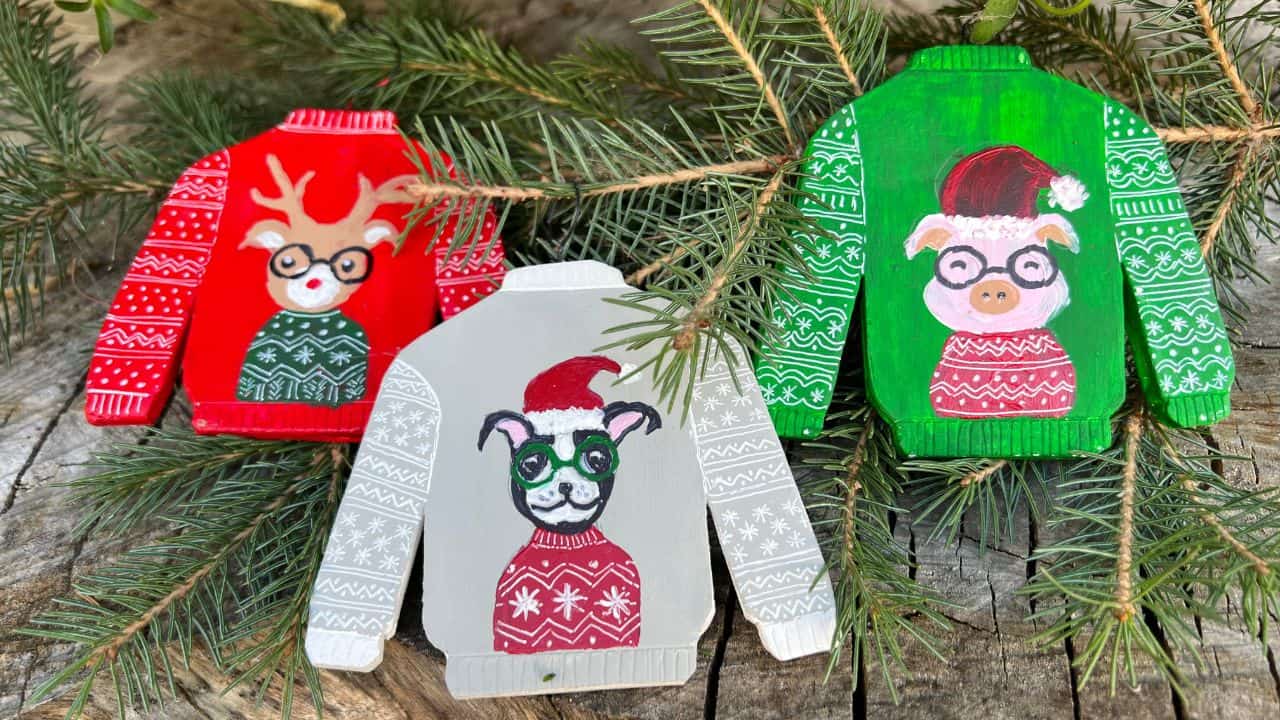
Is it durable? The sweater graphic probably is not forever. But pet personalization is, because it is identity rather than decoration. These will be the ornaments your family argues over in twenty years.
Paint the sweater pattern first and the animal face last, once everything is fully dry. Faces are what people look at, and a smudge there ruins the ornament. Use a fine liner brush and keep the eyes small — huge anime eyes on a flat wooden shape read as creepy rather than cute.
Do the glasses in a single thin black line across both eyes, extending just past the head. Two seconds of work that sells the entire joke.
30. Recycled Can Spiral Ornament with Glitter Edges
Metal is the secret ingredient. Strips cut from a soda can curl beautifully and hold their shape forever, which is why this spiral looks crisp while paper versions go limp by January. The glitter along the cut edges does double duty — it hides the raw metal edge, which is genuinely sharp.
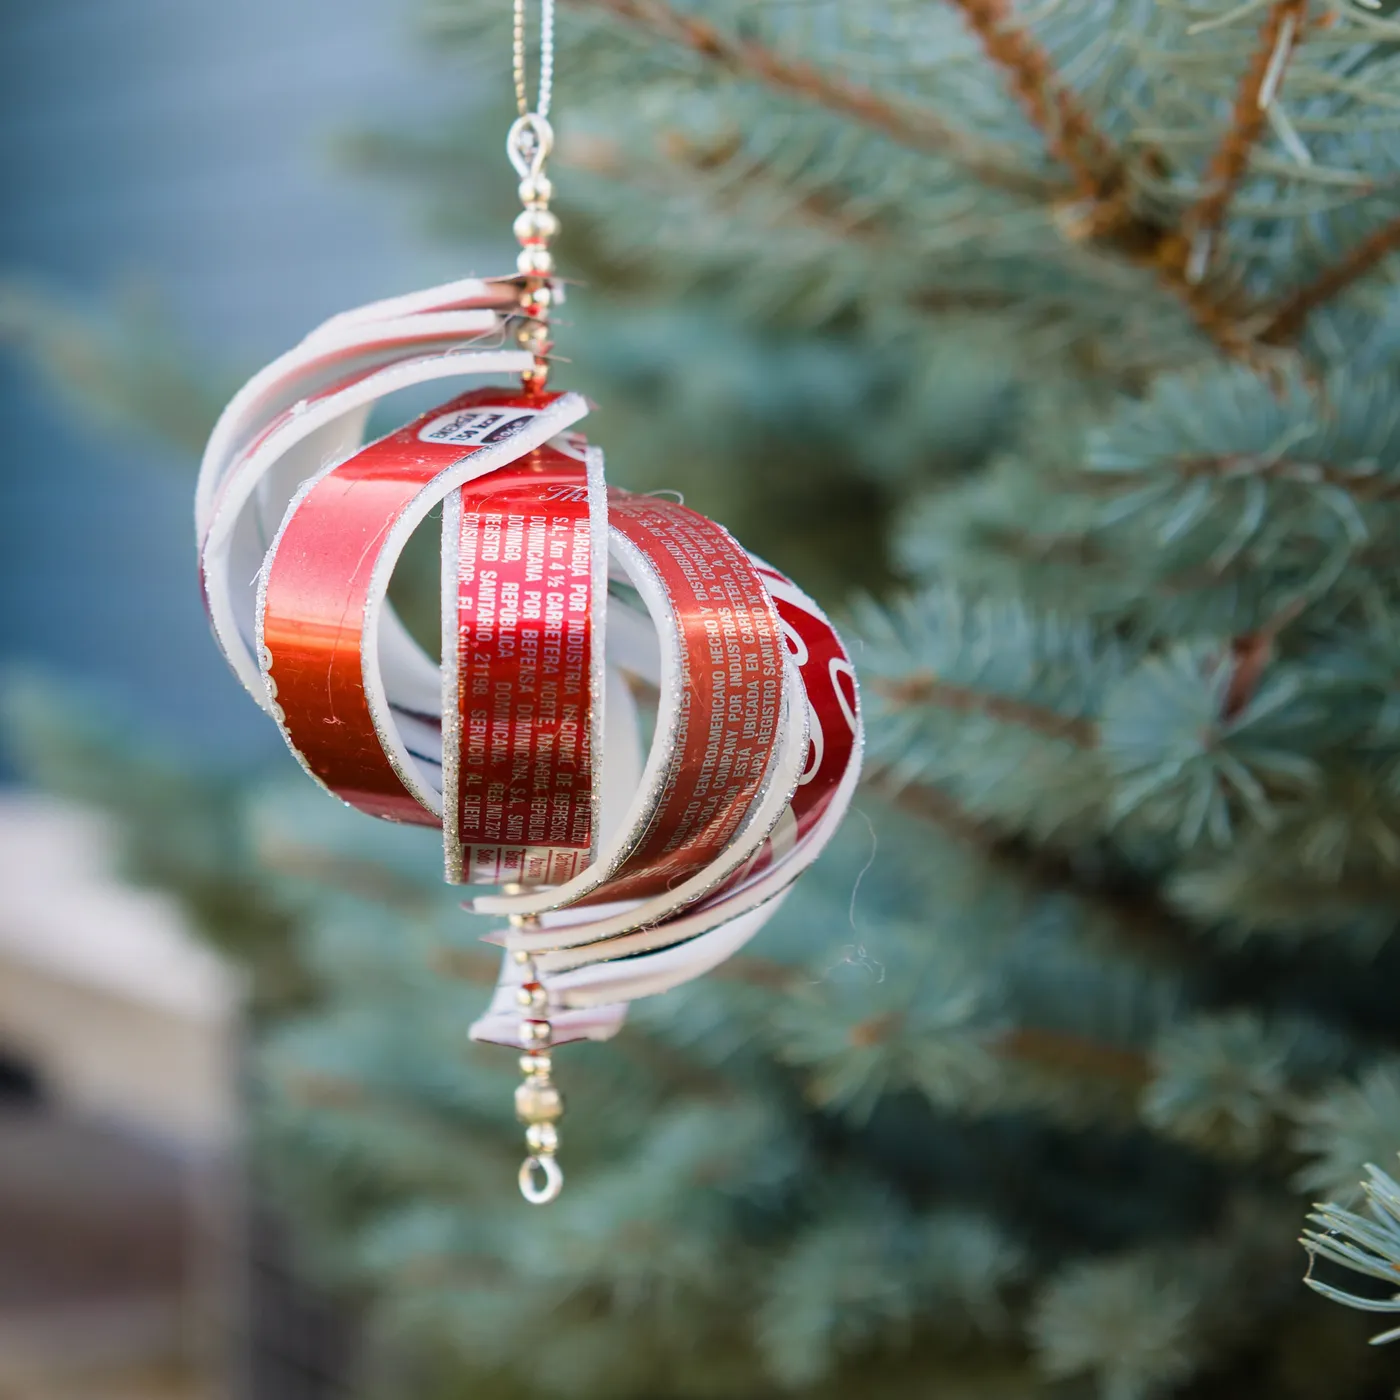
And the red-and-white color is just the can’s own printing. The palette coordinates itself. Pretty clever for something that was in a recycling bin this morning.
This one is free in the truest sense. A can, some glitter, a glue stick. The only thing you might buy is a beaded chain for hanging, and plain twine works just as well.
If you want the look without cutting metal, use stiff cardstock strips painted gloss red and white. It lacks aluminum’s curl memory but gets you 90 percent of the way with none of the risk. Wear gloves if you are cutting cans — the edges are razor sharp.
31. White Clay Stars and Angels with Sequins and Gems
- Roll the clay on parchment, not directly on a wood table — it sticks.
- Cut the hanging hole while the clay is fresh, and make it twice the width of your string.
- Test your glitter glue on a scrap first; some brands dry cloudy.
- Set aside a full 48 hours for drying before you decorate anything.
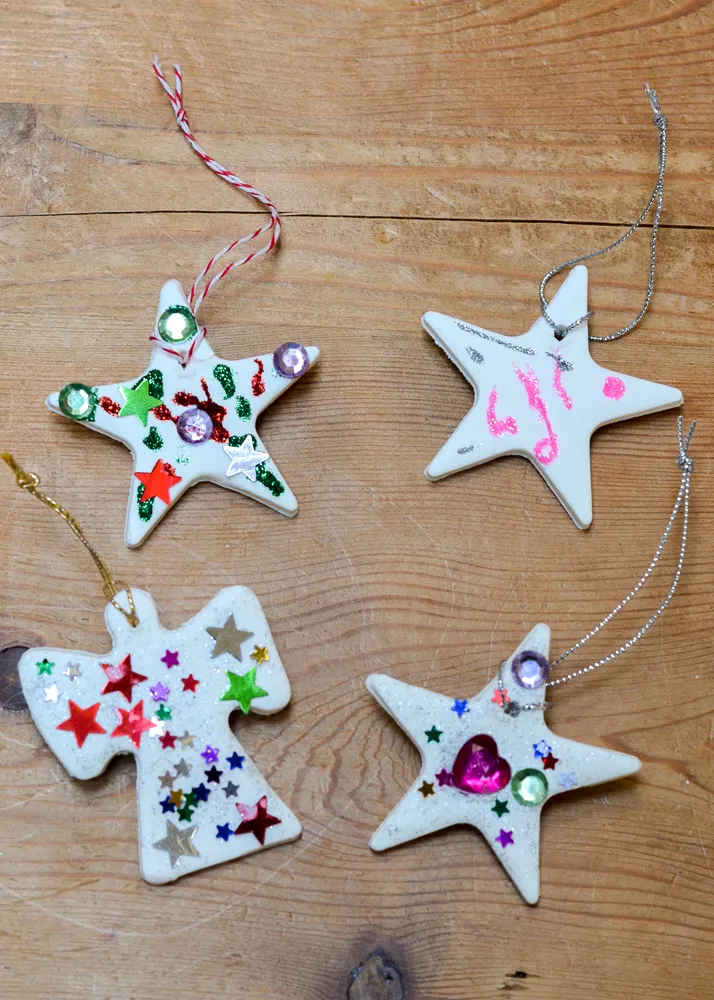
Decide on a base color before you start, too. These are all white because white makes the sequins and gems the star — a beige or grey clay would muddy the whole thing.
Place sequins and gems in odd numbers and cluster them off-center. Three stars on one side of an angel reads as designed; two placed symmetrically reads as a decal. Glue gems with a thick dot of tacky glue, not school glue, because gems are heavy and they slide down a drying surface.
Pick a maximum of three colors across the whole set. Four white ornaments covered in every color from the drawer end up looking like a craft bin.
32. Hand-Painted Rose and Cornflower Bauble
- Base-coat the ornament white and let it cure for 24 hours.
- Paint the rose in three passes: a dark red base circle, a lighter red mid-tone, then small cream highlights along the petal edges.
- Add green leaves in short, curved strokes — two per rose is plenty.
- Fill the gaps with tiny blue five-petal flowers and a yellow dot center.
- Seal with a brush-on matte varnish once everything is fully dry.
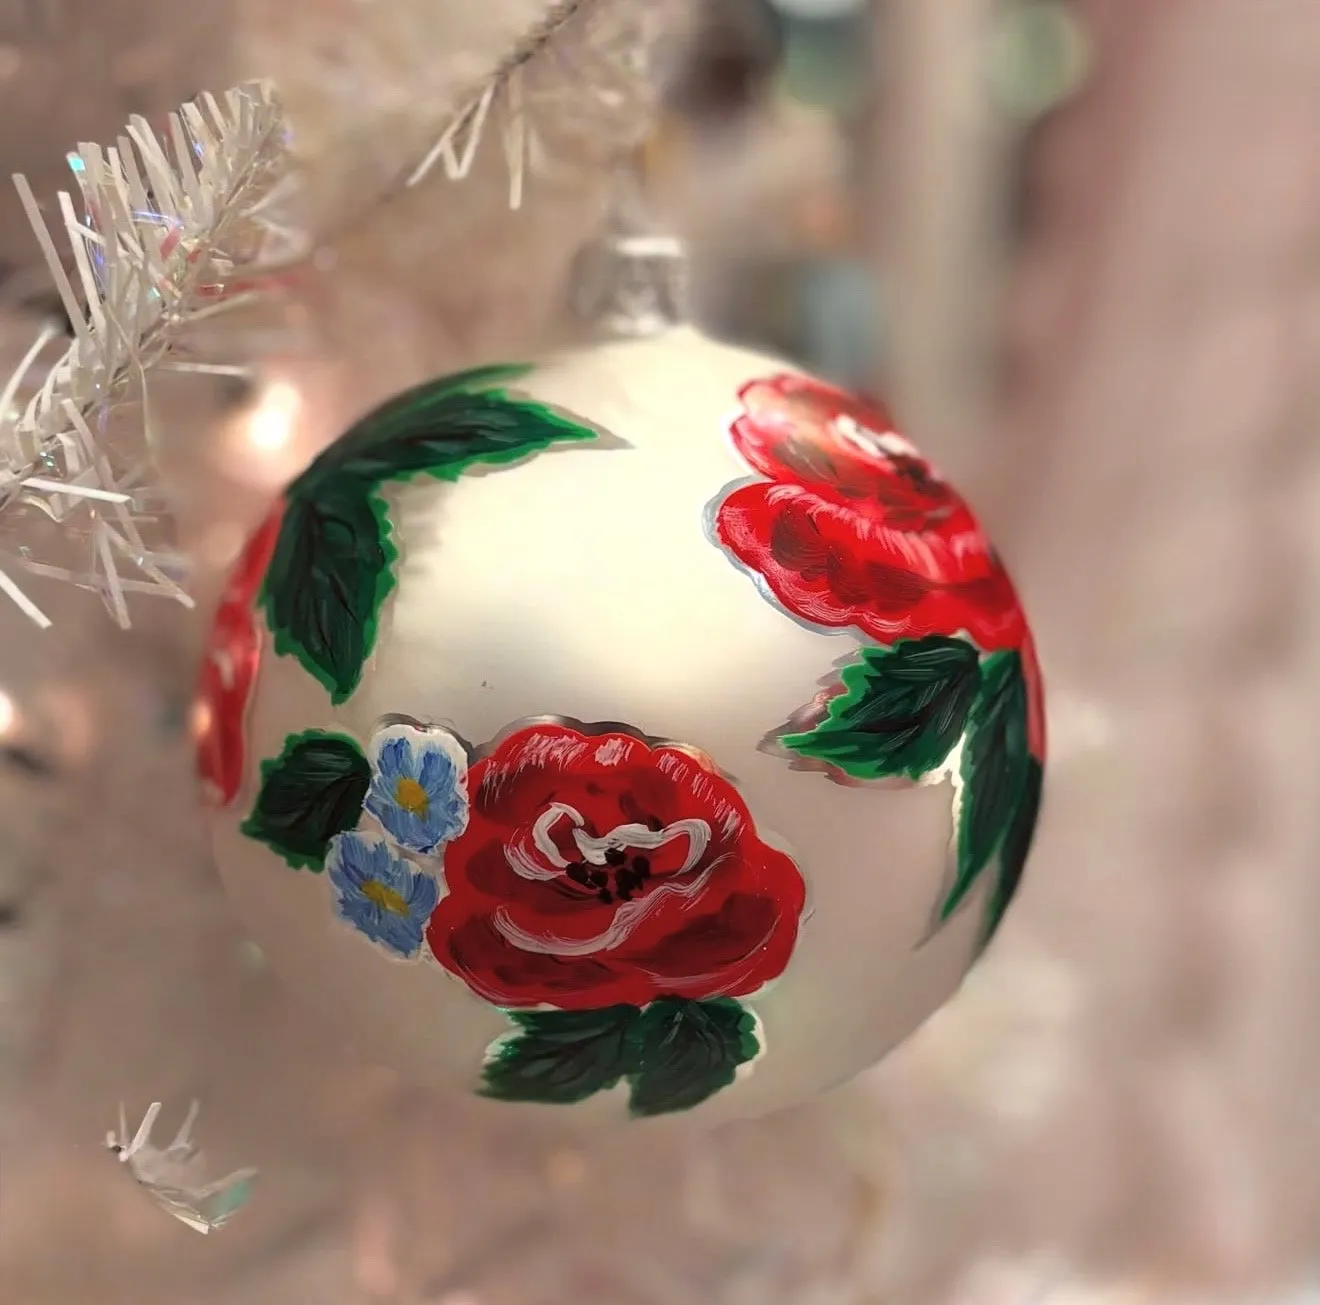
Roughly 30 minutes per ornament once you have practiced on a scrap surface, about $5 each.
The palette is built from three parts: 55% white ground, 30% red, 15% blue and green combined. The white is doing the heavy lifting — it is what keeps red roses and blue flowers from competing, because both have somewhere neutral to sit.
To shift the palette, swap the red for apricot and the blue for sage, keeping the ratios identical. That is the whole trick: change the colors, keep the proportions.
33. White Dove and Snowflake Ornaments with Red Strings
White-painted wood or clay shapes cost about $1 each, and one roll of red satin cord handles two dozen. The kraft paper wrap is the sleeper budget win — a roll costs about $5 and covers everything under the tree, which means your wrapping matches your ornaments for almost nothing.
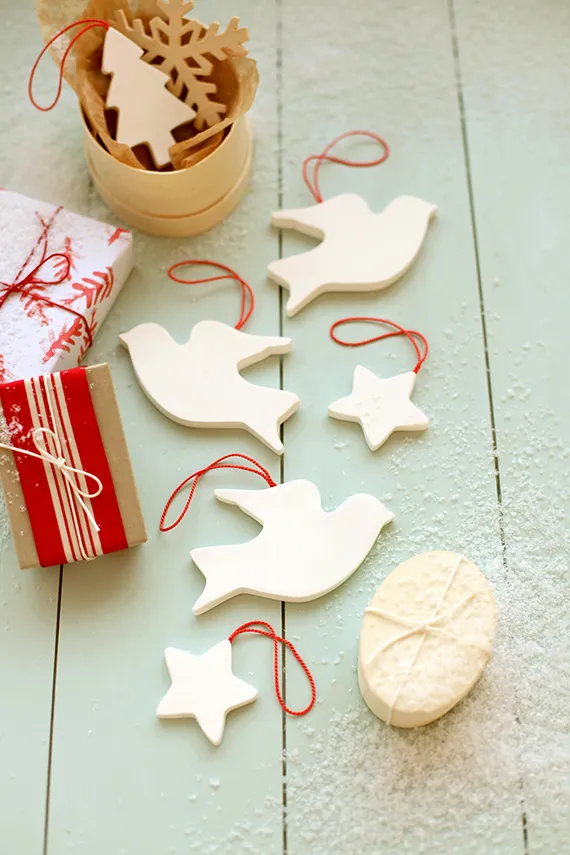
Thrift stores are gold for this. Buy a bag of mismatched wooden ornaments for $3, spray them all matte white, and you have a coordinated set. Nobody will know they started as somebody else’s reindeer.
The white-powder snow dusted across these planks is beautiful in photos and a pain in real life. Use fine artificial snow or baking soda, and accept that it will migrate. Vacuum what falls — do not wipe, or you smear it into the wood.
Red satin cord also bleeds if it gets wet. If your ornaments live near a humidifier or a kitchen, switch to red cotton twine and skip the drama. Head to Idea #28 if you would rather work with glass and ribbon.
34. Pink Velvet and Gold Ornament on an Emerald Tree
The pink velvet teardrop is why this tree reads as elegant instead of merely decorated. Velvet absorbs light, so it sits as a dark, soft shape in the middle of a tree full of reflective glass and silver. That contrast in finish is doing more work than the color itself.
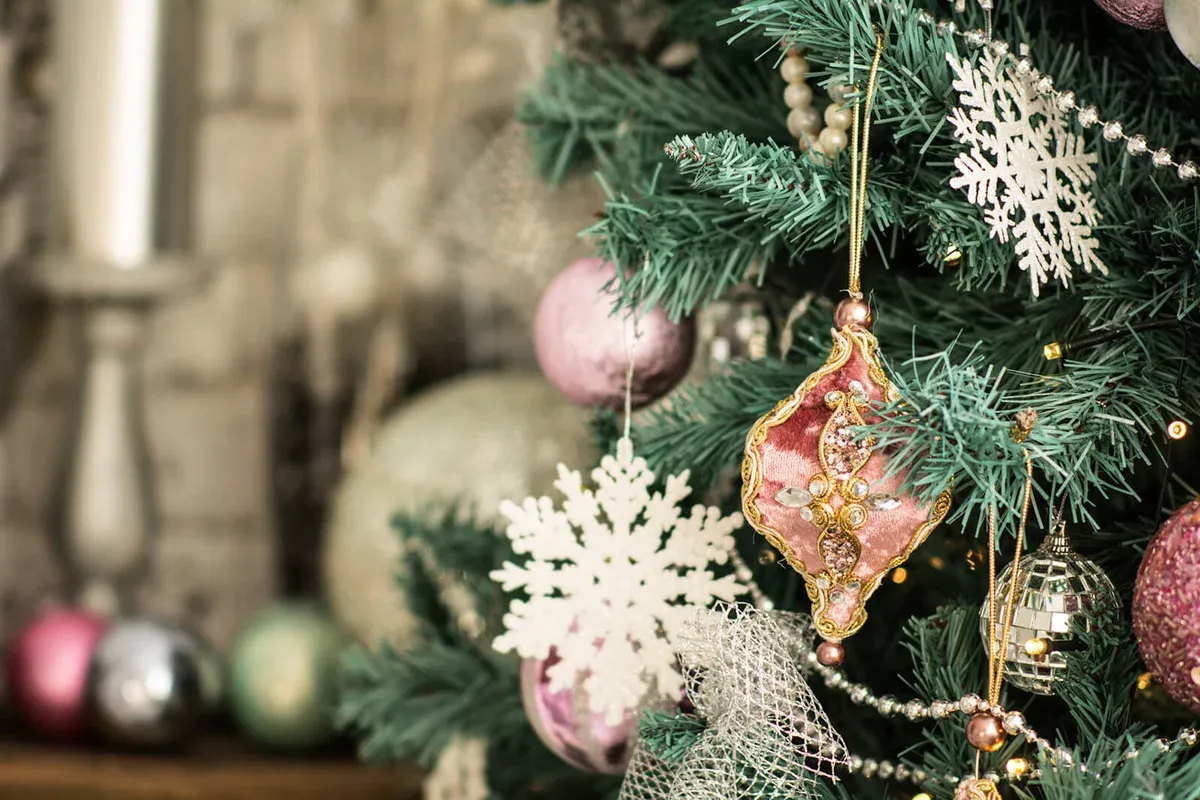
Gold embroidery and a few rhinestones on top seal it. Without the texture, the same ornament in pink glass would be pretty but ordinary.
This density needs room to breathe: an 8-foot tree with good branch spread, or a 7-foot tree kept to about a third of this ornament count. A crowded 6-foot tree loaded with pearl garlands and mesh ribbon just looks heavy.
Ceiling height matters too. In a standard 8-foot room, drop to a 6.5-foot tree and edit the ornament count by half, keeping the velvet pieces and cutting the filler balls. Save the full treatment for high ceilings and neutral walls.
Thirty-Four Ornaments, One Afternoon at a Time
You do not need a craft room, a Cricut, or a single ounce of talent you were not born with — you need an afternoon, a hot glue gun, and one idea off this list. Start with the book-page ornament or the jar-ring wreath, and let the rest of the collection grow over the next few Decembers.
📌 Save this to Pinterest now so next year’s version of you has somewhere to start.